Table of Contents
Advertisement
Advertisement
Table of Contents

Related Manuals for Mamiya RZ67 PRO II


Summary of Contents for Mamiya RZ67 PRO II
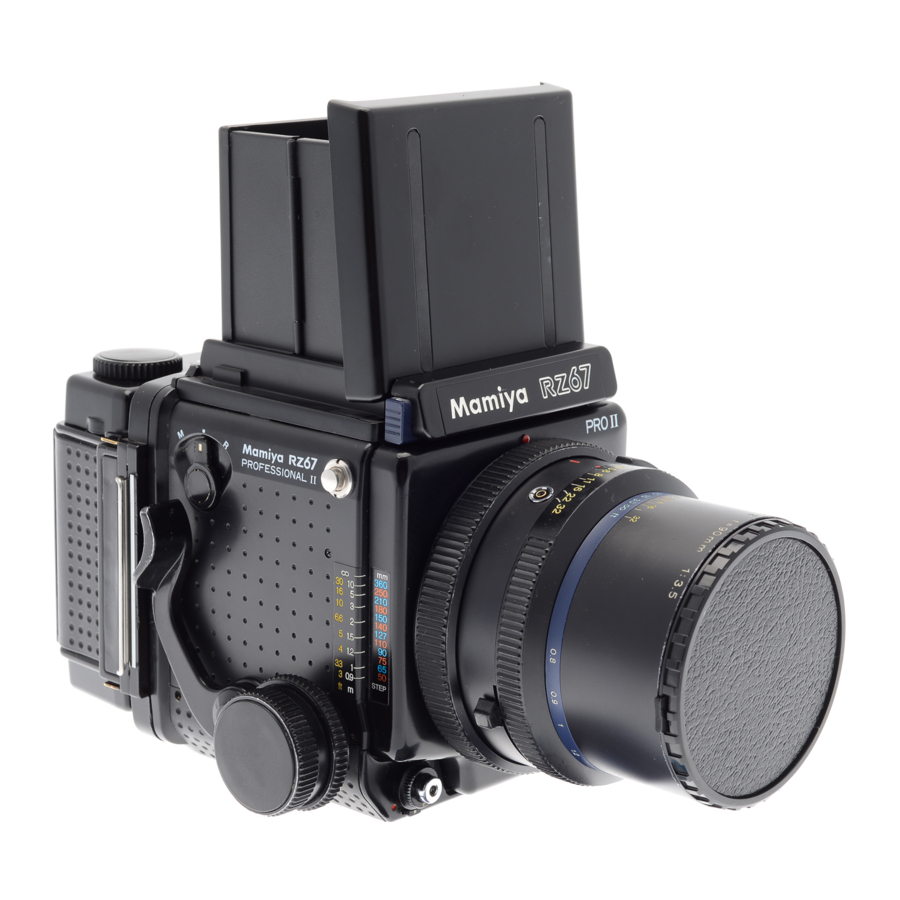
- Page 2 Congratulations on your purchase of a Mamiya RZ67 PRO II The Mamiya RZ67 PRO II is the latest and most advanced model of Mamiya's famous 6 x 7 cm SLR camera series, distinguished by their Revolving Back and rack and pinion Bellows Focusing.
-
Page 3: Table Of Contents
Contents Special Features of the Mamiya RZ67 PRO II ...2 Nomenclature and Functions ...4 Mamiya RZ67 PRO II Specifications ... 10 Inserting the Battery ... 11 Attaching / Removing Lenses ... 12 Using the Waist-Level Finder ... 14 Interchanging the Focusing Screen ... 16 Releasing the Shutter ... -
Page 4: Special Features Of The Mamiya Rz67 Pro Ii
31.3cm, the 65mm wide angle lens 8.5cm and the 180mm is 84.5cm). World-Class Mamiya Lenses Mamiya world-class lens quality is a major reason for the top reputation of Mamiya camera. Mamiya operates its own modern optical design, engineering and manufacturing plant... - Page 5 Bright, Interchangeable Finders and Focusing Screens A Waist Level Finder FW702 with self-erecting focusing hood and magnifier is factory supplied with each camera. The eye-level AE Prism Finder FE701 is an important accessory. It features three-way metering (average, spot or auto shift) and computerized, aperture-priority shutter control, compatible with the intermediate shutter speeds.
-
Page 6: Nomenclature And Functions
Nomenclature and Functions Body R-M Lever For normal operation, lever is aligned with center index mark. "M": For making Multiple Expo- sures set it to "M". This will dis- engage the film transport when cocking the shutter. Do not for- get to return it to center posi- tion afterwards. - Page 7 Shutter Speed Dial Speeds from 8 to 1/400 sec. Between 4 and 1/250 sec. there are intermediate settings with click stops. When set to "AEL" or "RBL" dial is locked. To release press center button. (See page 21) Carrying Strap Lug Lock Release Button Hot-Shoe Focusing Knob Lock Lever...
- Page 8 Waist-Level Finder Magnifier Release To raise the magnifier, push the Magnifier Release to the left. Magnifier Interchangeable with other magni- fiers in various diopter strengths. Finder Release Button To remove the finder, Push in on both (right and left) release buttons and lift the finder off camera body.
- Page 9 Film Speed Dial Used to set the ISO speed of the film used. Spool Release Pins Depress these pins to insert or remove film. Film Spool Stud A new roll of film is loaded on this stud with the paper leader pulled over the roller in the direction indicated by the dotted line and arrow which appears...
- Page 10 Lens Flash Sync Terminal (X-sync) Knob for turning Depth of Field Calculating Ring Can be set for meters or feet. Depth-of-Field Preview Time Exposure Lever Mirror Lock-up Cable Release Socket To lock mirror up for vibration free photography follow this sequence: Camera mirror and lens is in cocked position.
-
Page 12: Mamiya Rz67 Pro Ii Specifications
Mamiya RZ67 PRO II Specifications Camera Type :6 X 7 cm roll film SLR with lens shutter. Film Holder :120 Roll Film Holder HA703 ---the standard holder 220 Roll Film Holder HB702 6x4.5 120 Roll Film Holder RZ Polaroid Pack Film Holder HP702... -
Page 13: Inserting The Battery
Inserting the Battery Because the Mamiya RZ67 Pro-II does not function properly without a battery, be sure to load one into the Battery Chamber before attempting to use the camera. The camera uses one of either of the fol- lowing batteries:... -
Page 14: Attaching / Removing Lenses
Attaching / Removing Lenses Before attaching a lens to the camera body, the mirror in the body must be set in the down position and the shutter of the lens cocked. Setting the Mirror 1. Remove the Body Cap from the camera. 2. -
Page 15: Removing The Lens
Removing the Lens 1. Push the Cocking Lever of the camera body completely down, which will set the mirror and cock the lens shutter. 2. Rotate the Bayonet Ring of the lens counterclockwise as far as it will go (the white dot on Bayonet Ring will align with central red index line of lens) and remove the lens. -
Page 16: Using The Waist-Level Finder
Using the Waist-Level Finder Raising the Finder Merely lift the back of the Finder until it opens completely. Raising the Magnifier Slide the Magnifier Release slightly to the left and the Magnifier will pop up into posi- tion. Lowering the Magnifier Gently push the base plate of the Magni- fier all the way down until it locks in place. - Page 17 Folding the Finder After lowering the Magnifier, gently squeeze the right and left panels of the finder together while closing it. Removing/Attaching the Finder Removing the Finder To remove the Finder, push the right and left release buttons towards the rear of the Finder and while holding them in, lift the front of the Finder.
-
Page 18: Interchanging The Focusing Screen
Interchanging the Magnifier To remove the Magnifier, gently squeeze the magnifier frame with the sides of the finder and rotate the Magnifier counterclockwise. To attach the Magnifier, align the white dot on the Magnifier frame, and rotate the Magni- fier clockwise. •... -
Page 19: Releasing The Shutter
Releasing the Shutter It is best to become acquainted with the method of releasing the shutter before using film in the camera. 1. Rotate the Release Button Collar until the white dot on it is aligned with the one immediately below (on the Collar Stop Lever). - Page 20 Using the Release Button Collar 1. For normal operation, align the white square “B” on the Release Button Collar “A” with the white dot on the lever below ”B”. When this is done, the Shutter Release functions electro- magnetically and the various safety mecha- nisms operate electrically.
- Page 21 Operating the Cocking Lever When depressing the Cocking Lever, be sure to push it all the way forward (toward the Shutter Release Button). If the Cocking Lever is not pressed forward as far as it will go, it will return to its original position when released, but the shutter will not be cocked.
- Page 22 • The roll film holder has not been advanced. (Does not apply when in multi exposure "M" mode.) Green Lamp : When the Metz/Mamiya Interface Module SCA 395 is attached to the flash shoe and connected to certain Metz flash units, this LED will glow to indicate that the unit is flash ready.
-
Page 23: Shutter Speed And Aperture
Shutter Speed and Aperture The Shutter Speed Dial Select the shutter speed desired and rotate the Shutter speed Dial until the appropriate fig- ure is aligned with the shutter speed index mark. Usually, the Shutter Speed Dial must be set to a click-stop position. However, it can also beset to an intermediate speed. -
Page 24: The Roll Film Holder
The Roll Film Holder Attaching the Holder 1. Slide the Holder Lock Lever of the Roll Film Holder completely toward the Lock Release Lever “A”. 2. Align the orange circle “B” of the Revolving Ring (found at the rear of the camera) with one of the two white index marks “C”... - Page 25 Removing the Holder Insert the Dark Slide into the Roll Film Holder. For instant recognition, the Dark Slide Slot is bordered by white reference lines. The Film Holder can be removed after moving the Holder Lock Lever as far as it will go toward Lock Release Lever...
-
Page 26: Loading The Film Holder
Loading the Film Holder Pull out the upper and lower Back Cover Latches and the back cover will open. Be- cause of the double safety lock, pulling out just one of the two Back Cover Latches will not open the cover. After opening the back cover of the Roll Film Holder, remove the Film Insert. - Page 27 gently wind the Film Advance Knob until the arrow of the backing paper aligns with the insert Start Mark. As your gently advance the backing paper, make sure it advances evenly between the spool flanges and does not begin to slant. If it advances unevenly, remove the backing paper from the Take-up Spool and re-insert.
- Page 28 Advancing the Film Before attempting to advance the film to the first frame, make sure the R-M Lever is set to its normal (center) position. If the lever is set to 'M'(multiple exposure), it will not be possible to advance the film with the Cock- ing Lever.
-
Page 29: Taking Photographs
Taking Photographs When the film is advanced to the next frame, the numeral in the Exposure Counter will automatically change. • CAUTION 120 or 220 film used in this roll film holder is, unlike 35 mm film, not perforated. Therefore, if it is advanced very rapidly, the spacing between frames may become uneven. -
Page 30: Focusing And Locking The Focusing Knob
During exposures, the Dark Slide can be stored in the Dark Slide Slot in the back of the holder. The Memo Clip on the back cover can be used for holding the film box-top as a film reminder or for holding a piece of paper with pertinent data. -
Page 31: The Revolving Back
The Revolving Back The Vertical and Horizontal Formats Before attempting to revolve the back, set the R-M Lever to "R". To change from horizontal to vertical format, rotate the Film Holder clockwise as far as it will go. Rotating it counter-clockwise, changes the format from vertical back to horizontal. -
Page 32: Distance Scale • Depth-Of-Field
Distance Scale • Depth-of-Field Distance Scale The Distance Scale is used to determine the film-plane-to-subject distance. The scale itself is composed of two parts, the Distance Scale and Focal Length Scale. After focusing, the correct distance can be determined by locating the point at which the curved line for the focal length in use inter- sects the Distance Scale. -
Page 33: Long Exposures
Long Exposures Bulb (B) Exposures When the Shutter Speed Dial is set to B, the shutter will remain open as long as the Shutter Release Button remains depressed. Since bulb exposure is also controlled electronically, the shutter will automatically close after approximately one minute in or- der to prevent inadvertent battery depletion. -
Page 34: Multiple Exposures • Infrared Photography
There is a millimeter scale on top of the focus scale. RZ67 PRO II Infrared Correction Table Shows required adjustment at infinity... -
Page 35: Mirror Lock-Up Operation
Mirror Lock-up Operation With the RZ 67 PRO II , it is possible to lock the mirror in the up position beforehand, and at the desired instant release the shutter without the usual accompanying mirror movement. Referred to as, "mirror lock-up operation," this technique is extremely valuable when even the slightest mirror vibration must be eliminated. -
Page 36: Flash Photography • Using A Tripod
When using large, grip-type units, attach the sync cord of the flash to the Flash Sync Terminal (X-sync) of the lens. • When the Mamiya MZ36R Flash is used, a green monitor lamp will glow, indicating that battery charging has been accomplished. -
Page 37: Close-Up Photography
/16 at 1/60 sec., for an exposure compensation of +1, set the lens to either f /16 at 1/30 sec. or f/11 at 1/60 sec. When using a Mamiya through-the-lens (TTL) Exposure Meter Finder, such as the RZ AE Prism Finder, it corrects automatically for close-up photography. -
Page 38: Attaching A Lens With Shutter Released Or Mirror Raised
Attaching a Lens with Shutter Released or Mirror Raised When a lens is removed from the camera body, the mirror is set (lowered) and the lens shutter cocked. Conversely, when attaching a lens, the same conditions should prevail (mirror set and shutter cocked). However, should a lens be attached with either the mir- ror raised or shutter released, or both, the camera can be reset by following the proce-... -
Page 39: Camera Back Lock System
Camera Back Lock System 120 Roll Film Holder HA703 220 Roll Film Holder HB702 120 Roll Film Holder 6 x 4.5 HA704 Polaroid Pack Film Holder HP702... -
Page 40: How To Use The Carrying Strap
How to Use the Carrying Strap Attaching the Strap Hold the metal clamp of the strap so that the key-hole shaped opening faces the Car- rying Strap Lug on the camera body. Gently fit the upper part of the key-hole opening over the lug. -
Page 41: Troubleshooting
The previous models of AE Prism Finders or AE Magnifying Finders cannot be used with the RZ PRO II unless their circuits are modified. Contact your country's Mamiya Distributor for further information. The AE Prism Finder FE701 can be directly mounted on the RZ PRO II . -
Page 42: Using Rb Series Lenses And Accessories
The shutter is cocked and released in the same manner as RZ series lenses. When using a Mamiya Sekor C lens for the RB series on the RZ PRO II body, be sure to insert an optional interchange mounting ring into the lens rear mount to assure correct coupling with the camera body. -
Page 43: Care Of The Camera
Also check any accessories you plan to use. Proper Maintenance The Mamiya RZ PRO II is designed for heavy professional use and will last indefinitely, if properly maintained. Every camera has mechanisms like film transport, shutter, diaphragm blade etc.
Need help?
Do you have a question about the RZ67 PRO II and is the answer not in the manual?
Questions and answers