Table of Contents
Advertisement
Operating Instructions
Telephone Answering System
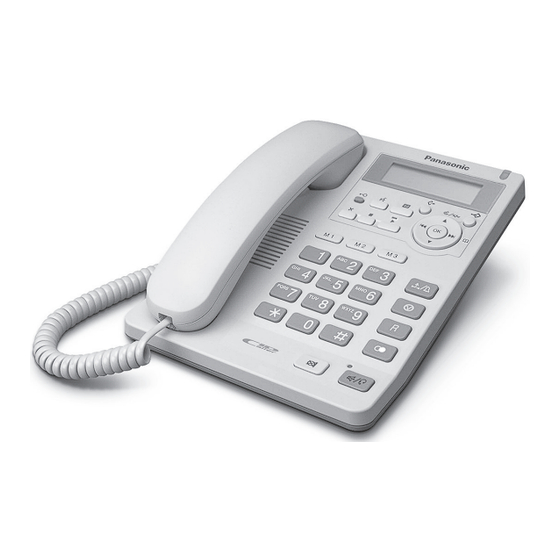
KX-TS620EX
Model No.
Model shown is KX-TS620EXW
This unit is compatible with Caller ID. To use this feature, you must subscribe to the
appropriate service offered by your service provider.
Please read these Operating Instructions before using the unit and save for future
reference.
Advertisement
Table of Contents

Related Manuals for Panasonic KX-TS620EX


Summary of Contents for Panasonic KX-TS620EX
-
Page 1: Operating Instructions
Operating Instructions Telephone Answering System KX-TS620EX Model No. Model shown is KX-TS620EXW This unit is compatible with Caller ID. To use this feature, you must subscribe to the appropriate service offered by your service provider. Please read these Operating Instructions before using the unit and save for future... -
Page 2: Table Of Contents
Table of Contents Introduction Phonebook Accessory Information....... 3 Storing Names and Numbers in the Phonebook ........31 Preparation Dialling from the Phonebook ...33 Important Safety Instructions .... 4 Chain Dial ........34 Location of Controls ......6 Editing ..........35 Display..........8 Erasing ..........35 Settings Direct Dial (M1, M2, M3) Connecting the Handset /AC Adaptor/... -
Page 3: Introduction
• In the event of problems, you should contact your equipment supplier in the first instance. Declaration of Conformity: • Panasonic Communication Co., Ltd. declares that this equipment is in compliance with the essential requirements and other relevant provisions of Radio & Telecommunications Terminal Equipment (R&TTE) Directive 1999/5/EC. -
Page 4: Preparation
Preparation Incorrect reassembly can cause Important Safety electric shock when the unit is subsequently used. Instructions 12. Unplug this unit from the power outlet and refer servicing to an authorised When using this unit, basic safety precautions should always be followed to service centre when the following reduce the risk of fire, electric shock, or conditions occur:... - Page 5 Preparation General Information on Disposal for Users of Waste Electrical & Electronic Equipment • Use only the AC adaptor included with this (private households) product noted on page 9. • Do not connect the AC adaptor to any AC outlet other than a standard –...
-
Page 6: Location Of Controls
Preparation Location of Controls {??} (p. 42) Direct Dial ({M1} {M2} {M3}) (p. 29, 36) Headset Jack (p. 55) Display (p. 8) RINGER Indicator (p. 23, 24) Navigator Key ) (p. 11, 18, 33) {OK} Microphone {a/b} (p. 15, 23) (p. - Page 7 Preparation {s} (p. 44) {d} (p. 16) { } (p. 17, 27, 30, 37, 47) (p. 11, 18, 25, 33) (p. 11, 18, 27) } and Indicator (p. 45, 46) {N} (p. 17, 46)
-
Page 8: Display
Preparation Display (This display shows all the possible 123456789 123456 configurations.) ABCDEFGHIJKLMNOP abcdefghijklmnop When the handset is on the cradle, the AC adaptor is 34AM 31 DEC. missed calls connected and the Speakerphone/headset {s/W} 5 messages indicator light is off, the display shows the current time and date, the number of new calls and the number of recorded messages. -
Page 9: Settings
• Use only the included Panasonic AC adaptor PQLV207CE. • Use only a Panasonic Handset for the KX-TS620EXW or KX-TS620EXB. • The AC adaptor must remain connected at all times. (It is normal for the adaptor to feel warm during use.) •... -
Page 10: Connecting A Communication Device
Settings If you subscribe to a DSL service: • Please attach a noise filter (contact your DSL provider) to the telephone line between the unit and the telephone line jack in the event of the following: Noise is heard during conversations. Caller ID feature (p. -
Page 11: Programming Summary
Settings Programming Summary You can program the following functions. The display shows the programming instructions. See the corresponding pages for function details. Make sure that the handset is on the cradle, the AC adaptor is connected and the Speakerphone/headset {s/W} indicator light is off. Press <Function menu>* To store names and phone numbers in memory... -
Page 12: Time And Date
Settings Press { OK } (Next key). Time and Date • If numbers between 0000 and 0059, or 1300 and 2359 are You can select AM/PM or 24-hour clock entered, the time will automatically by programming. be set using the 24-hour clock. Go to the step 9. -
Page 13: Display Language
Settings Press { OK } (Save key). Display Language • A long beep sounds. • The clock starts working. You can select either “English”, • The display will return to step 2. To “French”, “Spanish”, “Italian”, “Greek” exit the programming mode, press or “... -
Page 14: Dialling Mode
Settings Dialling Mode LCD Contrast The dialling mode is fixed to “Tone”. You can select the LCD contrast level from 1 to 4 by programming. To make Make sure that the handset is on the the display clearer, set to high level. cradle, the AC adaptor is connected Your phone default setting is 2. -
Page 15: Ringer Volume
Settings Ringer Volume Time Adjustment (Caller ID subscribers only) Make sure that the AC adaptor is connected and the unit is not being Using this feature, the unit’s date and used. time setting will be automatically adjusted when caller information is To select HIGH (default), MID or received. -
Page 16: Preparing The Answering System
Preparing the Answering System Greeting Message You can record a personal greeting message of up to 1 minute. If a greeting message is not recorded, one of the two pre-recorded greetings will be played when a call is received (p. 17). All messages (incoming, etc.) are stored in flash memory (p. - Page 17 Preparing the Answering System When finished, press {d}. Greeting check • The unit will automatically play back the recorded greeting. • You can also finish recording by pressing {N}. • To change the message, start again from step 1. Greeting message sample “Hello, this is (your name and/or number).
-
Page 18: Programming Summary For The Answering System
Preparing the Answering System Programming Summary for the Answering System You can program the following functions. The display shows the programming instructions. See the corresponding pages for function details. Make sure that the handset is on the cradle, the AC adaptor is connected and the Speakerphone/headset {s/W} indicator light is off. -
Page 19: Number Of Rings
Preparing the Answering System Press { OK } (Save key). Number of Rings • A long beep sounds. • The display will return to step 3. To You can select the number of times the exit the programming mode, press unit rings before the answering system { ? } or wait for 60 seconds. -
Page 20: Caller's Recording Time
Preparing the Answering System If you select “Greeting only”, the unit will Caller’s Recording Time answer a call with the greeting message, and then hang up. The unit will not record You can select “1 minute”, “2 minutes”, any incoming messages. “3 minutes”... -
Page 21: Making/Answering Calls
Making/Answering Calls Making Calls You can make a call by simply lifting the handset. To hang up, place the handset on the cradle. Using the speakerphone Press {s/W}, then dial a phone number. Dial a phone number, then press {s/W}. 12 : 34PM 24 NOV. - Page 22 Making/Answering Calls To redial the last number dialled Using the handset: Lift the handset press { R }. Press { R } Lift the handset. Using the speakerphone: Press {s/W} press { R }. Press { R } press {s/W}. Automatic Redial: If you use the speakerphone or the headset when redial and the other party’s line is engaged, the unit will automatically redial the number up to 15 times.
-
Page 23: Answering Calls
Making/Answering Calls To put a call on hold Press {a/b} during a conversation. • The Speakerphone/headset {s/W} indicator flashes. • If using the handset, you can place it on the cradle. • During the hold, the caller will hear music. For cancelling music, see page 39. To release the hold If the handset is on the cradle, lift the handset. -
Page 24: Caller Id Service
Caller ID Service This unit is compatible with a Caller ID service offered by your telephone company. If you subscribe to a Caller ID service, the calling party’s information will be displayed when the unit is ringing. The unit can record information of up to 50 incoming calls, including the time and date received in the Caller List. -
Page 25: Viewing The Caller List
Caller ID Service Viewing the Caller List If you have received 10 missed calls, the number of 12 : 34AM 21 MAY missed calls will be displayed as shown, while the unit missed calls message is not in use. To check who has called, follow the steps below. Press { } or { } to enter the Caller List. - Page 26 Caller ID Service Example: When you search from the most recent call: Press { } or { } to enter the list. To return to the previous caller, press { Caller list 2 missed calls To exit the Caller List, press Press { Display meaning: : You have checked this caller...
-
Page 27: Calling Back From The Caller List
Caller ID Service Press Calling Back from the Caller To add a number List Add a number to the current number. Press { } or { } to enter the Caller List. To erase the number Press { } to erase the number. Scroll to the desired caller by •... -
Page 28: Storing Caller List Information In The Phonebook
Caller ID Service Press { OK } (Save key). Storing Caller List JACK SMITH Information in the 123456789 Phonebook You can store numbers that are in the • A long beep sounds. Caller List in the Phonebook. • The display will return to Caller List. You can continue storing other Make sure that the handset is on the items. -
Page 29: Storing Caller List Information In The Direct Dial Memory
Caller ID Service Press { Storing Caller List Save phonebook Information in the Direct >Save M1,M2,M3 M1,M2,M3=Save Dial memory You can store numbers in the Caller List Press one of the Direct Dial to the Direct Dial memory ({ M1 }, { M2 } button ({ M1 }, { M2 } or { M3 }) and { M3 }). -
Page 30: Erasing Caller List Information
Caller ID Service To erase all entries in the Erasing Caller List Caller List Information Before erasing all entries, make sure After checking the Caller List, you can that “ ” is displayed at missed call erase some or all of the entries. step 1. -
Page 31: Storing Names And Numbers In The Phonebook
Phonebook Press { OK } (Save key). Storing Names and • A long beep sounds. Numbers in the Phonebook • To continue storing other items, repeat from step 2. You can store up to 50 names and Tom Jones phone numbers in the memory. 987654321 Make sure that the handset is on the cradle, the AC adaptor is connected... -
Page 32: Selecting Characters To Enter Names
Phonebook Selecting characters to enter names The dialling buttons ({0} to {9}, {£} and {#}) can be used to enter letters and symbols. Pressing each button selects a character as shown below. Number of times key is pressed & ’ –... -
Page 33: Dialling From The Phonebook
Phonebook Dialling from the Phonebook Make sure that the handset is on the cradle, the AC adaptor is connected and the Speakerphone/headset {s/W} indicator light is off. Press { } or { } to enter the Phonebook. Scroll to the desired item by pressing Press { Press { } or {... -
Page 34: Chain Dial
Phonebook Index table Keys Index Keys Index Symbols, 1 P, Q, R, S, 7 A, B, C, 2 T, U, V, 8 D, E, F, 3 W, X, Y, Z, 9 ¢ G, H, I, 4 {£} J, K, L, 5 , Space M, N, O, 6 Chain Dial... -
Page 35: Editing
Phonebook Editing Erasing Make sure that the handset is on the Make sure that the handset is on the cradle, the AC adaptor is connected cradle, the AC adaptor is connected and the Speakerphone/headset {s/W} and the Speakerphone/headset {s/W} indicator light is off. indicator light is off. -
Page 36: Direct Dial (M1, M2, M3)
Direct Dial (M1, M2, M3) Press one of the Direct Dial Storing Names and button ({ M1 }, { M2 } or { M3 }) (Save key). Numbers in the Direct Dial (Example: { M1 } is pressed.) memory • A long beep sounds. You can store up to 3 names and phone •... -
Page 37: Dialling A Stored Number From The Direct Dial Memory
Direct Dial (M1, M2, M3) To erase a stored number Dialling a Stored Number Press the required Direct Dial from the Direct Dial button ({ M1 }, { M2 } or { M3 }). memory Press { }. Lift the handset or press {s/W}. •... -
Page 38: Special Features
Special Features {??} }, { }, { OK } { R } How to Use the PAUSE Button (For PBX Line/Long Distance Calls) We recommend you press { } if a pause is required for dialling with a PBX or to make a long distance call. -
Page 39: For Call Waiting Service Users
Special Features For Call Waiting Service Setting Hold Music to ON/ Users Press { R } if you hear a call-waiting You can set music play during the hold as follows. Your phone default setting is tone while talking. • The first call is put on hold and you can answer the second call. -
Page 40: Recall Button
Special Features Select the desired time by RECALL Button pressing { } or { Pressing { R } allows you to use special Press { OK } (Save key). features of your host PBX such as • A long beep sounds. transferring an extension call or •... -
Page 41: Setting The Password
} or { } and press Please write down your password. If you { OK } (Yes key). forget your password, consult your nearest Panasonic service centre. Scroll to “Change password?” by pressing { } or { } and press { OK } (Yes key). -
Page 42: Dial Lock
Special Features You can use the following features Dial Lock while the dialling buttons are locked. The Dial Lock feature allows you to • Dialling a number you programmed into prevent others from making calls. To the memory of Direct Dial buttons (p. 36) use this, set the feature to ON. -
Page 43: Call Restriction
Special Features 1. Enter the password (p. 41). Call Restriction Enter password :---- You can prevent the unit from dialling [OK]=Next phone numbers beginning with specified digit(s) (1 digit or 2 digits). 2. Press { OK } (Next key). Go to Phone numbers with the restricted step 5. -
Page 44: Answering System
Answering System Automatic Answering Operation When the unit answers a call, a greeting message is played and the caller’s message is recorded. When recording, “– Answering –” will flash on the display. • The recording time is about 15 minutes. If messages are recorded in noisy rooms, the time may be shortened by up to 3 minutes. -
Page 45: Listening To Messages
Answering System Listening to Messages You can see the total number of recorded messages on the display. If the MESSAGE indicator flashes (only when the Answering System is ON), new messages have been recorded. To play back messages, press { When you have new MESSAGE Indicator messages:... -
Page 46: Recording Your Telephone Conversation
Answering System During playback To repeat To repeat from the beginning of the message message Press { • If you press within 5 seconds of playback, the previous message will be played. To skip To skip to the next message message Press { To stop... -
Page 47: Erasing Messages
Answering System Erasing Messages The unit will announce the remaining recording time after playback, if it is less than 3 minutes. New messages cannot be recorded when: — “Memory full” is heard. — “Message full” is displayed. — The MESSAGE indicator flashes rapidly (only when the Answering System is ON). Erase some, or all, of the messages. -
Page 48: Remote Operation From A Touch Tone Phone
Answering System Remote Operation from a Touch Tone Phone You can operate the answering system from any touch tone phone. A synthesised voice menu will guide you on how to operate the unit (p. 50). • To skip the voice menu and operate the unit directly, see page 52. -
Page 49: Remote Code
Answering System Remote Code The remote code prevents unauthorised people from accessing your unit and listening to your messages. Choose any 2-digit number (00–99). Your phone default remote code is “11”. If you do not program your own remote code, you can use “11”. Make sure that the handset is on the cradle, the AC adaptor is connected and the Speakerphone/headset {s/W} indicator light is off. -
Page 50: Voice Menu
Answering System Voice Menu The shaded boxes are voice prompts. Press 1 to play back all messages. Press {1}. All message Press 2 for other functions. playback. Press {2}. Press {1}. Press 1 to play back new messages. New message Press 2 for other functions. - Page 51 Answering System All Messages Playback All recorded messages are played back. At the end of the last message, “ ” is heard. The unit will announce the End of final message remaining recording time if it is less than 3 minutes. New Message Playback Only new messages are played back.
-
Page 52: Direct Remote Operation
Answering System Direct Remote Operation Once you have entered the remote code, you can also control your unit by direct commands instead of using the voice menu. To end the remote operation, hang up anytime. Direct commands NEW MESSAGE • Only new messages are played back. PLAYBACK ALL MESSAGES •... - Page 53 Answering System Turning on the answering system Call your unit and wait for 15 rings. • The unit will answer and the greeting message will be played. • The answering system will turn on. Hang up or enter the remote code for other options. •...
-
Page 54: Useful Information
Useful Information Wall Mounting This unit can be mounted on a wall. Press the tabs in the direction of the arrows (1), then remove the wall mounting adaptor (2). Connect the AC adaptor. Tuck the telephone line cord inside the wall mounting adaptor, and push it in the direction of the arrow. -
Page 55: Optional Headset
Useful Information Optional Headset Plugging the optional headset into the unit allows a hands-free phone conversation. Please use only a Panasonic KX-TCA89EX. Connecting the optional headset to the unit Connect the optional headset to the headset jack as shown below. -
Page 56: Troubleshooting
Useful Information Troubleshooting Problem Cause and Remedy The unit does not work. • Check the settings (p. 9–15). • Unplug the AC adaptor to reset. Plug in, and try again. • KX-TS620EXW or KX-TS620EXB is not designed to be used with rotary (pulse dialling) services. The unit does not ring. - Page 57 Useful Information Problem Cause and Remedy The unit does not • You need to subscribe to a Caller ID service. display the caller’s • Check the AC adaptor is connected to the unit. phone number. • If you receive a call with the Caller ID information while viewing the Caller List, the redial list, the Phonebook list or the Direct Dial Memory, while programming or while playing back the message, the caller’s...
-
Page 58: Specifications
Useful Information Specifications Power Supply: AC adaptor (AC 220 V — 240 V, 50/60 Hz) Power Consumption: Standby: Approx. 2.4 W Maximum: Approx. 3.0 W Dimensions (H x W x D): Approx. 91 mm x 165 mm x 220 mm Mass (Weight): Approx. - Page 59 Sales department N Spain N Netherlands Panasonic ESPAÑA, S.A. Panasonic Infocentre Avda. Josep Tarradellas, 20 - 30 Europalaan 30 08029. Barcelona (España) 5232 BC’s-Hertogenbosch Teléfono atención usuario: Tel:073-6402 802 902 15 30 60 Fax:073-6402 812 www.panasonic.es e-mail:info-centre@panasonic.nl Reparaties Panasonic-Centre Nederland N Greece (Servicom b.v.)
- Page 60 Senai Malaysia Copyright This material is copyrighted by Panasonic Communications (Malaysia) Sdn. Bhd., and may be reproduced for internal use only. All other reproduction, in whole or in part, is prohibited without the written consent of Panasonic Communications (Malaysia) Sdn. Bhd.
Need help?
Do you have a question about the KX-TS620EX and is the answer not in the manual?
Questions and answers