Table of Contents
Advertisement
Quick Links
Advertisement
Table of Contents
Troubleshooting

Subscribe to Our Youtube Channel
Related Manuals for Hand Held Products Quick Check 200 Series


Summary of Contents for Hand Held Products Quick Check 200 Series
- Page 1 Quick Check® 200 Series User’s Guide...
- Page 2 Nijverheidsweg 9 5627 BT Eindhoven The Netherlands Hand Held Products shall not be liable for use of our product with equipment (i.e., power supplies, personal computers, etc.) that is not CE marked and does not comply with the Low Voltage Directive.
-
Page 3: Statement Of Agency Compliance
Caution: Any changes or modifications made to this device that are not expressly approved by Hand Held Products may void the user's authority to operate the equipment. Note: To maintain compliance with FCC Rules and Regulations, cables connected to this device must be shielded cables, in which the cable shield wire(s) have been grounded (tied) to the connector shell. -
Page 5: Table Of Contents
Table of Contents 1. About This Manual..............1 Conventions ......................1 QC200 “Low Battery” Warning ................ 1 2. Overview ..................3 Unpacking ......................4 Charging the Battery ..................4 Command Code “Quick Start” ................5 3. Detailed Operation..............7 Using the QC200 ....................9 Power ON/OFF .................... - Page 6 9. Single Scan To Result (SSTR)..........39 10. Printer Information ..............41 Saving Data ...................... 41 Reviewing printouts..................41 Using a printer ....................44 Print your work ....................44 Save data when a printer is not connected ............45 Review data from the last scan:................ 45 Print or delete stored data: ................
-
Page 7: About This Manual
1. About This Manual ® This manual contains information on the Quick Check 200 Series. • Quick Start Command Code • Detailed Operation • Configuration / Programming • Symbol Testing / Scan Results • Printer Printouts • Special Functions • Quick Check Maintenance •... - Page 8 or attempts to scan will automatically bring about additional “Low Battery” indications. This testing sequence has a power drain than normal scan or single menu functions. This protects the user by insuring a low battery indication before total unit power failure occurs, thus preserving proper unit operation. It is possible for an intermittent “false”...
-
Page 9: Overview
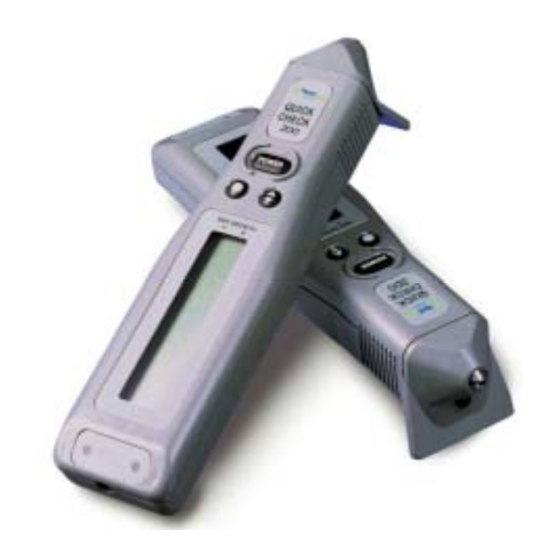
2. Overview ® The Quick Check 200 Series is one of the Hand Held Products family of Quick ® Check bar code quality assurance devices. The Quick Check 200 Series is fully portable and compatible with all major bar code symbologies. It is effectively two instruments in one, both an easy-to-use Pass/Fail quick tester and a powerful measuring tool for detailed testing and analysis of those same symbols. -
Page 10: Unpacking
UNIT AND VOID ITS WARRANTY!! ALL UNITS HAVE HAD A PACK INSTALLED AT THE TIME OF MANUFACTURE. USE ONLY A HAND HELD PRODUCTS SUPPLIED NICAD TYPE RECHARGEABLE BATTERY PACK. USE OF OTHER PACKS OR BATTERIES AND ATTEMPTS TO RECHARGE THESE BATTERIES COULD CAUSE THE... -
Page 11: Command Code "Quick Start
If you experience any problems during this set up procedure, carefully review the above steps and try again. If you still have problems, contact your dealer or Hand Held Products for assistance. Command Code “Quick Start” ® The Quick Check 200 Series is a complete, self-contained handheld bar code verifier. - Page 12 Hand Held Products’ Customer Support. NOTE: Display Orientation (Right Handed vs. Left Handed) and Printer Interface selection ARE NOT set using the Command Code. Factory default settings for these are “Right Handed” and “QCHSP”.
-
Page 13: Detailed Operation
Serial Number label as well as two of the three case screws that must be removed for access to the internal battery. (WARNING: DO NOT attempt to replace the battery pack without first contacting Hand Held Products’ Service Department!) A port on the end allows connection to a recharger or optional printer. - Page 14 ® Quick Check 200 Control Buttons...
-
Page 15: Using The Qc200
Using the QC200 Before you turn the unit on and select a mode of operation, you should review the following to learn how to properly scan a bar code with it. To scan a bar code: Hold the QC200 as you would a pen or pencil. The raised “finger grip ridges”... -
Page 16: Reflectance Scale Calibration
® The Quick Check 200 Series shuts itself off after about a minute of inactivity. Alternately, the operator can shut the instrument off by pressing the button for about two seconds, until it beeps and clears the display. Reflectance Scale Calibration The first time you use the unit or charge the battery pack and periodically during ®... - Page 17 “Ltr. Grades” – If ANSI is invoked, Letter Grades used “Right Handed” – LCD Right Hand Orientation “HS Printer” – Printer Interface set for Hand Held Products QCHSP An explanation of each of the above default settings can be found in the...
-
Page 19: Configuration/Programming
4. Configuration/Programming ® The Quick Check 200 Series auto-recognizes or “autodiscriminates” seven bar code symbologies - - Codabar, Code 39, Interleaved 2/5, EAN/UPC, Code 128, MSI Code and Code 16K - - or alternately can check that symbols conform under any or all of several applications specifications;... - Page 20 [- Specs - >] The “>” indicates to the user that pressing the Scroll [<>] Button will allow them to select between the different code “specifications” (generic symbologies vs. applications) preprogrammed into the QC200. If you press Scroll [<>] here, you are put into the “Codes”...
- Page 21 Changes and Shifts. Normally this information is totally transparent to the user but it may assist in analyzing reading or printing problems. When scanning Code 128 in the “Show Modes” setup, the LCD display and the printer “show” Code 128’s “Special Extra Characters” as well as information on the symbol’s check digit.
-
Page 22: Application"/Model Options
MSI Code Options displayed on the LCD are: [MSI NoUsrCk>] or [MSI Mod10Ck>] or [MSI Mod11CK>] which allows the selection of no user specified second check digit or a user specified second check digit of either the Modulo 10 or Modulo 11 type. NOTE: The MSI “System”... -
Page 23: Model Selections
SISAC [ - SISAC - >] – Serial Coding applications U.P.C. [ Coupon Code >] – Coupon Coding applications If additional user information must be input when an application is selected, the user will be prompted to do so after the Select button [0] has been pressed. Those applications need additional input follow: AIAG the user must indicate whether they are the “supplier”... - Page 24 [ - Tests - >] Pressing the Scroll [<>]Button once at this point will access the area of the QC200’s programming where test procedures are determined. Use of the Select [0] and Scroll [<>] buttons here will allow you to select the unit's pass/fail level criteria (Traditional vs.
-
Page 25: Config." Options
(Raise Pitch in single steps or Lower Pitch in single steps), select the Hand Held Products QC printer (HS Printer, VHS Printer or Std Printer) and finally save the settings in non-volatile RAM for future use. An explanation of these possible selections follows: “Left Handed”... - Page 26 [ - Busy! - ] then to [Version yyyy] and finally to [QC2xx aa/lll] as the non-volatile memory is updated. The “yyyy” represents the base software’s “checksum”. This number can be used by Hand Held Products’ Service Department when identifying a QC200. (If the Select [0] Button is pressed after “SaveSetngs?>”...
-
Page 27: Symbol Testing & Scan Results
5. Symbol Testing & Scan Results ® The Quick Check 200 Series acquires data during a measurement scan utilizing the new software-intensive “ScanProfile” methodology as specified in ANSI’s “Bar Code Print Quality Guideline” (ANSI x3.182). (NOTE: In all cases, the more smooth and slow the scan, the more accurate the results.) the user may be prompted with a series of beeps (one long and three short) and one of the following displays:... - Page 28 If in Traditional P/F Test Mode. When in ANSI Grading Test Mode, the PCS value shown is replaced with an ANSI letter grade or its numerical equivalent. A symbol that consistently produces no beeping is either fatally out-of-spec or of an unknown or unprogrammed bar code symbology.
-
Page 29: Test Result Details
When in the ANSI Grading mode, every tenth measurement of a given symbol (or every eightieth measurement if also in Extended Accuracy mode) will cause the results message for the last scan to be replaced with: [**g/aa/lll**] x.x reflecting the ANSI Symbol Grade (average of the ten Scan Grades per ANSI procedures). - Page 30 Another press of the Scroll [<>] Button will display (ONLY IF applicable errors have been found) certain Global Threshold, Reference Decode or Reference Algorithm failure messages such as: [GloThrsFAILS] F or [RefDcod FAIL] F or [RefAlgoFAILS] F Global Threshold ANSI’s Symbol Grading methodology requires foremost that a global reflectance threshold set simply at the halfway point between R(min) and ®...
-
Page 31: Reflectance Parameters
[Total xxx”X”] Total xxx”X” indicates the total symbol width expressed in “X” dimensions. “Formally” a bar code symbol’s width includes the quiet zones, however the value presented here is a calculated count of the number of “X” dimensions from the starting bar through the ending bar of the scanned symbol. -
Page 32: Format Parameters
[Rl:Rd xx:xx%] P (or F) Print Contrast Signal (PCS), Light Reflectance (Rl) and Dark Reflectance (Rd) are all “Traditional” measures of symbol contrast. PCS is based on the reflectance of light areas, Rl and dark areas, Rd. These values are determined using a definition of Rl and Rd as the Peak Light and Peak Dark points seen during the scan. - Page 33 [Msg Format >] P (or F) Either the “P” or “F” will be shown to indicate if the symbol under test passed or failed the Format Parameters. Pressing the Scroll [<>] Button will move you into the Format Parameters details. The order the displays are shown changes dependent upon whether the QC200 is set for “Traditional”...
-
Page 35: Printer Printout Samples
6. Printer Printout Samples [Store Data?>] When a printer is not attached or is turned off, you are asked if you wish to store the measured results in a 20-scan print buffer. Pressing the Scroll [<>] Button will store the scan. The buffer’s contents can later be dumped to the printer. - Page 36 Printout Samples All of the measurements obtained during a measurement scan are saved in a temporary buffer. When a printer is not connected those measurements can be transferred to a 20-scan print buffer as described above. When a printer is attached and powered, it produces a listing of full measurement details.
- Page 37 From a QCSSP, a typical printout would look more like the following: ® Quick Check 200 – 660 nm, 06 mil Scanner Code 39 *+A123B4C5D6E711* AvgBar = +.05 X OK! W/N Ratio = 2.9 OK! DecodMargn = 88% <A> Symbol Totals 264X PCS = 90% OK! R(L) = 79% OK! R(D) = 07% OK! SymbolContr = 72% <A>...
- Page 38 For the QCP and QCHSP: *************************** * Symbol Quality Grade * * Avg 4.0 = > A/06/660* *************************** And from the QCSSP: ***************************************************** **** Symbol Quality Grade: Avg 3.0 = > B/06/660 ***************************************************** **** Each result shown in the printout is information also available on the display as previously described.
-
Page 39: Special Functions
7. Special Functions ® The Quick Check 200 series can be set to a special “static” reflectance measurement function (Reflectometer Mode). This mode is especially useful in investigating the underlying optical characteristics of bar code symbols. The Reflectometer Mode, along with the Command Code mode is covered below. Reflectometer Mode This menu selectable Special Function is entered by pressing the Scroll [<>] Button when [Reflectom’r>] is present on the LCD. - Page 40 This helps improve the bar code quality. Making a “reduced size” copy will help also.) These codes are also produced by Hand Held Products. Contact Customer Administration at Hand Held Products about this service. It will be necessary to make the following selections; OPERATING MODE...
- Page 41 SPECIFICATION Generic Codes vs. Application Spec (choose one) Generic Codes (if selected an Application cannot also be selected) Code 39 Yes or No Mod Check? Yes or No Interleaved 2 of 5 Yes or No Mod Check? Yes or No UPC/EAN/JAN Yes or No Magnification Factor?_ _ _ (Default is 100) Choices –...
-
Page 43: Quick Check Maintenance
This page is a precision made standard. If it should become physically damaged or dirty, it should be replaced in order to insure proper operation of the unit. Contact Customer Administration at Hand Held Products to order replacements. -
Page 44: Troubleshooting
Troubleshooting If your Quick Check fails to operate properly after following all operation instructions carefully, do not open the case or attempt to repair. This will void the warranty. Contact Hand Held Products for assistance. -
Page 45: Single Scan To Result (Sstr)
9. Single Scan To Result (SSTR) Hand Held Products’ Single Scan To Result (SSTR) feature allows the user to quickly and easily access test results using the following SSTR bar codes, without having to step through each of the QC200’s individual result menu steps. -
Page 47: Printer Information
10. Printer Information Saving Data When you scan a bar code symbol, and you do not have a printer connected to the Quick Check, or it is connected by not turned on, the Quick Check can save the measured data in its temporary buffer. You can send scan results to this temporary buffer by using special Print/Store Codes or stepping through the menus. - Page 48 Figure 10-2, QCP and QCHSP printout ® \\\Quick Check 200\\\ 660 nm, 06 mil Scanner UPC-A: 100% Mag. Factor 021200074424 Avg Bar Err = +.04X OK! DecodeMargin = 92% <A> Symbol Total = 095 “X” Prnt Contr Sig = 94% OK! Reflect (Light) = 75% OK! Reflect (Dark) = 03% OK! Symbol Contrst = 72% <A>...
- Page 49 Figure 10-3. QCSSP printout ® Quick Check 200 – 660 nm, 06 mil Scanner Code 39 *+A123B4C5D6E711* AvgBar = +.05 X OK! W/N Ratio = 2.9 OK! DecodMargn = 88% <A> Symbol Totals 264X PCS = 90% OK! R(L) = 79% OK! R(D) = 07% OK! SymbolContr = 72% <A>...
-
Page 50: Using A Printer
Using a printer The Quick Check supports three different Hand Held Products serial printers: • Quick Check Printer (QCP) • Quick Check High Speed Printer (QCHSP) • Quick Check Super Speed Printer (QCSSP) The QC and QCHSP are both impact printers. The QCSSP is a thermal printer with high quality output. -
Page 51: Save Data When A Printer Is Not Connected
Save data when a printer is not connected Scan a bar code symbol. Scan the appropriate special Print/Store Code. The Codes are located at the back of this manual. There are four codes, one for each type of Quick Check printer and one for a PC printer. -
Page 52: Stop Printing
Stop printing During printing, press and momentarily hold the power switch on the Quick Check. Printing stops when the printer’s internal buffer is clear. Wait until the printer stops automatically. Using the QCP and QCHSP The QCP and QCHSP are shown in Figure 10-4. Figure 10-4. -
Page 53: Setup The Qcp Or Qchsp
Switch Position Function Down Left Center Down Right Paper Feed A red light-emitting diode (LED) to the right of the power switch lights to indicate to On and Paper Feed states. The printer has a VAC wall-outlet-mounted transformer with an 8-foot cord. The power transformer cord has a transformer on one end and has a mating connector to the printer on the other end. - Page 54 Unroll several inches of paper from a new roll and cut a straight edge on the paper if its is jagged or wrinkled. A straight edge helps guide the paper into the printer. Slide the paper’s straight edge into the slot between the paper compartment and the printer compartment until about one-quarter of an inch is inserted as shown in Figure 10-5.
-
Page 55: Remove Ribbon Cartridge From The Qcp Or Qchsp
Figure 10-5. Replacing the QCP or QCHSP paper roll Remove ribbon cartridge from the QCP or QCHSP Press the printer power switch to the Off (down left) position. Remove the printer cover by locating the four small grooves embossed on each side of the printer cover and tilting the cover open by pushing down gently on both sets of these grooves. -
Page 56: Connect The Qcp Or Qchsp To The Quick Check
Turn the cartridge ribbon advance knob (marked by an arrow on the cartridge) clockwise to remove slack from the ribbon. Replace the printer cover. Connect the QCP or QCHSP to the Quick Check Press the printer power switch to the Off (down left) position. Plug the transformer into an outlet. - Page 57 The connectors on each end of the cable are keyed so that they cannot be plugged in the wrong way. Hand Held Products recommends you use the thermal paper they supply for correct operation of the QCSSP. The order number is QCTP. Contact Hand Held Products Customer Administration at the numbers listed on the front cover of the manual.
-
Page 58: Turn On And Off The Qcssp
Turn on and off the QCSSP To turn on the printer, press the power switch to the On position. The Power LED lights. To turn off the printer, press the power switch to the Off position. The Power LED turns off. After you turn off the printer, wait at least three seconds to turn on the power for the proper initialization procedure. -
Page 59: Perform A Qcssp Self-Test
Perform a QCSSP self-test The self-test tests the print head. Ensure the power switch is in the Off position and there is paper in the printer. Plug the power source into the printer. Press and hold down Paper Feed while you press the power switch on. The printer begins to print the self-test. - Page 60 Table 10-1. QCSSP troubleshooting chart Indication Cause/Corrective Action Printing slowed power May be high temperature, when unit cools printing resumes at standard speed LED flashes Printing stopped May be loss of power, check supply. Data will be lost. Printing stopped and Paper Replace paper.
- Page 61 Indication Cause/Corrective Action Printing special characters while May be interface connection using RS-232 connection error. 1. Check connections; ensure “?” is framing error serial communications is selected. “@” is overrun error 2. Check cable integrity. 3. Check baud rate (VHS) with Paper Jam Remove jammed paper Power Surge...
-
Page 63: Customer Support
Hand Held Products provides service for all its products through service centers throughout the world. To obtain warranty or non-warranty service, return the unit to Hand Held Products (postage paid) with a copy of the dated purchase record attached. Contact the appropriate location below to obtain a Return Material Authorization number (RMA #) before returning the product. -
Page 64: Online Product Service And Repair Assistance
You can also access product service and repair assistance online at www.handheld.com. Technical Assistance If you need assistance installing or troubleshooting your scanner, please call your Distributor or the nearest Hand Held Products technical support office: North America/Canada: Telephone: (800) 782-4263, option 4 (8 a.m. to 6 p.m. EST) Fax:... -
Page 65: Online Technical Assistance
(C) static electricity or electro-static discharge, (D) operation under conditions beyond the specified operating parameters, or (E) repair or service of the product by anyone other than Hand Held Products or its authorized representatives. This warranty shall extend from the time of shipment for the duration published by Hand Held Products for the product at the time of purchase ("Warranty... - Page 66 This includes but is not limited to: cables, power supplies, cradles, and docking stations. Hand Held Products, Inc. extends these warranties only to the first end- users of the products. These warranties are nontransferable. The limited duration of the warranty for the Quick Check 200 Series is for two (2) years.
- Page 72 Hand Held Products, Inc. 700 Visions Drive P.O. Box 208 Skaneateles Falls, NY 13153-0208 QC200-UG Rev C 7/05...
Need help?
Do you have a question about the Quick Check 200 Series and is the answer not in the manual?
Questions and answers