
Related Manuals for ORION TELESCOPES & BINOCULARS Atlas EQ Mount 9830


Summary of Contents for ORION TELESCOPES & BINOCULARS Atlas EQ Mount 9830
- Page 1 INSTRUCTION MANUAL ® Orion ™ Atlas EQ Mount #9830 Customer Support (800) 676-1343 E-mail: support@telescope.com Corporate Offices (831) 763-7000 P.O. Box 1815, Santa Cruz, CA 95061 Providing Exceptional Consumer Optical Products Since 1975 IN 177 Rev. A 11/02...
- Page 2 Tube ring mounting plate Tube ring mounting plate lock knobs (2) Power indicator light Dec. lock lever Power cord jack Dec. setting circle Hand controller jack Front opening R.A. setting circle R.A. lock lever Latitude scale Counterweight shaft lock lever Counterweight shaft Latitude adjustment L-bolts Counterweights...
-
Page 3: Table Of Contents
® ongratulations on your purchase of a quality Orion mount. Your new Atlas Equatorial Mount works with many different telescope optical tubes. Designed for astronomical use, this precision mount allows con- venient “tracking” of celestial objects with its built-in motor drives. The setting circles built into the mount will assist you in locating hundreds of fascinating celestial denizens, including galaxies, nebulas, and star clusters, from their catalogued coordinates. -
Page 4: Attaching A Telescope
Azimuth adjustment knobs Post Figure 2. Orient the equatorial head so that the post on the tripod lines up with the azimuth adjustment knobs on the equatorial mount. prevents the counterweights from falling on your foot if the lock knobs happen to come loose. 6. -
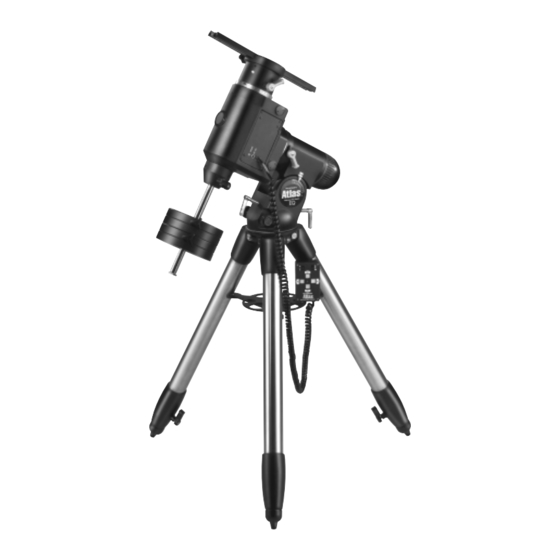
Page 5: Setting Up And Using The Equatorial Mount
® Dec. lock lever R.A. setting circle Dec. setting circle Front opening R.A. lock lever Polar axis finder scope Latitude scale Latitude Azimuth adjustment knobs (2) adjustment L-bolts Figure 4. The Atlas EQ Mount. 4. To balance the telescope on the declination axis, first tight- en the R.A. - Page 6 Eyepiece Alignment Focus Objective focus ring setscrew (3) lock ring lens Figure 6. Figure 7. The optional polar axis finder scope. The optical tube must be at a 90° angle to the R.A. axis in order to view through the polar axis finder. Alignment of the Polar Axis Finder Scope For general visual observation, an approximate polar align- ment is sufficient.
- Page 7 ® Note: From this point on in your observing session, you Power switch Rate switch should not make any further adjustments in the azimuth or the latitude of the mount, nor should you move the tri- Indicator light pod. Doing so will undo the polar alignment. The tele- scope should be moved only about its right ascension Reverse and declination axes.
- Page 8 Hemisphere, while the numbers above them apply to viewing in the Southern Hemisphere. The Dec. setting circle is scaled in degrees, with each mark Dec. setting circle representing 2° increments. Values of declination coordinates Dec. setting circle range from +90° to -90°. The 0° mark indicates the celestial thumbscrew (2) equator.
-
Page 9: Specifications
Figure 10a-d. These illustrations show the telescope pointed in the four cardinal directions. (a) north, (b) south, (c) east, (d) west. Note that the tripod and mount have not been moved; only the telescope has been moved on the its R.A. and Dec. axes. 2. - Page 12 One-Year Limited Warranty This Orion Atlas EQ Mount is warranted against defects in materials or workmanship for a peri- od of one year from the date of purchase. This warranty is for the benefit of the original retail purchaser only. During this warranty period Orion Telescopes & Binoculars will repair or replace, at Orion’s option, any warranted instrument that proves to be defective, provided it is returned postage paid to: Orion Warranty Repair, 89 Hangar Way, Watsonville, CA 95076.
Need help?
Do you have a question about the Atlas EQ Mount 9830 and is the answer not in the manual?
Questions and answers