Table of Contents
Advertisement
Quick Links
E
S
NERGY
TAR Printers have a feature that allows them to automatically "go to sleep" after a
period of inactivity. This auto-feature can reduce a machine's annual electricity cost by 60 percent.
E
As an
that this machine meets the
for energy efficiency.
E
What is an
NERGY
S
NERGY
TAR Partner, we have determined
S
TAR Printer ?
E
S
NERGY
TAR Guidelines
Advertisement
Table of Contents
Troubleshooting

Related Manuals for Minolta Color PAGEPRO PLUS


Summary of Contents for Minolta Color PAGEPRO PLUS
- Page 1 As an NERGY TAR Partner, we have determined that this machine meets the NERGY TAR Guidelines for energy efficiency. What is an NERGY TAR Printer ? NERGY TAR Printers have a feature that allows them to automatically “go to sleep” after a period of inactivity.
-
Page 2: Trademark Acknowledgments
Trademark acknowledgments Color PagePro is a trademark of Minolta in Europe, Japan and Asia. Minolta is a registered trademark of MINOLTA CO., LTD. Adobe, the AdobePS, and PostScript are trademarks of Adobe Systems Incorporated or its subsidiaries and may be registered in certain jurisdic- tions. -
Page 3: Safety Information
Foreword Safety Information – The printer should be plugged into an electrical outlet that is easily accessible. – After installing the Expansion Memory and the Network Board, be sure to replace the cover and secure it with the screws provided. –... - Page 4 Foreword LASER SAFETY For Users in Denmark ADVERSEL Usynlig laserstråling ved åbning, når sikkerhedsafbrydere er ude af funktion. Undgå udsættelse for stråing. Klass 1 laser produkt der opfylder IEC 825 sikkerheds Kravene. For Users in Finland and Sweden LUOKAN 1 LASERLAITE KLASS 1 LASER APPA- VEROITUS Laitteen Käyttäminen muulla kuin tässä...
- Page 5 Foreword LASER SAFETY For Users in Norway ADVERSEL Dersom apparatet brukes på annen måte enn spesifisert i denne bruksan- visning, kan brukeren utsettes for unsynlig laserstråling som overskrider grensen for laser klasse 1. Dette er en halvleder laser. Maksimal effeckt til laserdiode er 10 10 og bølgelengde er 770-810 nm.
- Page 6 Foreword WARNING This is a Class A product. In a domestic environment this product may cause radio interference in which case the user may be required to take adequate measures. For Users in Australia and New Zealand WARNING This is a Class A product. In a domestic environment this product may cause radio interference in which case the user may be required to take adequate measures.
-
Page 7: Ozone Release For All Users
Foreword OZONE RELEASE For All Users During printer operation, a small quantity of ozone is released. This amount is not large enough to harm anyone adversely. However, be sure the room where the printer is being used has adequate ventilation, espe- cially if you are printing a high volume of materials, or if the printer is being used continuously over a long period. - Page 8 Foreword Features High quality printing • Clear text and excellent graphics with true 600 dpi • Excellent graphics • Super Fine Micro Toning (Fine-MT) developing system • 8µm small particle toner • Color matching technology – Apple ColorSync (available only when the optional Adobe PostScript ROM SIMM is installed) –...
- Page 9 Foreword Versatile paper handling • Transparency, labels, thick paper, envelopes Compact size • Width 505mm/ 20" • Depth 530mm/ 20-3/4" • Height 403mm/ 15-3/4" Network ready with option • Ethernet Server: UNIX, Windows NT, NetWare 3.X/ 4.X (Bindery & NDS) Client: Windows 95/ 98/ 3.1, Windows NT Workstation 4.0, Macintosh (Option) Easy maintenance and operation...
- Page 10 Foreword Symbols and Terms This manual uses the following symbols and terms: ATTENTION This symbol indicates that a specified course of action is required to avoid causing damage or injury. Please be sure to follow the instructions in this manual exactly, whenever you see this symbol. This symbol is found at the following locations: “Changing the Oiling Roller”, “Changing the Fusing Unit and Image Transfer Roller Unit”, “Cleaning the Printer”...
-
Page 11: Table Of Contents
Contents CONTENTS Chapter 1: Introduction Precautions for Use ..........1-1 Operating Environment ........1-1 Using the Printer ..........1-2 Care of Printer Supplies........1-4 Moving the Printer..........1-5 Chapter 2: Using the Printer The Printer, Parts and Supplies ......2-1 Printer .............. - Page 12 Contents Loading Paper ........... 2-21 Loading Plain Paper/ Recycled Paper ... 2-21 Loading Transparencies and Labels ....2-31 Loading Special Paper (Letterhead/ Envelopes/ Postcards/ Thick Paper) ....2-43 Printing............... 2-46 Chapter 3: Changing the Printer Settings List of MENU Utilities .......... 3-1 Setting the MENU Utilities ........
- Page 13 Contents Chapter 4: PCL5C Printer Software Windows 95/ Windows 98 Printer Software Overview ......... 4-2 Displaying the PCL5C Printer Software Window ............4-3 Exiting the PCL5C Printer Software....4-3 Choosing Menu Settings........4-4 Common Button Operations ......4-4 Software Settings..........4-5 Paper ...............
- Page 14 Contents Settings............4-28 Alerts.............. 4-29 Windows NT 4.0 Printer Software Overview ....... 4-30 Displaying the PCL5C Printer Software Window ............4-31 Exiting the PCL5C Printer Software....4-32 Choosing Menu Settings........ 4-32 Common Button Operations ......4-32 Software Settings..........4-33 Page Layout ........... 4-33 Paper ............
- Page 15 Contents Software Settings..........4-49 Paper ............. 4-49 Color .............. 4-53 Options ............4-57 Watermarks ........... 4-59 Overlay............4-63 Setup ............. 4-65 Chapter 5: PostScript Printer Software (Option) Windows 95/ Windows 98 (Option) Printer Software Overview ......... 5-2 Displaying the PostScript Printer Software Window ............
- Page 16 Contents Windows NT 4.0 (Option) Printer Software Overview ....... 5-25 Displaying the PostScript Printer Software Window ............5-26 Exiting the PostScript Printer Software ..5-27 Using PostScript Printer Driver Setup Dialog ............5-28 Default Document Properties Window ... 5-28 Common Buttons........5-28 Page Setup..........
- Page 17 Foreword Fonts .............. 5-52 PostScript............5-53 Job Control ............ 5-56 Watermarks ........... 5-57 Macintosh (Option) Introduction ............5-59 Page Setup............5-60 Page Attributes ..........5-60 PostScript Options ......... 5-62 Print Menu Settings .......... 5-64 General ............5-65 Background Printing........5-66 Cover Page ............
- Page 18 Contents Chapter 6: Maintaining Your Printer Changing Cartridges........... 6-1 Changing the Toner Cartridge ......6-1 Changing the Toner Cartridge (Auto Mode) .......... 6-2 Changing the Toner Cartridge (Manual Mode) ........6-10 Changing the Drum Cartridge, Waste Bottle and Oiling Roller ..........6-14 Changing the Drum Cartridge ....
- Page 19 Contents Chapter 7: Troubleshooting How to Troubleshoot........... 7-1 Diagnosing Your Printer ........7-1 Problems During the Data Transfer and Print Cycle............7-3 Troubleshooting the Data Transfer Cycle ..7-3 Troubleshooting the Print Cycle ....... 7-4 Messages ............7-6 Clearing a Paper Misfeed ......7-11 Improving Print Quality........
- Page 20 Foreword General information End User License Agreement ....... 1 Contrat utilisateur de la licence......3 Endverbraucher-Lizenzvertrag ......5 Contratto di licenza d’uso ........7 Addresses MINOLTA-Partners in Europe ..... 9 Minolta Guarantee Certificate ......11...
- Page 21 Foreword...
-
Page 22: Chapter 1: Introduction
Chapter Introduction... -
Page 23: Precautions For Use
Precautions for Use Precautions for Use Operating Environment The operating environmental requirements of the printer are as follows. • Temperature: 10°C (50°F) to Humidity (%) 35°C (86°F) with a fluctuation of 10°C (18°F) per hour. • Humidity: 15% to 85% RH with a fluctuation of 20% per hour. -
Page 24: Using The Printer
Precautions for Use Using the Printer To ensure the optimum performance of the printer, follow the precautions listed below. • NEVER open any printer door, or turn OFF the printer during operation. • NEVER bring any magnetized object or flammable gas or liquid near the printer. - Page 25 Precautions for Use • NEVER place a vase or vessel containing water or other fluids on or near the printer as this can cause a fire or electrical shock. Should fluid or any foreign object get inside the printer, immedi- ately turn it OFF, unplug the power cord, and call your technical representative.
-
Page 26: Care Of Printer Supplies
Precautions for Use Care of Printer Supplies Use the following precautions when handling the printer supplies (toner cartridge, drum cartridge, and paper). • Avoid storing the supplies in any of the following places: A place subject to direct sunlight (the drum cartridge should not be exposed to fluorescent light, either). -
Page 27: Moving The Printer
Precautions for Use Moving the Printer Observe the following precautions when moving the printer. • Since the printer weighs approximately 35kg (77-1/4 lbs.), two people are required to lift it carefully. • If you need to transport the printer over a long distance, consult your technical representative. -
Page 28: Chapter 2: Using The Printer
Chapter Using the Printer... -
Page 29: The Printer, Parts And Supplies
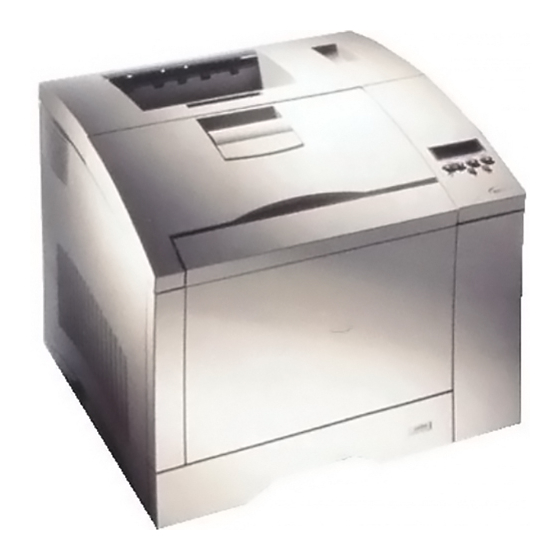
The Printer, Parts and Supplies The Printer, Parts and Supplies Printer 1. Output tray 2. Power switch 3. Front cover 4. Control panel 5. Front cover lock release lever 6. T multipurpose tray 7. Tray 2: 250 sheet second cassette 8. - Page 30 The Printer, Parts and Supplies Front cover Open the cover by pulling the lever up and swinging the door down to replenish supplies such as the toner cartridge, or to clear a paper misfeed. Control panel • Allows the operator to make various settings. •...
- Page 31 The Printer, Parts and Supplies 12. Interface connector 11. Network card panel (LocalTalk connector) 13. Rear cover lock release lever 14. Rear cover 16. Interface connector (parallel connector) 15. Power cord socket...
- Page 32 The Printer, Parts and Supplies 11. Network card panel Use to mount the optional network card. 12. Interface connector (LocalTalk connector) Provides connection between the printer and host computer. 13. Rear cover lock release lever Pull down to swing open the rear cover. 14.
-
Page 33: Supplies And Units
The Printer, Parts and Supplies Supplies and Units 2. Toner cartridge 1. Waste bottle 3. Image transfer belt unit 4. Drum cartridge 5. Image transfer roller unit... - Page 34 The Printer, Parts and Supplies Waste bottle • Collects and contains unused toner. • Replace this bottle with a new one when it is full. p. 6-18 • Dispose of the old container in a plastic bag or according to local regulations.
- Page 35 The Printer, Parts and Supplies 7. Fusing unit 6. Oiling roller...
- Page 36 The Printer, Parts and Supplies Oiling roller • Oils and cleans the fusing rollers. • Replace the oiling roller with a new one when necessary. p. 6-21 • Dispose of the old roller in a plastic bag or according to local reg- ulations.
-
Page 37: Control Panel Keys
The Printer, Parts and Supplies Control Panel Keys 1. Data indicator 2. Message display 3. Message indicator 4. Proceed key 5. On Line key 6. On-line indicator Data indicator • Data indicator ON Indicates when data received from the host computer is stored in the printer’s memory. - Page 38 The Printer, Parts and Supplies Message display • Indicates the current status of the printer. • Indicates the selected settings for the various functions of the printer. Message indicator • Message indicator flashing Indicates that an error has occured. • Message indicator OFF Normal.
- Page 39 The Printer, Parts and Supplies 7. Menu key 8. UP & DOWN keys 9. Enter key 10. Item key 2-11...
- Page 40 The Printer, Parts and Supplies Menu key p.3-4 Initiates the print and configuration menus. The menus repeat in a loop until the On Line key is pressed. UP & DOWN keys p.3-5 These two keys display the next or the previous setting for the current menu item.
-
Page 41: Operation And Warning Labels
The Printer, Parts and Supplies Operation and Warning Labels 1. Installing the toner cartridge 2. Changing the waste bottle, drum cartridge and oiling roller 3. Clearing paper misfeeds 4. Loading paper 5. WARNING! HIGH TEMPERATURE 2-13... - Page 42 The Printer, Parts and Supplies Installing the toner cartridge • Describes how to replace the toner cartridge. For details, refer to page 6-1. Changing the waste bottle, drum cartridge and oiling roller • Describes how to replace the waste bottle, drum cartridge and oiling roller.
-
Page 43: Turning The Printer On And Off
Turning the Printer ON and OFF Turning the Printer ON and OFF Turning the printer ON Press the power switch to the I (ON) position. Turning the printer OFF Press the power switch to the O (OFF) position. 2-15... - Page 44 Turning the Printer ON and OFF When the printer is On The printer is ready to print approximately 90 seconds after the power switch is turned ON. Note • If no print commands are sent from the host computer to the printer within min., the printer automatically enters the Power save mode...
-
Page 45: Paper
Paper Paper Precaution • This printer is designed to print on only the following types of paper. Type Special paper Plain paper Paper Recycled weighing: J-Post (Postcard) Thick paper* feeding Trans- paper 60 to 90 g/m Letter- Enve- size: weighing: port weighing: parency... -
Page 46: Capacity
Paper Capacity Unit: sheets Special Paper Plain paper Paper Recycled weighing: J-Post (Postcard) Thick paper* feeding Trans- paper 60 to 90 g/m Letter- Enve- size: weighing: port weighing: parency Labels 16 to 24 lbs head lopes 100 148 mm 90 to 157 g/m 60 to 90 g/m sheet 4"... -
Page 47: Printable Area
Paper Printable Area • Monochrome (black and white) printing can be done on paper up to 352mm (13-3/4") in length, with the exception of four, 4mm (0.16") margins. • Color printing can be done on paper up to 293mm (11-1/2") in length, with the exception of four, 4mm (0.16") margins. - Page 48 • The Following transparencies are recommended: For color printing, Minolta CF-200 (D) or 3M CG3710 For monochrome printing, Minolta M-100 (D) or 3M PP2500 • For more information, refer to page 2-21.
-
Page 49: Loading Paper
Loading Paper: Loading Plain Paper/ Recycled Paper Loading Paper Loading Plain Paper/ Recycled Paper Caution • Do not use the following types of paper as it may cause reduced print quality, a misfeed or a failure. Paper already used in a thermal transfer printer or ink jet printer. Paper that is too thin (under 60 g/m , 16 lbs.) or too thick (over 157 g/m... - Page 50 Loading Paper: Loading Plain Paper/ Recycled Paper Adjust the paper guides to fit Face up the size of the paper. Load the paper stack on the tray, print side facing up. Paper guides When loading a long stack of paper, open the paper support.
- Page 51 Loading Paper: Loading Plain Paper/ Recycled Paper Note • The paper should be loaded no higher than the maximum level according to the indicator Paper guide • When paper remains in the tray, do not stack more paper on top. •...
- Page 52 Loading Paper: Loading Plain Paper/ Recycled Paper How to Set the Paper Size for Tray 1 After loading the paper into Tray 1, set the corresponding paper size in the control panel. The default setting for the paper size of Tray 1 is Letter. It is not necessary to reset the menu provided that A4 size paper has been placed in Tray 1.
- Page 53 Loading Paper: Loading Plain Paper/ Recycled Paper Press the Item key on the control panel twice. Twice Check that “TRAY 1 PAPER TRAY 1 PAPER A4 ” appears on the message display. Press the Up/Down key on Example: Changing from A4 to EXECUTIVE the control panel to select the paper size setting that...
- Page 54 Loading Paper: Loading Plain Paper/ Recycled Paper Tray 2: second cassette / Tray 3: third cassette (optional) Slide out Tray 2 (second cassette) or Tray 3 (third cassette). Tray 2/Tray 3 Press down on the paper Paper lifting lifting plate until it locks. plate 2-26...
- Page 55 Loading Paper: Loading Plain Paper/ Recycled Paper Trailing Install the trailing edge guide edge to fit the size of the paper to guide be loaded. Letter Note • When loading legal size paper, the trailing edge guide is not used. Return it to the guide space in the cassette.
- Page 56 Loading Paper: Loading Plain Paper/ Recycled Paper Load the paper stack into the Face down Paper cassette, print side down, separator under the paper separator and flush with the front side of the cassette. Note • The paper should be loaded no higher than the maximum on the level indicator.
- Page 57 Loading Paper: Loading Plain Paper/ Recycled Paper Guide lock Pressing the guide lock lever, lever adjust the paper guides to fit the size of the paper. Paper guides Set the paper size indicator Paper size to the size of the paper used. indicator Note •...
- Page 58 Loading Paper: Loading Plain Paper/ Recycled Paper Slide in the cassette. Note • Make sure that Tray 2 is completely loaded into the printer whenever you print from Tray 3. Printing from Tray 3 is not possible if Tray 2 is not completely loaded into the printer.
-
Page 59: Loading Transparencies And Labels
(please follow the instruc- tions on page 2-34). • The following transparency types are recommended: For color printing, Minolta CF-200 (D) or 3M CG3710 For monochrome printing, Minolta M-100 (D) or 3M PP2500 2-31... - Page 60 Loading Paper: Loading Transparencies and Labels Tray 1 (multipurpose tray) Swing open Tray 1 (multipurpose tray). Adjust the paper guides to fit the size of the transparency or label sheets to be loaded. When loading a long stack of paper, open the paper support.
- Page 61 Turn the face-side down • Load the recommended transparencies (Minolta CF-200 (D), 3M CG3710, Minolta CF-100 (D) or 3M PP2500) into the tray so that their front sides are face-side down • Do not load more than 50 sheets on the tray.
- Page 62 Loading Paper: Loading Transparencies and Labels How to Set the Paper Size for Tray 1 After loading the paper into Tray 1, set the corresponding paper size in the control panel. For detailed instructions on setting the paper size, refer to page 2-24. How to Set the Media type for Tray 1 The default setting for this option is “PLAIN PAPER”.
- Page 63 Loading Paper: Loading Transparencies and Labels Press the Item key on the control panel 7 times. 7 times Check that “TRAY 1 MEDIA TRAY 1 MEDIA PLAIN PAPER ” appears on PLAIN PAPER the message display. Press the Up/Down key on Example: Changing from PLAIN PAPER to TRANSPARENCY the control panel to select the...
- Page 64 Loading Paper: Loading Transparencies and Labels Press the On Line key on the control panel. Once Check that “READY” appears on the message display. READY Make sure that the On Line indicator lights up. This completes the setting procedure for Tray 1 (Media). 2-36...
- Page 65 Loading Paper: Loading Transparencies and Labels Tray 2: second cassette / Tray 3: third cassette (optional) Slide out Tray 2 (second cassette) or Tray 3 (third cassette). Press down on the paper Paper lifting lifting plate until it locks. plate Trailing Install the trailing edge guide edge...
- Page 66 Face down Note Face-side up • Load the recommended transparencies (Minolta CF 200-(D), 3MCG3710, Minolta CF-100 (D) or 3M PP2500) into the cassette so that their front sides are facing up The face of the transparency should be facing up •...
- Page 67 Loading Paper: Loading Transparencies and Labels Note • To replenish the transparen- cies, take out those that remain in the tray and add them to the new supply. Straighten the edges on a level surface. • It is recommended that the cassette be replenished only when it is empty.
- Page 68 Loading Paper: Loading Transparencies and Labels Set the paper size indicator Paper size to fit the size of the indicator transparencies to be used. Note • If the paper size indicator is not reset to the corresponding size, the document may not print correctly. When you have changed the paper size, always reset the paper size indicator.
- Page 69 Loading Paper: Loading Transparencies and Labels How to Set the Media type for Tray 2/Tray 3 The default setting for Tray 2/Tray 3 is “PLAIN PAPER”. Whenever transparencies are to be used with Tray 2/Tray 3, be sure to make the proper Media setting changes.
- Page 70 Loading Paper: Loading Transparencies and Labels Press the Up/Down keys on Example: Changing from PLAIN PAPER to TRANSPARENCY the control panel to select the Media setting that corresponds to the type of Once media in Tray 1. TRAY 2 MEDIA <PLAIN PAPER/ TRANSPARENCY TRANSPARENCY>...
-
Page 71: Loading Special Paper (Letterhead/Envelopes/ Postcards/ Thick Paper)
Loading Paper: Loading Special Paper Loading Special Paper (Letterhead/ Envelopes/ Post- cards/ Thick Paper) Precaution • Do not use legal L size thick paper (the printer does not support legal size thick paper). • Do not use the following types of paper to avoid reduced print quality, a misfeed or a print failure. - Page 72 Loading Paper: Loading Special Paper Tray 1 (multipurpose tray) Swing open Tray 1 (multipurpose tray). Adjust the paper guides to fit the size of the paper. To load a long stack of paper, open the paper support. Load the paper stack on the tray, print side facing up.
- Page 73 Loading Paper: Loading Special Paper When printing paper, load it on the tray after smoothing any folds or wrinkles. Specify the Media setting for Tray 1. p.2-34. Note • Do not load more than 50 sheets on the tray at one time.
-
Page 74: Printing
Printing Printing Paper can be fed through the printer from either Tray 1 (multi- purpose tray), Tray 2 (second cassette) or Tray 3 (third cassette). This will allow you to use the paper port that best suits your application. Turn the printer on. p. - Page 75 Printing Load the paper. Tray 1 (multipurpose tray) pp. 2-21, 2-24, 2-31, 2-34, 2-43, 2-44 “Tray 2 (second cassette) / Tray 3 (third cassette)” pp. 2-26, 2-37, 2-41 Input a print command from the host computer. The “READY” message will change to “PROCESSING”...
- Page 76 Printing To print long paper, open the paper support in the output tray. Input the print command from Face down the host computer. The printed paper feeds out onto the output tray with the image face down. Note • The output tray can hold up to 250 sheets of paper. Be careful not to exceed this limit when making multiple prints.
-
Page 77: Chapter 3: Changing The Printer Settings
Chapter Changing the Printer Settings... -
Page 78: List Of Menu Utilities
List of MENU Utilities List of MENU Utilities MENU utilities are settings that you can change to suit your particular operating needs. There are a total of features available in utilities. They are classified into the major groups MENU nine below. - Page 79 List of MENU Utilities MENU ITEM SETTING PORTRAIT/ LANDSCAPE 3. PRINT 10. ORIENTATION MENU 5 to 128 LINE (64 LINES) 11. FORM LENGTH 4. CONFIG 1. PERSONALITY AUTOMATIC/ PCL/ MENU POSTSCRIPT 2. AUTO CONTINUE ON / OFF 3. I/O TIMEOUT OFF/ 5 SECONDS/ 15 SECONDS/ 30 SECONDS/ 1 MINUTE/ 3 MINUTES...
- Page 80 List of MENU Utilities MENU ITEM SETTING INTERNAL / SOFT FONT 7. PCL MENU 1. FONT SOURCE INTERNAL: 0 to 52 (SOFT 2. FONT NUMBER FONT: 0 to max. 999) 3. FONT PITCH 0.44 to 99.99 (10.00) 4. FONT POINT 4.00 to 999.75 (12.00) SIZE 5.
-
Page 81: Setting The Menu Utilities
Setting the MENU Utilities Setting the MENU Utilities Make sure that “READY” is shown on the message READY READY display and that the On Line indicator is lit. Press the On Line key on the control panel. Check that “OFFLINE” Once appears on the message OFFLINE... - Page 82 Setting the MENU Utilities Press the Item key on the Example: PRINT MENU control panel until the desired item is found. 3 times PRINT MENU Example: PAPER SOURCE 5 times PAPER SOURCE TRAY 2 Press the Up/Down keys on Example: Changing from TRAY2 to TRAY1 the control panel to select the desired setting.
- Page 83 Setting the MENU Utilities Press the On Line key on the control panel. Once Check that “READY” appears on the message display. READY Make sure that the On Line indicator lights up. The procedure for setting the MENU utilities is complete. Note •...
-
Page 84: Outline Of The Menu Utilities
Outline of the MENU Utilities Outline of the MENU Utilities 1. RESET MENU provides the RESET MENU JOB & MEMORY MENU RESET utility functions. These functions allow the user to reset the parameters of the printer. 1-1. JOB & MEMORY •... -
Page 85: Print Menu
Outline of the MENU Utilities • Pressing the Enter key when is displayed PCL FONT LIST activates the printout. 2-3. PS FONT LIST • Select to print the internal and any external PS FONT LIST fonts stored or accessible to the printer in PostScript. •... - Page 86 Outline of the MENU Utilities 3-2. TRAY1 PAPER • The is selected. paper size TRAY 1 (Multipurpose Tray) • The settings are A4, A5, Letter, Invoice, JIS-B5, Legal, Exec- utive, COM 10, C5, DL, Monarch, J-Post • The factory default is 3-3.
- Page 87 Outline of the MENU Utilities 3-7. TRAY1 MEDIA • Selects media type. The factory TRAY 1 (Multipurpose Tray) default is PLAIN PAPER • The settings are PLAIN PAPER, TRANSPARENCY, THICK PAPER ENVELOPE • When both (PRINT TRANSPARENCY FULL COLOR MODE p.
-
Page 88: Config Menu
Outline of the MENU Utilities 3-10. ORIENTATION • Selects the default direction of the printed page. PORTRAIT can be selected. LANDSCAPE • The factory default direction is PORTRAIT 3-11. FORM LENGTH • Selects the number of lines per page. The setting value loops from and then back to again. - Page 89 Outline of the MENU Utilities • When is “ ”, printing will continue dur- AUTO CONTINUE ing the message “ ” as if the Proceed key is LOAD PAPER SIZE pressed. • The factory default is 4-3. I/O TIMEOUT • The time between the end of the print job to the idle mode. After this period has elapsed, the controller frees the port.
-
Page 90: Image Menu
Outline of the MENU Utilities 5. IMAGE MENU determines the image printing mode. IMAGE MENU 5-1. PRINT MODE • The type of printed image is selected (full color, monochrome). • When both (TRAY 1, 2, FULL COLOR TRANSPARENCY 3 MEDIA p. -
Page 91: Pcl Menu
Outline of the MENU Utilities 7. PCL MENU is a frequently used group of menu selections. PCL MENU 7-1. FONT SOURCE • Selects the font source (Internal fonts, Soft fonts) • The printer’s internal memory stores many of the (INTERNAL) fonts that can be selected. - Page 92 Outline of the MENU Utilities 7-3. FONT PITCH • Selects the pitch of the default font. • This menu item does not appear when the default font is not a mono-space scalable font. An example of a mono-space scal- able, 45 Laser Jet compatible typeface is COURIER. When COURIER is selected as the default font, the factory default pitch is 10.00.
- Page 93 Outline of the MENU Utilities Understanding Fonts Font A font is a specific group of characters that have common style and size characteristics. Your printer can store a variety of different fonts in its memory for printing. Since these fonts reside in printer memory, they are called resident fonts.
-
Page 94: Ps Menu
Outline of the MENU Utilities 8. PS MENU is a group of menu selections which is used frequently. PS MENU This MENU is displayed only when the optional PostScript ROM SIMM is installed. 8-1. PRINT PS ERROR • This function allows PostScript errors to be printed. It follows the standard Adobe PostScript sequence. -
Page 95: Chapter 4: Pcl5C Printer Software
Chapter PCL5C Printer Software... -
Page 96: Windows 95/ Windows 98
Windows 95/ Windows 98 Windows 95/ Windows 98 Printer Software Overview The PCL5C Printer Software lets you set up your printer to provide the type of printed output you want. Note also that the original data (number of colors, resolution, data format), the type of paper you are using, and the settings of your application software can also affect color printing results. -
Page 97: Displaying The Pcl5C Printer Software Window
Start Settings Printers dialog box. Printers Click to highlight it, and then Minolta Color PageWorks/Pro select from the menu. Properties File Tabs You can move between the PCL5C Printer Software screens by clicking on the tabs along the top of the window. These tabs let you check the status of your printer and make various changes in its settings. -
Page 98: Choosing Menu Settings
Windows 95/ Windows 98 Choosing Menu Settings The following standard Windows procedures can be used when making settings in the printer software’s menu pages. • Clicking an option button or name • Clicking a check box • Dragging the scroll box on a scroll bar •... -
Page 99: Software Settings
Windows 95/ Windows 98 Software Settings This section describes all of the settings you can make with this printer software. Note • The menus are features of both Win- General Details Sharings dows 95 and Windows 98 while the menu appears Color Management in Windows 98 only. - Page 100 Windows 95/ Windows 98 Paper Source • Tray 1 • Tray 2 • Manual Feed • Auto Select • Tray 3 (option) Note • If you select for the paper source, your print job is stored Manual Feed in the memory of the Printer and the message “LOAD XXX IN MAN- UAL”...
- Page 101 Windows 95/ Windows 98 Paper Size: The settings in this area let you specify either paper or envelopes for printing, and the size of each. Some applications override this setting with their own. The options that appear depend on the setting you choose for The currently selected paper type and its Paper Source.
- Page 102 Windows 95/ Windows 98 Envelopes • C5 • DL • Mon (Monarch) • #10 (Com-10) Note • Generally, envelopes perform well, but some types may wrinkle. We strongly recommend testing any type of envelope before buying it in large amounts. Output Media: Use this drop-down list to specify (for standard paper),...
-
Page 103: Color
Windows 95/ Windows 98 Color Color Options This setting gives you a choice of methods for making color settings. General automatically selects the best color settings to print a document. generates sharp, clear documents Business Graphics without a glossy finish. enables the Manual Settings Options... - Page 104 Windows 95/ Windows 98 Options... Click this button (which is enabled only when Manual Settings selected) to display a dialog box for Color Options Properties manual control of color settings. See below for details on the Color dialog box. Options Properties Color/Monochrome Use these radio buttons to specify whether the pages should be printed in color or black and white.
- Page 105 Windows 95/ Windows 98 Color Control This setting lets you specify how colors are produced by the printer. The following table describes each of the settings Color Control available. Setting Description No Color Adjustment Does not apply color matching for printing. Image Color Preserves the relative color values from the screen Matching*...
- Page 106 Windows 95/ Windows 98 Halftone Type creates a regular, repeating halftone pattern for more uniform Pattern tones that may be preferable for computer-generated images. creates a random, non-repeating distribution of color pixels Diffused for a more detailed image with finer variations between colors. Although sharper detail can be achieved through the setting, Diffused...
-
Page 107: Options
Windows 95/ Windows 98 Options Pages Per Sheet The Pages Per Sheet setting allows you to determine the number of documents to print per sheet of paper. The default setting, one (1) prints one document per sheet. Two (2) will print two documents per sheet dividing the sheet in half. - Page 108 Windows 95/ Windows 98 Resolution Select the resolution at which you want to print. provides 600 x 600 highest quality printing. may print with a lower level of 300 x 300 quality, but will allow a job to print faster. TrueType Options This setting controls the way TrueType fonts are stored and printed in the printer.
-
Page 109: Watermarks
Windows 95/ Windows 98 Watermarks The Watermarks dialog allows you to drag and click a selected watermark to a specified location and angle on the document to be printed. Additionally, there is a Count feature included in the dialog which allows you to place a watermark in multiple locations on a single document. - Page 110 Windows 95/ Windows 98 Count This features specifies how many times a selected watermark will appear on the page to be printed. The maximum number of times that a watermark can be printed on a page is determined by the length of text inside of the watermark as well as the size of the font in which it is printed.
- Page 111 Windows 95/ Windows 98 Bold Specifies between a bold or regular text style in which the watermark can be printed. Italic Specifies between an italicized or regular style in which the watermark can be printed. Position “User Defined” allows you to adjust the placement of the watermark relative to the X and Y values assigned to the page.
- Page 112 Windows 95/ Windows 98 Adjustment Specifies between the Move or Rotate modes for the “ Watermark sample” field. Show Layout Use this button to switch between the single page and the Layout display. Use this button to create a new watermark. Delete Use this button to delete a watermark.
-
Page 113: Overlay
Windows 95/ Windows 98 Overlay The Overlay dialog allows you to layer graphics (bitmap data) underneath the printed text of a document. This feature is especially useful for placing a logo against the background of a document. Specify the file name to be used as well as its size, location, darkness (density), etc. - Page 114 Windows 95/ Windows 98 Select Bitmap... Click this button to select a bitmap file to be used in this dialog box. Once a bitmap file is selected, it is shown in the list of files. Color Determines the color in which the selected graphic is printed. This box is only available for two-tone color graphics.
-
Page 115: Setup
Windows 95/ Windows 98 Setup The Setup Dialog Box allows you to choose driver settings. The settings and options that are explained in the following pages are only available depending upon the configuration and installed options of your printer. Options Use this setting to specify which options are installed. -
Page 116: Printer Status And Configuration
Windows 95/ Windows 98 Printer Status and Configuration Printer status refers to the relay of information that is exchanged between the printer and the computer. As soon as the driver is launched, it begins to search for all of the printers that may be installed in the system. - Page 117 Windows 95/ Windows 98 Use the button to minimize the Status Window while saving any changes you might have made. Use the button to minimize the status window without saving Cancel any changes. To close the Status Window, click the close (“ ”) button at the upper right corner of the screen.
-
Page 118: Using The Printer Status Display
Windows 95/ Windows 98 Using the Printer Status Display Opening the Printer Status Display Use the procedure below to open the Printer Status Display. To open the Printer Status Display Click , point to , and then click Start Programs Print Status Window To close the Printer Status Display On the Printer Status Display, click the close (“... - Page 119 Windows 95/ Windows 98 Front Panel Display The contents of this display reflect the same contents currently displayed on the printer console. Document Name Displays the title of the current document to be printed. Currently Printing Job: job name, start time, total bytes in job, number bytes sent, progress bar Displays various information about the current document to be printed.
-
Page 120: Configuration
Windows 95/ Windows 98 Configuration Installed Memory Displays the amount of memory currently installed in the printer. Firmware Version The controller firmware version is displayed here. Engine Page Count The total number of printed documents generated by the printer is displayed here. -
Page 121: Control
Windows 95/ Windows 98 Control New Front Panel Message The front panel message display (control panel message display) can be customized by entering a new message into this field. Reset Printer To Factory Default Settings Reset the factory default settings by clicking this button. Note •... -
Page 122: Settings
Windows 95/ Windows 98 Settings Launch Status Window When There is A New Print Job Enables the Status Window to automatically launch whenever a document is printed. Always On Top Enables the Status Window to be displayed at the top of the display so that it may not be covered by other windows. -
Page 123: Alerts
Windows 95/ Windows 98 Alerts Alert Conditions All of the printer’s possible alert messages are listed in this display. Only the alert messages that are selected from this list will appear when applicable during operation. Check All Enables all alert messages to appear when applicable during operation. -
Page 124: Windows Nt 4.0
Windows NT 4.0 Windows NT 4.0 Printer Software Overview This printer software allows you to configure your printer for optimal performance. The printing quality of your documents will be determined by the settings of your application software, the original data (resolution, data format), and the quality of the paper that you use. -
Page 125: Displaying The Pcl5C Printer Software Window
Start Settings Printers dialog box. Printers Select the printer icon by Minolta Color PageWorks/Pro clicking on it with the mouse pointer. Next, open the menu File and click on the item. Document Defaults… Tabs You can move between the five main screens of the printer software by clicking on the tabs along the top of the window. -
Page 126: Exiting The Pcl5C Printer Software
Windows NT 4.0 Exiting the PCL5C Printer Software You can exit the printer application by clicking the Cancel button at the bottom of any of the application’s five main screens or by clicking the window close button ( ) in the upper-right corner of the window. -
Page 127: Software Settings
Windows NT 4.0 Software Settings This section describes all of the setting options available through this software. Page Layout 4-33... - Page 128 Windows NT 4.0 N-up This feature allows you to print two (2-Up) or four (4-Up) documents on one page. Click the button to set the ascending or Detail of N-up… descending order of pages on your N-Up document. The pages can be arranged either horizontally or vertically by clicking on the title of the desired orientation.
- Page 129 Windows NT 4.0 Watermark Watermarks are useful for alerting the reader to the nature of your document’s content (CONFIDENTIAL,URGENT, etc.). When you select to print a watermark, the default setting will shadow the watermark underneath the text of your document. Watermarks will be placed on only the first page of the document when the First Page box is checked.
- Page 130 Windows NT 4.0 Edit Button Click this button to open the dialog. The following Watermark Edit settings are controlled here: Watermark Name The name that you wish to use to identify the watermark in the Watermark list is entered here. String The contents of the watermark that you wish to create are entered here.
- Page 131 Windows NT 4.0 Scaling Enlarge or reduce a document to be printed using this setting. The maximum that a document to be printed can be enlarged is 200%, or twice its original size. The maximum that a document to be printed can be reduced is 50% of its original size.
-
Page 132: Paper
Windows NT 4.0 Paper Paper Size This setting allows you to specify the size of paper or envelope(s) that will be used for printing. Some applications override this setting with their own. The following is a list of available paper sizes: •... - Page 133 Windows NT 4.0 Note • You cannot use Legal-sized paper for color printing. Only Black and White printing can be allowed on Legal-sized paper. • You cannot use Legal-sized thick paper. • Generally, envelopes perform well, but some types may wrinkle. We strongly recommend testing any type of envelope before buying it in large amounts.
- Page 134 Windows NT 4.0 Paper Source setting specifies the location of the paper and Paper Source media to be used for printing to the printer. Click on the arrow button to view the possible options. Optional paper and media sources such must be added in the tab before they will Tray3...
-
Page 135: Image
Windows NT 4.0 Image Color Click the box to enable the color printing of documents. The Color box becomes inactive when the box is Colors to Pattern Color checked. Note • Legal size documents cannot be printed in color. Colors to Patterns Enabling this setting will print color images as monochrome patterns. - Page 136 Windows NT 4.0 This setting sharpens colors to produce color documents that closely resemble their onscreen images. Black Gloss Level These settings control the texture of black images and text. This setting applies a flat, black finish to text as well as graphics and photos that contain black.
- Page 137 Windows NT 4.0 Detail Button Click this button to open the dialog. Graphics This dialog provides tools for fine tuning the clarity and appearance of the printed document. Use the view window to gauge the current settings and to monitor setting changes as you make them. Adjustment The sliders can be used to control the tones and lighting of an image in terms of...
-
Page 138: Device Option
Windows NT 4.0 Device Option This tab manages the optional accessories and equipment that are either installed or available for installation to your printer. Installable Options The auxiliary accessories that are available for installation appear in this window. To add an available option to the list, Installed Options select the option by clicking on it and then click... - Page 139 Windows NT 4.0 Remove Click this button to remove an installed option from the Installed window. Options Note • The button is active only when an option is selected from the window. Installable Options • The button is active only when an option is selected from the Remove window.
-
Page 140: Windows 3.1
Windows 3.1 Windows 3.1 Printer Software Overview The PCL5C Printer Software lets you set up your printer to provide the type of printed output you want. Note also that the original data (number of colors, resolution, data format), the type of paper you are using, and the settings of your application software can also affect color printing results. -
Page 141: Displaying The Pcl5C Printer Software Window
Double-click to display the printers dialog box. Printers Select from the “Installed Minolta Color PageWorks/Pro printers” and then click Setup..Tabs You can move between the PCL5C Printer Software screens by clicking on the tabs along the top of the window. These tabs let you check the status of your printer and make various changes in its settings. -
Page 142: Exiting The Pcl5C Printer Software
Windows 3.1 Exiting the PCL5C Printer Software After you are finished using the PCL5C Printer Software, you can exit it either by clicking the button, or by double-clicking Cancel the window close button in the upper-left corner of the window. Choosing Menu Settings The following standard Windows procedures can be used when making settings in the printer software’s menu pages. -
Page 143: Software Settings
Windows 3.1 Software Settings This section describes all of the settings you can make with this printer software. Paper Paper Source: Pull down this list to specify the location from which paper should be fed for printing. The paper tray you select becomes highlighted in the printer illustration below this list. - Page 144 Windows 3.1 Paper Source • Tray 1 • Tray 2 • Manual Feed • Auto Select • Tray 3 (option) Note • If you select Manual Feed for the paper source, your print job is stored in the memory of the printer and the message “LOAD XXX IN MANUAL”...
- Page 145 Windows 3.1 Paper Size: The settings in this area let you specify either paper or envelopes for printing and their size. Some applications override this setting with their own. The options that appear depend on the setting you choose . The currently selected paper type and its size are Paper Source also shown to the right of the Paper Size...
- Page 146 Windows 3.1 Envelopes • C5 • DL • Mon (Monarch) • #10 (Com-10) Note • Generally, envelopes perform well, but some types may wrinkle. We strongly recommend testing any type of envelope before buying it in large amounts. Output Media: Use this drop-down list to specify (for standard paper), Plain Paper...
-
Page 147: Color
Windows 3.1 Color Color Options This setting gives you a choice of methods for making color settings. automatically selects the best color settings to print a General document. generates sharp, clear documents Business Graphics without a glossy finish. enables the Manual Settings Options... - Page 148 Windows 3.1 Color Options Properties Dialog Box This dialog box appears when the tab’s button is Color Options... clicked. The three tabs of this dialog box let you control the color settings for photographs, graphics, and text. There are four Color Control settings.
- Page 149 Windows 3.1 Color Control This setting lets you specify how colors are produced by the printer. The following table describes each of the settings Color Control available. Setting Description No Color Adjustment Does not apply color matching for printing. Blue Shift Reproduces colors, especially blues, that are very close to their onscreen images.
- Page 150 Windows 3.1 Halftone Type creates a regular, repeating halftone pattern for more Pattern uniform tones, that may be preferable for computer-generated images. creates a random, non-repeating distribution of color pixels Diffused for a more detailed image with finer variations between colors. Although sharper detail can be achieved through the setting, Diffused...
-
Page 151: Options
Windows 3.1 Options Pages Per Sheet The Pages Per Sheet setting allows you to determine the number of documents to print per sheet of paper. The default setting, one (1) prints one document per sheet. Two (2) will print two documents per sheet dividing the sheet in half. - Page 152 Windows 3.1 Resolution Select the resolution you want to print at. provides highest 600 x 600 quality printing. may print with a lower level of quality, but 300 x 300 will allow a job to print faster. TrueType Options This setting controls the way TrueType fonts are stored and printed by the printer.
-
Page 153: Watermarks
Windows 3.1 Watermarks The Watermarks dialog allows you to drag and click a selected watermark to a specified location and angle on the document to be printed. Additionally, there is a Count feature included in the dialog which allows you to place a watermark in multiple locations on a single document. - Page 154 Windows 3.1 Count This features specifies how many times a selected watermark will appear on the page to be printed. The maximum number of times that a watermark can be printed on a page is determined by the length of text inside of the watermark as well as the size of the font in which it is printed.
- Page 155 Windows 3.1 Bold Specifies between a bold or regular text style in which the watermark can be printed. Italic Specifies between an italicized or regular style in which the watermark can be printed. Position “User Defined” allows you to adjust the placement of the watermark relative to the X and Y values assigned to the page.
- Page 156 Windows 3.1 Adjustment Specifies between the Move or Rotate modes for the “Watermark sample” field. Show Layout Use this button to switch between the single page and the Layout display. Use this button to create a new watermark. Delete Use this button to delete a watermark. Restore Defaults Restores watermark settings to their previously saved values.
-
Page 157: Overlay
Windows 3.1 Overlay The Overlay dialog allows you to layer graphics (bitmap data) underneath the printed text of a document. This feature is especially useful for placing a logo against the background of a document. Specify the file name to be used as well as its size, location, darkness (density), etc. - Page 158 Windows 3.1 Select Bitmap... Click this button to select a bitmap file to be used in this dialog box. Once a bitmap file is selected, it is shown in the list of files. Color Determines the color in which the selected graphic is printed. This box is only available for two-tone color graphics.
-
Page 159: Setup
Windows 3.1 Setup Options Use this setting to specify which options are installed. Click the name of the option in the list and then click . This Available Options moves the name of the option to the list and Installed Options changes the printer illustration on this tab to show the new option. -
Page 160: Chapter 5: Postscript Printer Software (Option)
Chapter PostScript Printer Software (Option) -
Page 161: Windows 95/ Windows 98 (Option)
Windows 95/ Windows 98 Windows 95/ Windows 98 (Option) Printer Software Overview The PostScript printer driver was provided by Adobe systems Incorporated, and allows you take full advantage of your printer’s features and capabilities using your computer running Windows 95 or Windows 98. -
Page 162: Displaying The Postscript Printer Software Window
Start Settings Printers dialog box. Printers Click to highlight it, and Minolta Color PageWorks/Pro -ps then select from the menu. Properties File Tabs You can move between the Printer Software screens by clicking on the tabs along the top of the window. These tabs let you check the status of your printer and make various changes in its settings. -
Page 163: Choosing Menu Settings
Windows 95/ Windows 98 Choosing Menu Settings The following standard Windows procedures can be used when making settings in the printer software’s menu pages. • Clicking an option button or name • Clicking a check box • Dragging the scroll box on a scroll bar •... -
Page 164: Software Settings
Windows 95/ Windows 98 Software Settings This section describes all of the settings you can enable with this printer software. Note • The menus are features of both General Details Sharings Windows 95 and Windows 98 while the Color Management menu appears in Windows 98 only. - Page 165 Windows 95/ Windows 98 Paper Envelope • Letter • C5 • Legal • DL • A4 • Monarch • Executive • Com-10 • A5 • JIS B5 • Invoice • J-Post Note • Icons that are in a red circle with a line through the middle represent available paper/envelope sizes that require additional setting changes.
- Page 166 Windows 95/ Windows 98 Orientation Allows you to determine how your document is positioned on the printed page. Possible settings include Portrait, Landscape and Landscape Rotated. This setting can also tell you the measurements of your selected paper or envelope size. Click and hold on the paper icon to view dimensions, including the unprintable margins.
- Page 167 Windows 95/ Windows 98 Copies: This setting selects the number of copies to be printed. Use the arrows to increase or decrease the number of copies from one to 999. Unprintable Area Margins can be modified by clicking on the button Unprintable Area and decreasing/increasing the left, right, top and bottom margin...
- Page 168 Windows 95/ Windows 98 More Options button opens a dialog box that allows you to select More Options printing mediums that are not available from the Paper Size settings, including transparencies. A black border placed around logical pages can also be specified here. Apply and save modifications in this dialog box by clicking Click on to close the dialog box and return to previous...
- Page 169 Windows 95/ Windows 98 Note • Be sure to apply media changes not only in Paper type but on the printer’s control panel as well. Use the Menu button to select Print Menu. From the Print Menu, select from the TRAY1 MEDIA, TRAY2 MEDIA, or TRAY3 MEDIA options.
-
Page 170: Graphics
Windows 95/ Windows 98 Graphics Resolution: This setting allows you to adjust the printing resolution measured in Dots Per Inch (dpi). This printer generates documents at a resolution level of 600 dpi. Halftoning Halftoning refers to the frequency (lines per inch) and angle of the lines that consist of a halftone pattern of a screen. - Page 171 Windows 95/ Windows 98 Special These settings allow you to reverse the design of your document to be printed. To reverse black and white values of the document, enable command. To produce a mirror “Print as a negative image” image or reverse the left to right orientation of the document, enable “Print as a mirror image”...
-
Page 172: Fonts
Windows 95/ Windows 98 Fonts The printer provides the option to utilize TrueType font technology or defer to the built-in printer fonts. Built-in printer fonts allow for faster printing, however documents that are generated using TrueType fonts and are printed using built-in printer fonts may not print exactly as they appear on the screen. - Page 173 Windows 95/ Windows 98 To set the format in which fonts are downloaded, click on the “Send button. dialog box allows fonts Fonts As...” “The Send Fonts As...” to be sent as an outline, bitmap, type 42 or not to be sent at all. Click on the arrow of the “Send True Type Fonts as”...
-
Page 174: Device Options
Windows 95/ Windows 98 Device Options Available printer memory [in KB]: Indicates the amount of memory used in PostScript. Usually, printer software automatically sets a recommended size for this memory depending on the amount of memory stored in the printer which is entered at of the Installed Memory... - Page 175 Windows 95/ Windows 98 Color Mode Use this setting to specify whether the document is to be printed in color or monochrome. Image Content The optional settings of this feature determine the gloss levels, graphic imaging and black and gray tones used in the document to be printed.
- Page 176 Windows 95/ Windows 98 Accurate Use this setting to print documents as they appear on the computer monitor. Blue Shift Reproduces colors, especially blues, that are very close to their onscreen images. Auto Tray Switching This feature allows the printer to automatically switch trays during a print operation when paper from one tray runs out.
- Page 177 Windows 95/ Windows 98 Tray3 Registers whether or not the 250 Sheet Third Cassette Unit (Optional) has been installed. Installed Memory Use this setting to tell the printer driver how much memory is installed in the printer. The driver will manage resources in accordance with the amount of memory available.
-
Page 178: Postscript
Windows 95/ Windows 98 PostScript PostScript output format: Use this dialog box to select and activate the preferred format for PostScript files. For printing most documents, the PostScript setting is recommended. Other available (optimize for speed) PostScript settings include: PostScript (optimize for portability- ADSC), Encapsulated PostScript (EPS), Archive format archive format Postscript header... - Page 179 Windows 95/ Windows 98 Print PostScript error information Enable this feature to be notified when PostScript errors occur. PostScript Error information is not available in EPS format. PostScript timeout values Specifies how long the printer will wait for a document to be downloaded from the computer.
- Page 180 Windows 95/ Windows 98 PostScript language level This is a PostScript 3 printer. Select “3” as the language level for this printer. Data format Select the format in which documents will be sent from the printer. Choose from: ASCII data, Binary communications protocol, Tagged binary communications protocol and pure binary data.
-
Page 181: Watermarks
Windows 95/ Windows 98 Watermarks The Watermarks dialog allows you to add text watermarks to the printed page. Select a watermark: Use this list to specify the watermark from the list that you want to use. Edit To edit a watermark, first select the watermark from the list and then click this button to open the Edit Watermark dialog (see page 5-23). - Page 182 Windows 95/ Windows 98 Edit Watermark / New Watermark dialog Text Type the contents of the new watermark into this box. Font Specify the font that you want to use for the watermark. Size Specify the font size that you want to use for the watermark. Style Select the style that you want to use for the watermark from the drop-down list.
- Page 183 Windows 95/ Windows 98 Angle Use this box or the slide bar to specify the angle of the watermark on the page. Position “User defined” allows you to adjust the placement of the watermark relative to the X and Y values assigned to the page. The watermark can be placed in the center of the document by selecting “Automatically”.
-
Page 184: Windows Nt 4.0 (Option)
Windows NT 4.0 Windows NT 4.0 (Option) Printer Software Overview The PostScript printer driver was provided by Adobe Systems Incorporated, and allows you take full advantage of your printer’s features and capabilities using your computer running Windows NT 4.0. This section explains the software’s features. 5-25... -
Page 185: Displaying The Postscript Printer Software Window
Turn on your computer and start up Windows NT 4.0. On your computer, click , point to , and then click Start Settings to display the Printers dialog. Printers On the Printers dialog, click the Minolta Color PageWorks/Pro - icon. 5-26... -
Page 186: Exiting The Postscript Printer Software
To change hardware settings, click the Properties item to open the Minolta Color PageWorks/Pro -ps Properties window (page 5-38). Exiting the PostScript Printer Software After you are finished using the PostScript Printer Software, you can... -
Page 187: Using Postscript Printer Driver Setup Dialog
Windows NT 4.0 Using PostScript Printer Driver Setup Dialog Default Document Properties Window The two tabs that this dialog contains allow you to control the main settings of the printer driver. The following sections describe specific settings you can make with this printer driver. -
Page 188: Page Setup
Windows NT 4.0 Page Setup tab allows you to control several parameters that Page Setup determine the layout of your document. Paper Size This item allows you to specify the sizes of paper and envelopes that you are using. The range of possible sizes is: Paper Envelope •... - Page 189 Windows NT 4.0 Paper Source The Paper Source item specifies the tray from which paper is fed from the printer. To change this setting, just select the desired paper source from the drop-down list. Paper sources that are not available to your printer are identified by the mark.
-
Page 190: Advanced Tab
Windows NT 4.0 Orientation This setting allows you to determine how your document is positioned on the printed page. Portrait Portrait documents are printed lengthwise (vertically), relative to the page. Landscape Landscape documents are printed widthwise (horizontally), relative to the page. Color Appearance Color and monochrome printing cannot be controlled using this setting. - Page 191 Windows NT 4.0 Advanced Tab tab allows you to control and fine tune many of the Advanced advanced features of your printer driver. The features are organized in a tree format with three main branches: Paper Output, Graphic and Document Options. tab consists of two windows that allow you to specify Advanced and manage many of the advanced features of your printer driver.
- Page 192 Windows NT 4.0 AdobePS Minolta Color PageWorks/Pro -ps Document Settings Click on this item to open a dialog that provides the following two options: Revert to previous settings by clicking the Undo Changed Option button. View copyright and version information about your printer driver by clicking the button.
- Page 193 Windows NT 4.0 Scaling Enlarge or reduce a document to be printed using this setting. The maximum that a document can be enlarged is 1000%. The maximum that a document can be reduced is 1% of its original size. A scaling value of 100% indicates that the document will be printed without any relational enlargement or reduction.
- Page 194 Windows NT 4.0 Metafile Spooling The EMF, or metafile format, makes your program available for other tasks while you are waiting for your document to print. This default setting ( ) is optimal for most applications. However, you can switch to the RAW format by disabling this feature ( ) if you experience any problems.
- Page 195 Windows NT 4.0 Image Content The optional settings of this feature determine the gloss levels, graphic imaging and black and gray tones used in the document to be printed. General This setting supports ideal imaging standards for most graphics and photographs. Black tones will not contain the gloss of other Image Content settings however gray tones will print with an attractive shine.
- Page 196 Windows NT 4.0 PS Color Matching Adjusts color sharpness and contrast to produce printed documents that closely represent their on-screen images. No Color Adjustment Documents are printed without using PS Color Matching. Perceptual Best suited for printing photographs. Saturation This setting produces vivid and sharp prints. Relative This setting is also good for photographs and for generating images on paper as they appear on the computer monitor.
-
Page 197: Properties Window
Windows NT 4.0 Properties Window The following sections describes specific settings you can make with this printer driver. Common Buttons The following buttons appear at the bottom of the window. Click to exit the dialog, saving any changes made. Cancel Click to exit the dialog without saving any changes made. -
Page 198: Device Settings
Settings the printer driver. AdobePS Minolta Color PageWorks/Pro -ps Document Settings Click on this item to open a dialog that provides the following two options: Revert to previous settings by clicking the Undo Changed Option button. - Page 199 Windows NT 4.0 Form to Tray Assignment Paper Source and Paper Size settings must be entered through the Default Document Properties dialog. The printer will not recognize Paper Source and Paper Size settings that are entered through the Device Settings tab. Font Substitution Table This branch contains the font-substitution table and options for changing the TrueType-to-PostScript font mapping.
- Page 200 Windows NT 4.0 Send CTRL-D Before Each Job Specify whether a CTRL+D character should be sent at the beginning of every PostScript document (its default is ). If your document fails to print when sent to a printer connected through parallel ports, change Send CTRL-D After Each Job Specify whether a CTRL+D character should be sent at the end of...
- Page 201 Windows NT 4.0 Minimum Font Size to Download as Outline Specify the minimum font size (in pixels) for which the PostScript driver will download TrueType font as outline fonts. Maximum Font Size to Download as Bitmap Specify the maximum font size (in pixels) for which the PostScript driver will download TrueType fonts as bitmap fonts.
-
Page 202: Windows 3.1 (Option)
Windows 3.1 Windows 3.1 (Option) Printer Software Overview The PostScript printer driver was provided by Adobe Systems Incorporated, and allows you take full advantage of your printer’s features and capabilities using your computer running Windows 3.1 or later. This section explains the software’s features. 5-43... -
Page 203: Displaying The Postscript Printer Software Window
Control Panel Control Panel dialog box. Double-click to display the printers dialog box. Printers Select Minolta Color PageWorks/Pro from the Installed printers and then click Setup..Tabs You can move between the PostScript Printer Software screens by clicking on the tabs along the top of the window. These tabs let you check the status of your printer and make various changes in its settings. -
Page 204: Exiting The Postscript Printer Software
Windows 3.1 Exiting the PostScript Printer Software After you are finished using the PostScript Printer Software, you can exit it either by clicking the button, or by clicking the Cancel window close button in the upper-left corner of the window. Choosing Menu Settings The following standard Windows procedures can be used when making settings in the printer software’s menu pages. -
Page 205: Paper
Windows 3.1 Paper This tab is the default for the Setup dialog box. Paper size, orientation (including portrait, landscape and rotated landscape), scaling, paper source and number of copies to be printed can all be specified through the Paper tab. This tab supports layout changes, determines how many documents to be printed per page and also provides a window for selecting Watermarks (see page 5-57). - Page 206 Windows 3.1 Paper Size: This window shows the currently selected size of the paper being used for printing. The pull-down menu of possible paper sizes is displayed by clicking once on the arrow to the right of the window. Make sure that the selected tray contains the correct size of paper.
- Page 207 Windows 3.1 Special Effects Watermarks: Watermarks allow you to print a specific message onto your document such as COPY, DRAFT or CONFIDENTIAL. Click the “First Page Only” box to specify that only the first page of a multi- page document will contain the selected watermark. For more details regarding this function, click on the Watermark tab dialog.
-
Page 208: Features
Windows 3.1 Features This tab is only available if your printer supports various features or accessories such as optional paper trays. Whenever Media Type changes are made, it is necessary to properly set the printer’s control panel for the selected media (MENU/PRINT MENU/TRAY1 MEDIA, TRAY2 MEDIA, TRAY3 MEDIA). - Page 209 Windows 3.1 Media Type Specifies the type of media to be used for printing. For details, refer to PCL (Output Media) on page 4-8 and page 4-52. Note • Whenever Media Type changes are made, it is necessary to properly set the printer’s control panel for the selected media (MENU/PRINT MENU/TRAY1 MEDIA, TRAY2 MEDIA, TRAY3 MEDIA).
- Page 210 Windows 3.1 Image Content The optional settings of this feature determine the gloss levels, graphic imaging and black and gray tones used in the document to be printed. General This setting supports ideal imaging standards for most graphics and photographs. Black tones will not contain the gloss of other Image Content settings however gray tones will print with an attractive shine.
-
Page 211: Fonts
Windows 3.1 Fonts This tab allows you to manage the various TrueType and PostScript Fonts that are available to the printer. The Fonts tab allows you to specify whether to have PostScript versions of fonts exchanged for TrueType versions, or to have PostScript versions of TrueType fonts automatically downloaded to the printer. -
Page 212: Postscript
Windows 3.1 PostScript This tab controls the “PostScript Level” and “Binary” options of the printer. Other controls, such as the communication protocols and color printing options are also accessed through the PostScript tab. For printing most documents, the “PostScript (optimize for speed)” setting is recommended. - Page 213 Windows 3.1 Color Options This dialog controls the color printing features of the printer. Check the “Send Full Color Data” box in order to send documents that are to be printed in color to the printer. If you wish to print monochrome documents, do not check this box.
- Page 214 Windows 3.1 PostScript Timeout Values The “Job Timeout” and “Wait Timeout” functions allow you to specify the maximum amount of time that a print job can take before cutting off. If your printer has a direct connection to the computer, a time value of zero will prevent the printer from timing out.
-
Page 215: Job Control
Windows 3.1 Job Control This dialog controls the following printer settings. Printer Mode The settings of this feature do not pertain to this printer. Error Handler Checking the “Error Handler” box will enable the driver to print an error message report whenever a PostScript error occurs. PostScript Header The PostScript Header carries instructions to the printer that are required to print a document correctly. -
Page 216: Watermarks
Windows 3.1 Watermarks Use this dialog to customize, edit or create Watermarks. To customize or edit an existing Watermark, first select it from the “Select Watermark” window. Click the Edit button and open the “Edit Watermark” window to change the text, font, size, style, location, and or color of the watermark. - Page 217 Windows 3.1 The same options for editing and customizing watermarks are applicable to original watermarks that can be created in the Add Watermark window which can be opened by clicking the “Add” button. Watermarks can also be deleted from the “Select a Watermark” window.
-
Page 218: Macintosh (Option)
Macintosh Macintosh (Option) Introduction The software allows you take full advantage of your printer’s features and capabilities using a computer running the Mac OS. This section explains the software’s features. 5-59... -
Page 219: Page Setup
Page Image icon. Click once to view the dimension values in inches, twice for centimeters. Clicking a third time will return the Page Image icon to its original overview. Format for: Make sure that is selected. Color PagePro Plus 5-60... - Page 220 Macintosh Paper: These settings allow you to choose from various paper sizes and document formats that are supported by the printer. Orientation: Allows you to determine how your document is positioned on the printed page. Possible settings include Portrait and Landscape. Scale: Enlarge or reduce a document to be printed using this setting.
-
Page 221: Postscript Options
Macintosh PostScript Options The following visual effects and printer options can be enabled through this window: Visual Effects: Flip Horizontal Produces a mirror image of the document to be printed. Flip Vertical Turns the image upside down. Invert Image Reverses black and white values of the document. Image &... - Page 222 Macintosh Smooth Graphics This option is set by default to smooth the edges of graphic images to be printed. Precision Bitmap Alignment Adjusts and reduces bitmapped images to the resolution setting of the printer. Unlimited Downloadable Fonts in a Document Manages a large number of fonts on an “as needed”...
-
Page 223: Print Menu Settings
File menu of your application. Printer: Make sure that is selected. Color PagePro Plus Destination: Select Printer or File to specify whether a document is printed as is or saved as a PostScript file, respectively. The default setting for this option is Printer. -
Page 224: General
Macintosh General Copies: Enter the number of copies to be printed here. Pages: Use this function to select specific pages of a sequence to be printed. The “All” default setting for this function automatically prints all pages of the document. To print a particular range of pages, enter the page numbers in the “From”... -
Page 225: Background Printing
The ColorSync Color Matching feature manages the color matching of the document through the host computer. When using this feature, make sure that the Minolta Color PageWorks/Pro Plus option is selected from the Printer Profile drop-down list. 5-66... - Page 226 Color Matching feature is used. Along with the other feature settings that may be selected before printing, it is necessary to select either Printer’s Default or Minolta Color PageWorks/Pro Plus from this drop-down list. If the Minolta Color PageWorks/Pro Plus option is not displayed in the Printer Profile drop-down list, reinstall the PostScript Printer Software for Macintosh according to the set-up instructions provided.
-
Page 227: Layout
Macintosh Layout Pages per sheet: This setting allows you to determine the number of documents to print per sheet of paper. The “1” default setting prints one document per sheet. "2" will print two documents per sheet dividing the sheet in half. -
Page 228: Printer Specific Options
Macintosh Printer Specific Options Color Mode: Use this setting to specify whether the document is to be printed in color or monochrome. Image Content: The optional settings of this feature determine the gloss levels, graphic imaging and black and gray tones used in the document to be printed. - Page 229 Macintosh Photographs The best mode for printing photographs. Produces black and gray tones with a glossy sheen. PS Color Matching Adjusts color sharpness and contrast to produce printed documents that closely represent their on-screen images. No Color Adjustment Documents are printed without using PS Color Matching. Perceptual Best suited for printing photographs.
- Page 230 Macintosh Media Type: Use this drop-down list to specify (for standard paper), Plain Paper , or as the output media you are Thick Paper Transparency Envelope printing to. The printer will automatically make adjustments to optimize printing according to your choice. Note •...
-
Page 231: Chapter 6: Maintaining Your Printer
Chapter Maintaining Your Printer... -
Page 232: Changing Cartridges
Changing Cartridges Changing Cartridges Changing the Toner Cartridge • There are four color toner cartridges: Black, Yellow, Magenta (Red) and Cyan (Blue). When any of the color toner cartridges run out, replace them with new ones. • When any color toner cartridge begins to run short of toner, is displayed. -
Page 233: Changing The Toner Cartridge (Auto Mode)
Changing Cartridges Changing the Toner Cartridge (Auto Mode) The Auto Mode automatically enables the carriage that holds the toner cartridges inside of the printer to rotate to the exact position for proper toner cartridge replacement. The printer cover must be closed when using the Auto Mode. - Page 234 Changing Cartridges Press the Item key on the control panel twice. Twice Check that “REPLACE REPLACE TONER TONER, BLACK” appears on BLACK the message display. Press the Up/Down keys on Down key Up key Color — 4 times BLACK the control panel to select the Once 3 times YELLOW...
- Page 235 Changing Cartridges Make sure that the sound of Example: Color Toner printer operation has stopped, Cartridge Magenta (Red) indicating that the printer has READY TO REPLACE finished cycling. MAGENTA Wait for “READY TO REPLACE XXXXX” The Message indicator will start to blink. Grasp and pull down the front cover lock release lever to Front cover...
- Page 236 Changing Cartridges 10. Remove the new toner cartridge from its carton and holding the cartridge as shown, shake it well. Note • Never touch the roller in the Roller toner cartridge. Print quality will be reduced. Roller protective shutter 11. Make sure that the label on Toner color label the toner cartridge rack is...
- Page 237 Changing Cartridges 13. Holding the new cartridge as shown, insert the green pin on the right side of the cartridge into the green installation guide of the rack. Green pin Green installation guide...
- Page 238 Changing Cartridges 14. Insert the green pin on the left side of the cartridge into the Green pin green installation guide of the rack. Green installation guide 15. Firmly press the cartridge OK (LOCKED) NG (UNLOCKED) into the rack until it clicks into Toner cartridge lock plate place.
- Page 239 Changing Cartridges 16. Once the toner cartridge has been installed, secure the drum unit into place by applying pressure at its top where the “ ” label is Press affixed. The drum unit will lock into place when it has been correctly inserted into the printer.
- Page 240 Changing Cartridges 19. Wait until the sound of printer Example: Color Toner Cartridge Magenta (Red) operation has stopped, indicating that the printer is REPLACE TONER ready. MAGENTA “REPLACE TONER XXXXX” will appear. Make sure that the Message indicator light is Off. 20.
-
Page 241: Changing The Toner Cartridge (Manual Mode)
Changing Cartridges Changing the Toner Cartridge (Manual Mode) The toner cartridge dial inside of the printer allows you to manually rotate the toner cartridge rack for toner replacement. Refer to page 6-2 for instructions on how to replace toner cartridges using the Auto Mode. - Page 242 Changing Cartridges You will feel the dial tighten while turning it. This is the position for removing the cartridge. Toner cartridge Toner cartridge Cyan (Blue) rack dial rack toner cartridge Black toner cartridge Yellow toner cartridge Magenta (Red) toner cartridge <Printer side view>...
- Page 243 Changing Cartridges To confirm the rack is positioned for removing the cartridge, use the position confirmation window beside the dial. The removal position indicator will alert the user to the proper removal position. Removal position indicator: ALL GREEN Note • Before installing or removing the toner cartridge, always make sure that the rack is in the proper position.
- Page 244 Changing Cartridges Gently close the front cover. Do not slam the front cover to avoid causing damage to the printer. Make sure that the front OK (LOCKED) NG (UNLOCKED) cover is completely closed. You will hear the sound of the printer operating.
-
Page 245: Changing The Drum Cartridge, Waste Bottle And Oiling Roller
Changing Cartridges Changing the Drum Cartridge, Waste Bottle and Oiling Roller • The drum cartridge can provide up to 20,000 images of A4/let- ter-size prints. One image is equal to one cycle of the drum car- tridge. The drum cartridge operates once (one image) to provide one monochrome print. -
Page 246: Changing The Drum Cartridge
Changing Cartridges Changing the Drum Cartridge Grasp and pull down the front Front cover cover lock release lever and Front cover lock release swing open the front cover. lever Grip Drum cartridge Holding onto the grip, pull out the drum cartridge. Drum cartridge Take the new drum cartridge out of its carton. - Page 247 Changing Cartridges Note • Do not touch the drum protective shutter of the Drum protective drum cartridge. Also, never shutter drum touch the internal PC This will reduce print quality. • If the drum cartridge will not be immediately installed in the printer, be sure to cover PC drum it with a cloth to shield it from...
- Page 248 Changing Cartridges Note • When the drum cartridge is Drum protective correctly installed into the shutter printer, the drum protective shutter will automatically open. Be careful not to disturb or apply pressure to the shutter. Finally, insert the drum unit as far as it will go into the printer by applying pressure at its top where the “...
-
Page 249: Changing The Waste Bottle
Changing Cartridges Changing the Waste Bottle Waste bottle Remove the old waste bottle from the printer. Remove the cap from the old toner waste bottle and place it into the mouth of the old bottle to prevent spills. Make sure that the shutter of the image transfer belt unit is closed. - Page 250 Changing Cartridges Slide the waste bottle into the Waste bottle slot located behind the image Slot transfer belt unit on the left side of the printer. Green label Install the waste bottle Waste bottle guide behind the image transfer belt unit (drawn in the diagram with dash marks) inside of the printer.
- Page 251 Changing Cartridges Image transfer 11. Make sure that the hook of the belt unit waste bottle is engaged Hook securely by the pins of the image transfer belt unit. Waste bottle Pins 12. Gently close the front cover. Do not slam the front cover to avoid causing damage to the printer.
-
Page 252: Changing The Oiling Roller
Changing Cartridges Changing the Oiling Roller 14. Swing open the rear cover. Rear cover Button of the fusing unit 15. Push and hold the button of lock release lever the fusing unit lock release lever and pull out the fusing unit. - Page 253 Changing Cartridges 16. Loosen both of the oiling roller’s installation screws. 17. Holding onto the grip, take out the oiling roller. 18. Remove the new oiling roller Fusing unit from its carton. Install the new oiling roller by inserting the tabs on its front end under the edge of the fusing unit.
- Page 254 Changing Cartridges Note • Do not touch the oiling roller as its surface is covered with silicone oil. 19. Tighten both of the oiling roller’s installation screws. Gently press down on the green tab while tightening the screws of the oiling roller. Screws Tighten the screws so that the spring action of the cover is...
- Page 255 Changing Cartridges 21. Make sure that the button of OK (LOCKED) the fusing unit lock release lever is pushed up as shown. NG (UNLOCKED) 22. Close the rear cover until it clicks, locking into place. 23. Make sure that the rear cover (LOCKED) (UNLOCKED) lock release lever is pushed...
-
Page 256: Changing The Fusing Unit And Image Transfer Roller Unit
Changing Cartridges Changing the Fusing Unit and Image Transfer Roller Unit • The image transfer roller unit and fusing unit can provide up to 100,000 A4/ letter-size prints (this value will vary with the color to monochrome print ratio, image conditions, etc). •... - Page 257 Changing Cartridges Pull out the image transfer roller unit. Note Image • Do not touch the surface of transfer the image transfer roller as roller this may lead to reduced print quality. Remove the new image transfer roller unit from its carton.
- Page 258 Changing Cartridges Once the image transfer roller unit has been installed, secure the drum unit into place by applying pressure at its top where the “ ” Press label is affixed. The drum unit will lock into place when it has been correctly inserted into the printer.
- Page 259 Changing Cartridges Changing the Fusing Unit 10. Open the rear cover. Rear cover Button of the fusing unit 11. Push and hold the button of lock release lever the fusing unit lock release lever and slide out the fusing unit. ATTENTION •...
- Page 260 Changing Cartridges 12. Remove both screws of the fusing unit. Fusing unit Screws 13. Slide out the fusing unit in the direction shown. Remove the fusing unit from its mount. 14. Remove the new fusing unit from its carton. 15. Insert the guide of the fusing unit mount into the installation hole of the new fusing unit as shown.
- Page 261 Changing Cartridges 16. Install the fusing unit by Installation hole Dowel inserting the dowel of the mount into the fusing unit’s installation hole. 17. Secure the fusing unit with the installation screws. Installation hole Dowel 18. Turn the misfeed clearing dial of the fusing unit coun- terclockwise and make sure that the white gear shown...
- Page 262 Changing Cartridges 21. Close the rear cover. The rear cover will click when it is closed completely. 22. Make sure that the button of (LOCKED) (UNLOCKED) the rear cover lock release lever is pushed up as shown. 6-31...
-
Page 263: Changing The Image Transfer Belt Unit
Changing Cartridges Changing the Image Transfer Belt Unit • The image transfer belt unit provides A4/letter-size prints of up to about 150,000 images. One image is equal to one cycle of the transfer belt. The image transfer belt unit operates once (one image) per monochrome print. - Page 264 Changing Cartridges Holding the grip, pull out the drum cartridge. Drum cartridge Note • Do not touch the drum Drum cartridge’s protective protective shutter. Also, never touch the shutter internal PC drum; to do so will reduce print quality. • If the drum cartridge will not be immediately installed in the printer, be sure to cover PC drum...
- Page 265 Changing Cartridges Left side Right side Holding the grips, pull out the grip grip image transfer belt unit. Image transfer belt unit 5. Take the new image transfer belt unit out of its carton. Note • When installing the image Left side grip transfer belt unit, be sure to...
- Page 266 Changing Cartridges The belt fixing brackets come locked like a key into both sides of the image transfer belt unit. Lock Unlock -1 Turn the belt fixing bracket on the left side of the image transfer belt unit to the position shown Belt fixing brackets to unlock the bracket.
- Page 267 Changing Cartridges Check that the connector from the image transfer belt unit is securely connected to the printer’s connector. Make sure that the shutter of the image transfer belt unit is closed. Image transfer belt unit Shutter OK (Close) NG (Open) 6-36...
- Page 268 Changing Cartridges 10. Slide the waste bottle into the Waste bottle slot located behind the image Slot transfer belt unit on the left side of the printer. Green label Install the waste bottle Waste bottle guide behind the image transfer belt unit (drawn in the diagram with dash marks) inside of the printer.
- Page 269 Changing Cartridges Image transfer 12. Make sure that the hook of the belt unit waste bottle is engaged Hook securely by the pins of the image transfer belt unit. Waste bottle Pins 13. HOLD THE GREEN Green handle HANDLE of the drum cartridge when installing it into the printer.
- Page 270 Changing Cartridges 15. APPLY PRESSURE ONLY TO THE GREEN SQUARES on the top face of the drum cartridge until it locks into place. Drum unit Note Drum • DO NOT PRESS ON the protective drum protective shutter shutter during installation. Doing so may damage the drum cartridge.
-
Page 271: Cleaning The Printer
Cleaning the Printer Cleaning the Printer Dust, dirt, and paper debris on the outer surfaces and inside the printer can interfere with printer performance. Clean the printer regularly. Note • Before cleaning, be sure to turn OFF the power switch and unplug the power cord from the outlet. -
Page 272: Cleaning The Inside
Cleaning the Printer Cleaning the Inside Grasp and pull down the front cover lock release lever to Front cover lock release swing open the front cover. lever Front cover Note • Whenever the printer is open, drape the front cover with a cloth so that the drum cartridge is not exposed to light. - Page 273 Cleaning the Printer Using a soft cloth, wipe dirt and paper debris off the roller as shown. Roller Note Image transfer roller • Do not touch the surface of the image transfer roller as it may cause reduced print quality. Roller Return the misfeed clearing lever to the “down”...
- Page 274 Cleaning the Printer Before closing the front cover, secure the drum unit into place by applying pressure at its top where the “ ” label is affixed. The Press drum unit will lock into place when it has been correctly inserted into the printer.
-
Page 275: Chapter 7: Troubleshooting
Chapter Troubleshooting... -
Page 276: How To Troubleshoot
How to Troubleshoot How to Troubleshoot Use this section as a reference for solving routine problems before calling your technical representative. Many of these troubleshooting tips provide quick and easy remedies to some common situations. If the problems persist however, please contact your dealer. Diagnosing Your Printer Different steps of action should be taken for different trouble symptoms. - Page 277 How to Troubleshoot Improving Print Quality Typical symptoms include: • Poor print quality. • Print results are not consistent with settings. • The printer requires excessive time in order to complete the print cycle. See p. 7-26.
-
Page 278: Problems During The Data Transfer And Print Cycle
Problems During the Data Transfer and Print Cycle Problems During the Data Transfer and Print Cycle Troubleshooting the Data Transfer Cycle Symptom Cause Action The printer power is The power cord is Plug the power cord not turned ON. unplugged or loose. into the printer and outlet. -
Page 279: Troubleshooting The Print Cycle
Problems During the Data Transfer and Print Cycle Troubleshooting the Print Cycle Symptom Cause Action The Data indicator The interface cable is Connect it securely. does not light up and unplugged. “Set-up Guide” the printer does not The interface cable Check the model code start a print cycle. - Page 280 Problems During the Data Transfer and Print Cycle Symptom Cause Action A paper misfeed. Possible causes Once you have identi- include: fied the cause of the • Paper does not meet problem, use the cor- specifications responding reference required. pages listed below and •...
-
Page 281: Messages
Problems During the Data Transfer and Print Cycle Messages LCD Message Description Action WARMING UP The printer is warm- Wait a few moments ing up. for the printer to warm OFFLINE Printer cannot receive Press the On Line key data from host compu- to take the printer on ter. - Page 282 Problems During the Data Transfer and Print Cycle LCD Message Description Action LOAD XXX The specified cassette Change the paper size TRAY X does not contain the in the cassette. right size of paper. p.2-17 Printing can continue with the currently selected paper by pressing the Proceed key or if an Auto-con-...
- Page 283 Problems During the Data Transfer and Print Cycle LCD Message Description Action PLEASE WAIT The toner cartridge is Wait for a few XXXXX moving into the moments. replacement position. DRUMALMOST The drum cartridge is The drum cartridge, USED almost ready to be waste bottle, and oil- replaced.
- Page 284 Problems During the Data Transfer and Print Cycle LCD Message Description Action WARNING A paper jam occurred Remove the misfed PAPER JAM 1 near the paper in-take sheet of paper. section. Details p. 7-11 WARNING A paper jam occurred PAPER JAM 2 between the paper in- take and the fusing section.
- Page 285 Problems During the Data Transfer and Print Cycle LCD Message Description Action CONTEXT SAVE The setting for PCL Press the Proceed key. CHANGE CONTEXT SAVING When “READY” or PS CONTEXT appears on the dis- SAVING has been play, the new setting changed.
-
Page 286: Clearing A Paper Misfeed
Problems During the Data Transfer and Print Cycle Clearing a Paper Misfeed When a paper misfeed occurs in the printer, remove the paper according to the following procedure. ATTENTION • The fusing unit inside the rear cover can become very hot during operation. - Page 287 Problems During the Data Transfer and Print Cycle Button of the fusing unit Push and hold the fusing unit lock release lever lock release lever button and slide out the fusing unit. ATTENTION • The fusing unit is hot. Be WARNING! HIGH TEMPERATURE careful not to touch the area label...
- Page 288 Problems During the Data Transfer and Print Cycle Pull out the paper from the fusing unit. Lift the misfeed clearing guide of the fusing unit and pull out the paper. Misfeed clearing guide Hold the lock release lever button and push in the fusing unit until it locks back into position.
- Page 289 Problems During the Data Transfer and Print Cycle 10. Close the rear cover, locking it into place. 11. Make sure that the button of OK (LOCKED) NG (UNLOCKED) the lock release lever is pushed up as shown. 12. Grasp and pull down the front Front cover Front cover cover lock release lever and...
- Page 290 Problems During the Data Transfer and Print Cycle 13. Lift the misfeed clearing lever. 14. Pull out the paper from the rear rollers. Note • Do not touch the surface of the image transfer roller. It may lead to reduced print quality. Image transfer roller 15.
- Page 291 Problems During the Data Transfer and Print Cycle 16. Lift the misfeed clearing guide. Misfeed clearing guide 17. Pull out the paper from the toward the top. rollers 18. Close the misfeed clearing guide. 7-16...
- Page 292 Problems During the Data Transfer and Print Cycle 19. After clearing the misfeed, secure the drum unit into place by applying pressure at its top where the “ Press ” label is affixed. The drum unit will lock into place when it has been correctly inserted into the printer.
- Page 293 Problems During the Data Transfer and Print Cycle 22. Pull out the paper misfed in Tray 1. 23. Slide out the second cassette. 24. Pull out the paper from the paper path toward you. 25. Replace the second cassette. 7-18...
- Page 294 Problems During the Data Transfer and Print Cycle 26. Slide out the third cassette (option). 27. Pull out the paper from the paper path toward you. 28. Replace the third cassette. 7-19...
-
Page 295: Improving Print Quality
Improving Print Quality Improving Print Quality Symptom Cause Action Image is too The print density set- Adjust the print density set- light ting on the host com- ting on the host computer to puter is not set the desired level. properly. - Page 296 Improving Print Quality Symptom Cause Action Image is too The print density set- Adjust the print density set- dark ting on the host com- ting on the host computer to puter is not set the desired level. properly. The toner cartridge Change the cartridges and/ may be defective.
- Page 297 Improving Print Quality Symptom Cause Action Partial void The paper being used For information regarding image does not meet size paper specifications. specifications. p. 2-17 The paper loaded in Replace the old paper with the tray is damp. fresh dry paper. p.
- Page 298 Improving Print Quality Symptom Cause Action White lines The toner cartridge Change the cartridges and/ may be defective. or the transfer belt unit. • Toner Cartridge p. 6-1 The drum cartridge • Drum Cartridge p. 6-15 may be defective. • Image Transfer Belt Unit. The image transfer p.
- Page 299 Improving Print Quality Symptom Cause Action Blurred back- The toner cartridge Change the cartridges. ground may be defective. • Toner Cartridge p. 6-1 • Drum Cartridge p. 6-15 The drum cartridge may be defective. The Image is Too much data. The Install the optional expan- coarse.
- Page 300 Improving Print Quality Symptom Cause Action The print image The paper loaded in Replace the old paper with is not fixed and the tray is damp. fresh dry paper. p. 2-21 easily smears. The paper being used Compatible types of paper. is not compatible with p.
- Page 301 Improving Print Quality Symptom Cause Action The printer takes The printer was in Turn off the Power Save too long to out- Power Save mode setting if it is inconvenient. put prints. when the print com- Press the On Line key to mand was issued.
-
Page 302: Chapter 8: Specifications
Chapter Specifications... -
Page 303: Specifications Of Printer
Specifications of Printer Specifications of Printer Type: Desktop full color laser beam printer Printing system: Electrostatic dry powdered imaging system Exposure system: Laser diode and polygon mirror scanning Print density: 600 dpi (dot/ inch) Paper feeding system: 2-way system (TRAY 1: multipurpose tray, TRAY 2: 250-sheet second cassette) Paper size: Standard size:... -
Page 304: Paper Types
Specifications of Printer Non-standard size (Tray 1 only): • Monochrome print: Width 92mm to 216mm (3-1/2" to 8- 1/2") Length 148mm to 356mm (5-3/4" to 14") • Full color print: Width 92mm to 216mm (3-1/2" to 8-1/2") Length 148mm to 297mm (5-3/4" to 11-3/4") Paper types: Plain paper 60 to 90 g/m... - Page 305 Specifications of Printer Paper exit system: Face down exit system (Plain Paper 250 print maximum) System speed: 77 mm/ seconds First printing time: paper size A4/ Letter Legal print type Monochrome (plain paper) 32 seconds or less 38 seconds or less Monochrome (thick paper) 58 seconds or less None...
- Page 306 Specifications of Printer Paper separating Curvature separating system and charge System: neutralizing pin Fusing system: Heat belt fusing system Acoustic noise: 39 dB (A) or less (idle state)/ 55 dB (A) or less (during operation) Power supply: AC 220 - 240V 50/60Hz Power consumption: During operation 800W or less/ during idle state (average), 45W or less (when...
- Page 307 Specifications of Printer Supply replacement: • Drum cartridge : Monochrome prints : after 20,000 sheets (when the black-to-white ratio is 5% on multi prints) Full color prints : after 5,000 sheets (when the color-to-white ratio is 20% on multi prints) •...
- Page 308 Specifications of Printer Weight: Approximately 40 kg (77-1/4 lbs.) including the drum cartridge and toner cartridge Operating environment: Temperature: 10°C (50°F) to 35°C (86°F) with a fluctuation of 10°C (18°F) per hour. Humidity: 15% to 85% RH with a fluctuation of 20% per hour.
-
Page 309: Specifications Of 250-Sheet Third Cassette Unit
Specifications of 250-sheet Third Cassette Unit Specifications of 250-sheet Third Cassette Unit Paper feeding system: 1-way system Paper types: Plain paper, recycled paper 60-90 g/m (16 to 24 lbs.), transparency sheet Paper size: A4, letter 8-1/2" 11", legal 8-1/2" 14" *All paper sizes are lengthwise only Paper capacity: Plain and recycled paper/250 sheets,... -
Page 310: Appendix A: Glossary
Appendix Glossary... - Page 311 Glossary Glossary The following definitions apply specifically to Minolta Color PagePro Plus Printers. Bitmap fonts A font in which the character images are defined by bit maps. With bitmapped fonts, a separate set of definitions is required for each point size. For example, Times 10 point and Times 12 point are considered separate fonts.
- Page 312 Glossary Font A complete set of characters and symbols in one size, typeface, and style. Size refers to the character height and is usually measured in points (1/72 inch). Typeface refers to the character design, such as Courier, Times, or Helvetica. Style refers to the character’s appearance, such as Italic or Bold.
- Page 313 Glossary Lightness (Brightness) The lightness or darkness of an image. Decreasing brightness darkens the overall image. Increasing brightness lightens the overall image. Local printer A printer that is directly connected to your computer, as opposed to a remote or network printer. Media Materials upon which data is printed, such as envelopes, plain paper, thick paper, and transparency film.
- Page 314 Glossary Parallel cable A data cable which transfers multiple bits of information simultaneously along each of its wires from the computer to the printer. Parallel interface This term is used to describe the connection between a computer and a peripheral device such as a printer. Through this type of connection, the synchronized transfer of multi-bit data is enabled via multiple wires over a limited distance.
- Page 315 Glossary Printer software A set of instructions in application software that translates formatting choices into printer commands. When installing the application, the user identifies the type of printer being used so that the application knows which printer software to use. Print job A document that a application has processed and sent either directly to the printer or to the print queue.
- Page 316 Glossary Serial Interface A connection between the computer and a peripheral device such as a printer, by which data is transferred sequentially over a single wire. Currently, this is a faster alternative to the parallel interface of which the USB interface is an example. Soft fonts The non-resident fonts that can be downloaded from the computer to the printer memory.
-
Page 317: Appendix B: Quick Reference
Appendix Quick Reference... -
Page 318: Printer Menus
Printer Menus Printer Menus TEST PRINT CONFIG RESET IMAGE PRINT MENU MENU MENU MENU MENU PRINT CON- COPIES JOB & PERSONAL- PRINT MEMORY MODE PCL FONT AUTO MENU TRAY1 LIST RESET PAPER CONTINUE MANUAL PS FONT I/ O TIME- FEED LIST TRAY PCL DEMO... - Page 319 Printer Menus PCL MENU PS MENU MAINTE- MEMORY NANCE MENU MENU FONT PRINT PS TOTAL PCL CON- SOURCE ERROR PRINT OUTS TEXT SAVE FONT REPLACE PS CON- NUMBER TEXT SAVE TONER FONT PITCH FONT POINT SIZE SYMBOL Note 1 The range of items to choose from when the printer is equipped with an Adobe PostScript ROM SIMM.
- Page 320 List of MENU Utilities List of MENU Utilities MENU ITEM SETTING 1. RESET 1. JOB & MEMORY ENTER to reset. MENU 2. MENU RESET ENTER to reset. 2. TEST 1. PRINT CONFIG ENTER to print. PRINT 2. PCL FONT LIST ENTER to print.
- Page 321 List of MENU Utilities MENU ITEM SETTING 4. CONFIG 1. PERSONALITY AUTOMATIC/ PCL/ MENU POSTSCRIPT ON / OFF 2. AUTO CONTINUE 3. I/O TIMEOUT OFF/ 5 SECONDS/ 15 SECONDS/ 30 SECONDS/ 1 MINUTE/ 3 MINUTES 4. POWER SAVE 15 MINUTES/ 30 MINUTES/ 60 MINUTES/ OFF 5.
- Page 322 List of MENU Utilities MENU ITEM SETTING OFF/ ON 1. PRINT PS ERROR 8. PS MENU 9. MAINTE- 1. TOTAL NANCE PRINTOUTS MENU BLACK/ 2. REPLACE TONER CYAN/ MAGENTA/ YELLOW The items in bold represent settings of the printer that are set at the time of purchase.
-
Page 323: List Of Menu Utilities
List of MENU Utilities Symbol Sets Display Name Symbol Set Name Page No. ROMAN-8 Roman-8 ISO L1 ISO 8859/1 Latin 1 ISO L2 ISO 8859/2 Latin 2 ISO L5 ISO 8859/9 Latin 5 B-10 PC-8 PC-8: Code Page 437 B-11 PC-8 D/N PC-8 Danish/Norwegian B-12... - Page 324 List of MENU Utilities Roman-8 <ROMAN-8>...
- Page 325 List of MENU Utilities ISO 8859/ 1 Latin 1 <ISO L1>...
- Page 326 List of MENU Utilities ISO 8859/ 2 Latin 2 <ISO L2>...
- Page 327 List of MENU Utilities ISO 8859/ 9 Latin 5 <ISO L5> B-10...
- Page 328 List of MENU Utilities PC-8: Code Page 437 <PC-8> B-11...
- Page 329 List of MENU Utilities PC-8 Danish/Norwegian <PC-8 D/N> B-12...
- Page 330 List of MENU Utilities PC-850 Multilingual <PC-850> B-13...
- Page 331 List of MENU Utilities PC-852 Latin 2 <PC-852> B-14...
- Page 332 List of MENU Utilities PC-Turkish <PC8-TK> B-15...
- Page 333 List of MENU Utilities 10. Windows 3.1 Latin 1 <WIN L1> B-16...
- Page 334 List of MENU Utilities 11. Windows 3.1 Latin 2 <WIN L2> B-17...
- Page 335 List of MENU Utilities 12. Windows 3.1 Latin 5 <WIN L5> B-18...
- Page 336 List of MENU Utilities 13. DESKTOP <DESKTOP> B-19...
- Page 337 List of MENU Utilities 14. PS Text <PS TEXT> B-20...
- Page 338 List of MENU Utilities 15. Ventura International <VN INTL> B-21...
- Page 339 List of MENU Utilities 16. Ventura US <VN US> B-22...
- Page 340 List of MENU Utilities 17. Microsoft Publishing <MS PUBL> B-23...
- Page 341 List of MENU Utilities 18. Math-8 <MATH-8> B-24...
- Page 342 List of MENU Utilities 19. PS Math <PS MATH> B-25...
- Page 343 List of MENU Utilities 20. Ventura Math <VN MATH> B-26...
- Page 344 List of MENU Utilities 21. Pi Font <PI FONT> B-27...
- Page 345 List of MENU Utilities 22. Legal <LEGAL> B-28...
- Page 346 List of MENU Utilities 23. ISO 4: United Kingdom <ISO-4> B-29...
- Page 347 List of MENU Utilities 24. ISO 6: ASCII <ISO-6> B-30...
- Page 348 List of MENU Utilities 25. ISO 11: Swedish <ISO-11> B-31...
- Page 349 List of MENU Utilities 26. ISO 15: Italian <ISO-15> B-32...
- Page 350 List of MENU Utilities 27. ISO 17: Spanish <ISO-17> B-33...
- Page 351 List of MENU Utilities 28. ISO 21: German <ISO-21> B-34...
- Page 352 List of MENU Utilities 29. ISO 60: Norwegian V1 <ISO-60> B-35...
- Page 353 List of MENU Utilities 30. ISO 69: French <ISO-69> B-36...
- Page 354 List of MENU Utilities 31. Windows 3.0 Latin 1 <WIN 3.0> B-37...
-
Page 355: Appendix C: Index
Appendix Index... - Page 356 Index Numerics 7-11 Color toner cartridge 2-6 250 sheet third cassette Color toner cartridges unit 2-1, 8-7 Config menu 3-11 Control panel 2-1 Black toner cartridge 2-6 Control panel keys 2-9 Cyan (Blue) toner cart- ridge 2-6 Changing cartridges 6-1 Changing the drum cart- ridge 6-15 Data indicator 2-9...
- Page 357 Index LocalTalk connector 2-3 Grips 2-1 Guide lock lever 2-29, 2-39 Macintosh (Postscript option) 5-59 Magenta (Red) toner cartridge 2-6 Humidity 1-1 Maintenance menu 3-17 Media type for Tray 1 2- Imae menu 3-13 Media type for Tray 2/ Image transfer belt unit Tray 3 2-41 Memory menu 3-13 Image transfer roller unit...
- Page 358 Index Recycled paper 2-21 Reset menu 3-7 Paper 2-17 Paper misfeed 7-11 Paper Size for Tray 1 2-24 Setting the menu utilities Paper supplies 2-19 Parallel connector 2-3 Special paper 2-43 Parts and supplies 2-1 Specifications 8-1 PCL menu 3-14 Starting Up the Status Plain paper 2-21 Display 4-24...
- Page 359 Index Tray 3: 250 sheet third cassette 2-1, 2-26, 2-37 Troubleshooting tips 7-1 Turning the printer on 2-15 Up & down keys 2-11 Waste bottle 2-6, 6-14 Windows 3.1 4-46 Windows 3.1 (Postscript option) 5-43 Windows 95/ Windows 98 4-2 Windows 95/ Windows 98 ( Postscript option) Windows NT 4.0 4-30...
- Page 360 Index...
- Page 361 General Information...
-
Page 362: End User License Agreement
(whether reg- istered or unregistered), or any other rights, franchises or licenses in respect of the Software. Title to the Software and any copy made from it is retained by Minolta or such other owners. 3. LICENSE... -
Page 363: General Information
You may terminate your license at any time by destroying the Software and all your copies of it or as otherwise described in these terms. Minolta may terminate your license if you fail to comply with these terms. Upon such termination, you agree to destroy all your copies of the Software. -
Page 364: Contrat Utilisateur De La Licence
2. Le contrat de licence Ceci est un contrat de licence et non un contrat de vente. Minolta possède ou a obtenu une licence d’autres propriétaires, des droits de reproduction dans le domaine des logiciels. A l’exception de ce qui est indiqué... - Page 365 7. Résiliation du contrat. Vous pouvez mettre un terme à votre licence à tout moment en détruisant le logiciel et toutes ses copies comme prévue dans le contrat, Minolta peut mettre fin à votre licence en cas de non respect du contrat.
-
Page 366: Endverbraucher-Lizenzvertrag
Fontprodukten befinden, oder MINOLTA besitzt die Lizenzen an den entsprechenden Urhe- berrechten anderer Inhaber. Der Lizenznehmer erwirbt keine Rechte an der Software. MINOLTA oder die genannten anderen Inhaber bleiben Inhaber der Rechte an der in der Packung enthaltenen Kopie der Software und jedweder von ihr angefertigten Kopie. Die Verantwortung für die Wahl zur Erzielung der gewünschten Ergebnisse, Installation, Benut-... - Page 367 Der Lizenznehmer kann den Lizenzvertrag jederzeit beenden, indem er sämtliche Kopien der Software vernichtet oder entsprechend anderweitiger Bestimmungen dieses Vertrages handelt. MINOLTA kann den Lizenzvertrag mit dem Lizenznehmer beenden, wenn dieser diese Bedingungen nicht einhält. In diesem Fall erklärt sich der Lizenznehmer damit einver- standen, alle Kopien der Software zu vernichten.Jedweder Versuch, eine Kopie der Software...
-
Page 368: Contratto Di Licenza D'uso
2. CONTRATTO DI LICENZA Il presente è un contratto di licenza e non un contratto di vendita. MINOLTA possiede, ovvero ha avuto la licenza da parte degli altri proprietari, i diritti di autore per il Software. - Page 369 5. GARANZIA LIMITATA MINOLTA garantisce che i mezzi su cui il Software è registrato sono privi di difetti nei materiali e nella fabbricazione secondo un normale uso. I dettagli della garanzia e le limitazioni per il Software sono descritti nella Dichiarazione di Garanzia Limitata che viene fornita insieme all’hardware.
-
Page 370: Addresses Minolta-Partners In Europe
05-41 558 511, Fax 05-41 212 681 Denmark • Minolta Danmark a/s, Valhøjs Allé 160, 2610 Rødovre 36 37 04 50 eller 36 37 04 52, e-mail: printer@minolta.dk Finland • Renatus Oy, P.O. Box 93, 02201 Espoo 09-42061, Fax 09-4206 200 France •... - Page 371 Poland • Minolta Polska sp.zo.o., Ul. Nowolipie 7A, 00-146 Warszawa 02-311-488, Fax 02-635-37-56 Portugal • Minolta Portugal Lda., Av. do Brasil 33a, 1700 Lisboa 01-79300-16, Fax 01- 7969547 Romania • Minolta Romania SRL, Soseaua Oltenitei 35-37, etaj 8, Sector 4, 712 12 Bucuresti 0330-68-35, Fax 0330-70-02 Slovakia •...
-
Page 372: Minolta Guarantee Certificate
3.1. UNIT During the Unit Guarantee Period MINOLTA will either repair or replace faulty Units falling within Clause 2.1. MINOLTA will inform the purchaser as to the choice of rem- edy within a reasonable time of inspecting the faulty Unit... - Page 373 Clause 2.2 within a reasonable time of inspecting the faulty Software 3.3 FAILURE Should MINOLTA fail to repair or replace the faulty Unit or faulty Software within the time limit specified in Clauses 3.1 and 3.2 the purchaser shall be entitled to claim a...
- Page 374 From our internet website (http://www.service.minolta.de) you can get the latest printer driver updates and answers to various questions. Minolta’s hotline (see pages 9 and 10 in chapter General Information) supports you with the solution to many prob- lems. Your technical representative will help you as well.
Need help?
Do you have a question about the Color PAGEPRO PLUS and is the answer not in the manual?
Questions and answers