Table of Contents
Advertisement
Quick Links
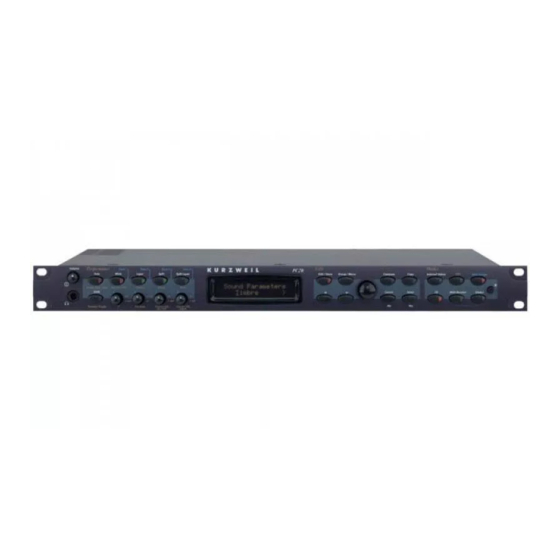
Kurzweil PC2R
Musician's Guide
©2000 All rights reserved. Kurzweil is a product line of Young Chang Co.; Kurzweil and PC2R are
trademarks of Young Chang Co. All other products and brand names are trademarks or registered
trademarks of their respective companies. Product features and specifications are subject to change
without notice.
Part Number: 910350 Rev. A November 1, 2000
Advertisement
Table of Contents
Troubleshooting

Related Manuals for Kurzweil PC2R


Summary of Contents for Kurzweil PC2R
- Page 1 Kurzweil PC2R Musician’s Guide ©2000 All rights reserved. Kurzweil is a product line of Young Chang Co.; Kurzweil and PC2R are trademarks of Young Chang Co. All other products and brand names are trademarks or registered trademarks of their respective companies. Product features and specifications are subject to change without notice.
- Page 2 The exclamation point within an equilateral The symbol of a house with triangle is intended to alert the user to the an arrow pointing inside presence of important operating and is intended to alert the user maintenance (servicing) instructions in that the product is to the literature accompanying the product.
- Page 3 Young Chang Distributors Contact the nearest Young Chang office listed below to locate your local Young Chang/ Kurzweil representative. Young Chang America, Inc. P.O. Box 99995 Lakewood, WA 98499-0995 Tel: (253) 589-3200 Fax: (253) 984-0245 Young Chang Co., Ltd. 178-55 Gajwa-Dong...
-
Page 5: Table Of Contents
Contents Young Chang Distributors ............................... iii Chapter 1 Introduction Basic PC2R Features................................ 1-1 The Sound ................................. 1-1 Physical Controllers..............................1-1 Effects..................................1-2 Options ..................................... 1-2 Sound ROM Cards ..............................1-2 Polyphony Expansion Board..........................1-2 Unpacking your PC2R..............................1-2 Chapter 2 Startup Setup.................................... - Page 6 Kurzweil PC2R Musician’s Guide Contents Color-Coded Labeling ............................. 3-5 The Display (LCD) ..............................3-5 The Performance Region............................3-7 The Edit Region ................................ 3-9 The Modes Region ..............................3-11 Program and Setup Organization ..........................3-12 Selecting Programs and Setups ........................... 3-13 EQ ....................................3-14 Changing the EQ ..............................
- Page 7 Using the Arpeggiator ..............................4-33 Using Pressure (Aftertouch) as an Arpeggiator Controller ................4-34 Using the Arpeggiator with a Sequencer or External Controller..............4-35 Using the PC2R with Other Gear..........................4-35 Using MIDI Receive Mode ........................... 4-35 The PC2R as MIDI Master ............................ 4-35...
- Page 8 Kurzweil PC2R Musician’s Guide Contents Sending Bank-Select and Program-Change Messages ................4-36 Understanding Bank-Select Controllers ...................... 4-36 Sending Program Changes Only ........................4-38 Sending Different Program Changes to the Same Channel..............4-39 Preventing Program Changes on Slaves...................... 4-39 Working With an External Sequencer ......................... 4-39 Multi-Track Recording ...........................
- Page 9 Line-Level Left and Right Analog Audio Outputs ..................B-3 Digital Audio Output ............................B-3 Headphone Output ............................B-3 Parameter Reference ............................... B-4 PC2R Audio Signal Routing ............................B-9 MIDI Controllers ................................B-10 Special Controllers ................................ B-10 MIDI Controller Messages for Front-Panel Knobs ....................B-11 KB3 Controllers ................................
-
Page 11: Chapter 1 Introduction
Wheels and/or other physical controllers. You can also control the sound from the front panel of the PC2R itself, using the four programmable knobs to the left of the display. See page 3-8 for more information about these control knobs. -
Page 12: Effects
Each expansion card adds 16 megabytes of ROM sounds to the 16 megabytes of onboard ROM. Polyphony Expansion Board There’s a kit for expanding your PC2R’s polyphony from 64 voices to 128 voices. You can install this kit yourself as well. Unpacking your PC2R Your PC2R carton should contain the following: •... -
Page 13: Chapter 2 Startup
Setup During operation, the PC2R must be either installed in a properly-ventilated MIDI rack, or resting on its four rubber feet on a sturdy, level surface. If not properly ventilated, the PC2R could overheat and malfunction. Figure 2-1 shows the bottom panel of the PC2R and the recommended locations for the rubber feet. -
Page 14: Basic Connections
Connect the plug at the other end of the power-supply cable into a standard power outlet. If you plan to take your PC2R to a location that uses a different voltage level, you’ll need to get an additional power supply that’s compatible with the local voltage. -
Page 15: Audio
MIDI information it receives on to other MIDI gear. The typical MIDI configuration for the PC2R is to connect its MIDI In port to the MIDI Out port of a MIDI control source—a keyboard, an alternative controller like a wind or percussion controller, or a sequencer. -
Page 16: Midi Configurations
Startup Powering Up Use the MIDI Out port and/or the programmable Thru/Out port if your PC2R is part of a more complex MIDI system. Even if your MIDI source can transmit on only one MIDI channel, you can make it more powerful with the PC2R, which can remap incoming MIDI information to four different MIDI channels, each playing a different sound. -
Page 17: Display (Lcd)
Troubleshooting No Text in Display If no messages are displayed when you turn on the power on your PC2R and no LEDs flash, check the power adapter connections at the AC outlet and the PC2R Adapter In jack. Low Battery When you turn your PC2R off, a lithium battery protects the memory that the PC2R uses to store user-defined programs and setups, and other editing changes that you’ve saved. -
Page 18: No Sound
Your MIDI connection may not be functioning: check that you have a MIDI cable connected from the MIDI Out port of your MIDI source to the MIDI In port of the PC2R. The LED in the MIDI Receive button blinks when the PC2R receives MIDI information. -
Page 19: Changing Sounds
See page 2-5 to learn how to play the demo sequences. Also In This Chapter Chapter 3 shows you how to get the most out of your PC2R in performance. The overview introduces a few important features and concepts, while the remaining sections provide more detail. -
Page 20: Overview
MIDI Setups Mode (Setups) MIDI Setups mode is what makes the PC2R such a flexible MIDI rack unit. In this mode you play setups instead of programs. Each setup can play up to four different programs, each on its... -
Page 21: Special Modes
Panel. In this case, you can still get directly to Effects edit mode by pressing the FX button, but Effects edit mode controls the effects for the entire PC2R, not just the current program or setup. -
Page 22: Effects
There’s more about the display beginning on page 3-5. In addition to the display, there are three main regions on the PC2R’s front panel. These regions are labeled in orange at the top of the front panel: Performance As the label suggests, you’ll use the buttons and knobs in this region... -
Page 23: Color-Coded Labeling
000|Stereo Grand| Program ID and name This is Internal Voices mode, where the PC2R always starts when you turn it on (to get to Internal Voices mode from another mode, press the Internal Voices button). The top line gives you information about the bank, while the bottom line shows the ID and name of the current program. - Page 24 This requires quite a bit of processing, and consequently has an effect on the polyphony available for other programs. KB3 programs use 44 of the PC2R’s 64 available voices, so when you use a KB3 program in a setup, you have 20 voices of polyphony available for the remaining programs in the setup.
-
Page 25: The Performance Region
16 setups in that group. The Performance Region Depending on how you use your PC2R, you may control it more from your MIDI source than from the PC2R’s front panel. Still, we’ve tried to organize the front panel so that everything you might need in a performance situation is easy to reach, and separate from the programming functions. - Page 26 In MIDI Setups mode, this button selects Zone 3 for viewing or editing. Split Layer In Internal Voices mode, this button switches the PC2R into AutoSplit mode, and adds a layer to the sound below the split point. In KB3 mode, this button switches between high and low pitch for the percussion effect (if any) for the current program.
-
Page 27: The Edit Region
The Edit Region There are eight buttons, and a dial called the Alpha Wheel, in the Edit region. Most of the buttons you’ll need for programming (editing) your PC2R are in this region. (We’ll discuss editing thoroughly in Chapter 4.) Four of the buttons in the Edit region have dual labels. - Page 28 If you’re in Internal Voices mode or KB3 mode, you can scroll all the way through the Internal Voices categories and into the KB3 categories (and vice versa). The PC2R automatically switches to the corresponding performance mode. Setups are separate, however; you can’t switch performance modes by scrolling through setup categories.
-
Page 29: The Modes Region
See page 4-28 for more information about editing effects. MIDI Receive This button takes you to MIDI Receive mode, where you can configure how the PC2R responds to incoming MIDI information. The first time you enter MIDI Receive mode after powering up, the display shows Channel 1, because the PC2R resets the MIDI Receive channel each time you shut down. -
Page 30: Program And Setup Organization
• Wet/Dry mix to input of FX-B Global The Global button takes you to a list of parameters and functions affecting the entire PC2R There’s a description of each global parameter/function beginning on page 5-35. Demo Press MIDI Receive and Global together to enter a special demo mode. Then press Main or Layer (in the Performance region) to play a demo sequence. -
Page 31: Selecting Programs And Setups
When Wrap/Skip is On, if the User KB3 bank is empty when you try to enter it, the PC2R skips to the next available program, which happens to be Program 000 in Bank 6. (This isn’t true in the case of the User Internal Voices bank, since it actually contains a factory program.) -
Page 32: Changing The Eq
B-11 lists the MIDI Controller messages that correspond to the knobs). Here’s an example. When you move Red Knob B on the PC2R (that is, when the Shift LED is red and you move Knob B), each zone of the current setup generates a MIDI Controller message (or not), depending on the value of the Ctrl Num parameter for Red Knob B in each setup zone. -
Page 33: Effects
Playing Your PC2R Effects the vibrato depth in the current program only if the PC2R were using the same MIDI channel as your MIDI source—and if the program responded to MIDI 1.) Suppose you want to use a different physical controller on your MIDI source to affect the vibrato depth in Setup 001. -
Page 34: Selecting Effects
Playing Your PC2R Effects Send a MIDI Controller message of 94 to change effects routing. A value of 0–31 switches the routing to None; a value of 32–63 switches to FX-A; a value of 64–95 switches to FX-B; a value of 96–127 switches to Both. -
Page 35: Bypassing Effects
Most of the PC2R’s factory programs and setups route the audio signal into FX-A and not directly into FX-B. In this case, the PC2R automatically routes the signal from the output of FX-A into FX-B before it goes to the audio outputs. This means that there are three wet/dry variables;... -
Page 36: Changing The Wet/Dry Mix From The Front Panel
If you’re on stage and you suddenly decide that your solo needs two sounds instead of one, you don’t want to take the time to edit a setup; you just want to add another sound as quickly as possible. Fortunately, the PC2R makes it easy to do this kind of thing without doing any actual editing. -
Page 37: Using Autosplit For Quick Layers And Splits
2. Use the Alpha Wheel to select Program 065 Slow Strings. In Step 1 we created the layer by activating Zone 2; now we’ve assigned a program to it. 3. Press Split (Zone 3). The PC2R automatically splits the keyboard at a predetermined point (it’s called the AutoSplit Key, and by default it’s G 3, although you can change it). -
Page 38: Saving Quick Layers And Splits
MIDI Setups mode. When you save a setup this way, the PC2R turns the AutoSplit feature off for that setup, and sets the low and high notes of each zone. See Muting and Soloing on page 3-21 to learn about how this affects playing setups. -
Page 39: Saving The Autosplit Key
You can make your setups even more versatile by muting or soloing zones, changing the sound by pressing a single button on the PC2R’s front panel. In MIDI Setups mode, the four zone buttons select, mute, and unmute the zones in a setup. This differs from turning the zones on and off, which is done with the MIDI Channel parameter in the MIDI Xmit menu. -
Page 40: Zone-Button Leds
Playing Your PC2R Muting and Soloing Zone-Button LEDs The tri-colored LED in each zone button indicates the zone’s status for the current setup: Empty zone—that is, a zone that has its MIDI Channel parameter set to Off. When a zone’s LED is off (unlit), the zone does not produce sound, even though it has a program assigned to it. -
Page 41: The Autosplit Feature
Playing Your PC2R Saving the Internal Setup The AutoSplit Feature Muting and soloing are slightly different depending on whether the AutoSplit feature is on. When it’s on, a soloed zone expands to cover the entire MIDI note range—it doesn’t matter what the settings are for the AutoSplit key or for the zones low and high notes (key range). - Page 42 Playing Your PC2R Saving the Internal Setup Saving to the internal setup is useful when you want the changes you’ve made in the current setup to apply to all the programs you play while in Internal Voices mode (remember, Zone 1 of the internal setup is what sets all the parameters for programs—like note range, controller...
-
Page 43: Programming Your Pc2R
If you prefer, you can program your PC2R directly from your PC2. Go to the Global menu (on the PC2, not on the PC2R), and set the value of the Xmit Buttons parameter to On. As long as the MIDI Out port of the PC2 is connected to the MIDI In of the PC2R, this causes the buttons you press on your PC2 to affect your PC2R in the same way. -
Page 44: Entering An Edit Mode
||||MIDI|Xmit||> Finding a Parameter and Changing its Value To navigate through the PC2R’s menus, use the Alpha Wheel or the cursor buttons (the right and left arrow buttons at the bottom left of the Edit region) and the Enter button. -
Page 45: Naming And Storing
Programming Your PC2R Basic Editing Concepts Naming and Storing Storing (saving) is optional, of course. If you don’t want to store any of your changes, press Cancel one or more times to return to the mode you were in before you started editing. -
Page 46: Other Save-Dialog Functions
3. Press Yes to restore, or No to cancel. If you choose to restore the current effect, the PC2R resets only the current program to its factory effect settings. If you choose to restore all effects, the PC2R resets all programs (both Internal- Voice programs and KB3 programs) to their factory effect settings. -
Page 47: Dumping Objects
2. Initiate the dump or playback of the object file from your external device. You don’t have to put the PC2R in any special mode to receive the dump. When a dump is sent back to the PC2R, the information goes to the memory location for the corresponding object... -
Page 48: Editing Short Cuts: Intuitive Entry
PC2R’s battery is running low. For example, you might dump a setup, then make a simple change to the version on your PC2R (like renaming it). Reload it, then select it, and check whether the name has reverted to its original. -
Page 49: Short Cuts For Changing Parameter Values
You can use any continuous physical controller (sliders, wheels, pedals, ribbons, or pressure on your MIDI source, or Knobs A–D on the PC2R) to change the value of the current parameter very quickly. You can also use the keyboard in some cases. Here are three quick examples. -
Page 50: Other Editing Functions
1. Enter an edit mode, and change the value of a parameter. 2. Press Compare. The PC2R restores the previous value of the parameter. To remind you that you’re listening to the unedited value, the Compare button blinks, and the top line of... -
Page 51: Copying And Pasting
Programming Your PC2R Basic Editing Concepts 7. Press the Right cursor button twice to display the Release parameter. 8. Change the value to its minimum. Now both the attack and the release are slow. 9. Press Compare. Both the slow attack and the slow release are gone. - Page 52 5. Press and hold the Global button, and turn Knob A. This quickly selects the Green Knob A parameter in the Controllers menu. 6. Press Copy, then Yes. The display informs you that the PC2R has copied the controller settings, then returns to the Copy prompt.
-
Page 53: More About Sysex Dumps
If all you’re doing is dumping objects from your PC2R to a sequencer and loading them back, you won’t have to worry about the PC2R’s SysEx ID. Just make sure that you don’t change it after dumping objects, because you won’t be able to reload them if the PC2R’s SysEx ID is different from the one contained in the incoming messages. -
Page 54: Dumping The Entire Memory
A note for K2000/K2500/K2600 owners: The sequencer in the K2000/K2500 has a 64K maximum for each song. A dump of the entire PC2R memory is larger than 64k, so you can’t use this method to load objects into a K2000, K2500, or K2600. Instead you must dump individual objects. -
Page 55: The Current Layer
Press the Right cursor button, and you’ll see the keymap for the right side. Most of the PC2R’s programs use mono keymaps, which means that only one of the keymap parameters is active. If you look at the keymap parameters for a mono-sample program (like any of the electric pianos) you’ll see parentheses around one of the parameter names. -
Page 56: Exiting The Program Editor
Your MIDI source’s Pitch Wheel (as well as other physical controllers) does what it does because the PC2R is programmed that way—but you could program it for other functions if you wanted. In a setup, your MIDI source’s Pitch Wheel can do something different in each zone—and that’s true for all the assignable physical controllers on your MIDI source (Mod Wheel, sliders, pedals, etc.)—as well as the knobs on the PC2R’s front panel. -
Page 57: The Kb3 Editor
Programming Your PC2R The KB3 Editor The KB3 Editor In the KB3 Editor, you have access to the parameters that affect the sound of the current KB3 program. These parameters are described beginning on page 5-6. KB3 parameters are different from Internal Voices parameters, but otherwise, editing KB3 programs is much like editing Internal Voices programs. -
Page 58: The Setup Editor
MIDI channel, controller assignments, and more. Even if your MIDI source can transmit on only one channel, you can make use of the four zones in a setup; the PC2R can remap incoming MIDI information to each of the channel in a setup, so you can play all four programs from one stream of MIDI information. -
Page 59: Entering The Setup Editor
Setup 125 has many of its controller parameters set for optimum control of the PC2R. If you’re using a PC2 keyboard to control a PC2R, pasting this setup into one or more zones in your PC2 setups will make it easier to control your PC2R. In this case, make sure that the PC2R has its MIDI In parameter (in the Global menu) set to a value of Auto (or Remap if you’re using MIDI... -
Page 60: Creating Setups
Programming Your PC2R The Setup Editor Creating Setups If you’ve read Layering and Splitting on page 3-18, you know how to create layered setups using the AutoSplit feature. Doing it this way, however, adds a lot of other features to the resulting setup, and you may not want that. -
Page 61: Setting Initial Volume Levels For Different Zones
Save|Setup|129? A01|Default|Setup Notice that the PC2R suggests a setup ID of 129, which is the first unused setup ID in the User bank. We’ll use that ID, but we’ll rename the setup before storing it. 14. Press the Right cursor button; the display prompts you to rename the setup. Press Yes. -
Page 62: Assigning Knobs To Control Wet/Dry Mix In Different Zones
Programming Your PC2R The Setup Editor Assigning Knobs to Control Wet/Dry Mix in Different Zones Many of the factory programs use Green Knobs A and B to control the wet/dry mix of the effects assigned to FX-A and FX-B. The setups in these examples don’t use either of these knobs. -
Page 63: Assigning Entry Values
To avoid this problem, the PC2R is designed so that once you set an entry value for a physical controller, it won’t become active until you pass the point of the entry value. So as you turn Knob A to the left for Setup 132, nothing happens until you reach 85. -
Page 64: Multiple Controller Function
This is less of a problem for some controllers, like volume and wet/dry controls, since the PC2R has default entry values for these controllers. It’s just something to keep in mind when you’re creating your own setups. -
Page 65: Offset Vs. Scale
Programming Your PC2R The Setup Editor 8. Press the Right cursor button. The display shows a prompt asking if you want to paste to Zone 1. 9. Press Zone 3, then Enter. The display shows Zone|pasted! and returns to the Paste prompt. -
Page 66: Crossfades
Programming Your PC2R The Setup Editor Crossfades You can use a single continuous controller to fade one sound out while it fades another sound in. This is called a crossfade. 1. Create a two-zone setup, as you did in the example on page 4-18. Use a sustaining sound in each zone: perhaps two different organs. -
Page 67: Velocity Layering
127). Selecting Setups Remotely You can use a switch controller on your MIDI source to select Setups 129–256 on the PC2R, which is convenient in performance situations if the PC2R isn’t within easy reach. By default, setups switch immediately when you activate the controller, but you can change the value of the Chg Setups parameter (in the Global menu) to Keys Up, and the setup will remain current until you’ve released all notes on your MIDI source. -
Page 68: Transposing A Setup With A Button
Transposing a Setup With a Button If you don’t have the time to learn a tune in a different key, you can have the PC2R transpose a setup with one press of a button. This example transposes up a fourth, but it’s up to you to decide both the direction and the interval. -
Page 69: Setting The Effects Change Mode
The value of FX Chg Mode resets automatically to Auto every time you turn on the PC2R. Setting the Effects Change Mode In many cases, you can leave both FX Chg Mode and FX Channel at their default settings (Auto and 1). -
Page 70: Selecting Different Effects
Programming Your PC2R Effects Edit Mode Selecting Different Effects On page 3-16 we briefly described performance aspects of changing effects. Here we’ll go into a bit more detail about selecting effects. 1. Enter Effects edit mode as described in the previous subsection. -
Page 71: Saving Effects
Programming Your PC2R Effects Edit Mode In addition to the usual four parameters, these effects have three additional parameters parameters at the end of the FXB Select menu. Also, there’s a special editing case. If the KB3 effect you’re editing is assigned to a KB3 program and the FX Chg Mode parameter is set to Auto (which is the default), you’ll notice that when... -
Page 72: Other Effects-Mode Functions
Programming Your PC2R Effects Edit Mode You don’t have to modify the factory programs when editing effects; you can create a new program in the User bank instead. 1. Repeat Steps 1 and 2 from the preceding procedure. When you see the Save dialog, press the Right cursor button. -
Page 73: Common Editing Tasks
If you have a monaural sound system, or have only one available input to your mixer, you might want to play your PC2R in mono mode, in which case the full audio signal gets sent to both sides of the analog outputs (there’s no separation of left and right). -
Page 74: Changing Preset Drawbar Values
PC2R sets them to their programmed values when you select the KB3 program. They can also be live, in which case the PC2R sets their values to the current positions of the drawbar controls (Knobs A–D, in combination with the Drawbar Toggle button) when you select the KB3 program. -
Page 75: Using The Arpeggiator
The arpeggiator can affect both the PC2R and any MIDI instruments that are slaves of the PC2R. The notes produced by the arpeggiator in a given setup zone go to all of that zone’s destinations: local, MIDI, or both. -
Page 76: Using Pressure (Aftertouch) As An Arpeggiator Controller
Programming Your PC2R Using the Arpeggiator The PC2R’s arpeggiator can be a lot of fun to play with; you can get many interesting and unusual effects. The following tutorial will get you started. 1. Start in MIDI Setups mode. To best hear the effects of the arpeggiator, you might want to start with a program that has a percussive attack, such as piano, marimba, or guitar. -
Page 77: Using The Arpeggiator With A Sequencer Or External Controller
Using the PC2R with Other Gear If your system consists of a MIDI source and a PC2R alone, you probably don’t need to read this section. If you’re using a sequencer, you should read Using MIDI Receive Mode; if you’re using the PC2R to control additional instruments, read The PC2R as MIDI Master. -
Page 78: Sending Bank-Select And Program-Change Messages
When you have a MIDI instrument slaved to the PC2R, the program-change messages you send to the PC2R from your MIDI source also go to the slave instrument. If your MIDI source can also send bank-select messages, you can select banks and programs on both the PC2R and the slave. - Page 79 … … When you’ve selected the Bank parameter in the PC2R, the display shows you both the 0/32 value and the bank number equivalent. With other parameters selected, the display shows only the bank number equivalent, followed by a colon (:), followed by the program number.
-
Page 80: Sending Program Changes Only
You want to use your keyboard controller to change programs on both the PC2R and the second keyboard. You don’t want to send note information to the second keyboard, however, since you’re actually playing the second keyboard (and not slaving it from the PC2R). -
Page 81: Sending Different Program Changes To The Same Channel
Sending Different Program Changes to the Same Channel Suppose you want to play Program A on Channel 1 on the PC2R, and Program B on Channel 1 on an instrument that’s slaved to the PC2R. To create a setup that does this, follow Steps 1–8 of the preceding tutorial, but in Step 4 use the same MIDI channel for both zones (don’t forget to... -
Page 82: Multi-Track Recording
This configuration enables you to record multiple tracks, if your sequencer has that capability: 1. Connect the MIDI Out of your keyboard or MIDI source to the MIDI In of the PC2R. 2. Connect the MIDI Out of the PC2R to the MIDI In of the sequencer. -
Page 83: Program Editor Parameters
Chapter 5 Descriptions of Parameters This chapter contains a description for each of the PC2R’s editing parameters. They’re organized into the following sections: • Program Editor Parameters ......5-1 •... -
Page 84: The Timbre Menu
Descriptions of Parameters Program Editor Parameters The Timbre Menu The parameters in the Timbre menu control the most basic components of the sound in a program. There’s a separate set of Timbre parameters for each program layer. Keymap The keymap for programs using mono keymaps (most keymaps are mono keymaps). This parameter appears as for programs using stereo keymaps. -
Page 85: The Envelope Menu
You may be wondering why you can set initial values for these MIDI Controllers and not others. It’s because most of the PC2R’s programs use at least one of these MIDI Controllers to do something (a common example is MIDI 1, which on most keyboards is the message sent by the Mod Wheel, and which controls vibrato or tremolo in many PC2R programs). -
Page 86: The Lfo Menu
Descriptions of Parameters Program Editor Parameters These parameters control the rate of attack, decay, and release, which are known collectively as the envelope of a sound. Each parameter is measured as a multiple of 1, which is the unadjusted rate (that’s why there’s an after the value). -
Page 87: The Lfo Menu: Rotor Effects Parameters
Descriptions of Parameters Program Editor Parameters The LFO Menu: Rotor Effects Parameters The rotor effects simulate the popular Leslie rotating speaker that has become a standard addition to the B-3 organ. KB3 programs all use rotor effects. You can add rotor effects to other programs by saving one of the KB3 effects to those programs. -
Page 88: Kb3 Editor Parameters
Descriptions of Parameters KB3 Editor Parameters KB3 Editor Parameters The Timbre Menu Wheel Volume Map (WheelVolMap) The wheel volume map determines the volume level for each tone wheel. We’ve provided several tone wheel volume maps here, based on measurements we’ve taken of different organs. All tone wheels at the same volume. - Page 89 Descriptions of Parameters KB3 Editor Parameters DrawbarMode Determines whether the program’s drawbar controls set themselves to the positions of the drawbar controls when you select the program. Preset Initial drawbar settings are defined by the values of Drawbar parameters 1–9; they ignore the initial positions of the drawbar controls.
-
Page 90: The Envelope Menu
Descriptions of Parameters KB3 Editor Parameters Leakage Controls the level of the simulated crosstalk and signal “bleed” of adjacent tone wheels in the model. This is provided to help “dirty up” the sound to make it a bit more realistic. A setting of -96 dB gives the purest tones;... -
Page 91: The Envelope Menu: Percussion Parameters
Descriptions of Parameters KB3 Editor Parameters Perc Switch Either On or Off, this parameter enables/disables the percussion effect for the program. When the value is On, the nature of the percussion effect is determined by the percussion and percussion-pitch parameters (described below). In KB3 mode, you can use the Perc On/Off button to enable or disable percussion (or send MIDI 73 from your MIDI source). -
Page 92: The Envelope Menu: Percussion Pitch Parameters
Bank and program assignments, and other program-related parameters Program Activation/deactivation of keys, pitch control Key Range Uniform pitch-shifting of entire zone Transpose Response to your playing style Velocity Functions of PC2R knobs, and physical controllers on your MIDI source Controllers Activation/deactivation and control of arpeggiator Arpeggiator 5-10... -
Page 93: The Midi Xmit Menu
Determines whether the zone transmits only to the PC2R, only to MIDI, or to both. The default- setup value is both (Local+MIDI). If you set the value to Local, the zone plays only on the PC2R. If you’re using the PC2R to control other instruments or to record to an external sequencer, use a value of MIDI or Local+MIDI. -
Page 94: The Program Menu
Descriptions of Parameters Setup Editor Parameters Auxiliary Bend 1, Up (AuxBnd1 Up) Sets the number of semitones of upward pitch bend applied by any physical controller that sends AuxBnd1 (MIDI 21 for MSB and MIDI 53 for LSB), when that controller is at its maximum. Auxiliary Bend 1, Down (AuxBnd1 Dwn) Sets the number of semitones of downward pitch bend applied by any physical controller that sends AuxBnd1 (MIDI 21 for MSB and MIDI 53 for LSB), when that controller is at its maximum. -
Page 95: Bank Mode
This parameter is primarily a convenience for when you’re sending MIDI to other instruments or to a sequencer. If you’re using the PC2R as a MIDI slave only, you won’t need to edit this parameter unless your MIDI source numbers its programs starting at 1 (the PC2R numbers its programs and setups starting at 0). -
Page 96: The Key Range Menu
ID and the name. Use a value of Off when you want the PC2R to remind you that the zone will select a program on a non-General-MIDI external instrument when you select the setup. In this case, the display... -
Page 97: The Transpose Menu
C 4 triggers the note C 4, just as you would expect. Assuming the zone’s Dest parameter is at its default value of Local+MIDI, every note you play goes both to the PC2R and to the MIDI Out port. -
Page 98: The Velocity Menu
PC2R transmits via its MIDI Out port. A Bit of Background When you play a note on your MIDI source, the PC2R generates a Note On message with an attack-velocity value corresponding to how forcefully you play the note. Attack-velocity values range from 1 to 127;... - Page 99 Descriptions of Parameters Setup Editor Parameters Velocity Scale: 100% as you strike the keys harder (increase the velocity) MIDI velocity increases proportionally Velocity Scale: 200% MIDI velocity reaches maximum on medium strike velocity Velocity Scale: 50% MIDI velocity never reaches maximum, even on maximum strike velocity Keystrike Velocity Velocity Offset (Vel Offset)
- Page 100 Descriptions of Parameters Setup Editor Parameters Here’s another example: reversing a linear velocity curve so that it plays loud when you strike the keys softly, and vice versa. You might think that all you have to do is set Vel Scale to -100%. when you do that, you find that all the final attack-velocity values are at minimum.
- Page 101 Descriptions of Parameters Setup Editor Parameters Velocity Curve: Linear Constant relationship between keystrike velocity and final attack velocity Velocity Curve: Sin+ Final attack velocity increases more rapidly up to keystrike velocity of 64, then increases more slowly Velocity Curve: Cos+ Final attack velocity increases more slowly up to keystrike velocity of 64, then increases more rapidly Keystrike Velocity...
-
Page 102: The Controllers Menu
MIDI sources: mono pressure (aftertouch) and control pedals, for example. The PC2R responds by default to many standard MIDI Controller messages like Sustain and Mod Wheel. With a little programming, you can get the PC2R to respond to just about any MIDI Controller message your MIDI source can generate. -
Page 103: The Controllers Menu: Continuous Controller Parameters
Setup Editor Parameters page B-11 there’s a table that shows the MIDI Controller messages to send from your MIDI source when you want to simulate moving the knobs on the PC2R’s front panel. Entry Volume Sets the volume level of the zone when you select the setup, by sending a MIDI Controller 7 message with the value you specify. -
Page 104: The Controllers Menu: Ribbon Controller Parameters
This parameter affects the behavior of the controller the same way that the Vel Curve parameter affects the PC2R’s velocity response. If you set Ctrl Curve to Sin+, the controller has its greatest effect in the middle of its range; if Ctrl Curve is Cos+, the controller has its greatest effect at the ends of its range. - Page 105 Descriptions of Parameters Setup Editor Parameters controllers—so are all of the continuous controller parameters (whose descriptions start on page 5-21). Ribbon Section Configuration (Ribbon Sect) Determines the configuration of the optional ribbon controller. A value of Large creates a single section spanning the entire length of the ribbon.
-
Page 106: The Controllers Menu: Switch Controller Parameters
PC2R’s behavior. The only reason this parameter is here at all is in case you dump setups from your PC2R to a PC2. In this case, the SwType parameter is relevant, since the PC2’s switch controllers can operate in two different modes. - Page 107 On Controller (On Ctrl) Determines the MIDI Controller message that the controller sends when you turn it on. When you set a value for this parameter, the PC2R automatically assigns the same value to Off Ctrl. On Value Sets the value of the MIDI Controller message sent by the controller when you turn it on. The value for all zones in the default setup is 127 or On.
-
Page 108: The Arpeggiator Menu
Descriptions of Parameters Setup Editor Parameters The Arpeggiator Menu Arpeggiator Activation (Arp Active) Enables or disables the arpeggiator for the setup. If this parameter’s value is Off, then you won’t hear arpeggiation for any notes in any zone of the setup, regardless of the settings for any of the other arpeggiator parameters. - Page 109 Descriptions of Parameters Setup Editor Parameters In the next three modes, the arpeggiator latches notes only when MIDI Controller 119 (ArpLatch) sends a value of On (64 or higher). An easy way to experiment with these modes is to assign a convenient physical controller to send MIDI 119. Overplay The arpeggiator latches any notes in the arpeggiator that are being held when ArpLatch goes on, and continues playing them, even after you let them go, until ArpLatch off.
- Page 110 Descriptions of Parameters Setup Editor Parameters Play Order Determines the order in which the arpeggiator plays latched notes. There are eight possible values: Played Latched notes get played in the chronological order in which you latched them. Latched notes play in ascending pitch order, regardless of their chronological order. Down Latched notes play in descending pitch order, regardless of their chronological order.
- Page 111 Internal. If the value of Clock is External, the arpeggiator follows the tempo of MIDI Clock signals (if any) received at the PC2R’s MIDI In port. If no external Clock signal is received, notes in the arpeggiator region do not play at all.
- Page 112 Ctrl 117 All arpeggiated notes play with attack velocities matching the current value of MIDI 117, either from a front-panel controller on the PC2R or received at the MIDI In port. Fixed Velocity (Fixed Vel) When the value of Vel Mode is Fixed, sets the attack-velocity level for all arpeggiated notes.
- Page 113 Shift is 4 (a third), and Shift Limit is 7 (so notes won’t get shifted above G 4). The arpeggiator plays C 4, then E 4. The next note should be G 4, but that’s above the shift limit—so the PC2R calculates the difference between that G 4 and the shift limit (G 4): one semitone.
-
Page 114: Effects Edit Mode Parameters
“glissando” changes direction around each change in direction of the latched notes. Effects Edit Mode Parameters Effects edit mode is a special subset of the PC2R’s editors. When you press FX, you go to the FX Routing menu in the editor corresponding to the performance mode you were in:... -
Page 115: Midi Receive Mode Parameters
MIDI Receive Mode Parameters MIDI Receive mode is designed to make it easy to configure your PC2R as a MIDI slave—especially when you’re using it as a multi-timbral playback module for a sequencer. - Page 116 FX-A Wet/Dry Mix (A) For the current program on the current channel, specifies how much of FX-A’s effect gets applied to the dry signal coming from the PC2R’s sound engine. Also transmits a MIDI 91 message to the MIDI Out port.
-
Page 117: Global Mode Parameters
PC2R is connected to the MIDI In of another instrument, and its MIDI Out is connected to the MIDI In of the PC2R. In this case, if the sequencer’s Soft Thru (Patch Thru, Play Thru, etc.) is active, you’ll get doubled notes unless you turn the PC2R’s local control off. - Page 118 Default value. The newly-selected setup becomes active as soon as you select it. Any notes being held by the PC2R (or by Kurzweil instruments receiving MIDI from the PC2R) continue with their normal decays. Non-Kurzweil MIDI slaves may cut off notes as soon as the PC2R’s setup changes.
- Page 119 Affects what happens when you exit an editor without saving. If the value if Never (the default), the PC2R won’t prompt you to save your edits when you leave an editor (by pressing one of the mode-selection buttons). In this case, the mode-selection button flashes, prompting you to select a bank (or press the same button again to enter that mode on the last program or setup you were using in that mode).
- Page 120 Global Mode Parameters If the value is Ask, leaving an editor without saving causes the PC2R to ask you if you want to save your edits. You can press Yes or No as desired, or you can press a mode-selection button to cancel your edits and return to a performance mode.
- Page 121 MIDI. All other programs use the current effect, but retain their own settings for wet/dry mix. Setting the value of FX Channel to a specific channel is useful when you’re using the PC2R for playback with a sequencer. This enables you to specify which channel controls the selection of effects.
- Page 122 KB3 program to a channel that’s not the KB3 channel, the program change won’t take effect. Tuning You can tune the PC2R up or down one semitone, in one-cent increments. This can be useful if you are playing along with a recording, or playing with other acoustic instruments that can’t be easily retuned.
- Page 123 Most digital processing and recording equipment requires these bits to be transmitted, so by default, the PC2R sends these status bits (a value of On for this parameter). If your equipment isn’t processing or recording the PC2R’s digital audio output properly, try setting the value of this parameter to Off, which prevents the PC2R from sending the status bits.
- Page 124 Not editable. Indicates the version of the currently installed operating system software. Keyboard (Keyboard) and Version (Ver) Not editable (and not important for the PC2R). There are two fields: Keyboard and Ver. The Keyboard field indicates the length of the keyboard (0, of course, since there is no keyboard; in keyboard models of the PC2, this field would have a value of 76 or 88).
-
Page 125: Appendix A Maintenance And Upgrades
Maintenance and Upgrades Replacing the Battery Changes that you make to your PC2R settings are stored using a Lithium battery when the PC2R is powered off. When it is time to replace your battery, the PC2R will display the message: for a few seconds after being powered up. -
Page 126: Installing The Battery
Maintenance and Upgrades Replacing the Battery 4. Grasp the front of the PC2R and slide the top panel straight back until it’s free from the body of the PC2R (see Figure 5-2). Figure 5-2 Removing the top panel Installing the Battery 1. - Page 127 Maintenance and Upgrades Replacing the Battery Figure 5-4 Freeing battery from retaining clip 3. Insert your fingernail, the plastic knife, or the pen cap behind and under the battery, and lift the battery out, as shown in Figure 5-5. Figure 5-5 Removing battery 4.
-
Page 128: Replacing The Top Panel
The PC2R boot block lets you install new software and factory setups into Flash ROM. The boot block also provides hard reset and diagnostic options. -
Page 129: Setting Up For A Software Upgrade
3. Start playing the MIDI file from the sequencer. While loading, the bottom line of the PC2R’s display will show a message “segment X of Y” where X starts at 1 and increments with each segment up to Y segments. If the display continues to show “waiting for MIDI”... -
Page 130: Installing A New Boot Block
This resets all of the PC2R’s memory back to the initial factory state. This is necessary if you are upgrading the software or installing ROM options. If you’re not concerned about losing all of your work, or it has been saved using a MIDI Sysex dump (see page 4-5), then press the button beneath the Yes on the display. -
Page 131: Running The Diagnostics
The Run diags option executes the diagnostics that are loaded with the operating system. Some diagnostic tests will erase the PC2R’s memory, which will cause a hard reset when the PC2R is powered on again. Power off and power on your PC2R to leave diagnostics and return to... -
Page 133: Specifications
PC2R Keymaps ........ -
Page 134: Electrical Specifications
General Reference Specifications Electrical Specifications Voltage and Frequency Ranges 120 VAC 230 VAC Adapter Model PM0023A (Adapter Model PM0024A Safe voltage range 100–125 Volts RMS 200–230 Volts RMS Safe frequency range 58–65 Hz 48–65 Hz Power Consumption Voltage Level Power consumption 120 VAC 0.6 Amps 230 VAC... -
Page 135: Audio Specifications
General Reference Specifications Audio Specifications Line-Level Left and Right Analog Audio Outputs Balanced outputs using two 1/4-inch stereo (tip-ring-sleeve) phone plugs and shielded twisted- Connectors pair cable or unbalanced using two 1/4-inch mono (tip-ring) phone plugs and coaxial cable 400 , balanced, nominal Impedance 200 , unbalanced, nominal 21 dBu (8.7 Volts RMS) balanced, high-impedance load... -
Page 136: Parameter Reference
General Reference Parameter Reference Parameter Reference Parameter names in parentheses don’t appear in the display; only their values are visible. Subgroup Menu Parameter Range of Values Default (if any) KeyMap L Any keymap Keymap R Any keymap C -1 to G 9 Key Range C -1 to G 9 Block param 1... -
Page 137: Parameter Reference
General Reference Parameter Reference Subgroup Menu Parameter Range of Values Default (if any) Keyclick Off, On KeyclickVol -96 dB–0.0 dB NoteAttack Normal, Hard, PercHard NoteRelease Normal, Hard Perc Switch Off, On Perc Volume Soft, Loud Perc Decay Slow, Fast KB3: Envelope Perc Pitch Low, High Perc Ld/Fast... - Page 138 General Reference Parameter Reference Subgroup Menu Parameter Range of Values Default (if any) Vel Scale -300 to 300% 100% Vel Offset -127 to 127 Setups: Velocity Vel Curve Linear, Sin+, Cos+ Linear Vel Min 1–127 1–127 Wheel 1 Up Ctrl Num: Wheel 1 Up Pitch Up Setups:...
- Page 139 General Reference Parameter Reference Subgroup Menu Parameter Range of Values Default (if any) Arp Active Off, On C-1 to G9 Key range C-1 to G9 Zone Enable Off, On Latch Mode Keys, OverPlay, Arpeg, Add, Auto, Pedals Played, Up, Down, Up & Down, Up & Down Rpt, Random, Play Order Played Shuffle, Walk...
- Page 140 General Reference Parameter Reference Subgroup Menu Parameter Range of Values Default (if any) -12 dB to +12 dB -12 dB to +12 dB High -12 dB to +12 dB Local Control Off, On Clock Internal, External Internal Transmit Clock Off, On, Seq Touch 1 Linear, 2 Light1, 3 Light2, 4 Light3, 5 Hard1, 6 Hard2, 7 Hard3 1 Linear...
-
Page 141: Pc2R Audio Signal Routing
General Reference PC2R Audio Signal Routing PC2R Audio Signal Routing A Dry FX-A A to B A Wet Multi-effects B Wet FX-B Reverb B Dry Stereo / Mono Digital Analog... -
Page 142: Midi Controllers
General Reference MIDI Controllers MIDI Controllers None Bank MSB Bank LSB Sustain DataInc Mod Wheel Mod Wheel LSB Port Switch DataDec Breath Sosten NRg LBS Soft NRg MSB Foot Control Legato Rg LSB Port Time Port Time LSB Hold2 Rg MSB Data Data LSB SndCtl1... -
Page 143: Midi Controller Messages For Front-Panel Knobs
For example, sending MIDI 6 from your MIDI source is the same as turning Knob A on the PC2R (when the Shift LED is green). The value of the Ctrl Num parameter for Green Knob A (in each zone of the current setup) determines what you’re controlling when you send MIDI 6. If you want to change what happens when you send MIDI 6, change the value of the Ctrl Num parameter for Green Knob A. -
Page 144: Kb3 Controllers
KB3 feature in the first column. For example, to control Drawbar 1, you can send either MIDI 6 or MIDI 12. MIDI Controller Number KB3 Program Feature PC2R Voce Drawbar1 Drawbar2... -
Page 145: Pc2R Keymaps
General Reference PC2R Keymaps PC2R Keymaps Piano f Left Clav alt Partials 1 3 Ambient Kit 2 Piano f Right Clav alt2 Partials 1 4 Electric Kit 1 Piano mf Left Clav Key Release Partials 1 6 Electric Kit 2... -
Page 146: Pc2R Effects And Effects Parameters
General Reference PC2R Effects and Effects Parameters PC2R Effects and Effects Parameters Reverb Effect Param1 Param2 Param3 Param4 NiceLittleBooth Rvrb Time HF Damping Size Scale Density Viewing Booth Rvrb Time HF Damping Size Scale Density Drum Booth Rvrb Time HF Damping... - Page 147 General Reference PC2R Effects and Effects Parameters Effect Param1 Param2 Param3 Param4 My Garage Absorption Late Lvl Treb Freq Treb Gain Half Bath Rvrb Time HF Damping E DfDlyScl E DiffAmt School Stairwell Absorption HF Damping L PreDelay R PreDelay...
- Page 148 General Reference PC2R Effects and Effects Parameters Flange Effect Param1 Param2 Param3 Param4 Big Slow Flange LFO Period LFO TempoFdbk Level L/R Phase Sweet Flange LFO Period LFO Tempo Fdbk Level L/R Phase Throaty Flange LFO Period LFO Tempo HF Damping...
- Page 149 General Reference PC2R Effects and Effects Parameters Chorus + Reverb Effect Param1 Param2 Param3 Param4 Chorus Air Ch Rate L Ch Rate R Ch Depth LCh Depth R ChorusSmallRoom Ch Rate L Ch Rate R L Mix Rvrb R Mix Rvrb...
- Page 150 General Reference PC2R Effects and Effects Parameters Flange + Delay + Reverb Effect Param1 Param2 Param3 Param4 FlangeDelayRoom Fl Tempo Fl Phase R Dly Tempo Rvb HFDamp SloFlangeDlyRoom Dly Tempo Dly Fdbk L Dly Fdbk R Rvb HFDamp FlangeDelayHall Dly Tempo...
- Page 151 General Reference PC2R Effects and Effects Parameters Distortion Effect Param1 Param2 Param3 Param4 SuperShaper Shp Amoun tOut Gain None None SubtleDrumShape Low Amount Mid Amoun tHi Amoun tOut Gain 2 Band Shaper CrossOver Low Amount Hi Amount Out Gain Shaper->Reverb...
-
Page 152: Rotary Speaker
General Reference PC2R Effects and Effects Parameters Rotary Speaker Effect Param1 Param2 Param3 Param4 VibChor+Rotary1 Vibr/Chor Low Rate High Rate HiResonate VibChor+Rotary2 Vibr/Chor Low Rate High Rate Roto InOut VC+Dist+Rotary1 Vibr/Chor Low Rate High Rate Dist Drive VC+Dist+Rotary2 Vibr/Chor Low Rate... -
Page 153: Midi Implementation Chart
*Manufacturer’s ID = 07 *Use Multi to assign different programs to each MIDI channel Notes Device ID: default = 0; **The PC2R can send any control change programmable 0–127 Mode 1: Omni On, Poly Mode 2: Omni On, Mono O = yes... - Page 155 PC2R Programs........C-2...
-
Page 156: Pc2R Programs
Sine V2.0 All Out Uncle Clark’s Testify Loungin’ Live Drawbars ProgRock Organ The PC2R uses this program for Reverend Al’s Keith’s Revenge internal diagnostics. Don’t use it as Steve’s li’l B Bars 1-3 a performance program; it can get Flutey Flakes Fine Overdrive really loud. - Page 157 Program and Setup Information PC2R Programs Bank 6 (Internal 2) Sweet Ivories Janet’s Comp Fast Vtrig Rosin Titanium Guitar Nice Touch Grand Mild Sheen Emotional String Latin Lover Piano Solitude Scrape Glass Octave Strings Roto 12 String Piano Recital Air Society...
-
Page 158: Controller Assignments For Programs In Bank 0
Program and Setup Information Controller Assignments for Programs in Bank 0 Controller Assignments 003 Warm Grand Green Knob A FX-A Wet/Dry for Programs in Bank 0 Green Knob B FX-B Wet/Dry Green Knob D Vibrato Rate The tables in this section list the physical controller Amber Swch A Octave Shift assignments for the factory programs in Bank 0. -
Page 159: Controller Assignments For Programs In Bank 0
Program and Setup Information Controller Assignments for Programs in Bank 0 007 Piano for layers 011 Mono Stage Piano Green Knob A FX-A Wet/Dry Green Knob A FX-A Wet/Dry Green Knob B FX-B Wet/Dry Green Knob B FX-B Wet/Dry Green Knob D Vibrato Rate Green Knob D Vibrato Rate... -
Page 160: Piano & Strings
Program and Setup Information Controller Assignments for Programs in Bank 0 015 Piano & Strings 018 That 70’s E Pno Green Knob A FX-A Wet/Dry Green Knob A FX-A Wet/Dry Green Knob B FX-B Wet/Dry Green Knob B FX-B Wet/Dry Green Knob C LoPass Freq Green Knob C... -
Page 161: Dyno My E Pno
Program and Setup Information Controller Assignments for Programs in Bank 0 021 Dyno My E Pno 024 My Best Wurly Green Knob A FX-A Wet/Dry Green Knob A FX-A Wet/Dry Green Knob B FX-B Wet/Dry Green Knob B FX-B Wet/Dry Green Knob C Hi Freq Cut Green Knob C... -
Page 162: Wurly Road
Program and Setup Information Controller Assignments for Programs in Bank 0 028 Wurly Road 031 Ballad E Piano Green Knob A FX-A Wet/Dry Green Knob A FX-A Wet/Dry Green Knob B FX-B Wet/Dry Green Knob B FX-B Wet/Dry Green Knob C Timbre Green Knob C Timbre... -
Page 163: Rock E Grand
Program and Setup Information Controller Assignments for Programs in Bank 0 034 Rock E Grand 037 Celestial Comet Green Knob A FX-A Wet/Dry Green Knob A FX-A Wet/Dry Green Knob B FX-B Wet/Dry Green Knob B FX-B Wet/Dry Green Knob C Timbre Green Knob C Treble Cut... -
Page 164: Clav Classic
Program and Setup Information Controller Assignments for Programs in Bank 0 040 Clav Classic 043 Harpsichord Green Knob A FX-A Wet/Dry Green Knob A FX-A Wet/Dry Green Knob B FX-B Wet/Dry Green Knob B FX-B Wet/Dry Green Knob C Bass Level Green Knob C Timbre Green Knob D... -
Page 165: Ballad Of 3 Bars
Program and Setup Information Controller Assignments for Programs in Bank 0 046 Accordion 049 Ballad Of 3 Bars Green Knob A FX-A Wet/Dry Green Knob A FX-A Wet/Dry Green Knob B FX-B Wet/Dry Green Knob B FX-B Wet/Dry Green Knob C Timbre Green Knob C Perc XFade... -
Page 166: Grungy Overdrive
Program and Setup Information Controller Assignments for Programs in Bank 0 052 Grungy Overdrive 055 Pipe Organ Green Knob A FX-A Wet/Dry Green Knob A FX-A Wet/Dry Green Knob B FX-B Wet/Dry Green Knob B FX-B Wet/Dry Amber Swch A Octave Shift Green Knob C Layer XFade... -
Page 167: Slow Strings
Program and Setup Information Controller Assignments for Programs in Bank 0 060 Trombones 065 Slow Strings Green Knob C Timbre Green Knob A FX-A Wet/Dry Green Knob D Attack Control Green Knob B FX-B Wet/Dry Red Switch A Layer Switch Green Knob C Brightness (Cut) Red Knob B... -
Page 168: Fast Strings
Program and Setup Information Controller Assignments for Programs in Bank 0 068 Fast Strings 072 Ooh><Aah Green Knob A FX-A Wet/Dry Green Knob C Timbre Green Knob B FX-B Wet/Dry Green Knob D Layer XFade Green Knob C Timbre Red Switch A Layer Switch Green Knob D Release Control... -
Page 169: Cathedral Vox
Program and Setup Information Controller Assignments for Programs in Bank 0 079 Cathedral Vox 083 Slo Wood Flute Green Knob C Brightness (Cut) Green Knob A FX-A Wet/Dry Green Knob D Envelope Control Green Knob B FX-B Wet/Dry Red Switch A Layer Enable Green Knob C Breath Noise... -
Page 170: Orch Pad
Program and Setup Information Controller Assignments for Programs in Bank 0 086 Sweeper Bass 089 Crypt Green Knob A FX-A Wet/Dry Green Knob A FX-A Wet/Dry Green Knob B FX-B Wet/Dry Green Knob B FX-B Wet/Dry Green Knob C LowPass Freq Green Knob C Timbre Green Knob D... -
Page 171: U Say Tomita
Program and Setup Information Controller Assignments for Programs in Bank 0 092 Neptune 095 U Say Tomita... Green Knob A FX-A Wet/Dry Green Knob A FX-A Wet/Dry Green Knob B FX-B Wet/Dry Green Knob B FX-B Wet/Dry Green Knob C Chiff Level Green Knob C LoPass Freq... -
Page 172: Rich 6 String
Program and Setup Information Controller Assignments for Programs in Bank 0 098 Rich 6 String 101 Elec 12 String Green Knob A FX-A Wet/Dry Green Knob A FX-A Wet/Dry Green Knob B FX-B Wet/Dry Green Knob B FX-B Wet/Dry Green Knob C Timbre Green Knob C Timbre... -
Page 173: Round And Wound
Program and Setup Information Controller Assignments for Programs in Bank 0 104 Round and Wound 107 Dual-Tri Bass Green Knob A FX-A Wet/Dry Green Knob A FX-A Wet/Dry Green Knob B FX-B Wet/Dry Green Knob B FX-B Wet/Dry Green Knob C LoPass Freq (Cut) Green Knob C Timbre... -
Page 174: Upright Bass
Program and Setup Information Controller Assignments for Programs in Bank 0 110 Upright Bass 1 113 Studio Drums 3+4 Green Knob A FX-A Wet/Dry Green Knob A FX-A Wet/Dry Green Knob B FX-B Wet/Dry Green Knob B FX-B Wet/Dry Green Knob C Timbre Green Knob C Timbre... -
Page 175: Resonant Traps
Program and Setup Information Controller Assignments for Programs in Bank 0 116 Resonant Traps 119 Electro Kit Green Knob A FX-A Wet/Dry Green Knob A FX-A Wet/Dry Green Knob B FX-B Wet/Dry Green Knob B FX-B Wet/Dry Green Knob C Timbre Green Knob C Timbre... -
Page 176: Woody Marimba
Program and Setup Information Controller Assignments for Programs in Bank 0 122 Woody Marimba 126 Aborigine Jam Green Knob A FX-A Wet/Dry Green Knob A FX-A Wet/Dry Green Knob B FX-B Wet/Dry Green Knob B FX-B Wet/Dry Green Knob C Sample Start Amber Swch A Octave Shift... -
Page 177: Suite Piano
Program and Setup Information Controller Assignments for Programs in Bank 6 Controller Assignments 006 Suite Piano Red Knob B Vibrato (when Red Switch A is on) for Programs in Bank 6 MIDI 67 Soft pedal Green Knob D Vibrato rate The tables in this section list the physical controller Red Switch A Activates Red Knob B vibrato... -
Page 178: Organic Piano
Program and Setup Information Controller Assignments for Programs in Bank 6 013 Organic Piano 020 Barking Tines Green Knob C Duller Vox Red Knob B Tremolo depth MIDI 67 Disables piano layer Green Knob C Cutoff & Resonance Amber Swch B Enables unison Vox Amber Swch B Alternative attack... -
Page 179: Chorus Rock Pno
Program and Setup Information Controller Assignments for Programs in Bank 6 027 Chorus Rock Pno 034 Scrape Glass Red Knob B Vibrato (when Red Switch A is on) Red Knob B Vibrato depth Green Knob C Green Knob C Cutoff MIDI 67 Soft pedal Amber Swch B... -
Page 180: Belly Celeste
Program and Setup Information Controller Assignments for Programs in Bank 6 041 Belly Celeste 049 Mello Tone Wheel Red Knob B Tremolo depth Red Knob B Vibrato/tremolo depth Green Knob C Tremolo rate Green Knob C LFO rate control Amber Swch B Alternative attack Amber Swch B Alternative attack... -
Page 181: Goosed Riff Sect
Program and Setup Information Controller Assignments for Programs in Bank 6 056 Goosed Riff Sect 064 Fast Vtrig Rosin MPressure Pitch bend Green Knob C Timbre: duller Green Knob C Green Knob D Envelope: attack rate MIDI 67 Red Switch A Disables Tsax octave layer 065 Emotional String Red Knob B... -
Page 182: Crystal Voices
Program and Setup Information Controller Assignments for Programs in Bank 6 073 Crystal Voices 081 Rezzy Bass/Poly Red Knob B Vibrato/tremolo depth Red Knob B Vibrato depth Green Knob C LFO rate control Green Knob C Filter cutoff Red Switch A Disables oayer Amber Swch B Transposes one layer down an octave... -
Page 183: Reverse Feedback
Program and Setup Information Controller Assignments for Programs in Bank 6 087 Reverse Feedback 093 FreeResAhh Notch Red Knob B Vibrato depth Red Knob B Crossfade, layer detune Green Knob C Filter cutoff MPressure Treble boost Amber Swch B Transposes one layer down an octave Green Knob C Filter cutoff Amber Swch C... -
Page 184: Bright A Bass
Program and Setup Information Controller Assignments for Programs in Bank 6 099 Electric 12 106 Bright A Bass Green Knob C Filter cutoff Red Knob B Vibrato depth MIDI 67 Alternative attack MPressure Pitch bend Amber Swch C Enables layer Green Knob C Less Body, more tacky Green Knob D... -
Page 185: Radio Kings/Rods
Program and Setup Information Controller Assignments for Programs in Bank 6 112 Radio Kings/Rods 119 SumPumpKit MWsus Green Knob C Timbre Red Knob B Drone layer Amber Swch B Envelope control MPressure Drone layer Amber Swch C 2nd Kit Enable Green Knob C Timbre Green Knob D... -
Page 186: Bunch Of Perc
Program and Setup Information Controller Assignments for Programs in Bank 6 125 Bunch of Perc Red Knob B Alternative attack Pitch bend with MIDI 66 or Green MPressure Knob D Green Knob C Pitch change MIDI 67 Alternative attack Amber Swch B Disables layer Green Knob D Enables MPressure pitch bend... -
Page 187: Pc2R Setups
Program and Setup Information PC2R Setups PC2R Setups Dance C7 Unison Line Tek Jam C6-> Heavenly Synth / E Piano SmoothBass/Pads Dad’s Bad Clav Odyssey Pad CenturyGroov C7 Oom pah pah Contemplation Brass & Strings Dramatize After Hours Piano Trio... -
Page 188: Dance C
Program and Setup Information Physical Controller Assignments for Setups Physical Controller Assignments for Setups (The list of physical controller assignments for programs begins on page C-4.) 001 Dance C7 Zones Setup Feature Zone 1 Zone 2 Zone 3 Zone 4 Zone Status Play Play... -
Page 189: Unison Line
Program and Setup Information Physical Controller Assignments for Setups 002 Unison Line Zones Setup Feature Zone 1 Zone 2 Zone 3 Zone 4 Zone Status Play Play Play Play MIDI Channel Program 056 Big Brass 106 Two Finger Bass* 019 Hard E Piano* 053 Uptown Gospel Wheel 1 Up/Down Pitch Up/Down... -
Page 190: Physical Controller Assignments For Setups
Program and Setup Information Physical Controller Assignments for Setups 003 Tek Jam C6-> Zones Setup Feature Zone 1 Zone 2 Zone 3 Zone 4 Zone Status Play Play Play MIDI Channel Program 115 Coliseum Kit* 116 Resonant Traps* 117 Tripkit/Trashkit* Wheel 1 Up/Down Pitch Up/Down Pitch Up/Down... -
Page 191: Physical Controller Assignments For Setups
Program and Setup Information Physical Controller Assignments for Setups 004 Heavenly Zones Setup Feature Zone 1 Zone 2 Zone 3 Zone 4 Zone Status Play Play Play Mute MIDI Channel Program 055 Pipe Organ 044 Modern Harpsi 064 Lyrical Strings 092 Neptune Wheel 1 Up/Down Pitch Up/Down... -
Page 192: Synth / E Piano
Program and Setup Information Physical Controller Assignments for Setups 005 Synth / E Piano Zones Setup Feature Zone 1 Zone 2 Zone 3 Zone 4 Zone Status Play Play Play Mute MIDI Channel Program 017 Serious Classic 087 Lowdown Bass 084 Groove Bass 002 Dynamic Grand Wheel 1 Up/Down... - Page 193 Program and Setup Information Physical Controller Assignments for Setups 006 SmoothBass/Pads Zones Setup Feature Zone 1 Zone 2 Zone 3 Zone 4 Zone Status Play Play Play Mute MIDI Channel Program 095 U Say Tomita... 088 Rez Aah Pad 087 Lowdown Bass 083 Slo Wood Flute Wheel 1 Up/Down Pitch Up/Down...
-
Page 194: Dad's Bad Clav
Program and Setup Information Physical Controller Assignments for Setups 007 Dad’s Bad Clav Zones Setup Feature Zone 1 Zone 2 Zone 3 Zone 4 Zone Status Play Play Play Play MIDI Channel Program 040 Clav Classic 041 Touch Clav 042 Dual Wah Clav 108 Clav o’... -
Page 195: Odyssey Pad
Program and Setup Information Physical Controller Assignments for Setups 008 Odyssey Pad Zones Setup Feature Zone 1 Zone 2 Zone 3 Zone 4 Zone Status Play Play Play MIDI Channel Program 080 Solar Lead 088 Rez Aah Pad 093 Analogy Wheel 1 Up/Down Pitch Up/Down Pitch Up/Down... -
Page 196: Centurygroov C
Program and Setup Information Physical Controller Assignments for Setups 009 CenturyGroov C7 Zones Setup Feature Zone 1 Zone 2 Zone 3 Zone 4 Zone Status Play Play Play Play MIDI Channel Program 117 Tripkit/Trashkit 118 Beat Box 080 Solar Lead 080 Solar Lead Wheel 1 Up/Down None... -
Page 197: Oom Pah Pah
Program and Setup Information Physical Controller Assignments for Setups 010 Oom pah pah Zones Setup Feature Zone 1 Zone 2 Zone 3 Zone 4 Zone Status Play Mute Play Play MIDI Channel Program 046 Accordion 112 Studio Drums 1+2 099 12 String Guitar 110 Upright Bass 1 Wheel 1 Up/Down None... - Page 198 Program and Setup Information Physical Controller Assignments for Setups 011 Contemplation Zones Setup Feature Zone 1 Zone 2 Zone 3 Zone 4 Zone Status Play Play Play Play MIDI Channel Program 037 Celestial Comet 065 Slow Strings 094 Dream Catcher 111 Upright Bass 2* Wheel 1 Up/Down Pitch Up/Down...
-
Page 199: Brass & Strings
Program and Setup Information Physical Controller Assignments for Setups 012 Brass & Strings Zones Setup Feature Zone 1 Zone 2 Zone 3 Zone 4 Zone Status Play Play Play MIDI Channel Program 070 Velocity Strings Williams Brass Trombones Wheel 1 Up/Down Pitch Up/Down Pitch Up/Down Pitch Up/Down... - Page 200 Program and Setup Information Physical Controller Assignments for Setups 013 Dramatize Zones Setup Feature Zone 1 Zone 2 Zone 3 Zone 4 Zone Status Play Play Play Play MIDI Channel Program Williams Brass 064 Lyrical Strings 070 Velocity Strings 092 Neptune Wheel 1 Up/Down Pitch Up/Down Pitch Up/Down...
-
Page 201: After Hours
Program and Setup Information Physical Controller Assignments for Setups 014 After Hours Zones Setup Feature Zone 1 Zone 2 Zone 3 Zone 4 Zone Status Play Play Play MIDI Channel Program Scatman The Croons 111 Upright Bass 2 Wheel 1 Up/Down Pitch Up/Down Pitch Up/Down Pitch Up/Down... -
Page 202: Piano Trio
Program and Setup Information Physical Controller Assignments for Setups 015 Piano Trio Zones Setup Feature Zone 1 Zone 2 Zone 3 Zone 4 Zone Status Play Play Mute Mute MIDI Channel Program 111 Upright Bass 2 Piano 440 Trombones 056 Big Brass Wheel 1 Up/Down Pitch Up/Down None... - Page 203 Program and Setup Information Physical Controller Assignments for Setups 016 KB3 Setup Zones Setup Feature Zone 1 Zone 2 Zone 3 Zone 4 Zone Status Solo mute Mute Play MIDI Channel Program All Out All Out Round and Wound Wheel 1 Up/Down None None Pitch Up/Down...
-
Page 204: Touch Orch
Program and Setup Information Physical Controller Assignments for Setups 017 Touch Orch Zones Setup Feature Zone 1 Zone 2 Zone 3 Zone 4 Zone Status Play Play Play Play MIDI Channel Program 092 Neptune Williams Brass Virtuoso Perc Drums ‘n Bells Wheel 1 Up/Down Pitch Up/Down Pitch Up/Down... -
Page 205: One Man Trio
Program and Setup Information Physical Controller Assignments for Setups 018 One Man Trio Zones Setup Feature Zone 1 Zone 2 Zone 3 Zone 4 Zone Status Play Play Play MIDI Channel Program Stereo Grand Virtuoso Percussion Fret Not Bass Wheel 1 Up/Down None Pitch Up/Down Pitch Up/Down... - Page 206 Program and Setup Information Physical Controller Assignments for Setups 019 HolidayInnMiami Zones Setup Feature Zone 1 Zone 2 Zone 3 Zone 4 Zone Status Play Play Play Play MIDI Channel Program Solo Tenor Sax 106 Two Finger Bass Wurly Road Virtuoso Perc Wheel 1 Up/Down Pitch Up/Down...
- Page 207 Program and Setup Information Physical Controller Assignments for Setups 020 Ambients Zones Setup Feature Zone 1 Zone 2 Zone 3 Zone 4 Zone Status Play Play Play Play MIDI Channel Program Vox Lead 087 Lowdown Bass 093 Analogy Atmaz Wheel 1 Up/Down Pitch Up/Down None None...
- Page 208 Program and Setup Information Physical Controller Assignments for Setups 021 CrypticNiteGlo Zones Setup Feature Zone 1 Zone 2 Zone 3 Zone 4 Zone Status Play Play MIDI Channel Program Crypt 037 Celestial Comet Wheel 1 Up/Down Pitch Up/Down Pitch Up/Down Red Knob B None None...
- Page 209 Program and Setup Information Physical Controller Assignments for Setups 022 Seascape Zones Setup Feature Zone 1 Zone 2 Zone 3 Zone 4 Zone Status Play Play Mute Mute MIDI Channel Program 080 Solar Lead 065 Slow Strings 037 Celestial Comet Stereo Grand Wheel 1 Up/Down Pitch Up/Down...
-
Page 210: Rhythmic Chase
Program and Setup Information Physical Controller Assignments for Setups 023 Rhythmic Chase Zones Setup Feature Zone 1 Zone 2 Zone 3 Zone 4 Zone Status Play Play Play Play MIDI Channel Program 092 Neptune Piano For Layers Rhythm Maker Rhythm Maker Wheel 1 Up/Down Pitch Up/Down Pitch Up/Down... -
Page 211: Rhumba Combos
Program and Setup Information Physical Controller Assignments for Setups 024 Rhumba Combos Zones Setup Feature Zone 1 Zone 2 Zone 3 Zone 4 Zone Status Play Play Play Play MIDI Channel Program New Fluid Vibes* Drums ‘n Bells 065 Slow Strings* Punch Bass Wheel 1 Up/Down Pitch Up/Down... -
Page 212: E Bass/E Piano
Program and Setup Information Physical Controller Assignments for Setups 025 E Bass/E Piano Zones Setup Feature Zone 1 Zone 2 Zone 3 Zone 4 Zone Status Play Play Mute Mute MIDI Channel Program Dual Tri-Bass Pearly Keys Dual Tri-Bass Soft E Piano Wheel 1 Up/Down Pitch Up/Down Pitch Up/Down... - Page 213 Program and Setup Information Physical Controller Assignments for Setups 026 Babaganooj Zones Setup Feature Zone 1 Zone 2 Zone 3 Zone 4 Zone Status Play Play Play Play MIDI Channel Program Atmaz CrystalClavchd Rhythm Maker Fret Not Bass Wheel 1 Up/Down Pitch Up/Down Pitch Up/Down Pitch Up/Down...
-
Page 214: Warm Fusion
Program and Setup Information Physical Controller Assignments for Setups 027 Warm Fusion Zones Setup Feature Zone 1 Zone 2 Zone 3 Zone 4 Zone Status Play Mute Play Play MIDI Channel Program Alazawi The Croons 092 Neptune Big Red Wurly Wheel 1 Up/Down Pitch Up/Down Pitch Up/Down... -
Page 215: Ostinato / Lead
Program and Setup Information Physical Controller Assignments for Setups 028 Ostinato / Lead Zones Setup Feature Zone 1 Zone 2 Zone 3 Zone 4 Zone Status Play Play Play Play MIDI Channel Program FantAsmAtron Pearly Keys Ballad E Piano 080 Solar Lead Wheel 1 Up/Down Pitch Up/Down Pitch Up/Down... -
Page 216: Dr. Crane's
Program and Setup Information Physical Controller Assignments for Setups 029 Dr. Crane’s Zones Setup Feature Zone 1 Zone 2 Zone 3 Zone 4 Zone Status Play Mute Play Play MIDI Channel Program Vibes The Croons 110 Upright Bass 1 Vibes Wheel 1 Up/Down Pitch Up/Down Pitch Up/Down... -
Page 217: Perc/Organ Jam
Program and Setup Information Physical Controller Assignments for Setups 030 Perc/Organ Jam Zones Setup Feature Zone 1 Zone 2 Zone 3 Zone 4 Zone Status Play Play Play Play MIDI Channel Program Virtuoso Perc Prog Rocker’s 115 Coliseum Kit Studio Drums 3 Wheel 1 Up/Down Pitch Up/Down None... -
Page 218: Voxjazzcombo C
Program and Setup Information Physical Controller Assignments for Setups 031 VoxJazzCombo C7 Zones Setup Feature Zone 1 Zone 2 Zone 3 Zone 4 Zone Status Play Play Play Play MIDI Channel Program The Reverend’s Scatman 106 Two Finger Bass 116 Resonant Traps Wheel 1 Up/Down Pitch Up/Down Pitch Up/Down... -
Page 219: Where's Syd
Program and Setup Information Physical Controller Assignments for Setups 032 Where’s Syd??? Zones Setup Feature Zone 1 Zone 2 Zone 3 Zone 4 Zone Status Play Play Play Play MIDI Channel Program 000 Stereo Grand 037 Celestial Comet Fret Not Bass 099 12 String Guitar Wheel 1 Up/Down Pitch Up/Down... - Page 220 Program and Setup Information Physical Controller Assignments for Setups 125 PC2R Control Zones Setup Feature Zone 1 Zone 2 Zone 3 Zone 4 Zone Status Play Mute Mute Mute MIDI Channel Program 000 Stereo Grand 088 Rez Aah Pad 104 Round and Wound...
-
Page 221: Internal Voices
Program and Setup Information Physical Controller Assignments for Setups 126 Internal Voices Zones Setup Feature Zone 1 Zone 2 Zone 3 Zone 4 Zone Status Play Mute Mute Mute MIDI Channel Program 000 Stereo Grand 088 Rez Aah Pad 104 Round and Wound 040 Clav Classic Wheel 1 Up/Down Pitch Up/Down... - Page 222 Program and Setup Information Physical Controller Assignments for Setups 127 Clear Setup Zones Setup Feature Zone 1 Zone 2 Zone 3 Zone 4 Zone Status Play Mute Mute Mute MIDI Channel Program 000 Stereo Grand 000 Stereo Grand 000 Stereo Grand 000 Stereo Grand Wheel 1 Up/Down None...
- Page 223 Program and Setup Information Physical Controller Assignments for Setups 128 Default Setup Zones Setup Feature Zone 1 Zone 2 Zone 3 Zone 4 Zone Status Play Mute Mute Mute MIDI Channel Program 000 Stereo Grand 093 Analogy 105 Punch Bass 087 Lowdown Bass Wheel 1 Up/Down Pitch Up/Down...
-
Page 225: Appendix Dpc2R Drum Maps
Appendix D PC2R Drum Maps Drum maps determine the layout of PC2R drum programs with respect to the notes you play on your MIDI source. They don’t control the sounds contained in the drum programs as much as the location of the sounds within the MIDI note range. This means that for any given drum program, changing the drum map changes the sound (if any) that you hear when you play a particular note on your MIDI source. -
Page 226: Normal
Normal Hard Snare 1 Kick 3 Kick 3 Snare 4 Snare 4 Crash Cymbal Floor Tom Floor Tom Lo Mid Tom Lo Mid Tom Mid Tom Mid Tom Mid Tom Hi Tom Hi Tom Hi Tom Hi Tom Kick 1 Kick 1 Kick 1 Kick 2... -
Page 227: Pc2Remap
PC2ReMap Floor Tom Kick 1 Floor Tom Crash Cymbal Low Mid Tom Kick 3 Kick 2 Mid Tom Kick 1 Hi Tom Snare 4 Snare 3 Lo Mid Tom/Floor Tom Snare 2 Mid Tom Cross Stick Hi Tom Kick 1 Kick 1 Foot Hi-hat Hard Snare 1... -
Page 228: Gmremap
GMReMap Metronome Click Kick Drum 2 Kick Drum 1 Side Stick Snare Drum 1 Hand Clap Snare Drum 2 Lo Tom 2 Closed Hi Hat Lo Tom 1 Pedal Hi Hat Mid Tom 2 Open Hi Hat Mid Tom 1 Hi Tom 2 Crash Cymbal 1 Hi Tom 1... - Page 229 Kurzweil PC2R Musician’s Guide Index Index audio 2-3 MIDI 2-3 power 2-2 continuous controllers 5-21 Controller messages 3-14 Controller messages for front-panel knobs B-11 adding layers with velocity 4-25 controllers 4-10 additional sounds 1-2 KB3 B-12 ADR 5-3 MIDI (list) B-10...
- Page 230 Kurzweil PC2R Musician’s Guide Index selecting 3-16, 4-28 Internal-Voices program structure 4-12 wet/dry mix 3-17, 3-18 intuitive entry 4-6 effects and effects parameters, list of B-14 effects change mode 4-26 Effects edit mode 3-3, 4-26, 4-30, 5-32 effects sends 3-15 KB3 button 3-11 electrical specifications B-2...
- Page 231 1-1 muted zones 3-22 selecting 3-13 muting and soloing 4-13 programs, list of C-2, C-3 muting zones 3-21 protecting the PC2R’s memory A-1 naming objects 4-3 quick layers and splits 3-19 navigation 4-2, 4-6 No button 3-10 RAM A-1...
- Page 232 Kurzweil PC2R Musician’s Guide Index Store menu 5-5 storing effects 4-29 Save dialog 4-4 storing objects 4-3 saving structure of Internal-Voices programs 4-12 the autosplit key 3-21 structure of KB3 programs 4-15 effects 4-29 structure of setups 4-16 the internal setup 3-23...
-
Page 233: Index Of Parameters
Kurzweil PC2R Musician’s Guide Index of Parameters Index of Parameters Drum Remap (Global) 5-38 DSP parameters (Timbre) 5-2 Dump All Objects? (Global) 5-42 Duration (Arpeggiator) 5-29 Parentheses indicate the menu or editor containing the parameter. Index entries in italics are not parameter names. - Page 234 Kurzweil PC2R Musician’s Guide Index of Parameters KB3 Editor parameters 5-6–5-10 name, effect (Effects Editor) 5-33 KB3 MIDI Chan (Global) 3-6, 5-40 name, program (MIDI Receive mode) 5-34 Key Range Hi (Timbre) 5-2 name, program (Program) 5-12 Key Range Low (Timbre) 5-2...
- Page 235 Kurzweil PC2R Musician’s Guide Index of Parameters Scale (Controllers) 4-23, 5-21 Scale (Velocity) 5-16 Setup Chg Chan (Global) 5-36 Setup Editor parameters 5-10–5-32 Shift Limit (Arpeggiator) 5-30 Spring Pos (Controllers) 5-23 Spring Switch (Controllers) 5-23 ST (MIDI Xmit) 5-11 Steal Bar (KB3: Envelope) 5-10...
Need help?
Do you have a question about the PC2R and is the answer not in the manual?
Questions and answers