Kurzweil PC3 Musician's Manual Addendum
Hide thumbs
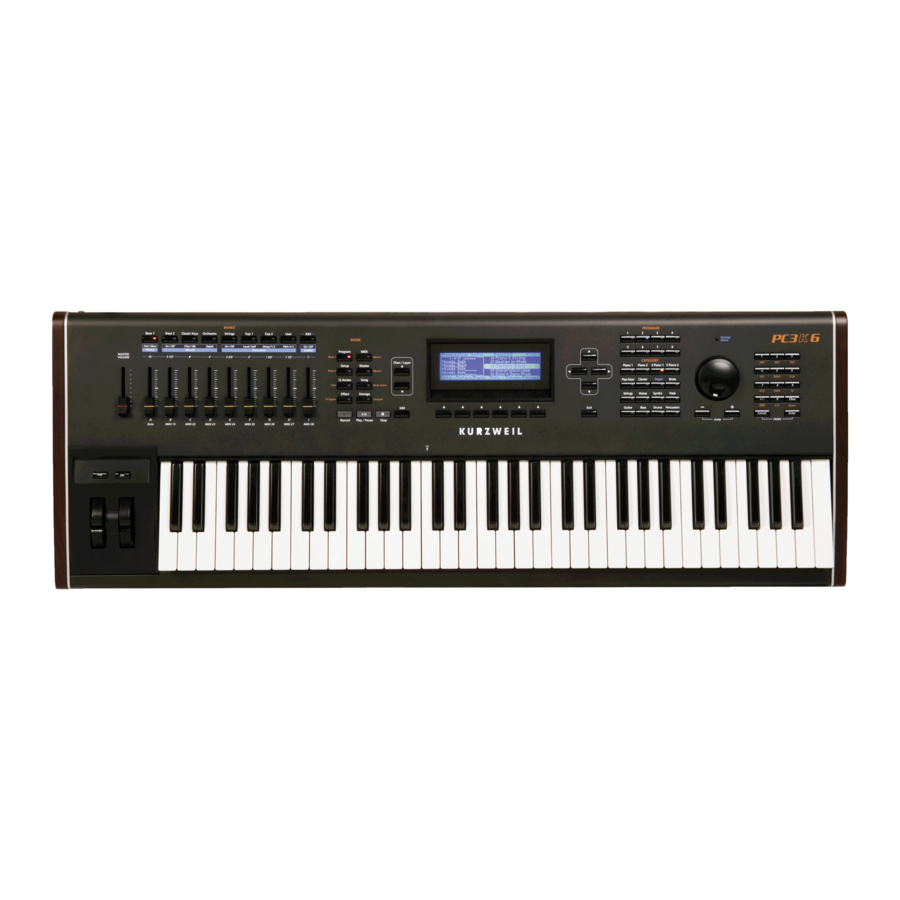
Also See for PC3:
- Musician's manual (309 pages) ,
- Getting started manual (122 pages) ,
- User manual (96 pages)
Table of Contents
Advertisement
Quick Links
Musician's Guide v2 Addendum
(includes PC3, PC3X, PC361, and X-Pro)
®
©2011 All rights reserved. Kurzweil ® is a product line of Young Chang Co., Ltd. Young Chang®, Kurzweil ®, V. A. S. T. ®, PC3®, KDFX®,
Pitcher®, and LaserVerb®, KSP8 ™, K2661™, K2600™, K2500™, and K2000™ are trademarks of Young Chang Co., Ltd. All other products
and brand names are trademarks or registered trademarks of their respective companies. Product features and specifications are subject to
change without notice.
You may legally print up to two (2) copies of this document for personal use. Commercial use of any copies of this document
is prohibited. Young Chang Co. retains ownership of all intellectual property represented by this document.
910532-001 – V2 January 2011
Advertisement
Table of Contents

Related Manuals for Kurzweil PC3


Summary of Contents for Kurzweil PC3
- Page 1 Musician’s Guide v2 Addendum (includes PC3, PC3X, PC361, and X-Pro) ® ©2011 All rights reserved. Kurzweil ® is a product line of Young Chang Co., Ltd. Young Chang®, Kurzweil ®, V. A. S. T. ®, PC3®, KDFX®, Pitcher®, and LaserVerb®, KSP8 ™, K2661™, K2600™, K2500™, and K2000™ are trademarks of Young Chang Co., Ltd. All other products and brand names are trademarks or registered trademarks of their respective companies. Product features and specifications are subject to change without notice. You may legally print up to two (2) copies of this document for personal use. Commercial use of any copies of this document is prohibited. Young Chang Co. retains ownership of all intellectual property represented by this document. 910532-001 – V2 January 2011...
- Page 2 The lightning flash with the arrowhead symbol, CAUTION within an equilateral triangle, is intended to alert the user to the presence of uninsulated "dangerous voltage" within the product's RISK OF ELECTRIC SHOCK enclosure that may be of sufficient magnitude DO NOT OPEN to constitute a risk of electric shock to persons.
- Page 3 Important Safety Instructions Read these instructions Keep these instructions. Heed all warnings. Follow all instructions. Do not use this apparatus near water. Clean only with dry cloth. Do not block any of the ventilation openings. Install in accordance with the manufacturer’s instructions. Do not install near any heat sources such as radiators, heat registers, stoves, or other appara‐ tus (including amplifiers) that produce heat. Do not defeat the safety purpose of the polarized or grounding‐type plug. A polarized plug has two blades with one wider than the other. A grounding type plug has two blades and a third grounding prong. The wide blade or the third prong are provided for your safety. If the provided plug does not fit into your outlet, consult an electrician for replacement of the obso‐ lete outlet. 10) Protect the power cord from being walked on or pinched, particularly at plugs, convenience receptacles, and the point where they exit from the apparatus. 11) Only use attachments/accessories specified by the manufacturer. 12) Use only with a cart, stand, tripod, bracket, or table specified by the manu‐ facturer, or sold with the apparatus. When a cart is used, use caution when moving the cart/apparatus combination to avoid injury from tip‐over. 13) Unplug this apparatus during lightning storms or when unused for long periods of time. 14) CAUTION: Danger of explosion if battery is incorrectly replaced. Replace only with the same or equivalent type (CR2032). 15) Refer all servicing to qualified service personnel. Servicing is required when the apparatus has been damaged in any way, such as power‐supply cord or plug is damaged, liquid has been spilled or objects have fallen into the apparatus, the apparatus has been exposed to rain or moisture, does not operate normally, or has been dropped. Warning‐ To reduce the risk of fire or electric shock, do not expose this apparatus to rain or mois‐ ture. Do not expose this equipment to dripping or splashing and ensure that no objects filled with liquids, such as vases, are placed on the equipment.
-
Page 4: Kurzweil International Contacts
Kurzweil International Contacts Contact the Kurzweil office listed below to locate your local Kurzweil representative. American Music & Sound 22020 Clarendon St, Suite 305 Woodland Hills, CA 91367 Phone: +1 (800) 431‐2609 Fax: +1 (818) 597‐0411 Email: info@americanmusicandsound.com Young Chang Co., Ltd. 9th Floor, Bldg 102, I‐Park, Jeongja‐Dong, Bundang‐Gu, Seongnam‐Si, Gyeonggi‐Do 463‐811 South Korea Phone: +82 (31) 786‐7986~7 Fax: +82 (31) 785‐2701 www.ycpiano.co.kr www.youngchang.com www.kurzweil.com TECHNICAL SUPPORT Email: support@kurzweil.com... -
Page 5: Table Of Contents
Table Of Contents Kurzweil International Contacts............................iv Chapter Table Of Contents Chapter 2 Program Mode The Program Mode Page ..............................2‐1 The Soft Buttons in Program Mode ........................2‐1 Editing VAST Programs..............................2‐1 The Program FX (PROGFX) Page ..........................2‐1 Output ..................................2‐1 Function Soft Buttons ..............................2‐1 INFO ...................................2‐1 Editing VAST Programs With KVA Oscillators......................2‐3 Setting KVA Oscillator Type ...........................2‐3 Advanced Use Of KVA Oscillators ........................2‐4 Editing KB3 Programs..............................2‐4 The MISC Page .................................2‐4 LeakMode ..................................2‐4 The OUTPUT Page ................................2‐4 Demo Song.................................2‐4 Chapter 3 Setup Mode Main Page..................................3‐1... - Page 6 Chapter 5 Effects INFOEDIT page (INFO)..............................5‐1 Chapter 6 MIDI Mode The TRANSMIT Page ..............................6‐1 Velocity Map (Transmit) ............................6‐1 Pressure Map (Transmit) ............................6‐2 The RECEIVE Page ................................6‐3 Velocity Map (Receive) ............................6‐3 Pressure Map (Receive) ............................6‐4 Local Keyboard Channel (LocalKbdCh) .......................6‐5 Chapter 7 Master Mode MAIN....................................7‐1 Tune ....................................7‐2 Transpose ...................................7‐2 FX Mode..................................7‐2 Drum Remap ................................7‐2 ID Entry..................................7‐2 Setup Controllers (SetupCtls) ..........................7‐2 Master Table Lock (Master Lock) ...........................7‐3 Demo Button ................................7‐3 Buttons Mode (Buttons)............................7‐3 Display ..................................7‐3 MAPS....................................7‐5...
- Page 7 Storage Mode The LOAD Page ................................9‐1 Export ....................................9‐2 Chapter 10 Keymap and Sample Editing The Keymap Editor ...............................10‐1 Keymap Editor Parameters ...........................10‐3 The Soft Buttons in the Keymap Editor.......................10‐5 Special Double Button Presses in the Keymap Editor..................10‐6 Building a Keymap ................................10‐7 Editing Samples ................................10‐9 The Miscellaneous (MISC) Page ........................... 10‐9 The TRIM Page..............................10‐12 Appendix A PC3 Legacy File Conversion Object Types and Conversion Details ..........................A‐1 Keymap Objects ...............................A‐1 Program Objects...............................A‐1 Setup Objects ................................A‐1 Index TOC-iii...
- Page 8 TOC-iv...
- Page 9 Introduction Chapter 1 Introduction This addendum contains updated sections for the printed copy of the PC3 Musician’s Guide that was included with your PC3. This addendum includes new features which are part of the v2 software update for the PC3 OS, as well as additional information that was not included in your printed copy of the PC3 Musician’s Guide. When using the v2 OS, the sections in this addendum should be referenced instead of any similar sections in The PC3 Musician’s Guide. The OS version installed on your PC3 can be viewed on the bottom left of the start‐up screen when the PC3 is first turned on. The OS version can also be viewed on the Object screen in Master Mode by pressing the OBJECT soft button (see OBJECT on page 7‐13 for details.) You can download the most recent version of the PC3 OS at www.kurzweil.com by going to the Downloads section, then clicking on the PC3 link. For details on installing updates to your PC3, see Appendix B, PC3 Bootloader, in the PC3 Musician’s Guide. You can also download the most recent version of the PC3 Musician’s Guide in PDF format at www.kurzweil.com by going to the Downloads section, then clicking on the PC3 link. ...
- Page 10 Introduction...
-
Page 11: Program Mode
Program Mode The Program Mode Page Chapter 2 Program Mode The Program Mode Page The Soft Buttons in Program Mode Press the Info soft button to see all of the controller assignments of the current program. Scroll down the page using the Alpha Wheel or the Plus/Minus buttons. Info text is automatically created when assigning a controller to a parameter within the Program Editor (see Automatic Info Creation on page 2‐2 for details.) Editing VAST Programs The Program FX (PROGFX) Page Output Each Output parameter specifies the rear panel analog output to which the bus on the same line (Insert, Aux1, or Aux2) is routed. (The Output setting for Insert determines the output destination of the main program signal, even if no insert effects are used.) Setting the Output to Main routes the signal of the selected bus to the main outputs. Setting the Output to Sec. routes the signal of the selected bus to the auxiliary outputs. - Page 12 Program Mode Function Soft Buttons To edit the text of a controller assignment, press the Text soft button. To create a new controller assignment info entry, press the New soft button (you will be prompted for a MIDI controller number.) To create a new controller assignment info entry with the same text as the current info entry, press the Dup soft button (you will be prompted for a MIDI controller number.) To delete the current controller assignment info entry, press the Delete soft button (you will be prompted to confirm or cancel.) To return to the program editor press the Done soft button or the Exit button. See Export on page 9‐2 for details on exporting program info. Automatic Info Creation Note: The following does not apply to controller assignments made for effects within the Chains editor. Info text for Chains must be manually created using the INFO page in the Chains Editor. When assigning a controller to a parameter on any of the Program Editor pages, an Info text entry is automatically created. (Info text allows you to view controller assignments from the Program Mode main page by pressing the Info soft button.) When assigning a controller to a parameter on any of the Program Editor pages, an i appears on the top line of the page to indicated that Info text has been created. If you return the controller assignment to OFF, the i disappears, indicating that the Info text has been removed (unless you have gone to the INFO Edit page, see note below.) The automatically created info will use the parameter name for the Info text. To rename the Info text, press the Edit button while the controller assignment field is still selected. This will bring you to the Info Editor page (see above) and the Info entry for the assigned controller. From the Info Editor page, press the Exit button to return to the page where you made the controller assignment. Note: After assigning a controller to parameter, if you go to the INFO Edit page, the Info text entries for each controller assignment will remain set unless you remove them with the Delete soft button on the INFO Edit page. If you change the controller assignment for a parameter after going to the INFO Edit page, the parameter’s last Info text entry will remain in addition to the newer Info text entry automatically made for the controller assignment. This is done a to ensure that user renamed Info text does not get deleted if a controller assignment was accidentally changed while editing the program. To remove an unused Info text entry, locate the entry on the INFO Edit page and use the Delete soft button.
-
Page 13: Editing Vast Programs With Kva Oscillators
Program Mode Editing VAST Programs With KVA Oscillators Editing VAST Programs With KVA Oscillators Setting KVA Oscillator Type The PC3 comes with 22 different KVA oscillators. There are 11 high quality anti‐aliased oscillators (free of digital artifacts,) and 11 oscillators that exhibit some aliasing (digital artifacts) in the higher octaves. The anti‐aliased oscillators use up more DSP resources than the ones with aliasing, but the improvement in sound quality is quite noticeable. We strongly recommend using the anti‐aliased oscillators for most applications. The tables below list KVA oscillators by type and function block size. Before setting an oscillator, you must choose an algorithm which includes a block that matches the block size for the oscillator that you wish to use. See The Algorithm (ALG) Page and Algorithm Basics in The PC3 Musician’s Guide for more on selecting algorithms. Once you have picked an algorithm with the desired block size, highlight the block and use the alpha wheel to scroll through the available functions until you find the desired oscillator. The SYNC SQUARE oscillator is an 8 block oscillator that requires the use of two layers (4 blocks each) and the Alt Input feature of cascade mode. See The PC3 Musician’s Guide for details on setting up the Sync Square oscillator. Note: If you put more than one oscillator in an algorithm, you will only hear the output of the last oscillator in the algorithm, unless an algorithm is used to route the earlier oscillator around the last oscillator and into a MIX function block, or if the last oscillator processes its audio input. Anti-Aliased Oscillators Aliased Oscillators Size... -
Page 14: Advanced Use Of Kva Oscillators
Program Mode Editing KB3 Programs Advanced Use Of KVA Oscillators Oscillator Specific Control And Modulation Parameters: Several KVA oscillators also have their own modulation parameters that must be accessed to control the oscillator’s intended function. Below is a list of these oscillators and their distinctive parameters, grouped by block size. Though the following parameters could be left at one setting, utilizing one of the DSPCTL or DSPMOD techniques described in the above examples will expose a wider range of expression from each oscillator. 1 Block: SINE+ [Aliased (not recommended)] Same as 2 block version, but without the Sine+Am parameter. SAW+ [Aliased (not recommended)] A saw oscillator that can add an input signal to its output. NOISE+ [Aliased (not recommended)] A noise oscillator that can add an input signal to its output. Editing KB3 Programs The MISC Page LeakMode Selects between different leakage models, determining which leakage harmonics are emphasized. TypeA provides an overall tone wheel leakage, with all tone wheels leaking a small amount. TypeR, TypeX, TypeY, and TypeZ emulate different degrees of drawbar leakage, where the leakage components correspond to the nine drawbars, instead of all the tone wheels. The OUTPUT Page Demo Song The Demo Song parameter allows you to choose the demo song for the current KB3 program. ... -
Page 15: Setup Mode
Setup Mode Main Page Chapter 3 Setup Mode Main Page Press the Info soft button to see a list of all of the controller assignments for all zones of the current setup. On the Info page, use the Alpha Wheel, cursor buttons, or ‐ / + buttons to scroll through the list. -
Page 16: The Setup Editor
Setup Mode The Setup Editor The Setup Editor The Channel/Program (CH/PROG) Page Use the Out parameter to set the rear panel audio outputs used for each zone of the current Setup. This parameter determines the output settings for the main program signal and insert effects of each zone (for Aux effects output settings, use the Output parameter on the Setup Mode AUX1 or AUX2 pages.) A setting of Auto will make that zone output audio based on the settings for the program used by that zone. Program output settings are set in the Program Editor using the Output parameter on the top line of PROG FX page (see Output on page 2‐1 for details) or the Output parameter on the top line of LAYER FX page (see the PC3 Musician’s Guide for details.) A setting of Pri. (primary) will output track audio to the MAIN Balanced Analog Outputs. A setting of Sec. (secondary) will output track audio to the AUX Balanced Analog Outputs. Input Channel In Setup mode, an external MIDI device (such as a keyboard or sequencer) will play notes of a single program by default (if the Local Keyboard Channel parameter is set to off, see page 6‐5 for details.) The played program will be on a Zone that has a Channel parameter (on the CH/ PROG page) which matches the channel on which the external MIDI device is transmitting. (If no Zone’s Channel parameter matches, the external device will play notes of the last program that was using that channel in Program Mode or from a previously loaded Song or Setup.) When the Program of a Setup Zone is played this way, Setup MIDI parameters (most noticeably key range and transposition) will not be applied. If you want these parameters applied, set the Input Channel parameter to match the channel on which the external MIDI device is transmitting. To play the entire Setup from an external MIDI device, see Local Keyboard Channel (LocalKbdCh) on page 6‐5. When Local Keyboard Channel is set to something other than Off, the ... -
Page 17: Controllers
Continuous Controller Parameters Entry (Ent) and Exit Values Entry value allows you to specify an initial value for a controller in a Setup that will be sent whenever you select that Setup. For example, if you want to make sure that all of the modulation for the Program in a Zone is turned off when you select a Setup, use the Setup Editor to assign a physical controller to a destination of MIDI 01 (MWheel) and set Entry Value to 0. (The Mod Wheel is usually assigned to destination MIDI 01 MWheel, which is used to control a modulation parameter for most Programs.) Entry values ignore the current position of the physical controller when the setup is selected. By default, once the Setup is loaded and the entry values have been sent, moving a controller will instantly send new controller values. This can cause a jump in values if the controller happens to be set to a value far from its entry value. To avoid these jumps, change the SetupCtls parameter in Master Mode to PassEntry (see Setup Controllers (SetupCtls) on page 7‐2 for details.) With SetupCtls set to PassEntry, moving the controller will have no effect until it moves past its entry value. In this case, continuing the modulation example above, moving the assigned controller won’t turn on any modulation until it’s pushed all the way down (passing entry value 0,) and then up again. An entry value of None is quite different from a value of 0. None means that there will be no initial controller command when the setup is selected, and any subsequent movement of the physical controller will be effective. Exit Value tells the PC3 to send a value for that controller whenever you leave the setup, either by selecting another setup or by selecting a different mode altogether. It can be very useful when a controller is doing something to the sound, and you don’t want that effect to continue after you leave the setup. For example, if you want to make sure a zone’s pitch returns to normal whenever you leave a setup, you would set Exit Value to 64 for any controller whose Destination parameter is set to PitchUp. Again, None means no command is sent. Note: Programs can also be saved with controller entry values (on the Program Editor CONTROLLERS page.) When a Setup is loaded, entry values for the Programs in the Setup are sent first, followed by the entry values for the Setup. Because of this, if a Setup and a Program used by a Setup have entry values set for the same controller, the entry value for the Setup will be used. If a Program used by a Setup has an entry value set for a controller, but the Setup has an entry value of None for the same controller, the entry value from the Program is used. - Page 18 Setup Mode The ARPEGGIATOR & ARPEGGIATOR 2 (ARP1, ARP2) Pages The ARPEGGIATOR & ARPEGGIATOR 2 (ARP1, ARP2) Pages Each zone in a setup has its own Arpeggiator. When activated, each Arpeggiator takes MIDI note input from the PC3 keyboard (or via MIDI) and outputs a rhythmic pattern of MIDI notes. You can control the speed and nature of the pattern in real time. Each Arpeggiator can affect both the PC3 and external MIDI instruments. The notes produced by the Arpeggiator in a given zone go to all of that zone’s destinations: local, MIDI, or both. You can also set one zone’s arpeggiator to override arpeggiators on other zones using the Arpeggiator Global (ArpGlobal) parameter on Setup Mode’s COMMON page. The concept behind the PC3’s Arpeggiators is fairly simple, although the options are extensive. You might think of each Arpeggiator as a “note processor,” generating complex output from relatively modest input. You can select any number of notes for the input, and tell the Arpeggiator to recognize and remember them. This is called “latching” the notes. The Arpeggiator then processes them by playing them repeatedly, and/or transposing them up and down the keyboard. You have control over several processing parameters: velocity, order, duration, transposition, orchestration, whether the notes are played simultaneously, and whether the intervals between notes are filled chromatically. You can also tell the Arpeggiator how to deal with new information coming from the keyboard when the Arpeggiator is already processing notes. The arpeggiator also includes step sequencers for note and velocity shifting, allowing you to more precisely control how your MIDI note input is processed. Set the arpeggiator parameters on the ARPEGGIATOR and ARPEGGIATOR2 pages:...
-
Page 19: The Arpeggiator Page
ShiftLimit 0-60 Limit Option Stop, Reset, Unipolar, Bipolar, Float Res, Unipolar Float Uni, Float Bip ShftPattrn (Shift Pattern) Off, (1-69 factory patterns, user created patterns) Active The first parameter on the Arpeggiator menu is Active, which specifies whether or not the Arpeggiator is on for the current zone. This parameter can be switched from the ARPEGGIATOR page, or for real‐time control, it can be switched on using Controller number 147 (ArpOn) and switched off using Controller number 148 (ArpOff); these Controllers can, of course, be assigned as the destination of a PC3 physical controller. Turning Active on affects zones whose ZoneArpeg values are also set to On. By setting the ZoneArpeg parameter (on the CH/PRG page) to Off or On in the individual zones of a setup, you can choose which zones will be controlled by the Arpeggiator when it is on. Beats The Beats parameter sets the number of notes per beat. The tempo is based on quarter notes. Therefore, if you set it to 1/4, you will get one note per beat of the clock. At 1/16, you will get 4 notes per beat, and so forth. You can go all the way to 96 notes per beat (1/384), but at most tempos, divisions smaller than 1/64 will sound pretty much the same. To find a Beats value, ... - Page 20 Setup Mode The ARPEGGIATOR & ARPEGGIATOR 2 (ARP1, ARP2) Pages multiply the notes you want per beat by 4. For example, 4 notes per beat (16th notes) would be 4*4=16, a Beats value of 1/16. Three notes per beat (8th note triplets) would be 3*4=12, a Beats value of 1/12. Six notes per beat (16th note triplets) would be 6*4=24, a Beats value of 1/24. Note that when recording arpeggiations to a PC3 MIDI track, you must turn on real‐time quantization and set it to the same Grid value in order for the selected Beats value to sync properly with the tempo grid (see Quant and Grid on page 12‐17 of The PC3 Musician’s Guide.) Play Order This parameter determines the order in which the PC3 plays arpeggiated notes. Played causes them to play back in the chronological order in which you played and latched them. Upwards means that notes play in ascending pitch order, regardless of their chronological order. Downwards means descending pitch order. UpDown causes notes to play from lowest pitch to highest, then from highest pitch to lowest, repeating the cycle until you stop the arpeggiation. The notes at the very top and very bottom only play once. UpDown Repeat is similar to UpDown, except that the notes at the top and bottom play twice (repeat) when the Arpeggiator reverses direction. Random plays the currently latched notes in completely random order. Shuffle plays them at random, but keeps track of the notes so that no note repeats until all of the others have played. Walk is a “random walk” order: each successive note is either the next or previous note (in chronological order). For example, suppose you’ve latched four notes—G 4, B 4, D 5, and F 5— in that order. The first note the Arpeggiator plays is the G 4. The second note will be either B 4 ...
- Page 21 The ARPEGGIATOR & ARPEGGIATOR 2 (ARP1, ARP2) Pages Pattern engages a step sequencer for arpeggiator velocity patterns, which shifts the velocity of each arpeggiated note according to a sequenced pattern. There are 74 pre programed velocity patterns that you can choose from the VelPatt field, some of which create rhythms by using velocity values of ‐127 or “none” to leave rests in the arpeggiation. The sequencer uses the velocity received from the first note played as the center position to shift velocities up or down from. If no other keys are playing, patterns will start over each time a key is pressed (there are some exceptions to this when using ARPEGGIATOR Latch parameters other than “Keys,” though a newly triggered pattern will always start at step 1.) When triggering velocity patterns from more than one key at a time, each consecutive step of the pattern shifts the velocity from a different inputted key, the order of which is decided by the order parameter on the ARPEGGIATOR page. Note: For patterns with negative velocity values, if the velocity of the first played note is low enough that a pattern step could result in a velocity of zero, some notes may have a velocity of zero and therefore produce no sound. You can edit the included patterns by pressing “Edit” with a pattern highlighted in the VelPatt field (see edit screen below.) The top line of the “EditVelocityPatt” page displays the pattern’s name and total number of steps. This page also shows the full name for a pattern whose name does not fit on the ARPEGGIATOR page. Each pattern can have up to 48 steps, and each step can shift velocities by ± 127 steps. You can insert a step with a value of “none” by entering ‐127 and then shifting down one more step. A step with the value “none” causes the arpeggiator to play nothing for that step, allowing you to create rhythmic patterns by using “none” to leave spaces. Pressing Step‐ removes the last step in the list, pressing Step+ inserts a new velocity step at the end of the list (the pattern editor remembers the values of removed steps until you save or exit.) Use the cursor to move between pattern steps, use the alpha wheel, alphanumeric pad, or plus/minus buttons to enter the velocity shift amount for each step. Press More to see a second page for patterns with more than 24 steps. Press Delete to delete the pattern from memory. Press Rename to rename the pattern and save. Pressing Save gives you the option to save the pattern or rename and save. To create a new VelPatt, edit an existing pattern and choose Rename when saving. Press Exit to return to the ARPEGGIATOR page. When exiting the editor, it will automatically give you the option to save the pattern if changes have been made. For more detailed instructions on these functions, see Saving and Naming on page 5‐2 of The PC3 Musician’s Guide. The Human1 through Human4 settings randomly change played note velocity within a range in order to make arpeggiation sound more human like, with each note varying slightly in velocity. The Human settings use the velocity received from the first note played as the center of the randomization range. Each note of the arpeggiator will randomly choose a velocity within the given range. (See the table below for velocity ranges.)
- Page 22 ± 6 Human3 ± 10 Human4 ± 15 Chimp1 ± 25 Chimp2 ± 35 Chimp3 ± 50 Chimp4 ± 64 MissNotes1 through MissNotes9 makes the PC3 randomly miss playing a percentage of inputted notes. See the table below for percentages and their equivalent settings. Each of these settings also randomly changes some of the inputted velocities in a range of ± 5, with the purpose of simulating a more human played sound. Note: Missed Notes are actually output as notes with a velocity of zero. Approximate % of Velocity Setting Notes Missed MissNotes1 % 10 MissNotes2 % 20 MissNotes3 % 30...
- Page 23 Setup Mode The ARPEGGIATOR & ARPEGGIATOR 2 (ARP1, ARP2) Pages Shift Amount You can tell the Arpeggiator to transpose all of the currently latched notes each time it plays through them. Shift determines how much transposition will occur for each cycle of notes. For example, if you have latched C4 and F4, and you assign a Note Shift of 2, the Arpeggiator will play C4, F4, D4, G4, E4, A4, and so on until it reaches the Limit value. The Shift values can range from ‐88 to 88, with 0 (the default) being no transposition. Shift Limit Limit determines how far up or down the Arpeggiator shifts from the original note. The minimum value is 0, and the maximum is 60. When the Arpeggiator reaches the limit, the Arpeggiator responds according to the setting for the Limit Option parameter. Limit Option This parameter determines what the Arpeggiator does when it has shifted the currently latched notes up (or down) to the shift limit. Stop causes the Arpeggiator to stop when it reaches the shift limit. Reset causes the Arpeggiator to return to its original pitch and repeat the latched cycle of notes, transposing each cycle according to the settings for Note Shift and Shift Limit. If the limit allows the notes to go out of MIDI range (for example, if you set Shift to 12, set the limit to 60, and play C6), then those “ghost” notes don’t sound, but they take up rhythmic space: the Arpeggiator waits for the cycle to play itself out before starting over. Unipolar means that after playing up to the shift limit, the Arpeggiator begins shifting notes in the opposite direction, until it reaches the original pitch, where it reverses again. To determine the next note when it reaches the shift limit, the Arpeggiator calculates the interval between the shift limit and what the next note would be if the shift limit weren’t there. It then plays the note that is the calculated interval lower than the last note before the shift limit. The same thing happens in reverse when the arpeggiated notes get back down to the original pitch. The following table makes this easier to visualize by showing the result of arpeggiating one note (C4) in Unipolar mode, with Note Shift set to 3 ST and various values for Shift Limit. Resulting Arpeggiation (When LimitOption is Unipolar) Shift Limit Comment Down...
- Page 24 Setup Mode The ARPEGGIATOR & ARPEGGIATOR 2 (ARP1, ARP2) Pages Float Res adds a bit of apparent randomness to the process. “Float” means that when the Arpeggiator reaches the shift limit, it resets—but not to its original pitch as with plain Reset. Like Unipolar and Bipolar, it looks at the first note that would exceed the shift limit, and calculates the interval between that note and the shift limit. It then restarts the cycle of latched notes, transposing the entire cycle by the interval it just calculated, then shifting each subsequent cycle by the value of Note Shift, until it reaches the shift limit again. Here’s a very simple example. Suppose that the only note in the Arpeggiator cycle is C4, Note Shift is 4 (a third), and Shift Limit is 7 (so notes won’t get shifted above G4). The Arpeggiator plays C4, then E4. The next note should be G 4, but that’s above the shift limit—so the PC3 calculates the difference between that G 4 and the shift limit (G4): one semitone. It adds that difference to the original starting note (C4) and plays that note next—C 4. The next note (F4) is within the shift limit, but the next note (A4) isn’t, so it gets translated into D4—and so on. Float Uni uses the same concept and applies it to Unipolar mode: when the Arpeggiator reaches the shift limit, it calculates the difference between the next note and the limit, and transposes the next cycle of notes down by that interval, then shifts each subsequent cycle down until it reaches the original pitch. Float Bip is similar to Float Uni, but the downward shift limit isn’t the original pitch, it’s the negative of the Shift Limit value. The Arpeggiator can be a lot of fun, even if you don’t always understand exactly what it’s doing. Keep in mind that the stranger the algorithm you set up, the more unlikely the notes will stay close to one key, so if you want to create something that’s going to sound at all diatonic, keep it simple. Shift Pattern (ShiftPatt) ShiftPatt engages a step sequencer for arpeggiator note patterns. The inputted note number of ...
- Page 25 Setup Mode The ARPEGGIATOR & ARPEGGIATOR 2 (ARP1, ARP2) Pages step. A step with the value “none” causes the arpeggiator to play nothing for that step, allowing you to create rhythmic patterns by using “none” to leave spaces. When the arpeggiator determines the range of pattern notes played with the Limit parameter (see below,) steps with a value of “none” will be calculated as a step value of 0. Use the chan up/down buttons to change the direction in which pattern steps are played (indicated by Up, Down, or Flat on the right of the top line.) With pattern direction set to Up, the pattern plays as expected, starting at step one and moving up through each step towards step 48. With pattern direction set to Down, the pattern starts at step one, but then moves to the last step and continues to move backwards through the steps down towards step 1. Additionally, patterns set to Down base all notes after step one in the octave below the first note played. These settings are most useful for arpeggiating chord patterns upwards or downwards from the root note. Patterns set to Flat will not repeat in other octaves like those set to Up or Down (depending on the Limit parameter.) Patterns set to Flat play without transposition, the Limit parameter will not transpose the pattern but it can still restrict note range. Press Delete to delete the pattern from memory. Press Rename to rename the pattern and save. Pressing Save gives you the option to save the pattern or rename and save. To create a new ShiftPatt, edit an existing pattern and choose Rename when saving. Press Exit to return to the ARPEGGIATOR page. When exiting the editor, it will automatically give you the option to save the pattern if changes have been made. For more detailed instructions on these functions, see Saving and Naming on page 5‐2 of The PC3 Musician’s Guide. 3-11...
-
Page 26: The Arpeggiator 2 Page
Setup Mode The ARPEGGIATOR & ARPEGGIATOR 2 (ARP1, ARP2) Pages The ARPEGGIATOR 2 Page Parameter Range of Values Default Latch Keys, Overplay, Arpeg, Add, Auto, Keys Pedals, Autohold, 1NoteAuto Low Key C -1 to G9 C -1 High Key C -1 to G9 Glissando Off, On SyncTo... - Page 27 Setup Mode The ARPEGGIATOR & ARPEGGIATOR 2 (ARP1, ARP2) Pages Auto is independent of Latch; every note you play is automatically latched, and the Arpeggiator runs as long as you hold at least one arpeggiated note. As long as you keep holding on at least one note (it doesn’t have to be the same note the whole time), every note you play in the arpeggiation range gets latched. Pedals is sort of a combination of Keys, Add, and Overplay modes. It relies on both Latch (MIDI 157) and Latch2 (MIDI 158). If neither latch controller is on, notes will arpeggiate only while you are holding down keys (similar to Keys mode). If you activate Controller 158, the keys currently held down will latch, and any additional keys played while Controller 158 is on will also latch (similar to Add mode). When Controller 158 is off, any keys that are not currently held down will be removed from the arpeggiation. If you activate Controller 157, keys currently held down will latch, and any additional keys played while Controller 157 is on will play normally (similar to Overplay mode). This mode is called Pedals mode because you might want to assign Footswitch 1 to Latch (Controller 157) and Footswitch 2 to Latch2 (Controller 158) to make the pedals function similarly to sustain and sostenuto pedals. Additionally, you could assign one Footswitch to SusLatch (Controller 160)—doing this makes the Footswitch act as a sustain pedal when Arp is off, and as a Latch pedal when Arp is on. Autohold is similar to Auto. Holding at least one arpeggiated note on and playing other notes latches those notes. Unlike in Auto mode, if you stop holding at least one arpeggiated note on, the arpeggiation continues playing (although you can’t latch any more notes). In this case, if you strike another key within the setup’s arpeggiation range, you start a new arpeggiation sequence. Autohold is useful for arpeggiating chords: when you play a chord, it gets latched, and continues arpeggiating after you release the chord. When you play another chord, the previous chord gets unlatched, and the new one gets latched. You can use the Panic soft button to stop arpeggiation at any time. 1NoteAuto is similar to Autohold, except only the last note played is latched (even if previously played notes are still being held.) 1NoteAuto is specifically designed for use with Shift Patterns (see above,) because Shift Patterns are designed to be played from one note at a time (though you can use 1NoteAuto without a Shift Pattern as well.) Using 1NoteAuto for zones that use a Shift Pattern ensures that Shift Patterns will sound correct by only allowing one note at a time to trigger the pattern. You can use the Panic soft button to stop arpeggiation at any time. 1NoteAutoLow and 1NoteAutoHi are also designed for use with Shift Patterns. They work ...
- Page 28 “timekeeper.” If the lead arpeggiator starts first, the bass arpeggiator will see that as the first available arpeggiator to sync to and will do so. If the bass arpeggiator is started first, the lead arpeggiator will see that as the first available arpeggiator to sync to and will do so. This can be very handy if you are using multiple arpeggiators and want to do some live improvisation; you can start and stop different arpeggiators and as long is there is one arpeggiator playing, any arpeggiator with SyncTo set to FirstArp.Av. will sync back up when triggered again. You can also choose FirstRiff.Av., which behaves the same way as FirstArp.Av., but makes your arpeggiator look for the first available riff to sync to. A setting of Main Seq. will sync the arpeggiator to the song currently loaded in Song mode. You can select a song in Song mode, then play it from setup mode with the front panel Play/Pause button. (Doing this temporarily replaces the programs in your setup’s zones with the program used for each channel in the song, so it’s best to make a setup that uses the same programs as your song on the same MIDI channels. If you plan on syncing riffs with a song, it may be easier to start by creating a setup, then recording the setup into a song. See Recording A Setup To Song Mode on page 7‐64 of The PC3 Musician’s Guide for details.) A setting of First Avail. will sync the arpeggiator to the first available arpeggiator, riff, or song from Song mode. Note: If you have multiple arpeggiators or riffs already playing when using FirstArp.Av., FirstRiff.Av., or First Avail. for the current arpeggiator, the current arpeggiator will sync to the arpeggiator or riff of the lowest numbered zone that has an arpeggiator or riff playing. SyncType The SyncType parameter allows you to choose how your arpeggiator will sync to other arpeggiators, riffs, or a song playing from Song mode. With SyncType set to None, your arpeggiator will start playing as soon as it is triggered. It will not sync to anything. With SyncType set to DownBeat, if there is already something playing to sync to, the current arpeggiator will wait for the downbeat of the next measure before starting; so, you can trigger the arpeggiator to start ahead of time, and have it start in sync at the downbeat of the next measure. If Syncing to an arpeggiator, see Num Beats on page 3‐15 for details on changing when an arpeggiator’s downbeat will occur. With SyncType set to AnyBeat, if there is already something playing to sync to, the arpeggiator will wait only until the next beat. Depending on when you trigger the arpeggiator, it will sync up, but it may be on an upbeat or a ...
- Page 29 The ARPEGGIATOR & ARPEGGIATOR 2 (ARP1, ARP2) Pages set to DownBeatWait, for instance, and trigger the arpeggiator while no other arpeggiators are running. As soon as you start something else to sync to, the bass arpeggiator will start playing as well (provided that it is set to sync to something else or the first available.) If something to sync to is already running, DownBeatWait behaves just like DownBeat. With SyncType set to AnyBeatWait, if there is something playing to sync to, the arpeggiator will wait for the next beat to start. The difference from AnyBeat is that if there is nothing to sync to, this arpeggiator will not start. This can be useful if you want to start multiple arpeggiators synced to something else. You could have a bass arpeggiator set to AnyBeatWait, for instance, and trigger the arpeggiator while no other arpeggiators are running. As soon as you start something to sync to, the bass arpeggiator will start playing as well (provided that it is set to sync to something else or the first available). If another arpeggiator is already running, AnyBeatWait behaves just like AnyBeat. With SyncType set to Loop, if there is already a riff or song playing to sync to, the current arpeggiator will wait for the playing riff or song to restart its loop (if it is looped) before starting (see Loop on page 3‐22 for looping riffs, and Loop on page 12‐11 of The PC3 Musician’s Guide for looping songs.) This way you can trigger the arpeggiator to start ahead of time, and have it start in sync at the start of the playing riff or song’s loop (provided that it is set to sync to a riff, song, or the first available). With SyncType set to Stop, if there is already something playing to sync to, the current arpeggiator will wait for what is playing to stop before starting. This way you can trigger the arpeggiator to start ahead of time, and have it start in sync at the release (stopping) of the riff, arpeggiator, or song that you are syncing to. With SyncType set to StartWait, if there is nothing playing to sync to, the current arpeggiator will wait for something it can sync to to begin playing first before starting. This is similar to DownBeatWait, but it will only trigger the arpeggiator the first time that whatever it is syncing to starts. This way you can trigger the arpeggiator to start ahead of time, and have it start in sync at the start of the riff, arpeggiator, or song that you are syncing to. If you stop the arpeggiator and try to start it again while the thing you are syncing to is already playing, StartWait will not start the arpeggiator.
-
Page 30: Real-Time Control Of Arpeggiator Parameters
Setup Mode The ARPEGGIATOR & ARPEGGIATOR 2 (ARP1, ARP2) Pages Real-time Control of Arpeggiator Parameters You can have real‐time control over several arpeggiator parameters, by assigning physical controllers to special arpeggiator Controller Destinations. Any input (or entry value) from a physical controller assigned to an arpeggiator Controller Destination overrides the programmed values for the parameters of the arpeggiator on that controller’s zone. The override remains in effect until you select a different setup (or a different program in Program mode.) Remember, each of the following Controller Destinations affects only the arpeggiator for the zone which your controller is assigned to. Corresponding Controller ARPEGGIATOR Operation Number Parameter ArpOn Any controller value turns the Arpeggiator On. ArpOff Any controller value turns the Arpeggiator Off. ArpOrder Arpeggiator Order, each range of values selects one of nine options in order of the parameters list: 0-14... - Page 31 Setup Mode The ARPEGGIATOR & ARPEGGIATOR 2 (ARP1, ARP2) Pages Corresponding Controller ARPEGGIATOR Operation Number Parameter ShiftPatt Selects one of the 128 patterns in the ShiftPatt Bank for the ARPEGGIATOR page of a controller’s zone. ShiftPBank Each increment of 7 (0-6, 7-13...112-127) selects one of the 17 ShiftPatt Banks for the ARPEGGIATOR page of a controller’s zone.
-
Page 32: Riffs
Setup Mode Riffs Riffs Riffs are full songs or individual tracks of a song created in the PC3’s Song mode that you can trigger in setup mode. Standard MIDI files may also be imported to Song mode and then used as riffs in setups. Every zone in a setup can have itʹs own riff—a completely independent sequence. You can use a setup with many riffs to trigger and stop looped sequences of different instrument parts. Alternatively, a single riff can play multiple instrument parts. Each riff could be used as a different song section of a backing track. To use a riff, first go to Song mode and note the ID# of the song, section of song and track that you will use for your riff. Next go to Setup mode and create a setup. On the CH/PRG page of the Setup Editor, choose the program that you want to use for the riff on the current zone. Program changes that are recorded in song mode will be ignored when using the song as a riff in a setup. You can also set up the playback event filter in Song mode to ignore other types of events as well. Once you have selected your program, press the more soft button until you get to the RIFF1 and RIFF2 pages. The following sections describe the contents of these pages. Note: By default, setting a zone to trigger a riff will disable the ability to play notes of that zone’s program from the keyboard. To re‐enable this ability, see Local on page 3‐22. The RIFF1 Page The first Riff page appears as shown below, and has the following parameters: Parameter Range of Values Default Riff Off, On Song Song List 0 None (Bar) - Page 33 Setup Mode Riffs Riff Setting the Riff parameter to On will enable the riff feature for the current zone in setup mode. Setting this parameter to Off will disable the riff for this zone. Song Select the song you wish to use in the Song parameter by using the Alpha Wheel, ‐/+ buttons, or the alphanumeric pad. Start Use the Start parameter to specify the riff start point. The time format is Bar : Beat : Tick. Bar can be set to any bar in the sequence, and Beat can be set to any beat in that bar (beat range is dependent on time signature.) Tick can be set from 0 to 959. Since there are 960 possible start points within a beat, you can specify your riff to start on any common beat subdivision moments (and a few uncommon ones). The following Tick values correspond to the following beat subdivision moments: Beat Subdivision Beat Subdivision Tick Value Moment Quarter note 8th note 8th note triplet 16th note 16th note quintuplet 16th note triplet (sextuplets) Table 0-1 Subdivision Values 3-19...
- Page 34 Setup Mode Riffs Stop Use the Stop parameter to specify the riff stop point. Like the Start parameter, the time format for Stop is Bar : Beat : Tick. Bar can be set to any bar in the sequence, and Beat can be set to any beat in that bar (beat range is dependent on time signature.) Tick can be set from 0 to 959. Refer to Table 0‐1 for Tick values. The PC3 restricts the selectable values for the Stop parameter such that the current riff is at least one beat long. Transpose/Root Note With the Transpose parameter set to On, the riff will transpose to the value set in the Root Note parameter. So, if you have a riff whose root note is C4, you can set a new root note in the setup so that the riff will play in the correct range. In this scenario, if you want to trigger your riff from C1 but it was recorded at C4, you would set Transpose to On and Root Note to C1. Your riff will now play in the desired range when triggered from the C1 key, which now corresponds to the note C4. SrcTrack (Source Track) The SrcTrack parameter determines the source track of the riff (from the riff’s original sequence in Song mode.) Along with the Start and Stop parameters, SrcTrack allows you to use a single sequence as a riff for many zones, and to select a different source track and Start/Stop parameter setting for each zone to avoid having to create a special sequence for each riff. To create a setup with multiple riffs each playing a single instrument part, set a single track for the SrcTrack parameter, and that track of the sequence will play with the program on the current zone. Repeat the process on other zones using the same song for the riff, but using a different SrcTrack for each zone. To create a setup with a single riff that plays multiple instrument parts, set SrcTrack to ALL. Each track of the sequence will play its track through the zones which have corresponding MIDI channels (MIDI channels are set for each zone on The Channel/Program (CH/PROG) Page of the Setup Editor, see page 3‐2.) Re Channel Use the Re Channel parameter when the current zone’s MIDI channel and the channel that the riff was recorded on are not the same. When Re Channel is set to On, the track selected for the SrcTrack parameter will play through the MIDI channel of the current zone. For example, if you ...
-
Page 35: The Riff2 Page
Setup Mode Riffs The RIFF2 Page The second Riff page appears as shown below, and has the following parameters: Parameter Range of Values Default (HiKey) C -1 to G9 C -1 Trigger (LoKey) C -1 to G9 (HiKey) C -1 to G9 C -1 Release (LoKey) C -1 to G9 CondRel Off, On Local Off, On Loop... - Page 36 Setup Mode Riffs Next, move your cursor to the right to highlight the second value of the Trigger field (this will be the high end of the trigger key range.) Use one of the methods described above to select a key value for this trigger field. If you want to have only one key start a riff, set the Trigger key range from A#0 to A#0 for example, and your riff will be triggered to start only by pressing the A#0 key. If you want your trigger key range to be larger, set your Trigger key range to be, for instance, A#0 to A#1. Now any key that is pressed within this range will trigger your riff to start. Note: the LoKey and HiKey values on the KEYVEL page do affect the riff. If your riffʹs trigger and release notes are not within the LoKey and HiKey range on the KEYVEL page, your riff will not be able to be triggered from the keyboard. Release The way you release riffs is analogous to the way you trigger them. You can assign a physical controller to destination 164 RiffOff, or you can select a key or key range with the Release parameter. You set this the same way that you set the trigger range. Move your cursor so that the left field of the Release parameter is highlighted (this will be the low end of the trigger key range.) Now select a key value by using the Alpha Wheel, ‐/+ buttons or intuitive entry. Move your cursor to the right field and repeat the process (this will be the high end of the trigger key range.) If you set both of the Release values to A0, the Riff will stop when you release A0. So, if you use the settings described above and in the Trigger section above, your setup’s riff will start when you press A#0, and it will stop when you press and release A0. Note: the LoKey and HiKey values on the KEYVEL page do affect the riff. If your riffʹs trigger and release notes are not within the LoKey and HiKey range on the KEYVEL page, your riff will not be able to be triggered from the keyboard. Conditional Release (CondRel) The CondRel parameter allows you to have a riff play only while a key is pressed and held, and nothing will stop or restart that riff until the key is released. To use conditional release, set the same range for the Trigger and Release ranges on the RIFF2 page. Any key that is pressed and held within this range will play the selected riff. Release the key and the riff will stop. Playing any other key in this zone while triggering a riff with CondRel–even if they are within the Trigger and Release ranges–will not retrigger or stop the zone’s riff. Local If you want to trigger your riff without playing the current zone’s program, set Local to Off. Local is set to Off by default since most users wont want to play the program in the zone they are using for a riff, but only wish hear that zone’s program as a backing track. With Local set to On, you will play the current zones program any time a key is pressed. This could create undesired “grace notes” if you trigger a riff that has a downbeat at the same time you are playing a note.
- Page 37 You may want to have a little more freedom and not be tied to the drum riff as the main “timekeeper.” Maybe you want to start with the bass riff and have the drum riff start later. In this case you would set SyncZone to FirstRiff.Av. With this setting, the riff will look for the first available riff to sync to. So if both the drum riff and the bass riff have this parameter set to FirstRiff.Av., the riff that is started first will be the master. If the bass riff starts first, the drum riff will see that as the first available riff to sync to and will do so. If the drum riff is started first, the bass riff will see that as the first available riff to sync to and will do so. This can be very handy if you have multiple riffs and want to do some live remixing; you could have the drums drop out, and—as long is there is a riff playing—they will sync back up when triggered again. You can also choose FirstArp.Av., which behaves the same way as FirstRiff.Av., but makes your riff look for the first available arpeggiator to sync to. A setting of Main Seq. will sync the riff to the song currently loaded in Song mode. You can select a song in Song mode, then play it from setup mode with the front panel Play/Pause button. (Doing this temporarily replaces the programs in your setup’s zones with the program used for each channel in the song, so it’s best to make a setup that uses the same programs as your song on the same MIDI channels. If you plan on syncing riffs with a song, it may be easier to start by creating a setup, then recording the setup into a song. See Recording A Setup To Song Mode on page 7‐64 of The PC3 Musician’s Guide for details.) A setting of First Avail. will sync the riff to the first available riff, arpeggiator, or song from Song mode. Note: If you have multiple riffs or arpeggiators already playing when using FirstRiff.Av., FirstArp.Av., or First Avail. for the current riff, the current riff will sync to the riff or arpeggiator of the lowest numbered zone that has a riff or arpeggiator playing. SyncType The SyncType parameter allows you to choose how your riff will sync to other riffs, arpeggiators, and Songs (depending on your settings made for the SyncZone parameter.) With SyncType set to None, your riff will start playing as soon as it is triggered. It will not sync to anything. With SyncType set to DownBeat, if there is already something playing to sync to, the current riff will wait for the downbeat of the next measure before starting; so, you can trigger the riff to start ahead of time, and have it start in sync at the downbeat of the next measure. If Syncing to an arpeggiator, see Num Beats on page 3‐15 for details on changing when an arpeggiator’s downbeat will occur. With SyncType set to AnyBeat, if there is already a something playing to sync to, the riff will wait only until the next beat. Depending on when you trigger the riff, it will sync up, but it may be on an upbeat or a downbeat. With SyncType set to DownBeatWait, the riff will wait for the downbeat of the next measure to ...
- Page 38 Setup Mode Riffs With SyncType set to AnyBeatWait, the riff will wait for the next beat to start. The difference from AnyBeat is that if there is nothing playing to sync to, this riff will not start. This can be useful if you want to start multiple riffs synced to one riff. You could have a bass riff set to AnyBeatWait, for instance, and trigger the riff while no other riffs are running. As soon as you start another riff, the bass riff will start playing as well (provided that it is set to sync to another riff or the first available). If something is already playing to sync to, AnyBeatWait behaves just like AnyBeat. With SyncType set to Loop, if there is already a riff or song playing to sync to, the current riff will wait for the playing riff or song to restart its loop (if it is looped) before starting (see Loop on page 3‐22 for looping riffs, and Loop on page 12‐11 The PC3 Musician’s Guide for looping songs.) This way you can trigger the riff to start ahead of time, and have it start in sync at the start of the playing riff or song’s loop. With SyncType set to Stop, if there is already something playing to sync to, the current riff will wait for what is playing to stop before starting. This way you can trigger the riff to start ahead of time, and have it start in sync at the release (stopping) of the riff, arpeggiator, or song that you are syncing to. With SyncType set to StartWait, if there is nothing playing to sync to, the current riff will wait for something it can sync to to begin playing first before starting. This is similar to DownBeatWait, but it will only trigger the riff the first time that whatever it is syncing to starts. This way you can trigger the riff to start ahead of time, and have it start in sync at the start of the riff, arpeggiator, or song that you are syncing to. If you stop the riff and try to start it again while the thing you are syncing to is already playing, StartWait will not start the riff. With SyncType set to LoopWait, if there is already a riff or song playing to sync to, the current riff will wait for the playing riff or song to restart its loop (if it is looped) before starting (see Loop on page 3‐22 for looping riffs, and Loop on page 12‐11 of The PC3 Musician’s Guide for ...
- Page 39 Depending on when you release the riff it will stop in sync with a beat, but it may be on an upbeat or a downbeat. With RelSynTyp set to DownBeatWait, the riff will wait for the downbeat of the next measure to stop when released. The difference from DownBeat is that if there is nothing playing to sync to, the riff wont stop when released. If another riff is already running, DownBeatWait behaves just like DownBeat. With RelSynTyp set to AnyBeatWait, if there is already a something playing to sync to, the riff will wait for the next beat before releasing. The difference from AnyBeat is that if there is nothing playing to sync to, this riff will not stop when released. This can be useful if you want to stop a riff in sync only when another riff is playing. If something is already playing to sync to, AnyBeatWait behaves just like AnyBeat. With RelSynTyp set to Loop, if there is already a riff or song playing to sync to, the current riff will wait for the playing riff or song to restart its loop (if it is looped) before stopping when released (see Loop on page 3‐22 for looping riffs, and Loop on page 12‐11 of The PC3 Musician’s Guide for looping songs.) This way you can release the riff to stop ahead of time, and have it stop in sync at the start of the playing riff or song’s loop. With RelSynTyp set to Stop, if there is already something playing to sync to, the current riff will wait for what is playing to stop before releasing. This way you can trigger the current riff to release ahead of time, and have it stop in sync at the release (stopping) of the riff, arpeggiator, or song that you are syncing to. With RelSynTyp set to StartWait, if there is nothing playing to sync to, the current riff will wait for something it can sync to to begin playing first before releasing. This is similar to DownBeatWait, but it will only release the riff the first time that whatever it is syncing to starts. This way you can trigger the riff to stop ahead of time, and have it stop in sync at the start of the riff, arpeggiator, or song that you are syncing to. If you restart the riff and try to release it again while the thing you are syncing to is already playing, StartWait will not stop the riff. With RelSynTyp set to LoopWait, if there is already a riff or song playing to sync to, the current riff will wait for the playing riff or song to restart its loop (if it is looped) before stopping (see Loop on page 3‐22 for looping riffs, and Loop on page 12‐11 of The PC3 Musician’s Guide for ...
-
Page 40: Real-Time Control Of Riff Parameters
Setup Mode Riffs Duration (Dur) Duration changes the duration of each MIDI note. The original durations of the notes in the sequence are multiplied by the selected percentage. 100% will cause no change, values smaller than 100% will result in shorter durations, values larger than 100% will result in longer durations. Velocity Velocity changes the velocity of each MIDI note. The original velocities of the notes in the sequence are multiplied by the selected percentage. 100% will cause no change, values smaller than 100% will result in lower velocities, values larger than 100% will result in higher velocities. Offset You can fine tune the start time of your riff in ticks by using the Offset parameter. A positive value will delay the start time, while a negative value will speed up the start time. Real-time Control of Riff Parameters You can have real‐time control over several Riff parameters, by assigning physical controllers to special Riff Controller Destinations. Any input (or entry value) from a physical controller assigned to a Riff Controller Destination overrides the programmed values for the parameters of the riff on that controller’s zone. The override remains in effect until you select a different setup. Remember, each of the following Controller Destinations affects only the riff for the zone which your controller is assigned to. Controller Corresponding Operation Number Riff Parameter RiffOn Riff On. Any value triggers the zone’s Riff if Riff is set to On on RIFF1 page. -
Page 41: Trigger Keys (Keytrg)
Setup Mode TRIGGER KEYS (KEYTRG) TRIGGER KEYS (KEYTRG) The TRIGGER KEYS page (see below) allows you to set a controller destination to be triggered by playing a specific key. In addition to generating a standard MIDI note on message, each key of the PC3 can be set to trigger a controller destination. TRIGGER KEYS can be set independently per Zone. By using Zones with overlapping key ranges, a single key can trigger multiple controller destinations. On the TRIGGER KEYS page, select the Key field and choose a note by holding the Enter button and playing the desired key (you can also use the Alpha Wheel, ‐/+ buttons or alphanumeric pad to choose a note.) With the desired note selected, use the Dest field to select a controller destination (see The Controller Destination List in The PC3 Musician’s Guide for details.) Set a value to send to the controller destination with the Value field. Once a destination and value are set, the playing the key will send the value to the controller destination on the Zone’s MIDI Channel (see Channel on page 7‐7 of The PC3 Musician’s Guide for details on setting each Zone’s MIDI channel.) This may also send a continuous controller message to the MIDI or USB out ports, depending on the Zone’s Destination parameter (see Destination on page 7‐8 of The PC3 Musician’s Guide for details.) 3-27... - Page 42 Setup Mode TRIGGER KEYS (KEYTRG) 3-28...
-
Page 43: Quick Access Mode
Quick Access Mode Chapter 4 Quick Access Mode In Quick Access mode, you can select programs or setups with a single press of an alphanumeric button (or with other data entry methods). The PC3 offers a number of ways to quickly make selections while performing, but only Quick Access mode lets you store programs and setups together for instant access. On the PC3, we included several factory preset QA banks that are organized into useful groupings of sounds that we think you’ll find convenient. Below is the QA page: The top line of the page displays the current mode and the current QA bank. Using Quick Access mode involves selecting Quick Access (QA) banks from the list of factory preset or user‐programmed banks. Use the Chan/Zone buttons to scroll through the QA banks. You can also use the bank selection shortcut: press the +/– or Clear button on the alphanumeric pad, and you’ll be prompted to enter a bank number. Type the desired number on the alphanumeric pad, then press Enter. The bank is selected, and you return to the Quick Access mode page. Each bank contains ten memory slots, or entries, where you can store programs or setups in any combination. Any program or setup in the currently selected bank can be selected with the numeric buttons 0 through 9. If the highlighted entry contains a program, the bottom right‐hand field of the page displays the channel on which the program entries are transmitted (this channel is the current channel in Program mode). If the highlighted entry contains a setup, the bottom right‐hand field of the page displays the word “Setup.” The MIDI Program Change commands that the PC3 receives when in Quick Access mode can differ from those in Program or Setup mode. This depends on the setting you have for the PrgChgMode parameter on MIDI Receive page in Master mode. If PrgChgMode is set to Extended or K2600, the PC3 responds to Program Change commands as it would in Program or Setup mode. If PrgChgMode is set to QAccess, the PC3 responds to Program Change commands by calling up the corresponding entry in the current QA bank, not the actual program number of the entry. -
Page 44: Soft Buttons In Quick Access Mode
Quick Access Mode The QA Editor Soft Buttons In Quick Access Mode Use the Octav– and Octav+ soft buttons to transpose up or down by a full octave. Pressing both Octav buttons simultaneously returns the transposition to its original setting. Press the Info soft button to see all of the controller assignments of the current program. Scroll down the page using the Alpha Wheel, cursor or the ‐/+ buttons. The Xpose‐/Xpose+ buttons are a shortcut for quick transposition in semitone (half step) increments. You can use them to transpose the entire PC3 as much as three octaves up or down. The bottom line of the display shows the current amount of transposition (Xpose). Pressing both Xpose buttons simultaneously returns the transposition to zero. The Xpose buttons transpose the PC3, as well as any MIDI devices connected to the PC3’s MIDI Out port. Changing the transposition with the soft buttons also changes the Transpose setting on the Master mode MIDI Transmit page. The QA Editor Use the QA Editor to customize existing QA banks. Enter the QA editor from QA mode by pressing the Edit button. The top line gives you the usual mode reminder, the current QA bank, and the current entry (corresponding numeric button for the highlighted object.) The cursor highlights the object (program or setup) that’s stored in the current entry. Selecting A Quick Access Entry To Edit Pressing the Chan/Zone buttons scrolls through the ten entries—the number of the current entry is displayed in the top‐right corner. As the entry number changes, the highlighted objects ... - Page 45 Quick Access Mode The QA Editor Selecting A Setup For A Quick Access Entry If you want to store a setup in the current entry instead of a program, press the Type soft button—when you do this, notice that the Type field change from Program to Setup (also notice that the channel indicator disappears, since setups can transmit over several channels). The list of objects changes from the program list to the setup list. Just as with programs, the cursor highlights the setup’s ID and name. Use the Alpha Wheel or ‐/+ buttons to scroll through the setups. You can also use the alphanumeric pad followed by the Enter button to choose a Setup by ID#. Keep in mind that you can have both setups and programs in the same QA bank. Naming And Saving A Quick Access Bank When you’ve filled each entry with the object you want, press the Name soft button if you want to rename the bank, or press the Save soft button to begin the save procedure. Or, press the Exit button to exit the QA editor, and the “Save Changes?” dialog comes up.
- Page 46 Quick Access Mode The QA Editor...
-
Page 47: Chapter 5 Effects
Effects INFOEDIT page (INFO) Chapter 5 Effects INFOEDIT page (INFO) Press the INFO soft button to go to the INFOEDIT page where you can edit the controller assignment info for the current Chain. On the INFOEDIT page, use the Chan/Layer buttons to scroll through the current Chain’s list of controller assignment info. Each assignment info entry has a MIDI controller number and a Text parameter to describe what the assignment controls. To edit the text of a controller assignment, press the Text soft button. To create a new controller assignment info entry, press the New soft button (you will be prompted for a MIDI controller number.) To create a new controller assignment info entry with the same text as the current info entry, press the Dup soft button (you will be prompted for a MIDI controller number.) To delete the current controller assignment info entry, press the Delete soft button (you will be prompted to confirm or cancel.) To return to the Chain editor press the Done soft button or the Exit button. See Export on page 9‐2 for details on exporting Chain info. - Page 48 Effects INFOEDIT page (INFO)
-
Page 49: Chapter 6 Midi Mode
MIDI Mode The TRANSMIT Page Chapter 6 MIDI Mode The TRANSMIT Page Velocity Map (Transmit) Change the MIDI Transmit Velocity Map setting if you are triggering external MIDI gear which is producing notes that are too loud or too quiet based on your playing style (how light or heavy that you play the keys.) The default map provides the widest range of velocity expression, but you may want to choose a different map if the default does not suit your playing style. MIDI Sources MIDI In via MIDI In port or USB Computer port PC3 Keyboard VelocityMap Settings on MIDI Mode Receive Page KEY‐VEL page for current Control Setup (in Program Mode) or current Zone (in Setup Mode) Velocity Map Settings on Master Mode MAPS Page PC3 Song Mode VelocityMap Settings on MIDI Mode Transmit Page MIDI Destinations PC3 Sound Engine MIDI Out via MIDI Out port or USB Computer port to PC3 audio outputs The transmit Velocity Map affects the way the PC3 sends MIDI velocity values to its USB or MIDI Out port (see the circled box above for its location in the MIDI signal flow.) Different maps output different MIDI velocity values for the same received MIDI attack velocity. Each map applies a different curve to received MIDI attack velocities and remaps them to new velocities before transmitting them to the USB or MIDI Out port (this parameter has no effect on MIDI data sent from Song mode or to the PC3’s sound engine.) The default map provides the widest ... -
Page 50: Pressure Map (Transmit)
Light 3 being the easiest,) so these maps may work better for users who play with a lighter touch. Hard 1‐3 make it increasingly harder to produce high MIDI velocity values for the same key strike velocity (with Hard 3 being the hardest,) so these maps may work better for users who play with a harder touch. Piano Touch simulates the general velocity response of an acoustic piano, and is best suited for playing acoustic piano sounds. Easy Touch is similar to the Light settings, making high velocities easier to play, but it allows more sensitive control over playing high velocities by not boosting the MIDI velocity for fast strike velocities as much as it does for medium strike velocities. GM Receive mimics the velocity map commonly used by keyboards that use the General MIDI (GM) sound set. The GM Receive map makes medium strike velocities produce higher MIDI velocities compared to the Linear map. Pressure Map (Transmit) Change the Transmit Pressure Map setting if you are triggering external MIDI gear which is producing MIDI pressure (aftertouch) values that are too high or too low based on your playing style (how soft or hard that you press the keys.) The default map provides the widest range of pressure expression, but you may want to choose a different map if the default does not suit your playing style. MIDI Sources PC3 Keyboard MIDI In via MIDI In port or USB Computer port PressureMap Settings on MIDI Mode Receive Page PRESS page for current Control Setup (in Program Mode) or current Zone (in Setup Mode) Pressure Map Settings on Master Mode MAPS Page PC3 Song Mode PressureMap Settings on MIDI Mode Transmit Page MIDI Destinations PC3 Sound Engine MIDI Out via MIDI Out port or USB Computer port to PC3 audio outputs The transmit Pressure Map affects the way the PC3 sends MIDI pressure (aftertouch) values to its USB or MIDI Out port (see the circled box above for its location in the MIDI signal flow.) Different maps output different MIDI pressure (aftertouch) values for the same received MIDI pressure (aftertouch) value. Each map applies a different curve to received MIDI pressure (aftertouch) values and remaps them to new values before transmitting them to the USB or MIDI Out port (this parameter has no effect on MIDI data sent from Song mode or to the PC3’s sound ... -
Page 51: The Receive Page
MIDI Mode The RECEIVE Page engine.) The default map provides the widest range of pressure (aftertouch) expression, but you may want to choose a different map if the default does not suit your playing style. See the diagram above for the other pages that affect MIDI pressure (aftertouch) values before reaching the transmit Pressure Map. The default map, Linear, allows MIDI pressure (aftertouch) values to pass unchanged. Maps 2‐4 make it increasingly easier to produce MIDI pressure values for the same physical pressure applied to a key (with 4 “Easiest” being the easiest.) Maps 4‐7 make it increasingly harder to produce MIDI pressure values for the same physical pressure applied to a key (with 7 “Hardest” being the hardest.) The RECEIVE Page Velocity Map (Receive) Change the receive Velocity Map setting if you are triggering the PC3 with external MIDI gear which is producing notes that are too loud or too quiet. The default map provides the widest range of velocity expression, but you may want to choose a different map if the default does not suit your playing style. MIDI Sources PC3 Keyboard MIDI In via MIDI In port or USB Computer port VelocityMap Settings on MIDI Mode Receive Page KEY‐VEL page for current Control Setup (in Program Mode) or current Zone (in Setup Mode) Velocity Map Settings on Master Mode MAPS Page PC3 Song Mode VelocityMap Settings on MIDI Mode Transmit Page MIDI Destinations PC3 Sound Engine MIDI Out via MIDI Out port or USB Computer port to PC3 audio outputs The receive Velocity Map affects the way the PC3 receives MIDI velocity values from its USB or ... -
Page 52: Pressure Map (Receive)
MIDI Mode The RECEIVE Page The default map, Linear, allows MIDI velocities to pass unchanged. Maps Light 1‐3 make it increasingly easier to produce high MIDI velocity values for the same key strike velocity (with Light 3 being the easiest,) so these maps may work better for users who play with a lighter touch. Hard 1‐3 make it increasingly harder to produce high MIDI velocity values for the same key strike velocity (with Hard 3 being the hardest,) so these maps may work better for users who play with a harder touch. Piano Touch simulates the general velocity response of an acoustic piano, and is best suited for playing acoustic piano sounds. Easy Touch is similar to the Light settings, making high velocities easier to play, but it allows more sensitive control over playing high velocities by not boosting the MIDI velocity for fast strike velocities as much as it does for medium strike velocities. GM Receive mimics the velocity map commonly used by keyboards that use the General MIDI (GM) sound set. The GM Receive map makes medium strike velocities produce higher MIDI velocities compared to the Linear map. Pressure Map (Receive) Change the receive Pressure Map setting if you are triggering the PC3 with external MIDI gear which is producing MIDI pressure (aftertouch) values that are too high or too low based on your playing style (how soft or hard that you press the keys.) The default map provides the widest range of pressure (aftertouch) expression, but you may want to choose a different map if the default does not suit your playing style. MIDI Sources PC3 Keyboard MIDI In via MIDI In port or USB Computer port PressureMap Settings on MIDI Mode Receive Page PRESS page for current Control Setup (in Program Mode) or current Zone (in Setup Mode) Pressure Map Settings on Master Mode MAPS Page PC3 Song Mode PressureMap Settings on MIDI Mode Transmit Page MIDI Destinations PC3 Sound Engine MIDI Out via MIDI Out port or USB Computer port to PC3 audio outputs ... -
Page 53: Local Keyboard Channel (Localkbdch)
Musician’s Guide: The DSP Modulation (DSPMOD) Page on page 6‐29, The LFO Page on page 6‐37, The ASR Page on page 6‐39, The Function (FUN) Page on page 6‐40, The Envelope Control (ENVCTL) Page on page 6‐44, The MOD Pages on page 9‐9, FXLFO, FXASR, and FXFUN pages on page 9‐10. For KB3 programs, see the following sections in The PC3 Musician’s Guide: The PITCH Page on page 6‐63, The AMP Page on page 6‐62, The LFO, ASR, and FUN Pages on page 6‐70, and The MOD Pages on page 9‐9, FXLFO, FXASR, and FXFUN pages on page 9‐10. - Page 54 To control a program parameter via external MIDI CC in Setup Mode, the parameter must first have a source assigned within the Program Editor, as described in the Assigning A CC Control Source section above. To control an assigned parameter, send the correct CC number to the channel for the Setup zone which contains the program. Using External CCs In Setup Mode, Local Keyboard Channel On, Input Channel None To control a program parameter via external MIDI CC in Setup Mode, the parameter must first have a source assigned within the Program Editor, as described in the Assigning A CC Control Source section above. To control an assigned parameter with a Local Keyboard Channel set, send the correct CC number to the channel set for Local Keyboard Channel. (If the CC # is listed in the “External MIDI CC Remapping” table below, the CC will be remapped to the destination set for that physical controller in the Setup Editor. In this case, you must use the Setup Editor to assign that physical controller’s destination to the original CC number that you sent. For destinations that show a name, a corresponding MIDI CC number can be found by finding the name in The Controller Destination List (see page 7‐22 in The PC3 Musician’s Guide.)) Within the Setup Editor, you can also set a PC3 physical controller to send a CC number to a program on a zone. If this is done with a Local Keyboard Channel set, you will also be able to control a parameter by sending the default CC number for that physical controller to the channel set for Local Keyboard Channel. The table below lists the default CC number used to control the assignments of PC3 physical controllers while in Setup Mode. Also, for each physical controller, if a CC# is listed in the “Additional MIDI CC# Which Always Controls The Parameter Assigned To Each PC3 Physical Controller In Setup Mode” column, then that physical controller’s assignment can always be controlled by the CC# listed in that column. For physical controllers where this is the case, the physical controller’s assignment will respond to the CC# listed in the “Additional MIDI CC# Which Always Controls The Parameter Assigned To Each PC3 Physical Controller In Setup Mode” column, as well as the physical controller’s default CC number. Using External CCs In Setup Mode, Local Keyboard Channel None, Input Channel On To control a program parameter via external MIDI CC in Setup Mode, the parameter must first ...
- Page 55 External MIDI CC Remapping Default MIDI CC# Which Additional MIDI CC# Controls The Parameter Which Always Controls PC3 Physical Controller Assigned To Each PC3 The Parameter Assigned Physical Controller In To Each PC3 Physical Setup Mode Controller In Setup Mode...
- Page 56 MIDI Mode The RECEIVE Page...
-
Page 57: Master Mode
Master Mode MAIN Chapter 7 Master Mode Press the Master mode button to enter Master mode, which contains parameters affecting the PC3’s overall performance and system setup. You can set the system Clock so that the PC3 will time‐stamp your files correctly. You can use the Object tool to rename or delete selections of objects. You can also enter the Boot Loader to access a number of system and file utilities, or use Reset to delete all user objects and restore the PC3’s memory to its original factory settings. When you exit Master Mode (or MIDI Mode) the PC3 saves a Master Table (unless MasterTableLock is On — more on this below.) The Master Table remembers the settings of the Master pages, as well as the state of the PC3, such as which programs are assigned to each channel, settings for MIDI Mode Transmit and Receive pages, and Master FX settings. Explicit saving of the Master Table is also possible. MAIN On the Master Mode MAIN page you’ll find parameters for setting the overall tuning and transposition of the PC3, overall FX settings, drum program remapping, clock source options, ID entry options, demo song options, as well as options for saving master mode settings and remote triggering of PC3 functions. Parameter Range of Values Default Tune ± 100 cents Transpose -128 to 127 semitones FX Mode Performance, Multitrack... -
Page 58: Tune
Master Mode MAIN Tune Adjusting the value of this parameter tunes every program in the PC3 by the amount you specify. Tuning can be adjusted up or down 100 cents (one semitone) in one‐cent increments. This parameter is useful for getting in tune with recordings and acoustic instruments. Adjusting the tuning in Master mode does not change the settings on the PITCH page of individual programs, but will be added to any adjustments you make there. Master mode tuning adjustments affect only the audio output of PC3 program notes, and not notes sent via MIDI. Transpose Like the Tune parameter above, Transpose affects every PC3 program, but not those notes sent to the MIDI Out port. You can adjust the MIDI transposition sent to the MIDI Out port on the TRANSMIT page in MIDI mode. FX Mode With FX Mode set to Performance, the PC3 minimizes disruption of existing effects when changing programs, and entry values will not disrupt sustained notes when changing programs in Program or Quick Access modes. When controlling the PC3 from an external sequencer in Program Mode, you will want to set FX Mode to Multitrack to minimize effect disruption. FX Mode is set to Performance as a default, with some exceptions. In Song mode, Multitrack mode is always used, despite how this parameter is set in Master Mode. Also, the FX Mode parameter does not affect Setup Mode because it uses its own FX mode. Drum Remap This parameter will remap all Drum programs to conform to the General MIDI (GM) drum map, a standard drum map used in many keyboards and synthesizers. The GM drum map isn’t optimally intuitive in terms of playability, so by default the PC3 uses a unique keymap that is more intuitive and lends better to performance. However, the GM drum map is so commonplace that many players feel more comfortable playing drum programs with the GM drum map. Because of this, the PC3 is designed such that you can remap drum programs to the GM drum map. When the Master Page Drum Remap is set to None, no remapping takes place in Program mode. When the Master Page Drum Remap is set to GM, the PC3 remaps Drum programs to the GM drum map. ID Entry Global means that any entry you make from the alphanumeric keypad will select the object indicated, regardless of the bank it is in. For example, in program mode type “36” of the alphanumeric keypad to select program 36. -
Page 59: Master Table Lock (Master Lock)
MAIN Master Table Lock (Master Lock) With Master Lock set to Off, the PC3 will save the current Master mode configuration when you exit Master mode (or MIDI mode). This information is stored in a Master Table object (see Save on page 7‐17 below for more details on what is saved with a Master Table.) If you have a particular Master configuration that you would like to safeguard against the auto‐ saving feature, set Master Lock to On. With the Master Lock on, the PC3 does not save any changes unless you press the Save soft button. Note that if you would like Master Lock to stay on next time you turn on the PC3, you must press the Save soft button to store the state of Master Lock to the Master Table. Demo Button The Demo Button parameter determines what pressing the Play/Pause button does in program mode. With the Demo button parameter set to On, the Play/Pause button plays a demo song for the current program. (To play a demo song, the Demo Song parameter must be set in the program editor for the current program, see page 6‐36 in The PC3 Musician’s Guide for details.) With the Demo button parameter set to Off, the Play/Pause button plays the last song that was selected in Song Mode. If a demo song is set for the current program, it can always be played from program mode by simultaneously pressing the up and down cursor buttons. Buttons Mode (Buttons) If you set the Buttons parameter to On, pressing any buttons on the PC3 will generate System Exclusive (SysEx) messages that are sent to the MIDI Out port. This enables you to do two things: control a remote PC3, and/or record sequences of programming button presses to a sequencer or SysEx software package. If you have the MIDI In port of another PC3 connected to the first one’s MIDI Out port, the second instrument will respond to every button press on the first instrument, just as if you were pressing the buttons of the second one. Keep in mind that both devices must be in exactly the same state (the same page in the same mode, with identical lists of RAM objects) when you start. Otherwise the button presses you make on the first instrument may execute other functions on the second instrument. - Page 60 Master Mode MAIN Setup Editor RIFF1 page) are indicated in the info box with a riFF symbol. The info box can display up to four layers/zones at a time. If the current Program/Setup has more than four layers/zones, you can view their keymaps/programs by pressing and holding down the Enter button and scrolling with the Chan/Layer buttons. When Display is set to Ctls, Program Mode and Setup Mode use the info box to display the controller assignment info and MIDI CC value for the last moved controller. The info box clears a few moments after displaying the controller info.
-
Page 61: Maps
Master Mode MAPS MAPS On the MAPS page you’ll find parameters for setting keyboard behavior for velocity, pressure, intonation, and key action maps. You can also set the default sequence for Song mode. Velocity Map (Master) Change the Master Velocity Map setting if you find that the PC3 is not producing the desired velocities (too loud or too quiet) based on your playing style (how light or heavy that you play the keys.) The default map provides the widest range of velocity expression, but you may want to choose a different map if the default does not suit your playing style. MIDI Sources PC3 Keyboard MIDI In via MIDI In port or USB Computer port VelocityMap Settings on MIDI Mode Receive Page KEY‐VEL page for current Control Setup (in Program Mode) or current Zone (in Setup Mode) Velocity Map Settings on Master Mode MAPS Page PC3 Song Mode VelocityMap Settings on MIDI Mode Transmit Page MIDI Destinations PC3 Sound Engine MIDI Out via MIDI Out port or USB Computer port to PC3 audio outputs The Master Velocity Map is an overall control for MIDI velocities used in the PC3. MIDI velocities are values created for each note depending on how hard you strike a key. The Master Velocity Map affects MIDI velocity values for all MIDI sources and destinations used in the PC3 (see the circled box above for its location in the MIDI signal flow.) Different maps used for the Master Velocity Map generate different MIDI velocity values for the same physical key strike ... - Page 62 Master Mode MAPS velocity. Each map applies a different curve to received MIDI attack velocities and remaps them to new velocities before letting them pass. The default map provides the widest range of velocity expression, but you may want to choose a different map if the default does not suit your playing style. See the diagram above for the other pages that affect the MIDI attack velocity before and after reaching the Master Velocity Map. The default map, Linear, allows MIDI velocities to pass unchanged. Light 1‐3 make it increasingly easier to produce high MIDI velocity values for the same key strike velocity (with Light 3 being the easiest,) so these maps may work better for users who play with a lighter touch. Hard 1‐3 make it increasingly harder to produce high MIDI velocity values for the same key strike velocity (with Hard 3 being the hardest,) so these maps may work better for users who play with a harder touch. Piano Touch simulates the general velocity response of an acoustic piano, and is best suited for playing acoustic piano programs. Easy Touch is similar to the Light settings, making high velocities easier to play, but it allows more sensitive control over playing high velocities by not boosting the MIDI velocity for fast strike velocities as much as it does for medium strike velocities. GM Receive mimics the velocity map commonly used by keyboards that use the General MIDI (GM) sound set. The GM Receive map makes medium strike velocities produce higher MIDI velocities compared to the Linear map. GM Receive effects notes from the PC3’s keyboard as well as the MIDI in port. This map is automatically used when the PC3 is in GM mode (see General MIDI Mode (GM On, GM Off) below,) though users may want to use the GM Receive map when generating MIDI outside of GM mode which will later be played back by a GM system. ...
-
Page 63: Pressure Map (Master)
Master Mode MAPS Pressure Map (Master) Change the Master Press Map setting if you find that the PC3 is not producing the desired MIDI pressure (aftertouch) values (too high or too low) based on your playing style (how soft or hard that you press the keys.) The default map provides the widest range of pressure expression, but you may want to choose a different map if the default does not suit your playing style. MIDI Sources PC3 Keyboard MIDI In via MIDI In port or USB Computer port PressureMap Settings on MIDI Mode Receive Page PRESS page for current Control Setup (in Program Mode) or current Zone (in Setup Mode) Pressure Map Settings on Master Mode MAPS Page PC3 Song Mode PressureMap Settings on MIDI Mode Transmit Page MIDI Destinations PC3 Sound Engine MIDI Out via MIDI Out port or USB Computer port to PC3 audio outputs The Master Press Map is an overall control for MIDI pressure (aftertouch) values used in the PC3. MIDI pressure (aftertouch) values are created for each note depending on how hard you press on a key that is being held down. The Master Press Map affects MIDI pressure (aftertouch) values for all MIDI sources and destinations used in the PC3 (see the circled box above for its location in the MIDI signal flow.) Different maps used for the Master Press Map generate different MIDI pressure (aftertouch) values for the same physical key press value. Each map applies a different curve to received MIDI pressure (aftertouch) values and remaps them to new values before letting them pass. The default map provides the widest range of pressure (aftertouch) expression, but you may want to choose a different map if the default does not suit your playing style. See the diagram above for the other pages that affect MIDI pressure (aftertouch) values before and after reaching the Master Press Map. The default map, Linear, allows MIDI pressure (aftertouch) values to pass unchanged. Maps 2‐4 make it increasingly easier to produce MIDI pressure values for the same physical pressure applied to a key (with 4 “Easiest” being the easiest.) Maps 4‐7 make it increasingly harder to produce MIDI pressure values for the same physical pressure applied to a key (with 7 “Hardest” ... -
Page 64: Intonation
Master Mode MAPS Intonation Most modern western music uses what is known as equal temperament. This means that the interval between each semitone of the 12‐tone octave is precisely the same as every other semitone. However, many different intonation intervals have evolved over the centuries and across cultures and instruments, so equal temperament will not sound appropriate for certain styles of music. The PC3 supplies you with 17 different factory intonation maps which are useful for a range of different styles. By changing the value for this parameter, you select from among the intonation maps stored in the PC3’s memory. You can further customize each map or create your own by editing a map (see Editing Intonation Maps below.) Each of these maps defines different intervals between each of the semitones in a single octave (used for all octaves) by setting pitch offsets for each note in cents. Scroll through the list of Intonation maps, and listen for the differences between semitones. Some of the intervals between semitones may be quite different from equal temperament, but you’ll notice that all notes are precisely tuned with notes that are an octave apart. This is because the intonation maps set the intervals within a single octave, and apply those intervals to each octave. Like many instruments before the adaptation of equal temperament, most of these intonation maps were designed to sound best in one specific key. Though some may have historically been in a different key, all of the PC3s factory intonation maps are set to root note C by default. You can change the root key of the current intonation map by using the Int.Key parameter (see the Intonation Key (Int.Key) section below.) List and Description of Intonation Maps 0 None No intonation map is used, intonation is equal but cannot be edited. -
Page 65: Key Action Map
Editing Intonation Maps To edit an intonation map or create a new map, select an existing map and press the Edit button to bring up the EditIntonationMap screen (see below.) Intonation maps are based around a root key, shown on the right of the top line of the screen. Use the chan up/down buttons to change the root key (this is the same as changing the Int.Key parameter (see Intonation Key (Int.Key) below.) Intonation Key is not saved with the intonation map.) Use the cursor to move between note steps, each of which is labeled by its difference in keyboard steps from the root. Each step can be shifted by ± 200 cents (100 cents=1 half‐step.) Use the alpha wheel, alphanumeric pad, or plus/minus buttons to enter the desired cent shift amount for each step. Press Delete to delete the map from memory. Press Rename to rename the map and save. Pressing Save gives you the option to save the map or rename and save. To create a new map, edit an existing map and choose Rename when saving. Press Exit to return to Master page 2. When exiting the editor, it will automatically give you the option to save the map if changes have been made. For more detailed instructions on these functions, see Saving and Naming on page 5‐2 of The PC3 Musician’s Guide. Key Action Map The Key Action Map determines the default way the PC3 responds to key action for specific keyboard component models. Generally speaking, you will not want to alter the Key Action Map. This parameter is included for the rare occasion when a PC3 has been setup at the factory for a different keyboard component model than the one installed. A user may discover that they need to change the Key Action Map when they have tried all of the Velocity Map settings and still do not feel comfortable with the key response of their PC3. Different maps result in different responses from the PC3 for the same physical key action, and each map corresponds to a different keyboard component model. If you have changed this parameter and want to change it back to the default map for your PC3, simply enter a value of 0 in the Key Action Map parameter field. Intonation Key (Int.Key) This sets the tonic, or base note from which the currently selected intonation map calculates its intervals. If you select G as the intonation key, for example, and the intonation map you select tunes the minor 2nd down by 50 cents, then G will be a quartertone flat relative to equal ... -
Page 66: Default Sequence
Aux Out Pair Mode Normal, Mirror Primary Outputs Normal Clock Source Internal, External Internal Output Clock To send a MIDI clock pulse to the MIDI Out port, set this parameter to On. Otherwise, set it to Off. Digital Output Volume (Dig. out volume) The Digital Output Volume parameter specifies the behavior of the PC3’s Digital Output. Setting this parameter to Variable makes the Digital Output respond to changes made on the volume slider. Setting this parameter to Fixed makes the Digital Output output a signal with a fixed volume. Digital Output (Dig. Out) This Digital Output parameter specifies the PC3ʹs digital output sample rate. Internally clocked sample rates go from 44.1K up to 192K. Externally synced sample rates cover 20‐220KHz in 3 ranges. Be sure the external clock frequency is within the range you select. Aux Out Pair Mode The Aux Out Pair Mode parameter specifies the behavior of the Secondary Audio Outputs ... -
Page 67: Clock Source
Master Mode TEMPO Clock Source With the Clock Source parameter, you can set the PC3 to generate its own tempo by setting Clock Source to Internal, or you can set the PC3 to sync up with the tempo from another device—assuming the device is sending MIDI clock data to the PC3 via MIDI or USB—by setting Clock Source to External. See Important Note About External Sequencers: on page 12‐8 of The PC3 Musician’s Guide for related information. TEMPO Press the TEMPO soft button to go to the TEMPO page (see below.) When the Clock Source parameter is set to Internal (see Clock Source on page 7‐11,) the Tempo parameter on the TEMPO page sets the PC3’s system tempo. The system tempo sets the tempo for all modes except Setup Mode, which has its own tempo settings. Also, in Song mode, changing to a new song will override the system tempo. The Tempo parameter values are in units of BPM (beats per minute). You can also call up the TEMPO page from any other page by pressing the left and right cursor buttons simultaneously. Set the Tempo parameter with the ‐/+ buttons, the Alpha Wheel, or the alphanumeric pad. You can also set the system tempo by tapping the Tap soft button at the desired speed. You need to tap at least twice for a tempo to be calculated, though tapping several times (like on each beat of one or more measures) works best. The newly tapped tempo is displayed in the tempo field, and along the bottom four Program Category Select buttons a lit LED moves from left to right at this tempo. Alternatively, a temporary controller can be set for use in the Temporary TAP controller field, instead of using the Tap soft button. The Temporary TAP controller field lists groups of PC3 controllers in order of their usefulness for tapping. Listed first are the foot switches and switch buttons (though it would be easier to use the Tap soft button than set a temporary switch button.) After these is Note On, which lets you tap the tempo with any keyboard key. Last are the MIDI controller numbers, which includes all of the continuous controllers, though continuous controllers (such as a slider) are not easy or recommended for tapping the tempo. The Temporary TAP controller works only while on the TEMPO page and will remain selected when accessing the TEMPO page from other modes, but the selection will return to OFF the next time the PC3 is turned on. ... -
Page 68: General Midi Mode (Gm On, Gm Off)
Master Mode General MIDI Mode (GM On, GM Off) General MIDI Mode (GM On, GM Off) This soft button enables or disables General MIDI (GM) mode. When GM mode is off (the default,) the buttons is labeled GM On. Press the GM On soft button to enter GM mode. The PC3 will prompt you to confirm or cancel. When GM mode is on the buttons is labeled GM Off. Press the GM Off soft button to exit GM mode. The PC3 will prompt you to confirm or cancel. You can not access Setup Mode or Quick Access Mode while in GM mode. Aside from what is noted in this section, all other PC3 functions operate normally while in GM mode. In GM mode, the PC3 complies specifically with the General MIDI (GM1) specification. An Overview of General MIDI General MIDI is a specification created by the MIDI Manufacturers Association which defines specific features that a MIDI instrument must have (see the MMA website at www.midi.org for more information.) Among other things, the GM specification sets a standard bank of program names and numbers, as well as a standard drum mapping layout, so that sequences created on any GM instrument will playback with the correct instrumentation on any other GM instrument, no matter the manufacturer. GM has many uses, for example it makes it easy for musicians who use MIDI files to share ideas and collaborate while using different sets of equipment. Also many instrumental versions of public domain songs can be found for free on the internet as GM compatible MIDI files. These, like all MIDI files, offer certain advantages over audio such as small file size, the ability to edit, orchestrate, or change tempo to easily learn from the sequences, or even convert note information to standard notation with a third party application. Overview of General MIDI Mode Once enabled, Program mode will display the set of 128 standard GM program names on the right side of the screen (see below.) Aside from the different layout and program choice, Program mode operates normally (see below for info on the left side of the screen.) A default GM sequence will ... -
Page 69: Object
It is easy to replace default GM programs in order to make a custom GM sound set. Once in GM mode, the right side of Program Mode screen displays a list of the GM programs with their standard GM names. The left side of the screen shows you what PC3 program is being used for the selected GM program. Pressing left on the cursor moves you to this field. Use the cursor’s up/down buttons, the alphanumeric pad, the plus/minus buttons, or the alpha wheel if you wish to select a different PC3 program for the current GM program. Don’t use the program or category buttons because these will change the currently selected GM program. The newly selected PC3 program will be used by the current GM program, though the name of the GM program will not change. To save these settings you must save the master table (see Save below.) Saved settings can be recalled after powering off or leaving GM mode. To restore GM mode’s factory selected programs, press the Reset soft button (see below.) OBJECT Pressing the OBJECT soft button calls up the Objects page (see below.) From here you can choose one of two utility functions for renaming or deleting selections of user created (or edited) objects. Press the Rename or Delete soft button to access each function (see below for details.) The Objects page displays the number of user objects saved to internal RAM (in the UserObjects field,) the maximum amount of user objects that can be saved to RAM (in the MaxUserObjects field,) and the amount of free RAM (in the IntMemoryFree field.) This information is helpful when organizing user objects. For example, when loading many user objects from an external source, this information should first be used to determine if there are enough user object IDs available, and if there is enough internal memory available for the objects being loaded. If there are not enough resources available, use the Delete soft button to delete user objects. To save user objects before deletion, see The STORE Page on page 13‐5 of The PC3 Musician’s Guide. The Objects page also displays the current installed objects version (factory objects,) and the current installed OS version. This information is useful when installing updates. Rename The Rename utility allows you to rename an object without entering the object’s editor. The Rename page shows a list of all user created objects, grouped by object type (see below.) Use the alpha wheel or plus/minus buttons to select an object from the list. Press Rename to bring up the object Rename screen and enter a new name by following the standard renaming procedure. For more information, see Saving and Naming on page 5‐2 of The PC3 Musician’s Guide. 7-13... -
Page 70: Delete
Master Mode OBJECT As in all naming dialogs on the PC3, you can do a double‐press of the Left/Right cursor buttons to put the naming cursor on the last character of the string. This is helpful when putting unique characters at the ends of names. Left/Right cursor button double‐press ‐> Move cursor to the end of the name in any naming dialogue. Delete The object Delete utility is useful for deleting unwanted user created objects in order to increase free RAM space in your PC3. On the main Delete page, for each object type you can select a bank of objects to delete, a range of objects to delete, or delete all objects. On the Delete advanced page, you can select a single object or multiple objects to delete. To delete a group or range of objects, use the main Delete page (see below.) Use the cursor to select the left column, then use the cursor, alpha wheel or plus/minus buttons to select one or more object types from the list. Use the Select soft button to make your selection(s), which will be marked with a star. Select “All Types” if you want to delete all user objects (this will select all object types and numbers automatically.) Next, use the cursor to select the right column, then use the cursor, alpha wheel or plus/minus buttons to select one or more ranges of object numbers from the list. You can select object numbers by bank grouping (groups of 128), by number range (select “1...100 Range” use the SetRng soft button and choose any range of 2048 objects) or select “Everything” to delete all objects of the selected type. Again, use the Select soft button to make your selection(s), which will be marked with a star. The Clear soft button will clear your selection(s) from the currently selected list. Press the Delete soft button to delete your selection, you will be given the choice to Delete or Cancel. The Cancel soft button on the main delete page will return you to the Objects page. 7-14... -
Page 71: Utils
Master Mode Utils To delete single or multiple objects, go to the Delete advanced page by pressing the Advnce soft button on the main Delete page (see below.) The right column shows you a list of all user created objects. The left column tells you what type each object is, and objects are grouped by type. Use the alpha wheel or plus/minus buttons to select one or more objects from the list. Use the Select soft button to make your selection(s), which will be marked with a star. Use the Type soft button to jump to the lowest numbered object of the next group of object types. You can use the alphanumeric pad to jump to an object of the selected type by number, or enter 0 to jump to the lowest saved object number of the currently selected type. To review which objects you have selected, press the Next soft button to move to the next selected object in the list. Press the Delete soft button to delete your selection, you will be given the choice to Delete or Cancel. The Cancel soft button on the Delete advanced page will return you to the main Delete page. For Delete and Delete advance, if any of the selected objects have dependents that were not selected, you will see the question: Delete dependent objects? If you answer Yes to this question, all dependent objects of the selected objects are deleted, unless they are being used as dependents of other objects that are to remain in memory. Answering No will delete only those objects that were selected and not their dependents. Utils Pressing the Utils soft button calls up the Utility page, which gives you access to two analytic and diagnostic tool. Additionally, pressing the two right‐most soft buttons will call up the Utility page from any mode or editor. The Utilities page appears as shown below: Pressing the MIDI soft button launches MIDIScope™, a useful subprogram that lets you monitor the MIDI messages from the PC3 and those received via MIDI. This is a good way to make sure you’re receiving MIDI from MIDI masters. It’s also good for making sure your controls are assigned as you want them, checking your attack velocities, checking your controller values, etc. 7-15... -
Page 72: Clock
Master Mode CLOCK Pressing the Voices soft button calls up the Voice Status page, which shows the PC3’s active voice channels as you play. The Voice Status pages displays each active voice as a solid rectangular block—for mono voices—or displays stereo pairs of voices as a > for the left channel voice and a < for the right channel voice. Whatever symbol the page displays, when the key of a voice is released, that voice’s symbol on the Voices Status page turns into a dot during the release portion of that voice’s envelope. When the voice decays to silence, it is no longer active, and the dot disappears. The Voice Status symbols appears as shown below: The Voice Status page gives you an indication of the envelope level of each voice, though not necessarily the volume level. Nonetheless, this can give you a valuable indication of how your voices are being used. For example, if all or most of the voices are active, then there’s a good chance that when voice stealing takes place an audible voice will be reallocated. The Voices utility works a bit differently for KB3 programs. The PC3 uses one voice of polyphony for every two tone wheels in a KB3 program. In the Voices utility, the voices used by the tone wheels appear as solid rectangular block, meaning that the voices are used for the KB3 program. They don’t get reallocated at any time, since they’re always on, even if you’re not playing any notes. Any voices not dedicated to a KB3 program behave normally. So if you have a setup that contains a KB3 program in one zone, and VAST programs in one or more other zones, you can monitor the voice allocation of the non‐KB3 voices in the section of the display that isn’t constantly filled with solid rectangular blocks. CPU usage is displayed in percent on the bottom of the page, which reflects how much of the PC3’s total available CPU power is being used from moment to moment. Generally, having more voices, complex Programs and effects in use at once will result in higher CPU usage. CLOCK Pressing the CLOCK soft button allows you to view the PC3’s System Clock (see below.) When objects are saved, they are time stamped with the date and time of this clock. This time stamp can be seen in the file properties when viewing the files with a computer. The Format soft button changes the view format of the date on this page. The Set soft button brings you to the Set clock page where you can set the system clock and date. Use the cursor to move between fields, use the alpha wheel or plus/minus buttons to change each field. On the Set page, press the Set soft button to save changes and return to the System Clock page, or the Cancel soft button to return to the System Clock page without saving changes. The Chrono soft button brings up the PC3’s Chronometer (stop‐watch) page (see below.) This can be useful for timing the length of songs or performances. Press the Start soft button to begin timing. The Chronometer will continue running even if you exit to other screens or modes. Press the Stop soft button to stop timing, the Reset soft button to reset the Chronometer, or the Cancel soft button to return to the System Clock page. 7-16... -
Page 73: Reset
Master Mode Reset Reset Press the Reset soft button if you want to return your PC3’s memory to the state it was in when you bought it. CAUTION: Resetting the PC3 system causes ALL parameters to be restored to default values and ALL user objects to be erased. The PC3 will ask you if you want to delete everything (meaning all RAM objects), and a pair of Yes/No soft buttons will appear. Press No if you want to keep any objects you have saved. Press Yes, and everything stored in RAM will be erased. After a few seconds, the PC3 will return to the Program mode page. Loader Pressing the Loader soft button calls up the Boot Loader. For details on the Boot Loader, see Appendix B in The PC3 Musician’s Guide. About Pressing the About soft button calls up the general info page for the PC3. On this page is the version of the installed OS and factory object. Press any key to leave this page. Save Pressing the Save soft button saves the Master Table object, which saves many important PC3 settings as defaults. Since the Master Table is always saved when exiting Master Mode (or MIDI mode,) the Save soft button is only needed in order to save when Master Table Lock is on (see Master Table Lock (Master Lock) on page 7‐3, above.) The Master Table saves the current configuration of the Master Pages (both 1 and 2.) The Master Table also saves default settings for which program is selected on each of the 16 channels in Program mode (note that these channel settings are often altered by loading a song in Song mode.) The current channel and program selected in Program mode when the Master Table is saved will be loaded by default the next time the PC3 is powered on. The Master Table saves settings from MIDI mode for the Transmit, Receive, and Channels pages. The Master Table also saves settings for “favorite” programs (see the User Interface Basics chapter, page 3‐4.) Lastly, the Master Table saves settings for the Master Effects page in Effect mode. Only one Master Table object can be saved in the PC3’s internal memory, and this should be sufficient for most users. For users who wish to save alternate Master tables for quicker access to different system configurations, the object must be saved to an external device (see the Storage Mode chapter.) 7-17... -
Page 74: Preview Sample (Prview)
Master Mode Preview Sample (PRVIEW) Preview Sample (PRVIEW) Press the PRVIEW button to go to the PREVIEW page. The PREVIEW page can be used to automatically make a new keymap and program using any sample or group of sample roots. Programs created with the preview function are saved in Program Mode. This allows you to quickly hear what a sample or group of sample roots will sound like in a program. The preview function is also a quick way to begin making a new program which can be edited further if desired. If a single sample is selected a single keyrange keymap will be created. If a group of sample roots is selected, the preview function will try to create a keymap with multiple keyranges based on each sample’s root key. If the sample or group of sample roots are stereo, the created program will be stereo. To use the preview function, go to the PREVIEW page, select a sample or group of sample roots in the Sample field using the Alpha Wheel, ‐/+ buttons, or the alphanumeric pad, then press the OK soft button. Next you will be shown a list of banks by ID# range (bank 1 = 1...128, bank 2 = 129...256, etc.) Use the Alpha Wheel or ‐/+ buttons to choose a bank from this list. The preview function will save the created program and keymap using the lowest unused ID numbers available in that bank or higher. The preview function will never overwrite existing programs or keymaps. Saving to the User bank (1025...1152 and above) will make it easiest to find the new program or keymaps in the Programs list or Keymaps list. Press the Ok soft button to choose the selected bank and create the new program and keymap. The new program will be selected in the currently selected channel in Program Mode. 7-18... -
Page 75: Chapter 8 Song Mode And The Song Editor
Song Mode: The MAIN Page Chapter 8 Song Mode and the Song Editor Song Mode: The MAIN Page Soft Buttons on the MAIN Page The Delete Soft Button Press the Delete soft button to delete the current song. The PC3 will present a prompt, at which point you may cancel, or confirm to delete the song. Song Mode: The BIG Page Parameter Range of Values Default... -
Page 76: Metron
Song Mode and the Song Editor Song Mode: The MIXER Page For example, letʹs say you have a recorded a four bar drum loop and now want to record an eight bar bass line. This would be a situation where UnLoop would come in handy. While the drum track keeps looping, the bass track will record in linear fashion, and the end point will be moved to the point at which you press Stop. Actually, the drum track will also change. It will play through its loop twice, but while the information is repeating in the loop, it will be recorded to the track. So now if you look at the drum track, you will see information in bars 5‐8 (a duplicate of the information in bars 1‐4). Metron The Metron parameter determines the recording modes in which the metronome will play. With Metro set to Off, the metronome doesnʹt play at all. With Metron set to Rec, the metronome only plays while recording is in progress. With Metron set to Always, the metronome plays during playback and recording. With Metronome set to CountOff, the metronome plays only during count off (if the CountOff parameter on the Metro page is set to something other than Off.) Song Mode: The MIXER Page Use the Out parameter to set the rear panel audio outputs used for each track of the current song. This parameter determines the output settings for the main program signal and insert effects of each track (for Aux effects output settings, use the Output parameter on the Song Mode AUX1 or AUX2 pages.) A setting of Auto will make that track output audio based on the settings for the program used by that track. Program output settings are set in the Program Editor using the Output parameter on the top line of PROG FX page (see Output on page 2‐1 for details) or the Output parameter on the top line of LAYER FX page (see the PC3 Musician’s Guide for details.) A setting of Pri. (primary) will output track audio to the MAIN Balanced Analog Outputs. A setting of Sec. (secondary) will output track audio to the AUX Balanced Analog Outputs. ... -
Page 77: Song Mode: The Metro Page
Song Mode and the Song Editor Song Mode: The METRO Page Song Mode: The METRO Page Metronome This parameter determines the recording modes in which the metronome plays. With Metronome set to Off, the metronome never plays. With Metronome set to Rec, the metronome only plays during recording. With Metronome set to Always, the metronome plays during playback and recording. With Metronome set to CountOff, the metronome plays only during count off (if the CountOff parameter is set to something other than Off.) ... - Page 78 Song Mode and the Song Editor Song Mode: The METRO Page...
-
Page 79: Storage Mode
Storage Mode The LOAD Page Chapter 9 Storage Mode The LOAD Page Pressing the LOAD soft button calls up the LOAD page (see below,) where you can load .PC3, .P3K, .K26, .K25, or .KRZ files, or individual objects from within those files. Along the bottom of the Load page, there are four soft buttons. Below are descriptions of their functions: Select Select the highlighted file. An asterix (*) appears to the left of selected files. To deselect a file, highlight the file and press the Select soft button again. Multiple files can only be selected if they are in the same directory. Entering a new directory will deselect all files. SelAll Press the SelAll soft button to select all files in the current directory (directories within the current directory will not be selected.) Press the SelAll soft button again to deselect all files in the current directory. Entering a new directory will deselect all files. Parent Moves you up one level in the directory hierarchy. If the display is already at the root directory, this button has no effect. Entering a new directory will deselect all files. Open Open selected directory or view objects within a .PC3 file or other compatible Kurzweil file type for loading individual objects. See Loading Individual Objects in the Storage Mode chapter of The PC3 Musician’s Guide for instructions on opening .PC3 and other Kurzweil file types to view and load individual objects (see Appendix A for compatibility details.) Entering a new directory will deselect all files. Viewing objects within a .PC3 file or other Kurzweil file will deselect any other files that had been selected. OK Load the selected .PC3 file or other compatible Kurzweil file type. See Loading ... -
Page 80: Export
Storage Mode Export Export Press the EXPORT soft button to go to the Export page. The Export page allows you to export MIDI files created in Song mode, lists of controller assignment info that are automatically created for each Program and each Chain, or a list of all objects in text format. Developers can also export an object in XML format, a KPN. To export a MIDI file created in Song mode, the song must be currently loaded in Song mode. Go to Song mode and load the desired song, then return to the Storage mode EXPORT page and press the Song soft button. You will be prompted first to choose a directory to save the file into, and then you will be prompted to name the MIDI file. When you name the file, you can use the Type field to choose to export either a Standard MIDI File type 1 (saves with multiple channels,) or Standard MIDI File type 0 (saves all channels as 1 channel.) To export a list of controller assignment info for all Programs or for all Chains, press the PrInfo soft button or the FXInfo soft button. You will be prompted to choose a directory to save into, and then you will be prompted to name the info file. A comma separated value file will be exported. To export a list of all objects in text format, press the ObjLst soft button. You will be prompted to choose a directory to save into, and then you will be prompted to name the file. A comma separated value text file will be exported, listing each object type with ID number, object name, and whether the object is internal or user. To export an object in XML format, press the ObjFmt soft button. Choose an object from the list using the Alpha Wheel, ‐/+ buttons, or the alphanumeric pad, then press the Ok soft button. You will be prompted to choose a directory to save into, and then you will be prompted to name the file. To export a KPN, press the KPN soft button. Choose a Domain and Channel, then press the Ok soft button. You will be prompted to choose a directory to save into, and then you will be prompted to name the file. ... -
Page 81: Chapter 10 Keymap And Sample Editing
Keymap and Sample Editing The Keymap Editor Chapter 10 Keymap and Sample Editing The Keymap Editor The Keymap Editor lets you customize the PC3’s factory preset keymaps and save them to RAM. You can also build your own keymaps from scratch (see Building a Keymap on page 10‐7.) Keymaps are an integral part of every layer of a program. Each keymap contains a set of parameters determining which sample(s) the PC3 will play when you trigger a note. Each layer has at least one keymap, but it can have two keymaps when you’re working with stereo samples. Each of these stereo keymaps uses two of the 128 available voices. Each keymap consists of a set of key (note) ranges—C 4 to G 4, for example. The entire span of each keymap is from C 0 to G 10. Each range has a sample root assigned within the range. Each sample root is a distinct ROM sample. Within each key range, the sample root is transposed up and down to play on each of the range’s notes. You can view each range by changing the value of the Key Range parameter on the Keymap‐editor page. You can mix samples of different timbres within a single keymap, and even tune individual keys to any pitch by defining key ranges to single notes and assigning samples to each of those notes. When you trigger a note, the PC3 identifies the key range where the Note On event occurred. It also checks the attack velocity value of the note. It then addresses its memory, and retrieves the sample root that’s assigned to that key range and attack velocity value. If the note that’s triggered is not the note where the sample root is assigned, the sample is transposed to play at the correct pitch. The PC3 then generates the digital signal that represents the sound of the note. At this point the keymap’s job is done, and the signal proceeds through the layer’s algorithm and on to the audio outputs. You can assign as many key ranges to a keymap as you like, even creating a separate range for ... - Page 82 Keymap and Sample Editing The Keymap Editor layer using the LoKey and HiKey parameters on the LAYER page in the Program Editor. If each layer covers the entire range, then each note you played would trigger 20 voices (one for each layer). You would only hear one drum per note because all the other layers are triggering “Silence.” Because of the voice‐stealing algorithms in the PC3, the voices would almost immediately become available again, since they have no amplitude. But for one brief instant, the voice would be triggered, which could cause other voices to be cut off. You can also create multi‐velocity keymaps—that is, keymaps that will play different timbres depending on the attack velocities of your Note On events. Program 6 Pop Power Piano, for example, uses a keymap with three velocity ranges. Each key range in a multi‐velocity keymap contains two or more distinct sample roots that the PC3 chooses between, according to the attack velocity of the note. See Velocity Ranges (VelRng) on page 10‐5 for details. The Keymap Editor is nested within the Program Editor. The first step in using the Keymap Editor is to select the keymap you want to edit. This is done on the KEYMAP page in the Program Editor, using the Keymap parameter. Once you’ve done this, just press the Edit button, and you’ll enter the Keymap Editor. If you want to edit a different keymap, press the Exit button to return to the KEYMAP page in the Program Editor and select the desired keymap. If you want to build a keymap from scratch, start with the keymap 999 Silence (see Building a Keymap on page 10‐7). This keymap template contains one key range from C 0 to G 10, and is a convenient starting point for adding key ranges and assigning sample roots. The Keymap‐editor page looks like this: Parameter Range of Values Sample Sample Root list...
-
Page 83: Keymap Editor Parameters
Keymap and Sample Editing The Keymap Editor Keymap Editor Parameters Sample This is where you assign a sample root to the current key range. Depending on the nature of the sample root—an individual sample or a block of sample roots—the sample’s name looks a bit different in the display. Each sample’s name consists of three parts: a numeral, a name, and a note number—for example, 999 Silence‐C4. Additionally, the name of stereo samples will end with an S. (To use a stereo sample, the Stereo parameter must be set to On in the Program Editor, and two keymaps must be selected, see The KEYMAP Page on page 6‐19 in The PC3 Musician’s Guide for details.) The numeral is the sample block ID. If the sample object is an individual sample, the sample block ID is the same as the sample’s object ID. If the sample object is a group of sample roots, the object ID of the first root in the group determines the sample block ID. The remaining roots in the block have the same ID, and differ only in their note numbers. Next comes the name of the sample, which typically describes the sample’s timbre. The final part of the sample’s name refers to the pitch at which it was originally sampled. For many timbres, multiple samples are made at various pitches. As you scroll through the Sample list, you’ll see only the pitch of the sample change until you reach the next sample block. The sample’s original pitch is set in the Sample Editor (see Root Key on page 10‐10.) This determines which key will play the sample at its original pitch when a sample is used in a key range (see Key Range below.) Key Range A keyrange is a range of keyboard keys that plays one sample (per velocity range, see Velocity Range (VelRange) below for details.) Each sample in a key range (per velocity range) is transposed based on each sample’s RootKey parameter so that it plays at the correct pitch on the ... - Page 84 Keymap and Sample Editing The Keymap Editor Velocity Range (VelRange) This parameter shows the keyboard velocity range (in dynamic levels) that will trigger a sample for the current KeyRange. In a key range with more than one velocity range, each velocity range can use a different sample, as well as different CoarseTune, FineTune, and VolumeAdjust settings. Velocity ranges are intended for use with instrument samples recorded at different velocities. This helps to make playing sampled instruments sound more realistic. Sample volumes are also scaled based on keyboard velocity within each velocity range. Velocity ranges for the current Keymap are set using the VelRng soft button (see Velocity Ranges (VelRng) on page 10‐5) or the Low Velocity (Lo), High Velocity (Hi) parameters (see below.) All keyranges in a Keymap share the same set of velocity ranges. Up to eight velocity ranges can be used. When the VelRange parameter is selected, you can scroll through available velocity ranges using the Alpha Wheel or the ‐/+ buttons. Multiple velocity ranges are only shown if the current Keymap uses more than one velocity range. If the top line of the EditKeymap page displays VelRange, you can scroll through the available velocity ranges with any parameter on the page selected using the Chan/Layer buttons. (Press the Toggle soft button to toggle the top line between displaying VelRange and KeyRange.) Low Velocity (Lo), High Velocity (Hi) Use these parameters to set the velocity range of the current key range. If you extend the current velocity range into another, the boundaries of the other velocity range will become shortened to accommodate the velocity range you are extending. If the velocity range you are extending covers another velocity range, the other velocity range will be deleted. Coarse Tune Coarse Tune allows you to transpose a sample for a given range. This is extremely useful when ...
-
Page 85: The Soft Buttons In The Keymap Editor
Chan/Layer buttons will scroll between the available key ranges in the key map (if the current key map has more than one key range.) The note range for each key range will also be displayed on the top line. If the top line of the page displays VelRange, then the Chan/Layer buttons will scroll between the available velocity ranges in the key map (if the current key map has more than one velocity range.) The dynamic range for each velocity range will also be displayed on the top line. Velocity Ranges (VelRng) Press the VelRng soft button to view the VEL RANGES page (see below.) Use the VEL RANGES page to add, edit or delete velocity ranges for the current keymap. The VEL RANGES page shows a chart of a keymap’s entire available dynamic range, from most quiet (ppp) to most loud (fff.) Velocity ranges can also be adjusted from the EditKeymap page, but the VEL RANGES page provides a chart as a visual aid. Each keymap can be split into a maximum of eight velocity ranges. Each key range in a keymap can use its own sample for each velocity range. All key ranges in a keymap share the same velocity ranges. Press the Split soft button to split the currently selected velocity range into two ranges (until the maximum of eight velocity ranges have been created.) Press the Delete soft button to delete the currently selected velocity range. Press the Exit soft button to return to the EditKeymap page. On the VEL RANGES page, the currently selected velocity range is highlighted in the chart, and its name is displayed in the VelRange field. With the VelRange field selected, you can use the Alpha Wheel or ‐/+ buttons to move between the available velocity ranges (if there is more than one velocity range available.) You can also use the Chan/Layer buttons at any time to move between the available velocity ranges. If there is more than one velocity range available, you can adjust the dynamic range of each using Lo and Hi parameters. These Hi and Lo parameters are the same as the Low Velocity (Lo) and High Velocity (Hi) parameters on the EditKeymap page (see Low Velocity (Lo), High Velocity (Hi) on page 10‐4 for details.) Changes made with either set of parameters are shown on both pages. New Range (NewRng) The NewRng button lets you define a new keyrange to edit, whether it’s to assign a different sample, or to adjust the pitch or volume. Just press NewRng, then play the note you want as the low note, then the high note. The PC3 will prompt you for each note. When you trigger the high note, you’ll return to the Keymap‐editor page, and the new keyrange you defined will be selected. The next change you make will affect only that edit range. 10-5... -
Page 86: Special Double Button Presses In The Keymap Editor
Assign The Assign soft button lets you select a sample, then specify the key range to which it’s assigned. This enables you to insert a new key range within the current keymap. When you press the Assign soft button, a dialog appears that prompts you to select a sample from the Samples list. Scroll through the list, then press the OK soft button. You’ll then be prompted to define the new key range by playing the notes you want to be the lowest and highest notes of the range. (Press the Cancel soft button if you change your mind.) When you trigger the low and high notes, the new key range is inserted. If the new key range partially overlaps an adjacent key range, the existing key range will be adjusted to accommodate the new range. If the new key range completely overlaps an existing key range, the original key range will be replaced. Rename Call up the page that enables you to change the name of the current keymap. Save Start the process of saving the current keymap. Delete Delete the current keymap from memory. Factory ROM keymaps cannot be deleted. Special Double Button Presses in the Keymap Editor Suppose you have a sample whose root key is C 4, and you want to assign it to A 0, because you don’t expect to play it often. If you want it to play back without transposition, you’ll have to adjust the Coarse Tune parameter. Calculating the right value for Coarse Tune can get tedious if you’re assigning a large number of samples. Fortunately, there’s a short cut. 1. Assign a sample root to a key range, either using the Lo, Hi, and Sample parameters or using the Assign soft button. 2. Highlight the value of the Coarse Tune parameter. 3. Press the Plus/Minus buttons at the same time. The value of Coarse Tune changes automatically. If the sample is assigned to one note, the PC3 sets Coarse Tune so that the note plays the sample without transposition. If the sample is assigned to a range of notes, the PC3 sets Coarse Tune so that the middle note of the range plays the sample without transposition. 10-6... -
Page 87: Building A Keymap
G 10 (the entire MIDI keyboard range). The Sample parameter will have a value of 999 Silence‐C 4. Now you’re ready to start assigning samples to key ranges within the keymap. We’ll assume that you are using samples with roots at C 1, C 2, C 3, etc. (most of the ROM samples are set up this way) and that you plan to assign a root to each octave. To begin, press the Assign soft button. The display will prompt you to select a sample. Use the Alpha Wheel to scroll to one of the samples, or type its ID on the alphanumeric pad and press Enter. When you’ve found the sample you want to use, press the OK soft button. The display will say “Strike low key…” Trigger A 0 (MIDI note number 21, the lowest A on a standard 88‐note keyboard). The display will change to say “Strike High Key…”Now trigger F 1 (MIDI note number 29). The display will return to the Keymap‐editor page. The Key Range parameter will show A 0–F 1, and the Sample parameter will show the sample you selected when you started the range assignment. Each sample in a key range is automatically transposed based on each sample’s RootKey parameter so that it plays at the correct pitch on the keyboard relative to its root key (see Editing Samples on page 10‐9 for details on the RootKey parameter.) Other keys within the key range transpose the sample chromatically relative to the root key. Automatic transposition based on each sample’s RootKey is important if you want the sample to play in tune with other PC3 programs or other instruments. The PC3 makes this easy because each ROM sample has the correct RootKey settings. Generally you should set a keyrange so that the sample’s RootKey (displayed at the end of the sample name) is in the middle of the range. If you set a key range that does not cover the sample’s RootKey, the sample will have to automatically transpose by many semitones, and will likely not sound correct. Samples are also limited to an octave of upward transposition from the sample’s original pitch. If you set a keyrange too high based on the Root Key, some samples may not be able to transpose upward far enough to play in tune, and many keys may play the same note (the highest note that the sample can be transposed to.) Automatic transposition relative to the root key can be offset using the Coarse Tune and Fine Tune parameters on the EditKeymap page, (see Coarse Tune and Fine Tune on page 10‐4.) Continuing with the example, press the Assign soft button again. Select another sample root at the prompt, and press the OK soft button. Now trigger F# 1 for the Low Key prompt, and F 2 for the High Key prompt. At this point you’ve defined two key ranges, the first from A 0 to F 1, and the second from F# 1 to F 2. You can repeat the process as many times as you want, creating a new key range each time. - Page 88 Keymap and Sample Editing Building a Keymap Here’s a fairly important point that may or may not affect your keymap construction. Suppose you want to build a keymap that uses the same sample in several adjacent key ranges, and you plan to add a bit of detuning to the samples in each range. You might think that you could build the keymap first, then go into the Sample Editor and tweak the sample settings of each keyrange when the keymap is finished. Yes, but… Suppose you used the technique we described above to assign a sample whose root was C 4 to a key range from A 3 to E 4. Then you assigned the same sample to a key range from F 4 to B 4. You might be surprised to find that when you finished the F 4–B 4 key range and the Keymap‐editor page reappeared, the current key range would not be F 4 to B 4, but A 3 to B 4! This is because the PC3 automatically merges adjacent key ranges that are identical (this is done to save memory). Therefore, some parameter must be different in each adjacent key range you create if you want to build keymaps using the technique we just described. So if you want to use the same samples in adjacent key ranges with, for example, minor pitch or volume modification, you should make those changes to the current sample on the Keymap‐editor page before assigning the next range. 10-8...
-
Page 89: Editing Samples
Editing Samples Editing Samples To enter the Sample Editor, first select the program you wish to edit in Program mode. With the program selected, press the Edit button to enter the Program Editor. In the program editor the KEYMAP page will be selected (if not press the KEYMAP soft button.) With the KeyMap parameter selected on the KEYMAP page, press the Edit button again to enter the Keymap Editor. On the EditKeymap page, select the KeyRange parameter and use the Alpha Wheel or ‐/ + buttons to choose one of the available key ranges (if there is more than one keyrange.) You can edit the existing sample of a keyrange, or choose a new sample for the keyrange and edit that. When the Keymap parameter is selected you can hold the Enter button and trigger notes to select different key ranges. If you want to select a different sample, use the cursor buttons to select the Sample parameter. Use the Alpha Wheel to select a sample. Press the Edit button once more, and you’ll enter the Sample Editor. The sample will play through the effects of the current program. The name of stereo samples end with an S. To use a stereo sample, the Stereo parameter must be set to On in the Program Editor, and two keymaps must be selected, see The KEYMAP Page on page 6‐19 of The PC3 Musician’s Guide for details. There are two sample editing pages—MISC (Miscellaneous) and TRIM. The soft buttons for these pages are visible when you enter the Sample Editor. You can trigger notes at any time while you’re editing, to hear your changes as you make them. When you have finished editing your sample or samples, see the preview function on page 7‐18 for a way to automatically create a program and keymap using a sample or group of sample roots. The Miscellaneous (MISC) Page On the MISC page, you’ll set several parameters that affect the behavior of the current sample. These parameters affect the entire sample. The right side of the top line displays the root number and RootKey of the sample. For stereo samples, L or R is displayed after the Root# parameter to indicate that you are viewing parameters for the left or right channel of the sample. Use the Chan/Layer buttons to move between channels of stereo samples. Although you can edit parameters for the left and right channels of a sample, both channels can only be heard if the Stereo parameter is set to On in the Program Editor, and the same keymap is selected for the Keymap1 and Keymap2 parameters in the Program Editor. If the Stereo parameter is set to Off in the Program Editor, only the left channel of stereo samples will be heard (in mono.) If the ... - Page 90 Off, On Root Key The root key represents the keyboard key at which the sample will play back without transposition (that is, at the same pitch as the pitch of the original sample). Use the ‐/+ buttons or Alpha Wheel to select a RootKey note, or use the alphanumeric pad followed by the Enter button to enter a RootKey by MIDI note number. Pitch Adjust Use this parameter to change the pitch of the sample relative to the key from which it’s played. Setting a value of 100cts, for example, will cause the sample to play back one semitone higher than normal. This parameter is handy for fine tuning samples to each other if they’re slightly out of tune. Volume Adjust Uniformly boost or cut the amplitude of the entire sample. Alternative Start Volume Adjust (AltVolAdjust) This parameter sets the amplitude of the sample when the alternative start is used. See page 6‐21 in The PC3 Musician’s Guide for a discussion of AltSwitch. Decay Rate This parameter defines how long the sample takes to decay (fade) to zero amplitude (silence). DecayRate takes effect in the loop portion of the sample, after all the attack stages of the amplitude envelope are complete. Decay Rate affects each sample individually, and is in effect only when the amplitude envelope for the program (the Mode parameter on the AMPENV page in the Program Editor) is set to Natural. If Mode is User, the settings on the AMPENV page override the setting for DecayRate. Release Rate The release rate determines how long the sample will take to decay to zero amplitude when the note trigger is released. The higher the value, the faster the release rate.This release affects each sample individually, and is in effect only when the amplitude envelope for the program (the Mode parameter on the AMPENV page in the Program Editor) is set to Natural. In this case, the release begins as soon as the note is released.If Mode is User, the settings on the AMPENV page override the setting for ReleaseRate.
- Page 91 Keymap and Sample Editing Editing Samples Loop Switch This parameter activates or deactivates the looping of the currently selected sample. When set to On, the sample will loop according to the settings on the TRIM page. When set to Off, the sample will play through to its End point and stop. Playback Mode (Playback) This parameter lets you modify the direction in which the sample is played. Set it to a value of Reverse if you want the sample to play from its End (E) point to its Start (S) point. Choose a value of Bidirectional to cause the sample to play from Start to End, then reverse direction and play again from End to Loop and back, repeating until the note trigger is released (this works only when the Loop Switch parameter is set to On). Alternative Sample Sense (AltSense) This provides a convenient way to activate the alternative start of a sample. When set to Normal, the alternative start will be used when the Alt Switch control is On (this is set on the KEYMAP page), or when the control source assigned to it is above its midpoint. When set to Reverse, the alternative start will be used when the Alt Switch control is Off, or when the control source assigned to it is below its midpoint. Ignore Release (IgnRelease) When set to a value of Off, the sample will release normally when the note trigger is released. When set to On, the note will not release, even when the note trigger is released. This setting should be used only with samples that normally decay to silence; nondecaying samples will play forever at this setting. This parameter is equivalent to the IgnRelease parameter on the LAYER page, but affects only the currently selected sample. SampleRate and NumSamples These parameters cannot be edited, but show the sample’s sample rate and the sample’s length in samples. Samples that are longer than 1 million samples are displayed a 1Ms.
-
Page 92: The Trim Page
Keymap and Sample Editing Editing Samples The TRIM Page The TRIM page lets you set the Start, Alternative Start, Loop, and End points of the current sample. The top line indicates the Zoom and Gain settings. This Gain setting doesn’t affect the amplitude of the sample, just the view in the display. The right side of the top line displays the root number of the sample. If the sample is part of a group of sample roots, you can use the Chan/Layer buttons to scroll through each sample in the group. The four parameters on this page are Start (S), Alternative Start (A), Loop (L), and End (E). Selecting these parameters and adjusting their values enables you to modify how the sample plays back when notes are triggered. Each of these parameter points are expressed in individual samples. For example, a one second sample at a sample rate of 44,100Hz would have 44,100 values available to adjust for each of these parameters. There is a vertical line in the center of the display indicating the placement of the current parameter in the sample waveform. The sample waveform will move relative to the line when each parameter is selected or adjusted. The line remains in the center of the display, and the waveform shifts to indicate the new position of the point. Each parameter can be adjusted with the ‐/+ buttons, the Alpha Wheel, or the alphanumeric button pad followed by the Enter button. The Start (S) point determines the beginning of the current sample. You can truncate the beginning of the sample by increasing the value of the Start (S) parameter. You might do this to remove silence at the beginning of a sample, or to remove some or all of the attack. You can’t decrease the Start point of samples below zero. The Alternative Start (A) parameter lets you set a second, optional start or end point for the current sample. The Alternative Start will be used when the Alt Switch parameter on the KEYMAP page is set to On, or when it’s set to a specific control source and that control source is generating a value of more than +.5. (For example, if you assign MWheel as the control source for the Alt Switch parameter, the Alternative Start will be used when the Mod Wheel—or whatever control source you have set to send MWheel—is above its halfway point.) The Alternative Start can be set before, after, or at the same point as the Start or End. If you set the Alternative Start after the End, you can extend the play of looped samples. Normally, looped samples will play through to the End, then will loop back to the Loop point, and continue looping like this until the note is released, when they go into their normal release. If the Alternative Start is set after the End, looped samples will loop in the same way while notes are sustained. As soon as you release the notes, however, the samples will play through to the Alternative Start point before going into release. - Page 93 Keymap and Sample Editing Editing Samples the zero point of the display (the horizontal line in the middle of the waveform display.) Though adjusting these points visually is helpful, always listen to the sample and make the final settings based on what sounds best. You’ll notice an audible click in your sample loop if the ends of the waveform do not meet where the loop occurs. The closer you can get the two ends of the waveform, the better the sound quality of your loop will be. Using zero‐crossings for the Loop and End parameters may also help reduce clicks at the loop point, see Zero‐ and Zero+ below for details. The End (E) parameter sets the point at which the current sample will stop playback. Typically you’ll use this parameter to trim unwanted silence off the end of a sample, although you can use it to shorten a sample as much as you want. Note On Saving Samples: Trimmed portions of a sample are not saved. Trimmed portions before the Start (S), or Alternative Start (A) points (whichever has a lower value) will be lost upon saving, and whichever parameter had a lower value will have a value of zero the next time it is loaded (values for all other sample point parameters will be adjusted relatively.) Trimmed portions after the Alternative Start (A) or End (E) points (whichever has a higher value) will be lost upon saving. If you wish to save a copy of the original untrimmed sample, save the trimmed version under a different ID#. If you save a trimmed sample at its original ID#, you can always restore the original version by deleting the modified version that you saved. To delete a sample, see Delete on page 10‐11, or OBJECT on page 7‐13, the Delete function. Zoom- and Zoom+ These buttons increase or decrease the resolution of the waveform display, enabling you to see a larger or smaller segment of the waveform of the currently selected sample. The top line of the display indicates the zoom position in terms of a fraction—for example, 1/256—which indicates the number of individual sample elements represented by each display pixel. A value of 1/256 means that each pixel represents 256 individual sample elements. The maximum zoom setting of 1 shows you a very small segment of the sample. The minimum setting of 1/16384 shows you the largest possible segment of the sample. Each press of a Zoom soft button increases or ...
- Page 94 Keymap and Sample Editing Editing Samples 10-14...
-
Page 95: Appendix A Pc3 Legacy File Conversion
PC3 Legacy File Conversion Object Types and Conversion Details Appendix A PC3 Legacy File Conversion The PC3 can load objects from older Kurzweil K2 series products. Loaded objects are converted to object types native to the PC3 (see below for object types that can be converted.) Some object parameters cannot be converted and must be adjusted by the user after conversion (see object types below for details.) The PC3 does not load samples, so during keymap conversion the PC3 will try to find similar samples to use in the PC3 ROM. This process may or may not be successful. The PC3 is unable to convert the sample skipping parameter (SmpSkp,) so PC3 ROM samples used for converted K2 series keymaps can only be transposed upward by one octave. Only legacy objects ending with the file extension .K26, .K25, or .KRZ can be loaded and converted. Object Types and Conversion Details Keymap Objects All K series Keymap objects can be loaded, all parameters will be used or converted to PC3 specific parameters. The PC3 is unable to convert the sample skipping parameter (SmpSkp,) so PC3 ROM samples used for converted K2 series keymaps can only be transposed upward by one octave. Program Objects Most K series Program objects can be loaded, but FX are not converted and must be set by the user. A reverb effect is set by default for converted Programs. Some DSP ALGS and DSP objects (some filters, oscillators, etc.) can not be converted, so user may have to adjust some Program ... - Page 96 PC3 Legacy File Conversion Object Types and Conversion Details...
- Page 97 Index Extended sample loop 10‐10 Function soft buttons 2‐1 FX Mode on Master Mode MAIN page 7‐2 About 7‐17 Adjusting sample volumes 10‐4 Alternative Start Sample Editor 10‐12 General MIDI 7‐12 Analog output settings Drum Remap 7‐2 In Setup Mode 3‐2 In Song Mode 8‐2 Arp Active 3‐5 Arpeggiator Hard reset 7‐17 Active 3‐5 Beats 3‐5 Duration 3‐6 Glissando 3‐13 ID Entry Latch 3‐12 Master mode MAIN page 7‐2 Limit 3‐9 Info Limit Option 3‐9 Export 9‐2 Low Key (LoKey) and High Key (HiKey) 3‐13 INFO Editor 2‐1 Order 3‐6 INFO soft button Shift 3‐9 Program Editor 2‐1 shifting notes 3‐9 Info soft button 2‐1, 4‐2 Velocity 3‐6 Intonation key 7‐9 Assign sample 10‐6 Intonation tables 7‐8 Assigning samples to keymaps 10‐3 K series object conversion A‐1 Building a keymap 10‐7 KB3 2‐4...
- Page 98 Riffs 3‐18 Root Key Numeric Entry Sample Editor 10‐10 Master mode MAIN page 7‐2 Sample Objects Automatic Preview in a Program 7‐18 Master Mode Delete 7‐14 Sample Editor 10‐7, 10‐9 Master Mode Rename 7‐13 Samples Octav 4‐2 Adjusting volume 10‐4 OS Version 7‐17 Assigning to keymaps 10‐3 Oscillators 2‐3 Tuning 10‐4 OUTPUT page (Program Editor: KB3) 2‐4 Setup mode 3‐1 Output settings Setup Mode analog output settings 3‐2 In Setup Mode 3‐2 Setups In Song Mode 8‐2 Continuous Controller Parameters 3‐3 Controllers 3‐3 Entry values 3‐3 Shift Pattern (ShiftPatt) 3‐10 Pages Shifting notes MIDI RECV 6‐3 in the Arpeggiator 3‐9 MIDI XMIT 6‐1 Soft buttons MISC 2‐4 Keymap Editor 10‐5 OUTPUT (KB3) 2‐4 in Program Mode 2‐1 Polyphony 7‐16 Sample Editor 10‐11 Pressure Map Special functions 2‐1...
- Page 99 XMIT page 6‐1 Xpose 4‐2 Zero‐crossings 10‐13 Zone audio output settings (Setup Mode) 3‐2 Index-iii...
Need help?
Do you have a question about the PC3 and is the answer not in the manual?
Questions and answers