Lifetime 125 Owner's Manual
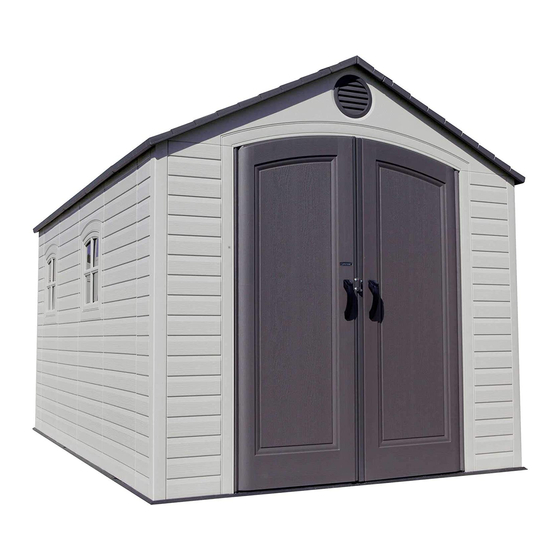
Outdoor storage shed
Hide thumbs
Also See for 125:
- Assembly instructions manual (32 pages) ,
- Assembly instructions and owner's manual (19 pages) ,
- Manual (166 pages)

Related Manuals for Lifetime 125


Summary of Contents for Lifetime 125
- Page 1 OUTDOOR STORAGE MODEL #0125 OWNER’S MANUAL Keep this Identification Number in case you need to contact our Customer Service Department.
- Page 2 Plan to spend a good part of your weekend putting together your fi ne Outdoor Storage Shed. Our Lifetime© Outdoor Storage Shed will surely last a long, long time, if you are patient, and take all the time necessary to put it together as we have instructed.
- Page 3 Lifetime continues to develop innovative products that outfi t the way you live. Lifetime makes the things you need for the lifestyle you want. By innovating products in and around the home, Lifetime simplifi es your everyday life and enables you to get the most out of your free time.
-
Page 4: Safety Instructions
REGISTER YOUR PRODUCT ONLINE AT WWW.LIFETIME.COM At Lifetime, we are committed to providing innovative and quality products. While registering, you will have the opportunity to give us your feedback. Your input is valuable to us. directly. LIFETIME’S PROMISE TO YOU: Maintaining your privacy is our long-standing policy at Lifetime. -
Page 5: Before Beginning Assembly
BEFORE BEGINNING ASSEMBLY Keep the hardware bags and their contents separate. If any parts are missing, call our Customer Service Department. Identify and inventory all parts and hardware using the parts and hardware lists and identifi ers in this document. *Two adults required to complete assembly* Only adults should set up the product. -
Page 6: Assembly Guide
ASSEMBLY GUIDE Refer to the following areas throughout the instructions to assist in the assembly process: This area is located at the top, left-hand TOOLS AND HARDWARE REQUIRED FOR THIS PAGE corner of the page and indicates which tools and hardware are needed to complete the assembly steps on a page. -
Page 7: Important Notices
IMPORTANT NOTICES Level Surface Notice: Surface must be leveled before installation. We recommend building a level work space with a concrete or patio style surface. If the surface is not properly leveled, the Outdoor Shed will not assemble correctly. Proper surface leveling will save you time in the long run, so please do not ignore this step. Building Code Notice: Consult all local building codes, as well as city and county ordinances, to ensure that the construction of the Outdoor Shed does not require a building permit. -
Page 8: Parts & Hardware List
PARTS & HARDWARE LIST Description Quantity Description Quantity BJK 0125 Hardware Bag Main Parts BGV Truss Assembly Hardware 1/4” Cap Nut Truss Connector BGT Wall & Roof Installation Hardware 1/4” x 5/8” Phillips Pan-Head Screw Roof Support Strip Foam Cube... -
Page 9: Parts Identifier
PARTS IDENTIFIER Parts shown at 4% of actual size Center Roof Panel Wall Panel Inner Floor Panel Parts shown at 8% of actual size ” Truss Support Strip ” AFY (x1) AFL (x6) Center Roof Cap Roof Support Strip ” 11/16 ”... - Page 10 TOOLS AND HARDWARE REQUIRED FOR THIS PAGE REFER TO YOUR CURRENT SHED PLATFORM FOR MATERIALS USED SITE SELECTION (shown) or cement platform; the width will remain the same. This may require the use of additional lumber or other materials. 14” 16”...
- Page 11 TOOLS AND HARDWARE REQUIRED FOR THIS PAGE NO HARDWARE REQUIRED FOR THIS PAGE **SAVE ALL HARDWARE FOR RE-ASSEMBLY!** If your existing shed is anchored to the ground, remove all anchoring hardware before following these steps. SHED DISASSEMBLY Remove the four Center Roof Panels and two Center Roof Caps highlighted below. Note: Your shed may be shorter than one shown above.
- Page 12 TOOLS AND HARDWARE REQUIRED FOR THIS PAGE NO HARDWARE REQUIRED FOR THIS PAGE Tip the Wall Panel inward. Note: You’re Shed may be a different length than the Shed shown, but the ideas are the same. Use a long flat screwdriver to gently pry the bottom corner of the Wall Panel so that it has room to slide on the inside of adjacent Wall Panel.
- Page 13 TOOLS AND HARDWARE REQUIRED FOR THIS PAGE NO HARDWARE REQUIRED FOR THIS PAGE Remove the Truss Assembly and set it aside for later. CAUTION As you remove the Wall Panels, have one person support the Truss assembly so that it does not fall over.
- Page 14 FLOOR ASSEMBLY PLASTIC PARTS REQUIRED Part shown at 4% of actual size Inner Floor Panel TOOLS REQUIRED Safety Glasses...
- Page 15 TOOLS AND HARDWARE REQUIRED FOR THIS PAGE NO HARDWARE REQUIRED FOR THIS PAGE FLOOR ASSEMBLY Fit together the two Inner Floor Panels (AGJ). Tip the Inner Floor Panel Assemblies forward at a 45° angle and connect them to the Inner Floor Panels on the main section of the shed.
- Page 16 TOOLS AND HARDWARE REQUIRED FOR THIS PAGE NO HARDWARE REQUIRED FOR THIS PAGE With at least one person on each side of the shed, tip the back section of the shed forward at about a 45° angle and slide it forward to re-connect it to the rest of the shed.
-
Page 17: Hardware Required
TRUSS ASSEMBLY HARDWARE BAG REQUIRED: BGV HARDWARE REQUIRED Hardware shown at 50% of actual size Hardware shown at actual size AAK (x10) ADJ (x10) 1/4” Cap Nut Floor Bracket AIP (x1) METAL PARTS REQUIRED Parts shown at 8% of actual size 11/16”... - Page 18 TOOLS AND HARDWARE REQUIRED FOR THIS PAGE 7/16” AAK (x6) AIP (x1) ADJ (x6) (Not to scale) TRUSS ASSEMBLY Fit two Truss Support Strips (AFP) together. Bolt Truss Support Strips, Truss Gutter Connector (AIP), and two Truss Gutter Channels (AFH) as shown using the required hardware. WARNING Do not overtighten the Cap Nut.
- Page 19 TOOLS AND HARDWARE REQUIRED FOR THIS PAGE 7/16” Attach Truss Assembly to two Wall Support Channels (AFQ) using 1/4” x 1 1/2” Hex Bolts (AAK) and 1/4” Cap Nuts (ADJ). Do not completely tighten the Cap Nut until after Truss is secured to the Wall. Note: Only fi...
- Page 20 TOOLS AND HARDWARE REQUIRED FOR THIS PAGE 7/16” (Not to scale) Attach one Floor Bracket (AHT) to the bottom of each Wall/Shelf Support Channel using the required hardware. Tighten all hardware. Repeat this section for all Trusses. You need only do this step if you plan to anchor your Shed. See the “Anchoring the Shed”...
- Page 21 WALL & ROOF INSTALLATION HARDWARE REQUIRED HARDWARE BAG REQUIRED: BGT Hardware shown at actual size (*unless otherwise indicated) AED (x4) AJA (x4)* Foam Cube ADZ (x60) ACJ (x4) 1/4” x 5/8” Phillips Pan-Head Screw METAL PARTS REQUIRED Part shown at 8% of actual size ”...
- Page 22 TOOLS AND HARDWARE REQUIRED FOR THIS PAGE Insert a Wall Panel you removed previously as well as the Wall Panel (AHD) Panels in any of the available locations. Use the 1/4” x 5/8” Phillips Pan-Head Screws you removed previously as well as the 1/4”...
- Page 23 TOOLS AND HARDWARE REQUIRED FOR THIS PAGE ADZ (x16) Connect the Truss Assembly you removed previously as well as the Truss Assembly you built using this kit to the center of each Wall Panel and Window Wall Panel with 1/4” x 5/8” Phillips Pan-Head Screws (ADZ).
- Page 24 TOOLS AND HARDWARE REQUIRED FOR THIS PAGE ACJ (x4) AED (x4) Connect the Center Roof Panels, Roof Support Strips, and Center Roof Cap you removed previously as well as the Center Roof Panels (AGQ), Roof Support Strips (AFL), and Center Roof Cap (AFY) provided with this kit using 1/4” x 5/8” Phillips Pan-Head Screws (ADZ), #10 x 5/8”...
- Page 25 TOOLS AND HARDWARE REQUIRED FOR THIS PAGE ADZ (x4) AJA (x4) 1/4” x 5/8” Phillips Pan-Head Screws (ADZ) (Fig. 1). When finished, insert Foam Cubes (AJA) Fig. 1 Fig. 2...
- Page 26 5. This product is not intended for institutional or commercial use; Lifetime Products, Inc. does not assume any liability for such use. Institutional or commercial use will void the warranty.
- Page 27 ® ENHANCE YOUR LIFETIME PURCHASE BY ADDING ACCESSORIES OR OTHER GREAT PRODUCTS To purchase accessories or other Lifetime Products, visit us at: www.lifetime.com Or call: 1-800-424-3865...
Need help?
Do you have a question about the 125 and is the answer not in the manual?
Questions and answers