Table of Contents
Advertisement
Quick Links
Download this manual
See also:
User Manual
Advertisement
Table of Contents

Related Manuals for Kramer VM-30AV


Summary of Contents for Kramer VM-30AV
-
Page 1: User Manual
Kramer Electronics, Ltd. USER MANUAL Models: VM-30AV, 1:3 Audio/Video DA VM-30AVB, 1:3 Audio/Video DA... -
Page 2: Table Of Contents
Figure 4: Configuring a 1:3 Audio/Video DA for Component (YUV) or RGB Tables Table 1: Front Panel VM-30AV and VM-30AVB 1:3 Audio/Video DA Features Table 2: Rear Panel VM-30AV and VM-30AVB 1:3 Audio/Video DA Features Table 3: VM-30AV and VM-30AVB Technical Specifications... -
Page 3: Introduction
Kramer line an integral part of the finest production and presentation facilities in the world. In recent years, Kramer has redesigned and upgraded most of the line, making the best even better! The Kramer line of professional video/audio... -
Page 4: Your Audio/Video Da
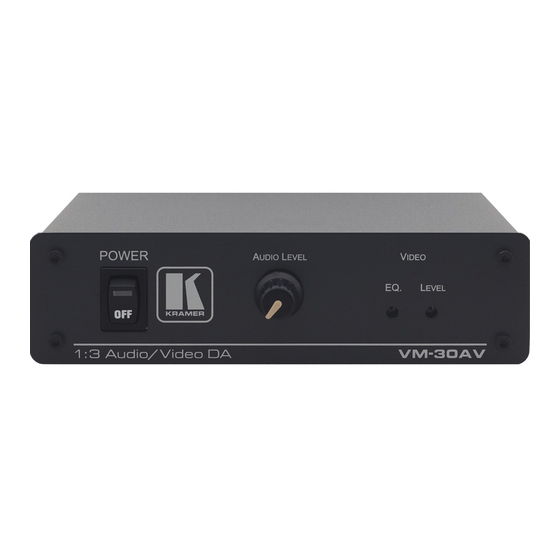
Kramer VM-30AV or VM-30AVB in a location free from moisture and away from excessive sunlight and dust Your Audio/Video DA Figure 1 illustrates the front and rear panels of the VM-30AV: Figure 1: VM-30AV 1:3 Audio/Video DA KRAMER ELECTRONICS, LTD. -
Page 5: Table 1: Front Panel Vm-30Av And Vm-30Avb 1:3 Audio/Video Da Features
Figure 2 illustrates the front and rear panels of the VM-30AVB: Figure 2: VM-30AVB 1:3 Audio/Video DA Table 1 and Table 2 define the front and rear panels of the VM-30AV and the VM-30AVB, respectively. Table 1: Front Panel VM-30AV and VM-30AVB 1:3 Audio/Video DA Features... -
Page 6: Using Your Audio/Video Da
Adjust the audio level and the video EQ. and video level, as required. Figure 3: VM-30AV 1:3 Audio/Video DA Connection 1 Switch OFF the power on each device before connecting it to your VM-30AV/B. After connecting your VM-30AV/B, switch on its power and then switch on the power on each device... -
Page 7: Configuring A 1:3 Audio/Video Da For Component (Yuv) Or Rgb
1 Switch OFF the power on each device before connecting it to your VM-30AV/B units. After connecting your VM-30AV/B units, switch on the power on each of the VM-30AV/B units and then switch on the power on each device 2 Not illustrated in Figure 4... -
Page 8: Technical Specifications
Technical Specifications Table 3 includes the technical specifications. Table 3: VM-30AV and VM-30AVB Technical Specifications Inputs: 1 composite video 1 Vpp/75 : RCA connector (VM-30AV); BNC connector (VM-30AVB) 1 stereo audio, 4.8 Vpp / 73k on RCA connectors Outputs: 3 composite video 1 Vpp/75 : RCA connectors (VM-30AV); BNC connectors (VM-30AVB) - Page 9 EXCLUSION OF DAMAGES The liability of Kramer for any effective products is limited to the repair or replacement of the product at our option. Kramer shall not be liable for: Damage to other property caused by defects in this product, damages based upon inconvenience, loss of use of the product, loss of time, commercial loss;...
- Page 10 For the latest information on our products and a list of Kramer distributors, visit our Web site: www.kramerelectronics.com. Updates to this user manual may be found at http://www.kramerelectronics.com/manuals.html. We welcome your questions, comments and feedback. Kramer Electronics, Ltd. Web site: www.kramerelectronics.com E-mail: info@kramerel.com...
Need help?
Do you have a question about the VM-30AV and is the answer not in the manual?
Questions and answers