Intermec PC23d User Manual
Desktop printer
Hide thumbs
Also See for PC23d:
- Quick start manual (2 pages) ,
- User manual (184 pages) ,
- User manual (182 pages)
Table of Contents
Advertisement
Quick Links
Advertisement
Table of Contents

Related Manuals for Intermec PC23d


Summary of Contents for Intermec PC23d
- Page 1 PC 23 | PC 43 Desktop Printer PC23d, PC43d, PC43t User Manual...
- Page 2 Intermec Technologies Corporation. Information and specifications contained in this document are subject to change without prior notice and do not represent a commitment on the part of Intermec Technologies Corporation. © 2012 by Intermec Technologies Corporation. All rights reserved.
-
Page 3: Table Of Contents
Contents Contents Before You Begin..............ix Safety Information . - Page 4 Contents ..........31 Set Up the Printer Adjust the Media Holders.
- Page 5 Contents About Wi-Fi Communications ........... . 75 Connect the Printer to a Wireless Network .
- Page 6 Contents ........107 Troubleshoot the Printer Call Product Support.
- Page 7 Contents Error, Information, and Warning Alert Settings........142 Error Alerts.
- Page 8 Contents viii PC23 and PC43 Desktop Printer User Manual...
-
Page 9: Before You Begin
Safety Information Your safety is extremely important. Read and follow all warnings and cautions in this document before handling and operating Intermec equipment. You can be seriously injured, and equipment and data can be damaged if you do not follow the safety warnings and cautions. -
Page 10: Global Services And Support
Dispose of any used batteries according to the instructions. Note: This equipment may be used on an IT power system. Global Services and Support Warranty Information To understand the warranty for your Intermec product, visit the Intermec web site at www.intermec.com and click Support >... -
Page 11: Telephone Support
Visit the Intermec website at www.intermec.com to download our current manuals (in PDF). Visit the Intermec technical knowledge base (Knowledge Central) at www.intermec.com and click Support > Knowledge Central to review technical information or to request technical support for your Intermec product. -
Page 12: Related Documents
(as .pdf files) that you can download for free. To download documents 1 Visit the Intermec website at www.intermec.com. 2 Click the Products tab. 3 Using the Products menu, navigate to your product page. For example, to find the PC43 product page, click Printers > Desktop >... -
Page 13: About The Printers
About the Printers This chapter introduces the PC23 and PC43 printers, and includes descriptions of printer features and basic operation. -
Page 14: About The Pc23 And Pc43
Print speeds of up to 8 ips (203 dpi printhead) or 6 ips (300 dpi printhead) • Multiple, selectable printer languages including Intermec Fingerprint, Direct Protocol, Intermec Printer Language (IPL), ESim, and ZSim • Optional Wi-Fi/Bluetooth dual radio module •... -
Page 15: Printer Features
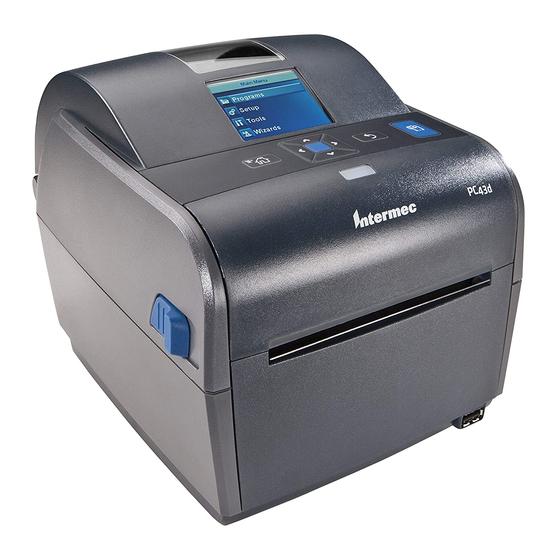
Chapter 1 — About the Printers Printer Features Use the next illustrations to locate printer features. PC23d Front Panel (LCD Model) PC23d Rear Panel PC23 and PC43 Desktop Printer User Manual... - Page 16 Chapter 1 — About the Printers PC43d Front Panel (Icon Model) PC43d Rear Panel PC23 and PC43 Desktop Printer User Manual...
- Page 17 Chapter 1 — About the Printers PC43t Front Panel (LCD Model) PC43t Rear Panel PC23 and PC43 Desktop Printer User Manual...
-
Page 18: About The Ready-To-Work™ Indicator
Chapter 1 — About the Printers About the Ready-to-Work™ Indicator The Ready-to-Work™ indicator on the front of the printer turns on when the printer is ready to print. Ready-to-Work Indicator Location Ready-to-Work™ Indicator Status Description Printer is ready for a print job. Blinking Printer is not ready for a print job. -
Page 19: About The Lcd Interface
Chapter 1 — About the Printers About the LCD Interface The printer LCD interface includes a screen, navigation buttons, and a Print/Feed button. PC43t Printer with LCD Interface On the PC43t, you can adjust the screen for the best viewing angle. Do not tilt the screen past its maximum angle or you could damage the screen. -
Page 20: About The Ready Screen
Chapter 1 — About the Printers LCD Interface Navigation Button Descriptions Button Description Menu/Home button. From the Ready screen, press to toggle between the Ready screen and the printer Main Menu. Directional pad: Press , , or to move the selection highlight to another item. -
Page 21: View Basic Printer And Connection Information
Chapter 1 — About the Printers The status bar at the top of the screen includes these information and status icons: Information and Status Icon Descriptions Icon Description Printer Information icon. Select this icon to view basic printer information. Wi-Fi Connection icon. This icon appears when the Wi-Fi/Bluetooth module is installed in the printer and shows the strength of the Wi-Fi connection: - Strong. - Page 22 Chapter 1 — About the Printers 1 Press any arrow key to select the one of the icons in the status bar at the top of the Ready screen. ® Ready Fingerprint 01/04/2012 10.200.27.89 12:00 2 Press . A list of basic printer or connection information appears. 3 Press to scroll through the list.
-
Page 23: About The Main Menu
• Select Programs to see a list of programs installed on the printer. This list includes utility programs provided by Intermec as part of the printer firmware, and programs you have installed on the printer. The Programs item appears in the Main Menu only if the printer is using Fingerprint or Direct Protocol as the command language. - Page 24 Chapter 1 — About the Printers In the Programs, Settings, Tools, or Wizards menus: • Press to change the item in the list, and then press (the center of the directional pad) to select the item. Another menu or a list of items appears.
-
Page 25: About The Onscreen Keypads
Chapter 1 — About the Printers About the Onscreen Keypads When you are changing settings, you may need to use the alphanumeric or numeric keypads on the screen. Alphanumeric Keypad - Alphabetic Characters Alphanumeric Keypad - Numeric Characters and Punctuation Numeric Keypad PC23 and PC43 Desktop Printer User Manual... -
Page 26: About The Printer Wizards
Chapter 1 — About the Printers For either keypad: • Press , , , or to select a character, and then press to enter that character. • Press to delete the last character you entered. For the alphanumeric keypad only: •... - Page 27 Chapter 1 — About the Printers Printing Wizards (Continued) Name Description Loading Ribbon (TTR printers only) Shows how to load a roll of ribbon. Communications Wizards Name Description Line Analyzer Logs all incoming data on all communications channels and saves the data to a log file. For experienced users. Wireless 802.11 Looks for wireless networks and sets up Wi-Fi communications.
-
Page 28: Use A Wizard
Chapter 1 — About the Printers Use a Wizard 1 From the Ready screen, press . The Main Menu appears. 2 Select Wizards and press 3 Select a category and press 4 Select a wizard from the list and press . - Page 29 Chapter 1 — About the Printers Icon Front Panel - Status Icons (Continued) Icon Color and Description Printer Models On: Bluetooth is enabled With Wi-Fi/Bluetooth module Off: Bluetooth is not enabled, or Wi-Fi/Bluetooth module is not installed On: Media is jammed or empty Off: No error On: Ribbon is jammed or empty TTR only...
-
Page 30: About Printer Languages
Chapter 1 — About the Printers About Printer Languages The printer uses the Intermec Fingerprint printer command language by default. You can load and run Fingerprint programs and send Fingerprint commands or Direct Protocol print jobs directly to the printer. -
Page 31: Set The Command Language From The Printer Web Page
Chapter 1 — About the Printers Set the Command Language from the Printer Web Page The printer uses Fingerprint by default. Follow this procedure to change the command language from the printer web page. Note: To use this procedure, the printer must be connected to your Ethernet or Wi-Fi network. -
Page 32: Mount The Printer On A Wall
The screw head width should be 6 to 8 mm (0.24 to 0.33 in). • Intermec recommends that you use pan-head or flathead screws with appropriate anchors for drywall, or for cement, concrete block, or plasterboard walls. Use wood screws only for wooden surfaces, and ensure the screw is long enough to be sunk to a depth of at least 12.5 mm (0.5 in). - Page 33 Chapter 1 — About the Printers 2 Install the mounting hardware. If you need to use anchors, install them first. 3 Place the printer mounting holes on the mounting hardware and slide the printer down to lock it in place. PC23 and PC43 Desktop Printer User Manual...
-
Page 34: Pc23 Wall-Mounting Template
Chapter 1 — About the Printers PC23 Wall-Mounting Template Use this template to correctly locate wall-mounting hardware for the PC23d printer. PC23 Wall-Mounting Template PC23 and PC43 Desktop Printer User Manual... -
Page 35: Pc43 Wall-Mounting Template
Chapter 1 — About the Printers PC43 Wall-Mounting Template Use this template to correctly locate wall-mounting hardware for the PC43d and PC43t printers. PC43 Wall-Mounting Template PC23 and PC43 Desktop Printer User Manual... -
Page 36: Printer Options And Accessories
Chapter 1 — About the Printers Printer Options and Accessories Note: Some printer configurations do not support all accessories. For more information, contact your local Intermec representative. Accessory Description 300-dpi Printhead Replaces the standard 203-dpi printhead. USB-to-Serial Adapter USB to RS-232 adapter. Connects to printer USB Host port and provides serial connectivity to a PC. -
Page 37: About The Battery Base
• AC power adapter For information on these accessories and replacement parts, contact your Intermec representative. About the Battery Base Instead of using the AC power supply, you can use the optional battery base to provide power for the PC43d printer. Depending on your printer duty cycle, the rechargeable battery in the battery base provides up to 8 hours of power. -
Page 38: Battery Precautions
Follow these precautions when using the printer with the Battery Base: • Use only the battery supplied by Intermec. Risk of explosion if battery is replaced by an incorrect type. Use of another battery may present a risk of fire or explosion. -
Page 39: Charge The Battery
Chapter 1 — About the Printers • Dispose of any used batteries according to the instructions that came with the battery. Charge the Battery Note: To charge the battery in the battery base, the PC43d must be correctly installed on the base. To charge the battery, install the printer on the battery base and connect the base to AC power. -
Page 40: Use The Battery Base
Chapter 1 — About the Printers Battery Base LEDs While Printer is Off LEDs Battery Charge Level 95% to 100% 76% to 94% 51% to 75% 26% to 50% 0% to 25% Battery out of charging temperature range. Battery error. Use the Battery Base After you charge the battery base, you can use it to supply power to the PC43d printer. - Page 41 Chapter 1 — About the Printers 5 To see the current battery charge level, press the Charge Level button on the front of the base. The base LEDs turn on to show the current charge level, and then turn off after a few seconds to save power.
- Page 42 Chapter 1 — About the Printers PC23 and PC43 Desktop Printer User Manual...
-
Page 43: Set Up The Printer
Set Up the Printer This chapter explains how to load media and ribbon, print test labels, and adjust the print quality. -
Page 44: Adjust The Media Holders
Chapter 2 — Set Up the Printer Adjust the Media Holders The first time you load media in the printer, or when you use different sizes of media, you must adjust the media holders. After you adjust the media holders, you do not need to adjust them again for a new roll of the same size media. - Page 45 Chapter 2 — Set Up the Printer 2 Pull the locking tab up. 3 Slide the media holders to adjust the distance between them, and place the media roll between the holders. PC23 and PC43 Desktop Printer User Manual...
-
Page 46: Load Media For Straight-Through Printing
Chapter 2 — Set Up the Printer 4 Make sure the holders are snug against the sides of the media roll, and then press the locking tab down to lock the media holders in place. Load Media for Straight-Through Printing In straight-through printing, you manually tear printed labels, tickets, wristbands, and other printed media from the front of the printer. - Page 47 Chapter 2 — Set Up the Printer 1 Pull one or both of the printer latches toward the front of the printer and lift the printer lid. 2 If there is an empty media core in the media compartment, remove the core.
- Page 48 Chapter 2 — Set Up the Printer To adjust the media holders for a different media size: a Pull the locking tab up. b Slide the media holders to adjust the distance between them, and place the media roll between the holders. PC23 and PC43 Desktop Printer User Manual...
- Page 49 Chapter 2 — Set Up the Printer c Make sure the media holders are snug against the sides of the media roll, and press the tab down to lock the media holders in place. 4 If you are using notched or black mark stock, slide the black mark sensor so the notches or marks pass over the sensor.
- Page 50 Chapter 2 — Set Up the Printer 5 For the PC23d and PC43d, thread the media under the tip guides on the media holders and past the front of the printer. For a PC43t, thread the media through the media guides and past the front of the printer.
- Page 51 Chapter 2 — Set Up the Printer 7 Turn the printer on and adjust the media feed as required. Intermec recommends the following values for straight-through or tear-off printing: Recommended Feed Adjust Values for PC23d Setting 203 dpi 300 dpi...
-
Page 52: Load Media For Cut-Off Printing
Chapter 2 — Set Up the Printer Load Media for Cut-Off Printing Note: Cut-off printing is supported only by the PC43 printer with the cutter module installed. For cut-off printing, you must install the automatic cutter accessory. You can print on non-adhesive, continuous label stock. You can also use self-adhesive labels with a liner, but you must cut only the liner. - Page 53 Chapter 2 — Set Up the Printer To adjust the media holders for a different media size: a Pull the locking tab up. b Slide the media holders to adjust the distance between them, and place the media roll between the holders. PC23 and PC43 Desktop Printer User Manual...
- Page 54 Chapter 2 — Set Up the Printer c Make sure the media holders are snug against the sides of the media roll, and press the tab down to lock the holders in place. 4 For the PC43d, thread the media under the tip guides on the media holders.
- Page 55 Chapter 2 — Set Up the Printer For the PC43t, thread the media through the media guides. To adjust the width of the media guides, slide the guides as needed to fit your media. 5 Thread the media into the slot in the cutter accessory and out through the front of the cutter.
- Page 56 Chapter 2 — Set Up the Printer Note: If you are using an icon printer, you must use Intermec PrintSet to configure the cutter. For LCD printers, continue with the next step. 8 After the printer finishes starting up, press 9 Select Settings >...
-
Page 57: Load Media For The Label Dispenser
Chapter 2 — Set Up the Printer Load Media for the Label Dispenser To use the label dispenser accessory for printing, you print labels on self-adhesive label stock with a liner. As each label is printed, the label is automatically peeled from the liner and is presented at the front of the printer for manual removal. - Page 58 Chapter 2 — Set Up the Printer To adjust the media holders for a different media size: a Pull the locking tab up. b Slide the media holders to adjust the distance between them, and place the media roll between the holders. PC23 and PC43 Desktop Printer User Manual...
- Page 59 Chapter 2 — Set Up the Printer c Make sure the holders are snug against the sides of the media roll, and press the tab down to lock the holders in place. 4 If you are using notched or black mark stock, slide the gap sensor so the notches or marks pass over the sensor.
- Page 60 Chapter 2 — Set Up the Printer 5 For the PC43d, thread the media under the tip guides on the holders. For the PC43t, thread the media through the media guides. To adjust the width of the media guides, slide the guides as needed to fit your media.
- Page 61 9 Close the front door. 10 Close the printer lid until it snaps shut. 11 Turn the printer on adjust the media feed as required. Intermec recommends the following feed adjust values for the label dispenser:...
-
Page 62: Load Ribbon
Chapter 2 — Set Up the Printer Recommended Feed Adjust Values for PC43t Setting 203 dpi 300 dpi Distance Start Adjust -125 -185 -15.7 mm (-0.62 in) Stop Adjust 2.1 mm (0.08 in) Note: You may need to adjust the recommended values slightly depending on your media type, supply method, and roll sizes, or because of individual differences between printers. - Page 63 Chapter 2 — Set Up the Printer 4 Place the new ribbon roll between the rear ribbon holders. The ribbon should come off the roll as shown in the illustration. 5 Place the takeup core between the front takeup core holders. PC23 and PC43 Desktop Printer User Manual...
- Page 64 Chapter 2 — Set Up the Printer 6 Attach the end of the ribbon to the takeup core. 7 Turn the slack-wheel to take up slack in the ribbon. PC23 and PC43 Desktop Printer User Manual...
- Page 65 Otherwise, from the printer Main Menu, select Settings > Printing > Media > Print Method > Ribbon (TTR). For an icon printer, you must use the printer web page or Intermec PrintSet to configure thermal transfer printing. 10 Save your changes.
-
Page 66: Use External Media
Connect the Printer to Power Use only the AC power adapter supplied with the printer. The use of a power adapter not approved by Intermec voids the product warranty and may damage the printer. 1 Connect the power adapter to the power port on the rear of the printer. -
Page 67: Use The Setup Wizard
Chapter 2 — Set Up the Printer 3 Press the power switch to turn the printer on. As the printer starts • a progress bar appears on the LCD printer screen. When the printer has finished starting up, the Ready screen appears, and the blue Ready-to-Work™... -
Page 68: Print Quality Labels
Chapter 2 — Set Up the Printer 3 Press . The Test Labels menu appears. Test Labels Print Quality Resources Printer Information Printer Settings 4 Press to select a type of test label and then press . A list of available labels appears. - Page 69 Chapter 2 — Set Up the Printer Print Quality Labels (Continued) Label Description Diamond Pitch Pyramid PC23 and PC43 Desktop Printer User Manual...
- Page 70 Chapter 2 — Set Up the Printer Print Quality Labels (Continued) Label Description Ruler Bar Code(Barcode) Wrinkle PC23 and PC43 Desktop Printer User Manual...
-
Page 71: Print Configuration Labels From The Main Menu
Chapter 2 — Set Up the Printer Print Configuration Labels from the Main Menu For quick reference, you can print configuration information, including lists of the fonts, images, and applications installed on the printer. 1 In the Ready screen, press . - Page 72 Chapter 2 — Set Up the Printer Sample Configuration Label for Fonts Resource Labels Label Description Applications All Intermec utility programs and user-installed applications. Fonts Resident and user-installed fonts. Bar Codes(Barcodes) Resident bar codes (partial label shown). Images All images, including resident and user-installed files.
- Page 73 Chapter 2 — Set Up the Printer Printer Information Labels Label Description Installed Hardware List of hardware modules in the printer, including: • Main logic board configuration number • Wireless 802.11 MAC address • Ethernet • Serial Port • USB Device •...
- Page 74 Chapter 2 — Set Up the Printer Printer Settings Labels (Continued) Label Description Ethernet Settings • MAC Address • Primary and secondary DNS servers • IPv4 settings: IP assignment method, IP address, subnet mask, default router, DHCP response type • IPv6 settings: IP assignment method, IP address Serial Port Settings •...
-
Page 75: Media Settings
Chapter 2 — Set Up the Printer Printer Settings Labels (Continued) Label Description Wi-Fi Security • Security Type • Association • PreShared Key • Network Key Index • Network Key 1, 2, 3, 4 • User Name • Password • Anonymous Name •... - Page 76 Sets the width of the printable area Variable measured from the media margin (X) across the printhead. Unit of measurement is defined in the Unit of Measure parameter. INTERMEC 6001 36th Ave W Everett WA 98203 PC23 and PC43 Desktop Printer User Manual...
- Page 77 Unit of measurement is defined in the Unit of Measurement parameter. INTERMEC 6001 36th Ave W Everett WA 98203 Media Margin (X) Sets the width of the margin from the...
- Page 78 Chapter 2 — Set Up the Printer Setting Description Default Clip Default Determines if the printer prints items outside the printable area of the label. When this is set to Off, the printer returns an error if any part of a bar code label cannot be printed because that part extends beyond the printable area.
-
Page 79: Connect The Printer
Connect the Printer This chapter explains how to connect the PC23 and PC43 printers to a PC and to an Ethernet or wireless network. -
Page 80: About Printer Drivers
If you do not have access to the PrinterCompanion CD but you still need to install driver software, follow this procedure to download InterDriver from the Intermec website and install the drivers. 1 Open a web browser and go to www.intermec.com. -
Page 81: Connect The Printer With Usb
6 Clear the Read installation instructions check box, and then click Finish. If a User Account control dialog box appears, click Yes to continue. InterDriver extracts the installation files to C:\Intermec\InterDriver7\ on your PC and starts InterDriver Wizard. 7 Make sure that Install printer drivers is selected, and then click Next. -
Page 82: Connect The Printer Using A Serial Or Parallel Cable
Chapter 3 — Connect the Printer • Connect a USB cable from the USB device port on the printer to a USB port on the desktop PC. A “USB Host Connected” message appears on the printer screen. USB Device Port Location Connect the Printer Using a Serial or Parallel Cable If you have the optional USB-to-Serial adapter or USB-to-Parallel... -
Page 83: Serial Port Settings
Settings > Communications > Serial and change settings as necessary. If you are using an icon printer, you need to configure settings through an application such as Intermec PrintSet. Serial Port Settings This section describes the serial port settings. To view these settings: •... - Page 84 Chapter 3 — Connect the Printer Setting Description Default Baud Rate Transmission speed in bits per second 115200 (bps) for the serial port. Data Bits Number of bits that define a character or byte. Parity Specifies how the printer checks the None integrity of the transmitted data.
-
Page 85: Connect The Printer To An Ethernet Network
After you install the optional Ethernet module in the printer, you can connect it to your wired network. For information on installing this accessory, see the PC23d, PC43d, and PC43t Ethernet Module Installation Instructions. 1 Connect an Ethernet cable to the Ethernet port on the rear of the printer and to your network. -
Page 86: Ethernet Settings
Chapter 3 — Connect the Printer 2 For a non-DHCP network (using a static IP address): • For an LCD printer, from the Main Menu select Settings > Communications > Ethernet and change the settings as needed. • For an icon printer, configure the Ethernet settings through PrintSet. -
Page 87: About Wi-Fi Communications
By default, the printer supports DHCP networks. If you are not using a DHCP network and you do not know the printer IP address, you need to configure Wi-Fi settings by using Intermec PrintSet through a USB connection to the printer, or by sending commands through a serial connection. - Page 88 LCD interface. Note: If you are using an icon printer and you do not know the printer IP address, you need to use Intermec PrintSet with a USB connection to a PC to configure wireless network settings for a non-DHCP network.
-
Page 89: Configure Wi-Fi Communications From The Printer Web Page
Note: If you are not using a DHCP network and you do not know the printer IP address, you must configure Wi-Fi settings using Intermec PrintSet with a USB connection, or by sending commands through a serial connection. -
Page 90: Wireless 802.11 General Settings
Chapter 3 — Connect the Printer 4 Press Enter. 5 Click Login in the upper right corner of the screen. The Login page appears. 6 Type your Username and Password, and then click Login. The default username is itadmin and the default password is pass. 7 Click the Configure tab. -
Page 91: Wireless 802.11 Network Settings
Chapter 3 — Connect the Printer Setting Description Default Network Defines the wireless network. To INTERMEC Name (SSID) communicate, all access points and wireless devices must have the same network name, which is case-sensitive. Network Selects the radio behavior of the printer. Ad... -
Page 92: Wireless 802.11 Security Settings
Chapter 3 — Connect the Printer Setting Description Default (IPv4) IP Sets how the printer obtains an IP DHCP Assignment address (for IPv4 networks). Method (IPv4) IP Address Sets the unique network-level address 0.0.0.0 that is assigned to each device in an IPv4 network. - Page 93 EAP type is EAP-FAST, PEAP, or TTLS. CA Certificate Sets the name of the Certificate Authority intermec.pem (CA) that verifies the server certificate. This CA should be the same one that was used to sign the server certificate.
-
Page 94: About Bluetooth Communications
Determines if the identity of the Certificate authentication server is verified using its certificate when using EAP-TTLS, PEAP, or EAP-TLS. Intermec recommends that you set Validate Certificate to Yes. Sets the name of the Protected Access eap-fast.pac Credential (PAC) that is used for EAP-FAST authentication. -
Page 95: Connect To A Bluetooth Device By Reading A Bar Code
Main Menu. • • using Intermec PrintSet through a USB connection to the printer. Connect to a Bluetooth Device by Reading a Bar Code To connect a Bluetooth-enabled bar code scanner to the printer, use the scanner to read the “Scan to Connect” bar code. -
Page 96: Connect To A Bluetooth Device Using A Wizard
Chapter 3 — Connect the Printer 4 Click Services and then select Print Test Labels > Printer Settings. 5 In the Printer Settings screen, locate the Bluetooth Settings label and click Print. The printer prints the Bluetooth Settings label. 6 Make sure your Bluetooth scanner is turned on and discoverable, and that the device is in range of the printer. -
Page 97: Configure Bluetooth Communications From The Main Menu
Chapter 3 — Connect the Printer Configure Bluetooth Communications from the Main Menu This section explains how to configure Bluetooth settings from the printer Main Menu. You may need to configure these settings if you want to connect to a mobile computer through Bluetooth. 1 From the Ready screen, press . -
Page 98: Bluetooth Settings
Chapter 3 — Connect the Printer 6 Click Communications > Bluetooth. The Bluetooth settings page appears. 7 Change Bluetooth settings as needed. You can also click Default Settings to restore all default Bluetooth settings. 8 Click Save when you are finished. Bluetooth Settings This section describes Bluetooth settings for the printer. -
Page 99: About Usb Devices
Use a standard USB keyboard to send Fingerprint printer language • commands directly to the printer. • Use Intermec USB bar code scanners for data input with a Fingerprint application or other custom application. The printer also supports other USB scanners that use a generic keyboard driver. -
Page 100: Connect A Usb Device
Chapter 3 — Connect the Printer Connect a USB Device To use a USB device with the printer, connect the device to one of the USB host ports. USB Host Port Location - Front of Printer USB Host Port Location - Back of Printer PC23 and PC43 Desktop Printer User Manual... - Page 101 Chapter 3 — Connect the Printer If you are using a USB storage device, from the printer Main Menu select Tools > USB Menu for more options. PC23 and PC43 Desktop Printer User Manual...
- Page 102 Chapter 3 — Connect the Printer PC23 and PC43 Desktop Printer User Manual...
-
Page 103: Configure The Printer
Configure the Printer This chapter explains how to view and change printer settings by using the Main Menu or the printer web pages. -
Page 104: About Printer Configuration
• use the LCD printer Main Menu. • use an application such as Intermec PrintSet to communicate with the printer through a network, serial, or USB connection. Configure the Printer From the Main Menu You can view and change settings directly on the printer through the Settings menu. - Page 105 SmartSystems, FTP, Telnet, and others. Set maintenance alert values for the printer odometer and other alerts. Network Services Enable or disable network services including Intermec SmartSystems, the web or email servers, and others. 2 Press to change the selected menu item, and then press to see related items.
-
Page 106: About The Printer Web Page
Chapter 4 — Configure the Printer 4 If you changed items in the list, press to save your changes. To return to the previous screen, press . If you made changes without saving them, you are prompted to save your changes: •... -
Page 107: View The Printer Web Page
The Services page includes a list of common maintenance and testing tasks. The Contact page includes general Intermec contact information. View the Printer Web Page When the printer is connected to your Ethernet or Wi-Fi network, you can view the printer web page in a browser. -
Page 108: View Printer Statistics
Chapter 4 — Configure the Printer 1 On your PC, open a browser. 2 In the Location or Address bar, type the printer IP address and press Enter. The printer web page appears. View Printer Statistics If your printer is connected to an Ethernet or Wi-Fi network, you can view printer statistics in the printer web page. -
Page 109: Statistics
Chapter 4 — Configure the Printer Statistic Description System information Printer uptime and CPU usage, firmware and kernel versions, printer configuration and serial numbers, flash and RAM memory information. Print Statistics Total labels printed, RFID tag success rate, odometer values, total distance printed (printer and current printhead). - Page 110 Chapter 4 — Configure the Printer Type Name Description RAM Memory Amount (in bytes) of total, Information currently used, and free RAM. Print Statistics Labels Printed RFID Statistics (Appears when optional RFID module is installed). Customer Odometer Total Distance Printed Length of media (in (Printer) meters) printed by this...
- Page 111 Chapter 4 — Configure the Printer Type Name Description Type Type of font (bitmap or TrueType). Location Installation location (resident as part of firmware, or user-installed). Size (bytes) Font file size in bytes. Barcode Information Name Name of symbology. Type Type of symbology (1D or Image Information Name...
-
Page 112: Configure The Printer From The Web Page
Chapter 4 — Configure the Printer Configure the Printer From the Web Page Note: To configure the printer from its web page, the printer must be turned on and connected to your Wi-Fi or Ethernet network. 1 On your desktop PC, start a browser. 2 In the Location or Address bar, type the printer IP address and then press Enter. -
Page 113: View The Configuration Summary
For network-related settings such as web and email server information, or if you are using a network management application such as Intermec SmartSystems, click Network Services. 7 Change settings by typing in the fields or by selecting an item from a list. -
Page 114: About Printer Profiles
Chapter 4 — Configure the Printer 4 Click Configuration Summary. The configuration summary appears. Note: This may take several minutes depending on the options in your printer and your network connection. About Printer Profiles After you change printer default settings to meet your needs, you can save those settings as a printer profile. -
Page 115: Create Or Load A Printer Profile
Chapter 4 — Configure the Printer Create or Load a Printer Profile This topic explains how to save the current settings as a printer profile, and how to load a saved profile. 1 From the Ready screen, press . The Main Menu appears. 2 Select Tools >... -
Page 116: Upload Or Export Applications And Files
Chapter 4 — Configure the Printer Upload or Export Applications and Files This topic explains how to upload applications and files to the printer using a USB storage device. You can also export applications and files from the printer to the storage device. -
Page 117: Print A File From A Usb Storage Device
Chapter 4 — Configure the Printer 4 Select the type of item you want to upload or export (Applications, Fonts, Forms/layout, Web Forms, Images, or FP Scripts) and then press 5 Select the file from the list and then press . - Page 118 Applications, Fonts, Images, Label Formats, or Web Forms. The page for that type of file appears, including a list of Resident (Intermec-supplied) files of that type and a list of Customer Downloaded files of that type (if any). 5 To upload an application or file to the printer: a Click Browse to locate your application or file.
-
Page 119: Troubleshoot The Printer
Troubleshoot the Printer This section explains how to troubleshoot the PC23 and PC43 printers. -
Page 120: Call Product Support
If you still need help after visiting Knowledge Central, call Product Support. To talk to an Intermec Product Support representative in the U.S.A. or Canada, call: 1-800-755-5505 Outside the U.S.A. and Canada, go to www.intermec.com... -
Page 121: Locate The Printer Configuration And Serial Numbers
Look in the System Information tab in the printer web pages for useful information and statistics on the printer hardware and firmware. This information can be useful when you contact Intermec Product Support for assistance or troubleshooting. Note: The printer must be connected to an Ethernet or wireless network to view system information in the printer web page. -
Page 122: View Printer Statistics
Chapter 5 — Troubleshoot the Printer System Information Tab in Printer Web Pages View Printer Statistics If your printer is connected to an Ethernet or Wi-Fi network, you can view printer statistics in the printer web page. 1 On your PC, open a browser. 2 In the Location or Address bar, type the printer IP address and press Enter. -
Page 123: Check The Printer Odometer
Chapter 5 — Troubleshoot the Printer Statistic Description System information Printer uptime and CPU usage, firmware and kernel versions, printer configuration and serial numbers, flash and RAM memory information. Print Statistics Total labels printed, RFID tag success rate, odometer values, total distance printed (printer and current printhead). -
Page 124: About Alerts
Chapter 5 — Troubleshoot the Printer About Alerts To help maintain the printer, you can configure the printer to send alert messages when certain conditions occur. For example, the printer can send a message when the odometer reaches a certain value, or if the printhead is lifted during printing. -
Page 125: Configure Alerts
Chapter 5 — Troubleshoot the Printer Configure Alerts This section explains how to configure alerts and alert messages. You configure alert settings from the printer web page. Note: To configure the printer from its web page, the printer must be turned on and connected to your Wi-Fi or Ethernet network. -
Page 126: Maintenance And Error Alert Messages
Chapter 5 — Troubleshoot the Printer 7 Change alert settings as necessary. When you are finished, click Save. To restore default settings for all alerts on the page, click Default Settings. Maintenance and Error Alert Messages Use these tables to understand and troubleshoot some common error alerts you may receive and how to fix them. -
Page 127: Restore Defaults On The Printer
Chapter 5 — Troubleshoot the Printer Message Description and Solution Odometer (User The printer has reached a limit set in the Odometer Resettable) (User Resettable) setting in Maintenance Alerts for the amount of media printed since the last reset. Printhead Too Hot The printhead is overheated and needs to cool down. -
Page 128: Restore Defaults From The Printer Web Page
Chapter 5 — Troubleshoot the Printer 4 For an icon printer, watch the icon panel. When the bottom row of icons turns off, press and hold , and release when the Ready-to-Work indicator begins flashing. For an LCD printer, watch the startup progress bar. When the bar is halfway across the screen, press and hold , and release when the first screen of the Startup Wizard appears. -
Page 129: Restore Defaults From The Main Menu
Chapter 5 — Troubleshoot the Printer 5 Click the Services tab > Restore Defaults. 6 Select the settings you want to restore: • Check the Network settings check box to restore defaults for all network connections, such as IP address and network name. •... -
Page 130: About Firmware Upgrades
No. To return to the Restore Defaults list without restoring any defaults, select Cancel. About Firmware Upgrades Intermec periodically offers firmware upgrades for the printer. You can upgrade the firmware by: • copying the firmware to a USB storage device and inserting the device into the printer. -
Page 131: Upgrade Firmware From The Printer Web Page
Upgrade Firmware with a USB Storage Device This procedure explains how to upgrade the printer firmware using a USB storage device. Note: For best results, Intermec recommends using a USB storage device that contains no other files. 1 Download the printer firmware from the Intermec website. -
Page 132: Upgrade Firmware From The Usb Menu
“Upgrade Firmware with a USB Storage Device.” 1 Download the printer firmware from the Intermec website. 2 On your USB storage device, create a /firmware directory. 3 Copy the firmware upgrade file (typically .bin format) to the /firmware directory on the USB storage device. - Page 133 Chapter 5 — Troubleshoot the Printer 6 In the Upgrade Firmware list, select the firmware upgrade file and press . An “Upgrade Firmware?” message appears. 7 Press to start the upgrade. When the upgrade is complete, the printer restarts and the Ready screen appears. PC23 and PC43 Desktop Printer User Manual...
- Page 134 Chapter 5 — Troubleshoot the Printer PC23 and PC43 Desktop Printer User Manual...
-
Page 135: Maintain The Printer
Maintain the Printer This section explains how to perform basic maintenance on the PC23 and PC43 printers. -
Page 136: Clean The Printhead
Chapter 6 — Maintain the Printer Clean the Printhead Cleaning the printhead on a regular basis is important for the life of the printhead and for the print quality. You should clean the printhead each time you replace the media. Follow this procedure to clean the printhead using the cleaning card. - Page 137 Chapter 6 — Maintain the Printer 3 Press the printhead latches apart until the printhead slides forward. 4 Carefully slide the printhead out of the mechanism. The printhead is still attached to the mechanism by a ribbon cable. PC23 and PC43 Desktop Printer User Manual...
- Page 138 Chapter 6 — Maintain the Printer 5 Disconnect the cable from the printhead and remove the printhead from the printer. Warning: Do not touch the printhead surface area. 6 Connect the ribbon cable to the new printhead. 7 Slide the printhead into the holders in the print mechanism. 8 Press the printhead onto the locator pins in the mechanism.
-
Page 139: Clean The Platen Roller
Clean the Platen Roller Follow this procedure to remove, clean, and replace the platen roller as part of standard maintenance for the printer. Intermec recommends that you check the platen roller for debris and clean it each time you replace media. -
Page 140: Clean The Exterior Of The Printer
Chapter 6 — Maintain the Printer 5 Pull the latches up to remove the platen roller from the printer. 6 Remove any adhesive residue from the roller with a cotton swab moistened with isopropyl alcohol. 7 Reverse Steps 4 and 5 to install the roller. 8 Press the latches into the printer until they snap into place. -
Page 141: Recommended Cleaners
Chapter 6 — Maintain the Printer Recommended Cleaners Intermec has tested and recommends these cleaning products for compatibility with the exterior surfaces of the PC23 and PC43 printers. Note: Do not use products containing ethylene glycol to clean the exterior of the PC43t. - Page 142 Chapter 6 — Maintain the Printer PC23 and PC43 Desktop Printer User Manual...
-
Page 143: Specifications And Default Settings
Specifications and Default Settings... -
Page 144: Printer Specifications
5°C to 40°C (41°F to 104°F) Storage Temperature: -40°C to 60°C (-40°F to 140°F) Relative Humidity: 20 to 80% non-condensing PC23d Print Speed, Resolution, and General Media Specifications Print Mode: Direct thermal Print Speed (variable): 203 dpi: 50 to 200 mm/sec (2 to 8 ips) - Page 145 Appendix A — Specifications and Default Settings PC43d Physical Specifications Dimensions: 16.8 cm x 18.0 cm x 21.5 cm (6.61 in x 7.09 in x 8.46 in) Weight: 1.72 kg (3.80 lbs) Power Supply Requirements: 100–240 VAC, 50–60 Hz, 60W Operating Temperature: 5°C to 40°C (41°F to 104°F) Storage Temperature:...
- Page 146 Appendix A — Specifications and Default Settings PC43t Physical Specifications Dimensions: 18.2 cm x 21.1 cm x 28.1 cm (7.17 in x 8.31 in x 11.06 in) Weight: 2.70 kg (5.95 lbs) Power Supply Requirements: 100–240 VAC, 50–60 Hz, 60W Operating Temperature: 5°C to 40°C (41°F to 104°F) Storage Temperature:...
- Page 147 128 MB flash • 128 MB SDRAM • (optional) USB memory device, up to 32 GB Supported Command Languages • Fingerprint • Direct Protocol • Intermec Printer Language (IPL) • ESim • ZSim • DSim Media Sensors • Label gap/tag notch •...
- Page 148 Appendix A — Specifications and Default Settings Network Services • • HTTP Server • SNMP • Line Printer Remote Protocol (lpr) • Telnet • DHCP • Ping • IPSEC/IKEv2 over IPv6 • Universal Font Scaling Technology and Standard Latin Fonts •...
-
Page 149: Supported Bar Code Symbologies
Appendix A — Specifications and Default Settings Localization Fonts • Simplified Chinese (optional) • Traditional Chinese (optional) • Cyrillic • Korean (Optional) • Latin • Greek • Turkish • Hebrew • Arabic • Baltic • Baltic Rim • Vietnamese • Thai Supported Graphic File Types •... - Page 150 Appendix A — Specifications and Default Settings • Code 128 Subset A • Code 128 Subset B • Code 128 Subset C Code 128 UCC • • DUN-14/16 • EAN: • EAN-8 • EAN-13 • EAN 128 • EAN 128 subset A EAN 128 Subset B •...
-
Page 151: Data Matrix
Appendix A — Specifications and Default Settings • UPC-E • UPC Shipping container Code Add-on bar code symbologies: Add-on 2 • • Add-on 5 • UPC-5 digits Add-on code 2D bar code symbologies: • Aztec Code 16K • • Code 49 •... -
Page 152: Bluetooth Settings
Appendix A — Specifications and Default Settings • EAN-13 Composite (CC-A, CC-B) • GS1 Composite (previously called EAN.UCC Composite) • UPC-A Composite (CC-A, CC-B) • UPC-E Composite (CC-A, CC-B) Bluetooth Settings This section describes Bluetooth settings for the printer. To view these settings: •... -
Page 153: Display And Audio Settings
Appendix A — Specifications and Default Settings Display and Audio Settings This section describes display and audio settings for the printer. To view these settings: • From the printer Main Menu, select Settings > System Settings > Display. • From the printer web page, click the Configure tab > System Settings >... -
Page 154: Error, Information, And Warning Alert Settings
Appendix A — Specifications and Default Settings Error, Information, and Warning Alert Settings This section describes error, information, and warning alerts and settings. To view these settings: • From the printer web page, click the Configure tab > Alerts > Error, Warning, or Information. -
Page 155: Error Alerts
Appendix A — Specifications and Default Settings Information Alert Default Settings Delay Information Alert Status Repeat Delay Unit Message Print Job Complete Disable Occurrences Print job complete Started Disable Occurrences Printer is started Printer is rebooting Disable Occurrences Printer is rebooting Warning Alert Default Settings Delay Warning Alert... -
Page 156: Information Alerts
Appendix A — Specifications and Default Settings • RFID Not Installed • Printhead Lifted • Printhead Not Detected • Motor Too Hot • Power Supply Too Hot Information Alerts Information alerts are sent when a print job is started or completed, or when the printer is rebooting. -
Page 157: Ethernet Settings
Appendix A — Specifications and Default Settings Ethernet Settings This section describes the Ethernet IPv4 and IPv6 settings. To view these settings: • From the printer Main Menu, select Settings > Communications > Ethernet. • From the printer web page, click the Configure tab > Communications >... -
Page 158: General System Settings
Appendix A — Specifications and Default Settings General System Settings This section describes general system settings. To view these settings: • From the printer Main Menu, select Settings > System Settings > General. • From the printer web page, click the Configure tab > System Settings >... -
Page 159: Media Settings
Sets the width of the printable area measured from the Variable media margin (X) across the printhead. Unit of measurement is defined in the Unit of Measure parameter. INTERMEC 6001 36th Ave W Everett WA 98203 PC23 and PC43 Desktop Printer User Manual... - Page 160 Variable edge of the label to the edge that is closest to the printhead. Unit of measurement is defined in the Unit of Measurement parameter. INTERMEC 6001 36th Ave W Everett WA 98203 Media Margin Sets the width of the margin from the left edge of the...
- Page 161 Appendix A — Specifications and Default Settings Setting Description Default Start Adjust Sets the length of media the printer feeds (positive value) or retracts (negative value) before printing a label. Unit of measurement is defined in the Unit of Measure parameter. Range is -9999 to +9999. Stop Adjust Sets the length of media the printer feeds (positive value) or retracts (negative value) after printing a label.
-
Page 162: Print Quality Settings
Appendix A — Specifications and Default Settings Print Quality Settings This section describes print quality settings. To view these settings: • From the printer Main Menu, select Settings > Printing > Print Quality. • From the printer web page, click the Configure tab > Printing > Print Quality. -
Page 163: System I/O Settings
Appendix A — Specifications and Default Settings Setting Description Default Stop Bits Number of bits sent at the end of every character to allow the receiving signal hardware to detect the end of a character and to resynchronize with the character stream. Hardware Specifies if hardware flow control (RTS/CTS) is used to manage Disable... -
Page 164: System Network Services
Determines if the printer can be managed by Wavelink Avalanche. Enable Net1 Determines if the printer can use Telnet to communicate with Enable Fingerprint. SmartSystems Determines if the printer can be managed by Intermec Enable SmartSystems Foundation. SNMP Determines if the printer can use SNMP. Enable... -
Page 165: System Maintenance Alert Settings
Appendix A — Specifications and Default Settings System Maintenance Alert Settings This section describes the system maintenance alert settings, such as the odometer distance. To view these settings: • From the printer Main Menu, select Settings > System Settings > Maintenance Alerts. -
Page 166: Wireless 802.11 General Settings
Setting Description Default Network Name Defines the wireless network. To communicate, all access INTERMEC (SSID) points and wireless devices must have the same network name, which is case-sensitive. Network Type Selects the radio behavior of the printer. Ad Hoc mode... -
Page 167: Wireless 802.11 Network Settings
Appendix A — Specifications and Default Settings Wireless 802.11 Network Settings This section describes the 802.11 IPv4 and IPv6 settings. To view these settings: • From the printer Main Menu, select Settings > Communications > Wireless 802.11 > Network > IPv4 or IPv6. •... -
Page 168: Wireless 802.11 Security Settings
EAP type is EAP-FAST, PEAP, or TTLS. CA Certificate Sets the name of the Certificate Authority (CA) that intermec.pem verifies the server certificate. This CA should be the same one that was used to sign the server certificate. Client Certificate... - Page 169 Validate Certificate Determines if the identity of the authentication server is verified using its certificate when using EAP-TTLS, PEAP, or EAP-TLS. Intermec recommends that you set Validate Certificate to Yes. Sets the name of the Protected Access Credential (PAC) eap-fast.pac...
- Page 170 Appendix A — Specifications and Default Settings PC23 and PC43 Desktop Printer User Manual...
-
Page 171: Print Labels With Inprint
Print Labels with INPrint This section explains how to use the INPrint feature to print labels. -
Page 172: About The Inprint Page
Appendix B — Print Labels with INPrint About the INPrint Page The INPrint page features sample web forms you can use to quickly and easily print single labels if you are using the Fingerprint or Direct Protocol language on your printer. You select a web form from the lists and enter information in the fields for that label. - Page 173 Appendix B — Print Labels with INPrint Predefined INPrint Label Formats and Sample Illustrations Format Name Sample shipping.lbx 203_in_demo_4x6.lbx PC23 and PC43 Desktop Printer User Manual...
- Page 174 Appendix B — Print Labels with INPrint Predefined INPrint Label Formats and Sample Illustrations Format Name Sample 203_shipaddr_4x6.lbx lifetest.lbx PC23 and PC43 Desktop Printer User Manual...
- Page 175 Appendix B — Print Labels with INPrint Predefined INPrint Label Formats and Sample Illustrations Format Name Sample 203_packslip_4x6.lbx PC23 and PC43 Desktop Printer User Manual...
- Page 176 Appendix B — Print Labels with INPrint PC23 and PC43 Desktop Printer User Manual...
- Page 177 Linux Copyright Information This software is provided in pertinent parts by the following copyright holders: Copyright or License Text Link to Source Code BlueZ - Bluetooth protocol stack for Linux http://www.bluez.org LPRng, IFHP, and LPRng Tool License http://www.lprng.com pslash - a lightweight framebuffer http://git.yoctoproject.org/cgit/cgit.cgi/psplash splashscreen for embedded devices udhop DHCP client...
- Page 178 Copyright (c) 1999 - Carsten Haitzler (The Rasterman) Copyright (c) 2001, 2002, 2003, 2004, http://www.libexpat.org/ 2005, 2006 Expat maintainers. Copyright 2009 Intermec Technologies http://www.columbia.edu/kermit/ Corp. All rights reserved. Based on code from Frank Da Cruz's excellent book, _Kermit: A File Transfer Protocol_, Digital Press, 1986.
- Page 179 Copyright or License Text Link to Source Code Copyright (c) 1998-2007 The OpenSSL http://www.openssl.org/ Project. (C) 1995-2004 Jean-loup Gailly and Mark http://zlib.net/ Adler Copyright (c) 2003-2009, Jouni Malinen <j@w1.fi> and contributors This software is provided by all copyright holders “as is” and any express or implied warranties, including, but not limited to, the implied warranties of merchantability and fitness for a particular purpose are disclaimed.
- Page 180 Worldwide Headquarters 6001 36th Avenue West Everett, Washington 98203 U.S.A. tel 425.348.2600 fax 425.355.9551 www.intermec.com © 2012 Intermec Technologies Corporation. All rights reserved. PC23 and PC43 Desktop Printer User Manual *935-044-001* P/N 935-044-001...
Need help?
Do you have a question about the PC23d and is the answer not in the manual?
Questions and answers