Table of Contents
Advertisement
Quick Links
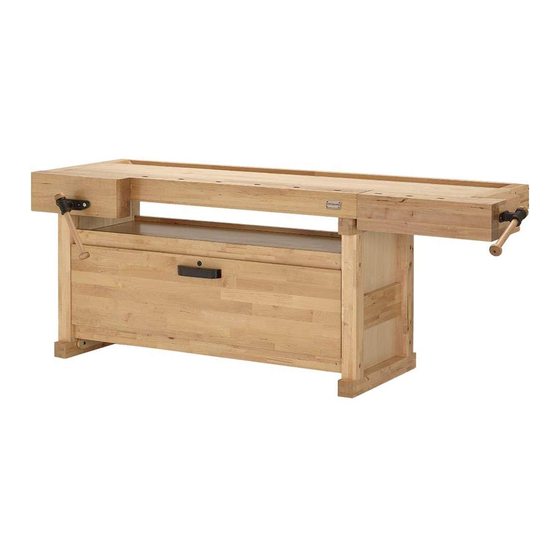
figure 1. model h7725 Birch Workbench.
Specifications
Finish .......................................... Lacquer sealed
table thickness ............................................... 4"
Front Vise size .....................................19
end Vise size ............................................6" x 6"
overall size .............. 84
tilt-out drawer size ......... 53
storage shelf size .....................55
shipping Weight ......................................332 lbs.
Safety & Limitations
•
maximum workbench table load is 500 lbs.
•
do not stand or climb on the workbench.
•
do not apply an unbalanced load on the table
that could result in the workbench tipping
over.
•
Keep unsupervised children away from the
workbench.
•
do not stand or climb on the workbench.
•
do not use workbench outdoors or in wet or
damp locations.
•
do not overload the vises or use cheater
pipes on the vise handles to increase lever-
age.
•
do not weld on this bench.
WaRNINg: NO pORTION Of THIS MaNUaL MaY BE REpRODUCED IN aNY SHapE
OR fORM WITHOUT THE WRITTEN appROvaL Of gRIzzLY INDUSTRIaL, INC.
(For modeLs manUFaCtUred sinCe 7/09) #Cr12019 printed in China
⁄
" x 7"
3
4
⁄
"W x 24
⁄
"d x 34
⁄
1
11
1
2
16
4
⁄
"W x 19"d x 14"h
1
2
⁄
"W x 18
⁄
1
1
2
2
Copyright © JULy 2009 By grizzLy indUstriaL, inC.
MODEL H7725
84" EURO STYLE
WORKBENCH-BIRCH
INSTRUCTIONS
assembly
refer to the last page of these instructions to
inventory your shipment for ease of assembly.
To assemble the workbench:
1.
insert eight (e5) barrel nuts into panels (LF &
LB), and assemble the drawer with eight (e1)
screws in the orientation shown in figure 2.
LR
LR
"h
E1
"d
figure 2. tilt-drawer assembly.
2.
position the right side leg (B) on the floor
so the Front arrow points to the front and
install two barrel nuts (e4) into cross brace (d
& e) as shown in figure 3.
D
figure 3. right leg and cross brace installation.
E2
H7
E5
E5
LF
LF
H8
BP
BP
LB
LB
E5
E5
B
Front
Slot
E4
Note: Slot
for Lock
E
E1
E1
LL
LL
E3
E2
Advertisement
Table of Contents

Subscribe to Our Youtube Channel
Related Manuals for Grizzly H7725


Summary of Contents for Grizzly H7725
-
Page 1: Specifications
Copyright © JULy 2009 By grizzLy indUstriaL, inC. WaRNINg: NO pORTION Of THIS MaNUaL MaY BE REpRODUCED IN aNY SHapE OR fORM WITHOUT THE WRITTEN appROvaL Of gRIzzLY INDUSTRIaL, INC. (For modeLs manUFaCtUred sinCe 7/09) #Cr12019 printed in China WORKBENCH-BIRCH... - Page 2 6, install two (e4) barrel nuts in the remaining cross support (h), and secure it in place (figure 7) between the legs with the remaining (e3) screws and (e2) washers. figure 7. Final cross support installation. Front figure 6. tilt-drawer installation. model h7725 (mfg. since 7/09)
- Page 3 16. Under the table, place a cotter pin in the end of the leadscrew, bending only one cotter pin leg to a 90 degree angle. model h7725 (mfg. since 7/09) 17. insert the tail vise wood block into the vise support block (figure 9). insert the tail vise...
- Page 4 " ph7725027 LWr BaCK Cross BraCe ph7725036 taiL Vise ph7725023 draWer FaCe ph7725037 draWer BaCK paneL ph7725039 draWer right side paneL ph7725038 draWer LeFt side paneL ph7725035 Bottom draWer paneL g8589 DESCRIpTION grizzLy Logo pLate model h7725 (mfg. since 7/09)
Need help?
Do you have a question about the H7725 and is the answer not in the manual?
Questions and answers