Table of Contents
Advertisement
Advertisement
Table of Contents

Subscribe to Our Youtube Channel
Related Manuals for Antec Three Hundred Two


Summary of Contents for Antec Three Hundred Two
- Page 1 User Three Manual Hundred Two...
- Page 2 Gaming Series legacy. The Three Hundred Two does not include a power supply. Make sure you choose a power supply that is compatible with your computer components and has a long enough power harness to reach your motherboard and peripheral devices.
-
Page 3: Table Of Contents
Table of Contents Section 1: Introduction Getting to Know Your Chassis ................5 Chassis Specifications..................6 Included Screws ....................6 Section 2: Hardware Installation Setting Up ......................8 Removing the Side Panels and Front Bezel…………………………………………………… . 8 Motherboard Installation................... 9 Installing KUHLER H O Liquid Coolers .............. -
Page 4: Section 1: Introduction
Section 1 Introduction Three Hundred Two User Manual... -
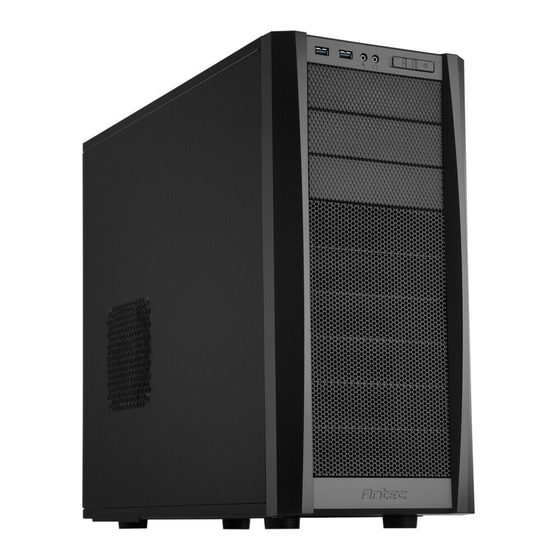
Page 5: Getting To Know Your Chassis
Getting to Know Your Chassis 1. 3 x 5.25” drive bays 2. 2 x 2.5” drive bays 3. 6 x 3.5” drive bays 4. 1 x 120 mm rear TwoCool fan (standard) 5. 1 x 140 mm top TwoCool fan (standard) 6. -
Page 6: Chassis Specifications
Chassis Specifications Chassis Type Mid Tower Chassis Color Black Dimensions 513 mm (H) x 229 mm (W) x 471 mm (D) 20.2” (H) x 9” (W) x 18.5” (D) Weight 15.3 lbs / 6.9 kg Cooling - 1 x 140 mm top TwoCool fan (standard) - 1 x 120 mm rear TwoCool fan (standard) - 2 x 120 mm front intake fans (optional) - 1 x 120 mm exhaust fan behind motherboard tray (optional) -
Page 7: Section 2: Hardware Installation
Section 2 Hardware Installation Three Hundred Two User Manual... -
Page 8: Setting Up
Setting Up When working in your case, please keep the following in mind: Put the case upright on a flat, stable surface so that the rear panel (power supply and expansion slots) is facing you. Handle all components and cards with care. ... -
Page 9: Motherboard Installation
Motherboard Installation Before proceeding, check the manual for your CPU cooler to find out if there are steps you must do before installing the motherboard. Make sure you have the correct I/O panel for your motherboard. If the panel provided with the chassis isn’t suitable, please contact your motherboard manufacturer for the correct I/O panel. -
Page 10: Installing Kuhler H O Liquid Coolers
Installing KUHLER H O Liquid Coolers The following instructs how to install the Antec KUHLER H O liquid CPU cooler (620 / 920). For any other CPU coolers, please consult your manufacturer’s installation guide. Caution: Check your motherboard’s CPU socket to ensure its compatibility with the KUHLER H O. -
Page 11: External 5.25" Device Installation
External 5.25” Device Installation The Three Hundred Two can support up to three 5.25” devices. 1. Remove the side panels and front bezel as directed in Section 2.2. 2. Remove the drive bay cover by pressing in on the four small tabs on either side of the cover, then push cover out the front of the bezel. -
Page 12: Internal 2.5" Device Installation
Internal 2.5” Device Installation There are two 2.5” drive mounting locations in the Three Hundred Two: on the back of the motherboard tray and at the bottom of the case. To install on the back of the motherboard tray: 1. Remove the side panels as described in Section 2.2. -
Page 13: Internal 3.5" Device Installation
Internal 3.5” Device Installation The Three Hundred Two includes 6 pairs of 3.5” drive rails. You will need 1 pair per 3.5” drive. 1. Line up the drive rail pins to the sides of your 3.5” drive. Ensure that the squeeze-tabs are aligned on the... -
Page 14: Expansion Slot Device Installation
2.10 Expansion Slot Device Installation When installing graphics cards or other expansion cards, you must first remove the rear place covering the expansion slots. 1. With the rear of the case facing you, remove the 2 screws shown to remove the plate. 2. -
Page 15: Section 3: Front I/O Ports
Section 3 Front I/O Ports... -
Page 16: Usb 3.0
Three Hundred Two User Manual USB 3.0 The Three Hundred Two comes with two front panel USB 3.0 ports and includes an internal motherboard connector. To access USB 3.0 capability from the front panel: 1. Identify the USB 3.0 header on your motherboard. -
Page 17: Power Switch / Reset Switch / Hard Disk Drive Led Connectors
Power Switch / Reset Switch / Hard Disk Drive LED Connectors Connected to your front panel are LED leads for power and HDD activity, as well as switch leads for the power and reset buttons. Attach these to the corresponding connectors on your motherboard. Consult your motherboard manual for specific pin header locations. -
Page 18: Rewiring Motherboard Header Connections
Rewiring Motherboard Header Connections There may come a time when you need to reconfigure the pin-out of a motherboard header connector. Examples could be for your USB header, audio input header, or some other front panel connector such as the Power Button connector. Before performing any work, please refer to your motherboard user’s manual or your motherboard manufacturer's website to confirm the pin-out needed for your connector. -
Page 19: Section 4: Cooling System
Section 4 Cooling System Three Hundred Two User Manual... -
Page 20: Included Fans
Included Fans The Three Hundred Two comes with two standard fans (yellow outline) – a rear 120 mm TwoCool fan and a top 140 mm TwoCool fan. The red rectangles indicate additional fan mounts. Mounting procedures for these fans is discussed in Section 4.2. -
Page 21: Optional Fans
Optional Fans The Three Hundred Two includes mounts for up to four more fans. These mounts are as follows: 2 x front intake 120 mm mounts 1 x side 120 mm mounts 1 x 120 mm mount behind motherboard Front intake 120 mm fans 1. -
Page 22: Air Filters
Air Filters There are two filters in the Three Hundred Two that can be removed and cleaned: the front filter and the PSU intake filter. To remove the front air filter: 1. Remove the front bezel as described in Section 2.2. - Page 23 Technical Support US &Canada 1-800-22ANTEC customersupport@antec.com Europe +31 (0) 10 462-2060 europe.techsupport@antec.com www.antec.com © Copyright 2012 Antec, Inc. All rights reserved. All trademarks are the property of their respective owners. Reproduction in whole or in part without written permission is prohibited.
Need help?
Do you have a question about the Three Hundred Two and is the answer not in the manual?
Questions and answers