Table of Contents
Advertisement
Advertisement
Table of Contents

Related Manuals for Antec Six Hundred


Summary of Contents for Antec Six Hundred
- Page 1 UNDRED ’ ANUAL...
-
Page 2: Table Of Contents
ABLE OF ONTENTS NTRODUCTION Case Specifications.…..………………………………………………………………………………….. 3 Diagram…………………………………………………………………….…………………………………. 3 ARDWARE NSTALLATION UIDE Setting Up….…………………………………………………………………………………………………. 4 Power Supply Installation……………………………………………………………………………… 4 Cable Management………………………………………………………………………………………. 5 Motherboard Installation..……………………………………………………………………………. 5 Internal 3.5” Device Installation……………………………………………………………………. 6 Front-Loaded Hot Swap SATA Hard Drive Caddy…………………………………………… 6 External 5.25” Device Installation…………………………………………………………………. 7 I/O P ONNECTING THE RONT... - Page 3 UNDRED ANUAL At Antec, we continually refine and improve our products to ensure the highest quality. It’s possible that your new case will differ slightly from the descriptions in this manual. This isn’t a problem; it’s simply an improvement. As of the date of publication, all features, descriptions, and illustrations in this manual are correct.
-
Page 4: Case Specifications
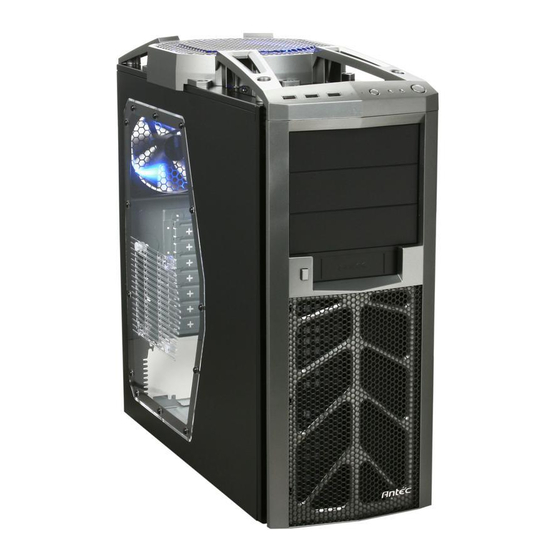
PECIFICATIONS Case Type Gaming Mid Tower Color Two Tone (Black/Gunmetal Gray) Dimensions 211.6mm (W) x 492mm (D) x 491mm (H) Weight 6.9 kg / 15.3 lb Cooling 1 x Rear 120mm TwoCool™ blue LED fan 1 x Top special 200mm TriCool™ blue LED fan 2 x Front 120mm fan mounts (optional) 1 x Side 120mm fan mount (optional) Drive Bays... -
Page 5: Hardware Installation Guide
ARDWARE NSTALLATION UIDE 2.1 S ETTING Place the case upright on a flat, stable surface with the rear of the case facing you. Remove the side panels by first removing the thumbscrews at the rear of the case. Then, grip each panel at the top and bottom and slide it toward the rear of the case until it detaches from the chassis. -
Page 6: Cable Management
2.3 C ABLE ANAGEMENT There is a cable management compartment behind the 3.5” drive cage. You can tuck or route excess cables in this compartment. Open the right side panel as described in section 2.1. Locate the cable management compartment with cable ties located behind the walls of the 3.5”... -
Page 7: Internal 3.5" Device Installation
2.5 I 3.5” D NTERNAL EVICE NSTALLATION The Six Hundred provides space for up to six 3.5” hard drives. Before you begin, remove the side panels and front bezel of the case as described in section 2.1. Behind the front bezel there is a fan cage which provides space for up to two fans at the front of the case. -
Page 8: External 5.25" Device Installation
2.7 E 5.25” D XTERNAL EVICE NSTALLATION There are three externally accessible 5.25” drive bays. Before you begin, remove both side panels and front bezel as detailed in section 2.1. Remove the drive bay faceplate by applying pressure to the inside of the plate to loosen, then swing back and forth until it pops free of the bezel. -
Page 9: Connecting The Front I/O Ports
I/O P ONNECTING THE RONT ORTS 3.1 USB 2.0 Connect the front I/O panel USB cable to the USB header pin on your motherboard. Check the motherboard user’s manual to ensure that it matches the table below: Signal Names Signal Names USB Power 1 USB Power 2 Negative Signal 1... -
Page 10: Switch And Led Connectors
3.3 P LED C OWER WITCH ESET WITCH RIVE ONNECTORS Connected to your front panel are LED and switch leads for power, reset, and HDD LED activity. Attach these to the corresponding connectors on your motherboard. Consult your motherboard manual for specific pin header locations. -
Page 11: Cooling System
High if you choose to connect the fan(s) to a fan control device or to the Fan- Only connector found on some Antec power supplies. A fan control device regulates the fan speed by varying the voltage, which may start as low as 4.5V to 5V. Connecting a TriCool™... -
Page 12: Twocool™ Fans
High if you choose to connect the fan(s) to a fan control device or to the Fan- Only connector found on some Antec power supplies. A fan control device regulates the fan speed by varying the voltage, which may start as low as 4.5V to 5V. Connecting a TwoCool™... -
Page 13: Optional Fans
There are a total of three optional 120mm fan mounts—one side intake fan (on the left side panel) and two front intake fans (at the front of the HDD cage). We recommend using Antec 120mm speed control fans and setting the speed to Low. These fans must be installed so that the air is blowing into the case. -
Page 14: Washable Air Filters
ASHABLE ILTERS Occasionally, it will be necessary to wash the air filters. Not washing the filters may result in high system temperatures and possible stability problems. We recommend checking the air filters at least once a month initially. The frequency will change depending on environmental conditions and system usage. Users who run their systems 24/7 will have to check their filters more often than those who don’t run their systems every day. - Page 15 Customer Support: US & Canada 1-800-22ANTEC customersupport@antec.com Europe +31 (0) 10 462-2060 europe.techsupport@antec.com www.antec.com © Copyright 2009 Antec, Inc. All rights reserved. All trademarks are the property of their respective owners. Reproduction in whole or in part without written permission is prohibited.
Need help?
Do you have a question about the Six Hundred and is the answer not in the manual?
Questions and answers