
Subscribe to Our Youtube Channel
Related Manuals for QNAP VioGate-340


Summary of Contents for QNAP VioGate-340
- Page 1 VioGate-340/340A IP Surveillance Server User Manual Version: 2.2.0 ® ©Copyright 2006. QNAP Systems, Inc. All Rights Reserved.
- Page 2 WARRANTY ® QNAP guarantees all VioGate-340 IP surveillance servers have passed strict and complete test and can operate normally in general condition. In case of system malfunction within the warranty period under normal operation of this product, ®...
-
Page 3: Table Of Contents
Table of Contents Table of Contents .................. 3 Overview of VioGate ..............5 About VioGate ................ 5 Features ................5 New Functions ................ 6 System Requirements .............. 7 Package Contents..............8 Product Illustration..............8 Install VioGate................9 VioGate CD-ROM ................17 Using VioGate ................ - Page 4 Restart/ Shut down VioGate............ 81 Reset Administrator Password & Network Settings ..... 82 System Update ..............83 Restore Configuration ............84 Appendix A Dynamic Domain Name Registration ....... 85 Appendix B Connect to VioGate via PC ..........88 Appendix C Connect to VioGate via RS-422/ 485 Port ....... 91 Appendix D PTZ Control Information..........
-
Page 5: Overview Of Viogate
Overview of VioGate Note: Unless otherwise specified, VioGate mentioned herein refers to VioGate-340/340A IP Surveillance Server. About VioGate VioGate adopts advanced MPEG-4 image compression technology and hardware compression chipset to minimize image and maintain DVD (720x480) quality resolution for instant display. VioGate is both a network image server and a network video monitoring module. -
Page 6: New Functions
New Functions SMART Recording VioGate supports SMART Recording technology. When the monitoring screen stays the same for 5 minutes, VioGate will adjust the bit rate and frame rate for recording automatically. When moving object is detected in the monitoring screen, the system will automatically resume the bit rate and frame rate to original settings. -
Page 7: System Requirements
System Requirements • Analog B/W or color camera (NTSC or PAL) • Audio line-in device for audio recording (if necessary) • Network requirements: RJ-45 Ethernet connection and dynamic or static IP address • Client side PC requirements: Pentium 4 or above CPU 256MB system memory or above VGA card (recommended resolution: 1024x768 pixels) ®... -
Page 8: Package Contents
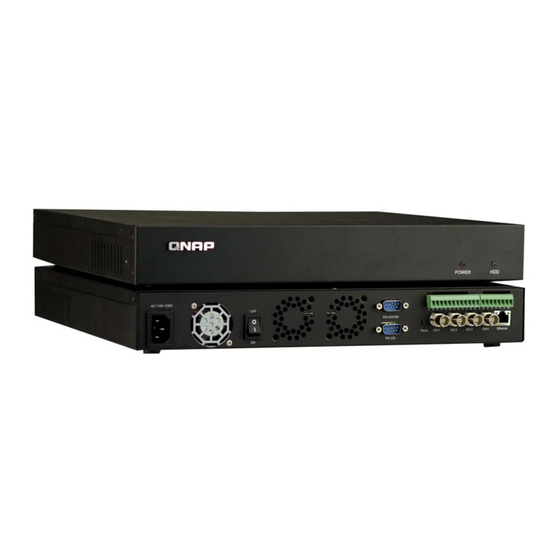
Package Contents i. 4-channel MPEG IP surveillance server VioGate ii. Power cord iii. Network cable iv. CD-ROM (user manual and software inclusive) v. GPIO connector vi. Quick Installation Guide Product Illustration VioGate-340 VioGate-340A Audio in connector - 8 -... -
Page 9: Install Viogate
Install VioGate Please follow the steps below to install VioGate. If you are not familiar with network settings, please contact your Internet service provider (ISP) or network administrator for the details. Connect the server to local network with DHCP server Connect VioGate to the local network with the enclosed CAT-5 Ethernet cable. - Page 10 iv. Insert VioGate CD-ROM in your PC and install QNAP Finder. Select the language of QNAP Finder. - 10 -...
- Page 11 vi. Double click the shortcut to run QNAP Finder. Click Refresh on QNAP Finder. vii. All available VioGate servers in the subnet will be displayed. Double click the correct device. - 11 -...
- Page 12 viii. Select the display language of the administration interface. VioGate supports English, Traditional Chinese, Simplified Chinese, Polish and French. Enter the user name and password to login VioGate. User name: administrator Password: admin - 12 -...
- Page 13 Connecting VioGate to local network by static IP address i. Connect VioGate to a hub or router in local network via an Ethernet cable. ii. Connect camera to video input connectors of VioGate via video cable. Up to 4 cameras can be supported. iii.
- Page 14 vii. Enter administrator name and password. viii. Select “Use Fixed IP Address” and enter the TCP/IP settings. ix. Click OK and restart VioGate. x. Launch the web browser and enter the IP address of VioGate. Login VioGate. - 14 -...
- Page 15 Connecting VioGate to the Internet using ADSL service If VioGate is connected to the Internet through ADSL (i.e. dynamic IP is used), it is recommended to use Dynamic DNS service to connect VioGate with an easy-to-remember server name. Register an account name on http://www.dyndns.org, http://update.ods.org, or http://www.dhs.org, to obtain a user name, password and a domain name.
- Page 16 v. Click Save and wait for a few seconds for VioGate to apply the new network configuration. vi. Shut down the VioGate, and connect the server to the ADSL modem. vii. Restore the network settings of your PC and restart VioGate. viii.
-
Page 17: Viogate Cd-Rom
VioGate CD-ROM QNAP provides different software for various surveillance products. When using VioGate, you will need to install QNAP Finder, VioGate Player, and VioGate Master Lite from VioGate CD-ROM. After installing the programs, you can find the shortcuts on the desktop of your PC. Run these shortcuts to use the programs. You may select to install three programs dedicated for more convenient use of VioGate. -
Page 18: Using Viogate
Using VioGate When you have installed VioGate successfully, you can use the web browser to ® connect and manage VioGate. VioGate supports Microsoft Internet Explorer 6.0 or above. Accessing Administration Page i. You can access VioGate administration page by one of the following methods: •... - Page 19 iv. Upon successful login to the server, click on the left column of the monitoring page to enter system configuration page. Help Logout - 19 -...
- Page 20 4.1.1 Display Mode Select the display mode for the monitoring page. Button Description View single channel Adjust window size: Select a single channel and click this button to enlarge or shrink the viewing window. Full-screen mode: Click this button to switch to full screen. Press Esc to return to normal display.
- Page 21 4.1.2 Manual Recording Video Click to record and save the live video of a camera to the PC. Click the button again to stop recording. The recorded files will be saved as vg3 format. You can play the files with VioGate Player in the CD-ROM. 4.1.3 Manual Snapshot Taking Click...
- Page 22 Event notification will be shown in the following conditions: • Motion is detected • Video input is lost • Connection to storage device fails • Storage space is full • Alarm input is triggered - 22 -...
- Page 23 4.1.6 Playback Video Files To playback video files recorded, click to enter the video playback page. Back to live video Help Logout Adjust screen view Full view Snapshot Enable/disable audio Frame by frame Search Adjust volume Fast forward Stop Play/ Pause - 23 -...
- Page 24 • Select Video Files Select the following options to play video files: Select the video file to play on the drop-down menu. Search video files by specified date and time. Search video files by events. Select to play files stored on local PC. Select files stored on the disk of VioGate.
- Page 25 4.1.7 Other Function Buttons Start recording manually Audio on/off Take snapshots manually Adjust PTZ camera Adjust PTZ camera scene view viewing angle Adjust the motion speed of the camera Adjust PTZ camera focus Function keys of PTZ camera : Adjust focusing lenses to minimize scope. : Adjust focusing lenses to maximize scope.
- Page 26 4.1.8 Network Bandwidth Information : Click this button to view and redetect the information of network bandwidth. - 26 -...
-
Page 27: System Overview
System Overview The sections in System Configuration are shown below: Server Name Description Software Version System Settings Time Zone Date & Time Obtain IP address automatically Assign IP address settings manually Use broadband connection to the Internet (PPPoE) Enable Dynamic DNS Service Network Settings Specify DNS Server Enable Multicast... - Page 28 Icons on System Settings Page System Settings Network Settings IP Security User Management Camera Settings Recording Settings Event Handling Statistics & Logs System Tools - 28 -...
-
Page 29: System Settings
System Settings Enter the basic information for the system such as the server name, date and time, and verify the current software version. • Server Name Enter a unique server name for VioGate. The server name supports up to 20 characters but cannot contain the following characters: "... - Page 30 • Time Zone Select the time zone according to the location of the server. If you enter invalid time zone settings, you may encounter the following problems: 1. If you are using web browser to view live video, the time displayed will not be the same as the time shown on the personal computer.
-
Page 31: Network Settings
Network Settings Select the method VioGate uses to connect to the network. Enable multicast function if necessary. If you are not certain how your server connects to the external network or about TCP/IP settings, contact your network administrator. • Obtain IP address settings automatically (DHCP) Often used in conjunction with cable modem and corporate networks, the system will obtain IP address and other TCP/IP information automatically. - Page 32 • Assign IP address settings manually Specify the IP address and other settings if you are using ADSL connection service. If the server’s external network uses ADSL service to connect to the Internet, specify a valid IP address provided by the ISP. Enter the following settings: IP address Subnet mask...
- Page 33 • Enable FTP Port Map To configure VioGate as virtual server via router, the virtual server must be mapped to external port 21 so that users from external network can play video on VioGate (please refer to Appendix F for more information). - 33 -...
-
Page 34: Ip Security
IP Security Specify the connections to be allowed and denied to access VioGate. Choose one of the following options to restrict access from a network or an IP address (host) to the server: 1. Allow all connections (Default setting) Allow connection from all hosts to the server. 2. -
Page 35: User Management
User Management This section enables you to maintain user accounts and configure account privilege for effective management of server access. The server can provide services to any authorized users. The system has a default account that cannot be renamed or deleted. - Page 36 • Advanced User Settings You may configure the following permissions to a user account: Monitoring Allow users to view live video of assigned cameras. Playback Allow users to view recorded video of assigned cameras. Camera PTZ Control If the attached camera supports PTZ functions, users can control Pan/Tilt/Zoom functions of assigned camera.
-
Page 37: Camera Settings
Camera Settings Define the following settings for the camera: Camera name 20 English characters or 10 Chinese characters can be used. The name can contain only English alphabets, numbers, dash (-), or Chinese characters " , ; \ : | * ? > < ' ` [ ] / % (excluding ii. - Page 38 The higher the resolution, the larger the display of the recording files. If the bit rate is unchanged, image quality will decrease but this will not increase the size of recording files. NTSC Full D1 (720x480), 30fps NTSC Half D1 (720x240), 30fps NTSC CIF (352x240), 30fps NTSC QCIF (176x112), 30fps - 38 -...
- Page 39 iii. Bit rate Select the bit rate for camera. Bit rate controls the storage space required by recording files. You can refer to the approximate disk space required every day by each channel for all bit rate options. The total bit rate of the four channels of VioGate will be affected by network bandwidth.
- Page 40 v. Brightness, contrast, hue, saturation You can adjust the best image for each channel of VioGate when different cameras are implemented. If cameras of relatively less optimized default settings are used, you can adjust the settings here for better image quality. - 40 -...
- Page 41 • Pan/ Tilt/ Zoom Camera If the camera connected to VioGate supports P/T/Z function, you can operate it with the control unit on the monitoring page. To use P/T/Z function, configure the following settings: Camera ID/ Speed Select the ID of P/T/Z camera to control and the moving speed of operation. Camera ID can be 255 at maximum.
-
Page 42: Recording Settings
Recording Settings VioGate supports audio and video recording of live video. To save live video and activate video playback function, enable recording function. VioGate supports multiple-interval scheduled recording. • Recording Mode Select a channel and enable recording. VioGate supports the following two recording modes: i. - Page 43 ii. Scheduled Recording To configure scheduled recording, select the week day(s), start and stop time. Then click Add Date. VioGate will record video according to schedule. The system also supports overnight scheduled recording. For instance, when you set the start time for recording as 18:00 on Monday and the end time as 09:00, the system will automatically defines the end time as 09:00 on the following day, i.e.
- Page 44 • Storage Settings for Recording/ Snapshot To configure the storage settings for recording and snapshot functions of VioGate, click Storage Settings. - 44 -...
- Page 45 VioGate provides two disks at maximum as built-in storage. You may also select to use NAS, Windows, or FTP as the storage platform. Firmware version 2.1.0 or later supports second storage for recording when primary storage fails. - 45 -...
- Page 46 Storage Platform & Storage Access Information Select one of the following storage types and enter the necessary information. Local Disk To use local disk as storage device, please format the disk in System Tools—Disk Tools section. ii. NAS To use NAS (Network Attached Storage) as external storage device, enter the IP address of NAS, user name and password to access the server.
- Page 47 Storage Path Enter two different paths (folders) to store the recorded video files and snapshot pictures. Note: To save video files via FTP, enter a valid path. Both recording and snapshot files are stored in the same path. Disk Full Settings Select an action to be taken when available storage space falls under a specified limit: 1.
- Page 48 Switch storage space Set the number of minutes VioGate should wait to switch to another storage space when the original one fails. Note that you have to enable second storage first before setting this function. Smart Recording Smart Recording is a function to optimize recording quality and recording space of VioGate.
-
Page 49: Event Handling
Event Handling When an event occurs, the system will automatically trigger alarms, and be configured to ensure correct capturing and recording of video files. 4.9.1 Event Type VioGate provides event action settings for following event type: 1. Motion Detection 2. Video Input Loss 3. - Page 50 Motion Detection VioGate provides up to 256 detection areas to replace the monitoring screen of your camera. When motion detection is enabled, any movement detected in the monitoring area will trigger a notification sent by the system. Highlight the area for motion detection. Click Advanced under Motion Detection, and select the camera movement and its dissection.
- Page 51 Note: When adjusting the sensitivity level of VioGate, it will affect the sensitivity of Smart Recording. Please make sure the settings are necessary for the operation. To set motion detection schedule, select Scheduled Detection and click Settings to configure the schedule. Configure the detection schedule, click Add Date and OK to confirm.
- Page 52 Video Input Loss You can select different types of event action for signal loss of the channels, e.g. recording and snapshot taking by another channel, alert e-mail and SMS. Network Failure You can enable alarm buzzer and GPIO alarms when network connection fails. Storage Connection Failure Configure the event action settings for failure to connect to the storage device.
- Page 53 Alarm Input Configure the actions to take when an alarm input is triggered. Note: GPIO device supports only 0-24V (voltage). It is recommended to use voltage of less than 24V. For further information, Appendix G. - 53 -...
- Page 54 4.9.2 Event Action Settings You can configure the actions to take for each event type on the left column to alert the administrator or save evidence by recording and snapshot taking. Event Type Supported Event Action Storage Alarm Motion Video Input Network Storage Settings...
- Page 55 • Recording Select the channel(s) which recording should be triggered when an event occurs, e.g. motion is detected. You can enable audio recording function for the selected channel. To specify the storage path for recording files, click Storage Settings. - 55 -...
- Page 56 Select the storage path for recording and enter relevant information. Configure disk full settings and relevant action to take, i.e. overwrite the oldest recorded files or stop saving newly recorded files. You can enable secondary storage and configure the settings. When video input loss detection is activated for a channel set for recording, in case that channel, e.g.
- Page 57 • Snapshot To activate snapshot function of particular cameras when an event action is detected, enable Snapshot function in Event Action and modify the settings. To specify the storage path for snapshot files, click Storage Settings. When video input loss detection is activated for a channel set for snapshot taking, in case that channel, e.g.
- Page 58 • Alert e-mail To send an e-mail to particular recipients when an event is detected. Enable this option, enter a valid mail server name, sender and recipient’s email address, email subject and other settings. You can select to attach snapshots of particular cameras in the e-mail.
- Page 59 • Alert SMS (Short Message Service) When an event action is detected, an SMS message will be sent to a particular phone number. You must purchase SMS package from TW SMS (http://www.twsms.com/) or VOLA (http://www.vola.it/) to acquire user name and password, and use the points for SMS service. After entering all necessary information, you can send a test message before saving the settings by clicking Test.
- Page 60 • Alarm buzzer This is an internal buzzer of the server. Set the alarm, and the buzzer will sound when an event action is detected. To stop the alarm, disable this function. • Notify remote client When an event action is detected, a notification icon will pop up on user’s screen. •...
-
Page 61: Statistics And Logs
4.10 Statistics and Logs You can view the record of users currently logged on and previously logged on to the system. In Event Logs section, you can check all events detected by the system and back up the logs. • Active Users Display information of all currently active users, i.e. -
Page 62: System Tools
4.11 System Tools You can use the following system tools to configure VioGate. • System Update You can download the latest system firmware from QNAP website (http://www.qnap.com) and update your system. Please make sure the firmware is correct and read the relevant release notes before update. (Refer to Chapter 6.3.) - 62 -... - Page 63 • Backup/ Restore You can back up and restore system settings and user information to your computer, and reset the system to default. • Restart/ Shut down System You can select to restart or shut down VioGate in this section. When VioGate is recording and the files are saved to the built-in, please shut down the server by this setting so that magnetic head of the hard disk will resume to its place to avoid system malfunction in case of sudden power outage.
- Page 64 • Hardware This option is enabled by default. When it is enabled, you can press the configuration reset switch of the server for a few seconds until you hear a beep sound, the administrator password and network settings will restore to default. After resetting the system, all connections to VioGate will be allowed.
-
Page 65: Use Viogate Player/ Finder/ Master Lite
Use VioGate Player/ Finder/ Master Lite When selecting to record image files by VioGate, VioGate will automatically save video files in vg3 format to a specified storage device. The video files will be named as yyyy-mm-dd hh-mm-ss.vg3 (i.e. year-month-date hour-minute-second.vg3). You can play the video files by VioGate Player. -
Page 66: Use Qnap Finder
Use QNAP Finder 1. Launch QNAP Finder. The program will search for all available VioGate servers in the network. To modify the settings of a server, select an item on the list and click Configure. 2. Enter the administrator name and password. - 66 -... - Page 67 3. Enter the information for VioGate and click OK. 4. Click Details to view the information of VioGate. - 67 -...
- Page 68 5. To search again, click Refresh. 6. To close the program, click Exit. - 68 -...
-
Page 69: Use Viogate Master Lite
Use VioGate Master Lite Features of VioGate Master Lite: 1/4/9/12/16/20-channel simultaneous display Supports 32-channel display at maximum Supports picture-in-picture and sequential display Free combination of monitoring screen Remote monitoring high speed dome camera Supports reception of alert messages from remote VioGate Various warning modes 5.3.1 Install VioGate Master Lite Install VioGate Master Lite from VioGate CD-ROM. - Page 70 Select the language of VioGate Master Lite. Double click the VioGate Master Lite shortcut to launch the program. Enter the user name and password to login VioGate Master Lite. Default user name: user Password: user - 70 -...
- Page 71 5.3.2 Add/ Delete VioGate The first time you use VioGate Master Lite, the program will search for all available VioGate servers on the network. Click OK to add the server or Cancel to add server manually. You can also click Add to add VioGate server manually. - 71 -...
- Page 72 Enter the IP address or domain name, port number, user name and password to add the server for VioGate Master monitoring. After adding video server, the following screen will appear. You can add, modify or delete VioGate connection. Click Auto Detect to search for VioGate in the LAN. - 72 -...
- Page 73 VioGate Master Lite will use admin as the default user name and password to login VioGate. To change the login name and password, click Default ID & Password. Enter the new user name and password, click Apply All to apply the settings to all servers or click OK to save the settings for the selected VioGate.
- Page 74 You can then use VioGate Master to manage multiple VioGate servers. Add/Delete Server Admin/ User Mode Master Lite Version Master Lite Settings - 74 -...
- Page 75 5.3.3 Display Mode Select the display mode on VioGate Master Lite. You can use the buttons on the left to adjust the display. Field Description View single channel Quad mode: Display 4 channels in one window. Picture-in-picture mode: Click this button to display viewing channels to main screen and sub-screens.
-
Page 76: Field Description
Field Description If there are multiple pages of channels, select the page from the drop-down menu. VioGate Master also provides event handling page to display channels which event handling is triggered. To view particular channel, click on a channel window and select the channel on the drop-down menu. - Page 77 • Add Channel Page 1. To add a channel page, select a display mode, e.g. (4-channel) and click 2. Enter the page name. 3. Click on a channel window and select the channel from the drop-down menu. Then select other channels for other channel windows. •...
- Page 78 Other buttons Start recording manually Audio on/off Take snapshots manually Adjust PTZ camera Adjust PTZ camera scene view viewing angle Adjust the motion speed of the camera Adjust PTZ camera preset Adjust PTZ camera focus : Sort channel order : Delete the selected channel - 78 -...
- Page 79 5.3.4 VioGate Master Lite Settings Click to configure VioGate Master Lite settings. - 79 -...
- Page 80 5.3.5 Admin/ User Mode Click to switch from admin mode to user mode. In user mode users can only view channels and electronic map, but do not have the right to modify viewing channel and page, and Master Lite settings. To return to admin mode, click and enter the user name and password.。...
-
Page 81: Maintenance
Maintenance VioGate is specially designed to run 24 x 7. The server also provides a dedicated power protection system to protect against system crash caused by power outage. Please read this section carefully for information of system maintenance. Restart/ Shut down VioGate To shut down or restart VioGate, go to System Tools page. -
Page 82: Reset Administrator Password & Network Settings
Reset Administrator Password & Network Settings If you forget the administrator password, you will not be able to login VioGate and perform system administration. To reset the administrator password and network configuration of VioGate to default, press the configuration reset button of VioGate for a few seconds until a beep sound is heard. -
Page 83: System Update
System Update When you have successfully registered the product, you will receive email notification on firmware update from QNAP. You can update the system and enjoy the new functions free. To update VioGate firmware version, follow the steps below: 1. Download the release notes of the same version as the firmware from QNAP website http://www.qnap.com. -
Page 84: Restore Configuration
Restore Configuration To restore VioGate to factory default, open an IE browser and connect to the server. Go to “System Tools–Backup/Restore” page and select Restore all configuration settings to factory default. Then click Backup/Restore. - 84 -... -
Page 85: Appendix A Dynamic Domain Name Registration
Appendix A Dynamic Domain Name Registration VioGate supports DDNS service provided by DynDNS, ODS, DHS, and DyNS. For example, you can go to the web site of DynDNS (http://www.dyndns.org/) and register for a dynamic domain name. Configure and activate DDNS service, then the Internet users will be able to access your VioGate via this dynamic domain name. - Page 86 Select to agree to the use policy. - 86 -...
- Page 87 Enter the user name, email address and password to create an account for DDNS service. Please verify your email address to receive the confirmation message from the server. Then click Create Account to proceed. When your account is successfully created, a confirmation message will be sent to your e-mail address.
-
Page 88: Appendix B Connect To Viogate Via Pc
Appendix B Connect to VioGate via PC To access VioGate by a PC, connect the PC to VioGate by a crossover cable. Configure the network settings of your PC and VioGate in the same network domain. To connect VioGate by default IP address, please configure the network settings of your PC as below: IP address: 192.168.0.2 Subnet Mask: 255.255.255.0... - Page 89 2. Highlight Internet Protocol (TCP/IP), and click “Properties”. - 89 -...
- Page 90 3. Set the IP address and subnet mask as the following: 4. Restart your PC. Open an IE browser and enter the IP address of VioGate 192.168.0.1. Upon successful connection to VioGate, enter the default user name and password to login the administration page: User name: administrator Password: admin - 90 -...
-
Page 91: Appendix C Connect To Viogate Via Rs-422/ 485 Port
Appendix C Connect to VioGate via RS-422/ 485 Port To connect a PTZ camera to VioGate using the RS-422/485 port, you will need a cable and a D-Type 9-pin connector. The four connectors for data transfer are shown in the picture below. To make a communication control wire, follow the steps below (*): Prepare a D-Type 9-pin female header and the wires necessary for RS-485. - Page 92 Weld the wires to the D-Type 9-pin female header. Cover the header carefully. VioGate header is made. - 92 -...
- Page 93 Connect TX+ and RX+ with twist pair (**) as data output D+. Connect TX- and RX- as data input D-. Connect D+ and D- to the RS-485 data control input (***) of high speed dome camera. Note: * Sony VISCA uses RS-232 port. This control wire is not applicable. ** For the details of communication control wires compatible with RS-485, please refer to the recommended wire list in the user manual.
- Page 94 High Speed Dome Recommendation List: Protocol Name Interface Preset Mode Manual Focus DynaColor 7720A RS-485 ╳ ╳ Sony VISCA VI-D30 RS-232 ╳ ╳ Merit Lilin RS-485 ○ ╳ Panasonic WV-CS564 RS-485 ○ ╳ Honeywell GC-755 RS-485 ╳ ╳ Honeywell GC-655 RS-485 ╳...
-
Page 95: Appendix D Ptz Control Information
Appendix D PTZ Control Information 1. VioGate supports three types of PTZ control service: Manual Mode, Auto Mode and Preset Mode. 2. All PTZ protocols support Manual Mode. You can use PTZ control panel on the bottom left of monitoring page to control PTZ device of the active channel. 3. -
Page 96: Appendix E Qnap Finder
Appendix E QNAP Finder QNAP Finder is a dedicated program provided by QNAP to search for all available VioGate servers in the local network. QNAP Finder shows all surveillance servers in the local network and displays the basic information such as server name, workgroup and IP address. - Page 97 You may obtain info rmation such as server name, s oftware version, MAC a ddress, and basic network settings. Enter the administrator name and password. Then configure network settings. - 97 -...
-
Page 98: Appendix F Use Viogate With Ip Sharing Router
Appendix F Use VioGate with IP Sharing Router Configure the virtual server settings of an IP sharing router connecting to VioGate: A fixed IP address mapping approach. If VioGate is in the same network as an IP sharing router using a fixed IP address, you can assign certain ports of the virtual server on the IP sharing router to access VioGate. -
Page 99: Appendix Ggpio Connections
Appendix G GPIO Connections Connections for Input/ Output Devices GPIO Input/ Output Connectors Description of Output Connector (From left to right) Common 1 Normal Close 1 Normal Open 1 Common 2 Normal Close 2 Normal Open 2 Common 3 Normal Close 3 Normal Open 3 Common 4 Normal Close 4... - Page 100 Specifications for General Inputs The general inputs can take DC voltage from 0~24V. Voltage above 24V is not recommended. Input Voltage Range 5 VDC Logic 0 0.5V Max Logic 1 4.5V Min 12 VDC Logic 0 0.5V Max Logic 1 11V Min Specifications for General Outputs Relay Contact Ratings...
- Page 101 Relay Coil Specifications (At 20˚C) Normal Voltage Normal Coil Resistance Coil Voltage (VDC) Current (mA) (ohm + 10%) 66.7 Power Pull-in Drop-out Voltage Max Allowable Consumption (W) Voltage (VDC) (VDC) Voltage (VDC) About 0.36W 75% max 3.75V 10% min 0.5V 110% 5.5V Please set up the external device properly before plugging the connector of the device to VioGate.
Need help?
Do you have a question about the VioGate-340 and is the answer not in the manual?
Questions and answers