Table of Contents
Advertisement
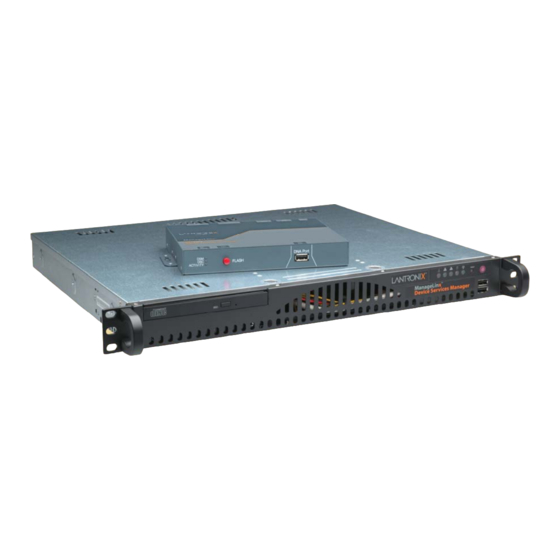
Quick Links
Advertisement
Table of Contents

Related Manuals for Lantronix ManageLinx


Summary of Contents for Lantronix ManageLinx
-
Page 1: User Guide
ManageLinx User Guide Part Number 900-515 Revision D November 2008... -
Page 2: Revision History
Copyright & Trademark © 2008, Lantronix. All rights reserved. No part of the contents of this book may be transmitted or reproduced in any form or by any means without the written permission of Lantronix. Printed in the United States of America. -
Page 3: Table Of Contents
Contents 1: Using This Guide Purpose and Audience....................6 Summary of Chapters ....................6 Additional Documentation .....................7 2: ManageLinx Overview Configuration Sequence ....................9 Product Information Label.....................9 Addresses and Port Numbers..................10 Hardware Address_______________________________________________ 10 IPv4 Address ___________________________________________________ 10 VIP Address____________________________________________________ 10 Technical Specifications .....................10 3: DSM Installation Buttons and Status LEDs....................12... - Page 4 Editing or Deleting a Map _________________________________________ 39 Filters ..........................39 Adding a Category Filter __________________________________________ 40 Editing or Deleting a Category Filter _________________________________ 40 Using Maps and Category Filters................40 System Settings: Category Filters Tab _______________________________ 41 System Settings: Map Filters Tab ___________________________________ 42 ManageLinx User Guide...
- Page 5 Deleting a Route ......................52 Deleting a VIP ......................53 12: DSM Administration Manage Global Settings....................54 Changing the ManageLinx Password .................54 System Logging ......................55 Backing up & Restoring System Settings ..............56 Rebooting and Shutting Down the DSM ..............57 Viewing System Information ..................58 Lantronix Contact Information..................59...
-
Page 6: 1: Using This Guide
Summary of Chapters Chapter Description Main features of the product and the protocols it supports. Includes 2: ManageLinx Overview technical specifications. 3: DSM Installation Installing the DSM and configuring network settings. 4: DSC Installation Installing the DSC and configuring network settings. -
Page 7: Additional Documentation
1: Using This Guide Additional Documentation The following guides are available on the CD-ROM the Lantronix Web site: www.lantronix.com. Device Services Controller Brief overview on installing the DSC. Quick Start Guide Device Services Manager Quick Brief overview on installing and configuring Start Guide the DSM. -
Page 8: 2: Managelinx Overview
DSC sits on the LAN at each service center location. Operating in host controller mode, a DSC provides a secure, scalable entry point to the ManageLinx VDN system. Once enabled, the host or device controllers provide encrypted communications through the firewall. -
Page 9: Configuration Sequence
2. Via the Web Manager interface, connect to the DSM and define and configure all elements of your ManageLinx network. See page 14. 3. Install and configure the DSCs. Use your PC and the Lantronix flash drive to copy a bootstrap file from the DSM to each DSC. See Chapter 4: DSC Installation. -
Page 10: Addresses And Port Numbers
The hardware address is also referred to as the Ethernet address or MAC address. The first three bytes of the Ethernet address are fixed and read 00-80-A3, identifying the unit as a Lantronix product. The fourth, fifth, and sixth bytes are unique numbers assigned to each unit. - Page 11 2: ManageLinx Overview Environmental Operating: 10°C to 35°C (50°F to 95°F) Temperatures Storage: -40°C to 70°C (-40°F to 158°F) Certifications FCC, C/UL,TUV, CE Table 2-2. DSC Specifications Hardware Intel XScale IXP420 Processor @ 266 MHz 256MB SDRAM 32MB Flash 8kb EEPROM...
-
Page 12: 3: Dsm Installation
Power On/Off and Reset. The five LEDs signal information during boot-up and while the DSM is running. State Meaning Power Steady green Power is on. Hard drive access Hard drive Blinking yellow (typical PC LED). Network Port 1 Green Activity. Network Port 2 Green Activity. ManageLinx User Guide... -
Page 13: Installing The Dsm
Overheat/Fan overheated. Failure WARNING: If the alarm LED comes on, quickly shut down the DSM and contact Lantronix Technical Support at www.lantronix.com/support. Continued use of the DSM while the alarm indicator is on may cause permanent system damage to hardware and data stored in the system. -
Page 14: Configuring Network Settings
7. To return to the main menu, type 1 and press Enter. 8. To configure the gateway, type 4 and press Enter. 9. Enter the Default Gateway address in dot-quad format and press Enter. 10. To save, type 5 and press Enter. ManageLinx User Guide... -
Page 15: 4: Dsc Installation
Configuring the DSC—General Settings 1. Open your internet browser (I.E. 6.0 or later) or (Firefox 2.0 or later). 2. Enter the IP address of the DSM. 3. Log in using sysadmin as the user name and PASS as the password. ManageLinx User Guide... - Page 16 7. On the command menu, select CONFIGURE ELEMENT, then click a DSC icon. The Configure Element page appears with the General tab selected by default. 8. Enter a Profile Name (required), Profile Description (optional), and click Save Profile. 9. Continue with Configuring IP Settings. ManageLinx User Guide...
-
Page 17: Configuring Ip Settings
Option 2: Set a Static IP Address a. Select Manual Configure IP address. b. Enter an IP Address. c. Enter a subnet mask. d. Enter the default gateway. e. Click Save Profile. Continue with Create a DSC Bootstrap file on page 18. ManageLinx User Guide... -
Page 18: Leds
On power-up, all the lights slowly turn red and then turn off. Once booted, the LEDs behave as follows: State Description DSC not bootstrapped Green Flashing DSC connecting or reconnecting to DSM Green Solid DSC connected to DSM Green Solid DSC is booted up Activity Not used at this time ManageLinx User Guide... - Page 19 DSC completed accessing the USB flash drive. Amber Blinking 3 USB flash drive removed. times Missing bootstrap.dna or other configuration error. The bootstrap.dna file is only used once and is renamed to bootstrap.dna.old after a successful load. ManageLinx User Guide...
-
Page 20: 5: Web Manager Guide
Accessing the Web Manager 1. Open a web browser (Mozilla Firefox 2.0 or later or Internet Explorer 6.0 or later). 2. Enter the DSM IP address. The ManageLinx login appears. 3. Log in as system administrator (username and password PASS). -
Page 21: Web Manager User Interface Components
Legend Web Manager User Interface Components The ManageLinx Web Manager consists of a navigation bar on the top right, a command panel on the left, and the main viewing area (map area). Each button on the navigation bar shows its options in the command menu. -
Page 22: Web Manager Maps
For example, to view only web cams, you can create a filter called web cam and display only web cams in that filter. Select the category type from the Category Filters drop-down list. To view all elements, select All Categories. ManageLinx User Guide... -
Page 23: Web Manager Elements
Web Manager Elements Individual DSMs, DSCs, device servers, and other network devices are elements. Each managed element has a corresponding entry in the ManageLinx Registry, which is an internal database used to track all information in the system. Viewing All Elements Elements on the map can be shown or hidden by selecting the category filter in the category list. -
Page 24: 6: Network Settings
6: Network Settings 6: Network Settings This chapter describes how to configure your network settings and network devices using the Lantronix Web Manager. Add and configure DSCs first then configure other devices and/or device servers. a DSC 1. Click CONFIGURATION on the navigation bar. -
Page 25: Configuring A Device Services Controller
Configuring Network Settings means assigning a dynamic or static IP address to the DSC. Auto-configuration is the Lantronix default and is dynamic, as set by the dynamic host configuration protocol (DHCP). Manual configuration is for assigning a static IP address. -
Page 26: Manual Configuration
The following steps copy network configuration information from the DSM to the Lantronix flash drive that came with your unit. 1. Insert the Lantronix USB flash drive into a USB port on your PC or laptop. 2. Click Create DSC Bootstrap. -
Page 27: Adding Other Elements
Device and device server elements represent the actual devices you will communicate with over the Virtual Device Network. A device server is usually a Lantronix hardware item (e.g. XPort, MatchPort). A device is usually a non-Lantronix hardware item (e.g. webcam). - Page 28 6. Click the map where you want the device to appear. An icon representing the device appears in that spot. You can drag it to another location anytime. If you do not click the map, the device is not created. ManageLinx User Guide...
-
Page 29: 7: Licensing
Add License File Upload the license from a PC. 1. From the ManageLinx main page, click Admin > Licensing. The Licensing page appears with the Host ID showing at the top. The Host ID identifies the DSM you are logged onto. It is generated automatically by the DSM. -
Page 30: Display License Usage
Save Licenses to PC This button allows you to download all the licenses from your DSM to your PC for backup purposes. The licenses will be zipped into a .zip file. ManageLinx User Guide... -
Page 31: 8: Monitoring Devices
1. Click MONITOR on the navigation bar. Monitor options appear in the command menu. 2. Click DSM/DSC SUMMARY on the command menu. 3. Click a device on the map. The DSM Summary page shows the device product type and network settings. 4. Click Close. ManageLinx User Guide... -
Page 32: Viewing Conduit Status
8: Monitoring Devices Viewing Conduit Status A ManageLinx conduit is a secure encrypted channel through which data flows between the DSC and the DSM. You can display information about the status of current conduits or connections. 1. Click the MONITOR button on the navigation bar. The Monitor options appear in the command menu. -
Page 33: 9: Route Configuration
You can define a single port number (e.g. 80). Port numbers must in the range of 1 through 65535. The default port number is 22 and is always included in the list by default. You may remove port 22 if you add another port number. ManageLinx User Guide... -
Page 34: Display Ports
There are 2 screens that display port numbers used by the DSC: DSC Summary and DSC Status. Click Monitor > DSM / DSC Summary > DSC icon. The DSC Summary page appears. Click Monitor > DSC Conduit Status. The DSC Conduit Status page appears. ManageLinx User Guide... -
Page 35: Configuring Elements
Profile Description Enter the device description and other relevant information. Escape characters (\0, \a, \b, \f, \n, \r, \t and \v) are treated as special characters. Enter a unique name for the device and click Save Profile. ManageLinx User Guide... -
Page 36: Device Profile: Network Tab
This is the IP the DSCs will use to connect with the DSM. Note: This option does not create a firewall. It only identifies the IP address of an existing firewall. 1. Select Use Firewall to specify a firewall IP between the DSM and the remote element. ManageLinx User Guide... -
Page 37: Adding A Dsc
4. Configure the DSC as described earlier in this chapter. Deleting an Element 1. Click Configuration on the navigation bar. 2. Select Delete Element on the command menu. 3. Click the element on the map and in response to the confirmation prompt, click OK. ManageLinx User Guide... -
Page 38: 10: Maps And Category Filters
2. Enter Name and Description. 3. Click Browse and locate the map image file. 4. Click Save. The new map appears in the map list box. 5. Click Close. ManageLinx User Guide... -
Page 39: Editing Or Deleting A Map
Category Filters: You can create filters of your own. For example, to view only web cams, the user can create a filter called web cam and show only web cams in that filter. Select the category type from the drop-down menu. To view all elements, select All Categories. ManageLinx User Guide... -
Page 40: Adding A Category Filter
The Category Filters and Map Filters tabs on the Configuration page are for defining when to show a specific element and when to hide it on the various maps. 1. Click Configuration > Configure Element > map icon. The Configure Element page appears. 2. Click System Settings. ManageLinx User Guide... -
Page 41: System Settings: Category Filters Tab
In the figure above are two categories. But you are assigning the element to Web Cams only. 2. Click the icon in the Show/Hide column to toggle the visibility of the device. 3. Click Save Changes. ManageLinx User Guide... -
Page 42: System Settings: Map Filters Tab
By default, all elements are visible on the default map. icon means element appears when this map is selected for the main view. icon means the element does not appear when this map is selected for the main view. 2. Click Close. ManageLinx User Guide... -
Page 43: Hiding And Showing Elements On The Dock
To hide an element on the map, click the map element and drag it to the dock. On the Map Filters tab for the element, a check icon appears for the map. ManageLinx User Guide... - Page 44 10: Maps and Category Filters Map Filters with an Additional Map Selected ManageLinx User Guide...
-
Page 45: 11: Vip Routes
DSC-B DSC-A DEV-1 ManageLinx supports tunneling of TCP and UDP traffic. There is a slight difference between the configuration and features of TCP tunneling vs.UDP tunneling. Virtual IP Routes A VIP Route is a mapping between a VIP on one DSC and a configured device (See page 27, Adding Other Elements, for instructions regarding device configuration). - Page 46 3. Click Add Row if you want to create another VIP. 4. Enter the Virtual IP Address and Netmask in dot-quad format, e.g. 255.255.255.0. 5. Proceed to the pull-down menu and select a target. 6. Click Save. ManageLinx User Guide...
-
Page 47: Udp Tunneling
11: VIP Routes UDP Tunneling The UDP tunneling feature of ManageLinx allows any host on subnet A to send UDP packets. Once a VIP route has been configured, it will carry both TCP and UDP traffic. However, the nature of UDP requires additional details—described below—to allow the receiving device to send UDP datagrams in the opposite direction. -
Page 48: Udp Uni-Directional Routing
Remember: Manually configured routings, like this, remain set until manually changed. 1. Click Configure > Configure Element > DSC-A > VIP Mapping. 2. Populate the Virtual IP and Netmask fields. 3. Select Target device, click Show Details, Uni-directional. ManageLinx User Guide... -
Page 49: Bi-Directional Manual Reverse Mapping
This figure shows that VIP 33.22.1.1 is configured on DSC A to send data to device Printer. And DSC-B has configured VIP 22.22.22.22 to send data to the originating device (Console). Configure Bi-directional Manual Reverse Mapping Configure DSC-A, Virtual IP 33.22.1.1, to Printer: ManageLinx User Guide... - Page 50 11: VIP Routes Configure DSC-B, Virtual IP 22.22.22.22, to Console: ManageLinx User Guide...
-
Page 51: Bi-Directional Automatic Reverse Mapping
Configure Bi-directional Auto Reverse Mapping 1. Configure DSC-A, Virtual IP 33.22.1.1, to Printer, and click Bi-directional Automatic Reverse Mapping. 5. Click Save. A VIP name is assigned and the status column updated. ManageLinx User Guide... -
Page 52: Add A Vip To The Pool
2. Click Add to auto VIP pool. 3. Click Save. Deleting a Route 1. Click Configuration, click a device icon, and click the VIP Mapping tab. 2. Click the checkbox of the route to the source DSC, and click Delete Route. ManageLinx User Guide... -
Page 53: Deleting A Vip
11: VIP Routes Deleting a VIP 1. Click Configuration, click a DSC icon, and click the VIP Mapping tab. 2. Click Delete, on the row corresponding to the VIP to delete. ManageLinx User Guide... -
Page 54: 12: Dsm Administration
Click Apply Changes to store and apply new changes. 4. Click close. Changing the ManageLinx Password 1. Click ADMIN > Change Password. The following page appears. 2. Click Change Password. Enter the current password, then enter the new password in the two boxes provided. -
Page 55: System Logging
2. Click Download All Logs to save the system log in .csv format. WARNING: In the next step, Clicking Delete All Logs, permanently erases the system log. 3. Click Delete All Logs and click OK. 4. Click close. ManageLinx User Guide... -
Page 56: Backing Up & Restoring System Settings
WARNING: Restoring the DSM registry completely erases its current settings. 1. Click ADMIN > Backup & Restore. The Backup & Restore page appears. 2. Click Browse. Locate the backup file and click Open. 3. Click Restore Registry. 4. Click close. ManageLinx User Guide... -
Page 57: Rebooting And Shutting Down The Dsm
1. Click ADMIN > REBOOT / SHUTDOWN DSM. The Reboot / Shutdown DSM page appears. 2. To reboot the DSM, click Reboot DSM and click OK. 3. To shut down the DSM, click Shutdown DSM and click OK. 4. Click close. ManageLinx User Guide... -
Page 58: Viewing System Information
Version number of the DSM firmware on the unit Version DSM Firmware Build Build number of the DSM firmware on the unit eth0 DSM MAC Hardware address of the unit Address DSM IP Address IP Address of the unit. 2. Click close. ManageLinx User Guide... -
Page 59: Lantronix Contact Information
12: DSM Administration Lantronix Contact Information View Lantronix contact information: 1. Click ADMIN > CONTACT US. The following page appears: 2. Click close. ManageLinx User Guide... -
Page 60: 13: Technical Support And Warranty
(949) 453-7198 Technical Support Europe, Middle East, Africa Phone: +33 1 39 30 41 72 Email: mailto:eu_techsupp@lantronix.com or mailto:eu_support@lantronix.com Firmware downloads, FAQs, and the most up-to-date documentation are available at: http://www.lantronix.com/support When you report a problem, please provide the following information:... -
Page 61: A: Dsc Compliances
A: DSC Compliances DSC compliance is according to ISO/IEC Guide 22 and EN 45014. Manufacturer Name & Address Lantronix 15353 Barranca Parkway, Irvine, CA 92618 USA Declares that the following product: Product Name: DSC2204 ManageLinx Device Services Controller (DSC) Model:... -
Page 62: Rohs Notice
EN55024/EN61000-4-11: > 95% reduction for 0.5 period 30% reduction for 25 seconds > 95% reduction for 250 periods RoHS Notice All Lantronix products in the following families are China RoHS-compliant and free of the following hazardous substances and elements: Lead (Pb) Mercury (Hg) -
Page 63: Manufacturer's Contact
X: toxic or hazardous substance contained in at least one of the homogeneous materials used for this part is above the limit requirement in SJ/T11363-2006. Manufacturer’s Contact Director of Quality Assurance, Lantronix 15353 Barranca Parkway, Irvine, CA 92618 USA Tel: 949-453-3990... -
Page 64: B: Warranty
B: Warranty For details on the Lantronix warranty replacement policy, go to our web site at www.lantronix.com/support/warranty. ManageLinx User Guide... -
Page 65: Index
Installing and Configuring the DSM, 13 IP Address, 10 Backing up & Restoring System Settings, Label, 9 Bootstrap, 18, 26 LEDs, 11, 12, 18, 27 Changing the ManageLinx Password, 54 Manage Global Settings, 54 Compliance, 61 ManageLinx Registry, 23 Configuration, 33 Manual configure, 25 Configuration Methods, 9 Manufacturer’s Contact, 63... - Page 66 Toxic or Hazardous Substances, 63 Exiting, 23 Filters, 22 Maps, 22 Using Maps and Category Filters, 40 Web Manager Icons, 21 User Interface Components, 21 Viewing All Elements, 23 Web Manager Navigation, 20 Viewing Conduit Status, 32 ManageLinx User Guide...
Need help?
Do you have a question about the ManageLinx and is the answer not in the manual?
Questions and answers