Table of Contents
Advertisement
Advertisement
Table of Contents

Subscribe to Our Youtube Channel
Related Manuals for Brady LabXpert


Summary of Contents for Brady LabXpert
- Page 1 User Manual www.bradyid.com/labxpert...
- Page 2 Brady further assumes no liability arising out of the application or use of any product or system described, herein; nor any liability for incidental or consequential damages arising from the use of this document.
- Page 3 Brady’s satisfaction to have been defective at the time Brady sold it. This warranty does not extend to any persons obtaining the product from the buyer.
- Page 4 Technical Support Choose one of the following options to contact system support provided by Brady Worldwide, Inc.: U.S. Phone: (800) 643-8791, Monday – Friday 6:30 a.m. – 6:30 p.m. CST Fax: (800) 292-2289 E-Mail: tech_support@bradycorp.com Assistance is available 24 hours per day / 7 days per week. Go to www.bradyid.com...
-
Page 5: Table Of Contents
AFETY NFORMATION CHAPTER 2 PRINTER COMPONENTS ................... 4 ............................4 EYPAD AYOUT ......................... 4 ATTERY OMPARTMENT ............................5 ONNECTIONS LABXPERT ........... 5 CCESSORIES FOR YOUR ABORATORY ABELING YSTEM ........................... 6 ATERIAL ARTRIDGES CHAPTER 3 GETTING STARTED ....................7 .......................... 7... - Page 6 ........................... 30 ARCODE ABELS ..........................31 ULTI ABELS CHAPTER 9 MEMORY ........................34 ....................... 34 AVING A ABEL TO EMORY ....................34 ECALLING A ABEL FROM EMORY ....................... 35 ELETING A ABEL FROM EMORY CHAPTER 10 MAINTENANCE ...................... 36 ............................... 36 LEANING .........................
-
Page 7: Chapter 1 Introduction
Chapter 1 Introduction This chapter contains introductory information about the LABXPERT Laboratory Labeling System as well as information about the User Manual. Package Contents Before you begin setting up the printer, verify that you have received the following items in your... -
Page 8: Additional User Documentation
Additional User Documentation Quick Start Guide Do you want to create and print a label fast? See the LABXPERT Quick Start Guide, included with your printer, for basic instructions for creating and printing labels. Technical Specifications The LABXPERT printer has the following physical and environmental characteristics:... -
Page 9: Certification
Certification The LABXPERT Laboratory Labeling System complies with the following: United States and Canada • UL/CSA 60950-1 • FCC Title 47, Part 15, Subpart B, Class B limits • Industry Canada ICES-003 Issue 4:2004 European Union • EN60950 • EN55022:1998 +A1 and A2 Class B •... -
Page 10: Chapter 2 Printer Components
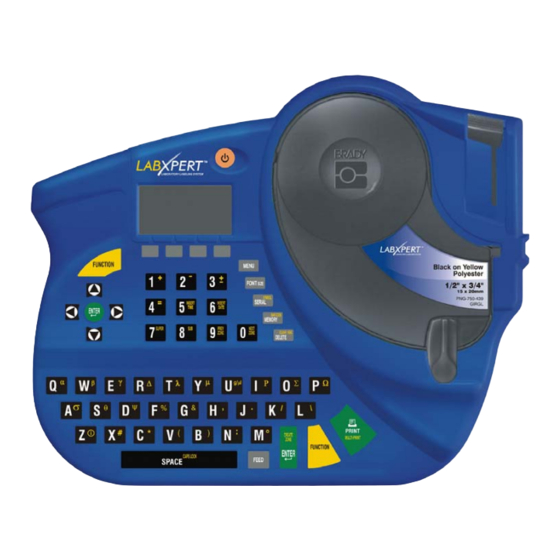
Printer Components This chapter provides the locations and descriptions of the components that make up the LABXPERT printer. Keypad Layout The LABXPERT Laboratory Labeling System is available in standard QWERTY keyboard layout style. Battery Compartment 1. Material Cartridge 2. Cutting Lever 3. -
Page 11: Connections
Note: Connections are found on the top of the printer. Accessories for your LABXPERT Laboratory Labeling System These accessories may be ordered from your Brady distributor: Note: See also the Accessory Parts List on page 37. • Hard Side Carrying Case •... -
Page 12: Material Cartridges
Material Cartridges Thanks to innovative smart-cell technology, the LABXPERT printer recognizes the label material and automatically adjusts to it, saving setup time and effort. Note: Most label formatting default settings are based on the cartridge installed in the printer. Please see the chapters on formatting later in this manual for information on changing the default settings. -
Page 13: Chapter 3 Getting Started
Chapter 3 Getting Started This chapter provides instructions on setting up your LABXPERT printer and creating a basic label. Refer to the following chapter for details on how to use the keypad and menu. Setting up the printer Follow these steps to set up your printer prior to creating your first label. - Page 14 1. Turn the locking lever down to unlock the cartridge. 2. Locate the cartridge release button on the backside of the printer and push firmly to eject cartridge. 3. Remove the existing cartridge. 4. Install the new cartridge as shown. 5.
-
Page 15: Chapter 4 Using The Display Screen, Menu, And Keypad
Chapter 4 Using the Display Screen, Menu, and Keypad This chapter provides information about the display screen and menu. It also provides information on the keys found on the LABXPERT printer and their corresponding functions. The Display Screen When the Power button is pressed, the display screen appears. -
Page 16: Peripheral Mode : Connecting To And Printing From Apc
Peripheral Mode: Connecting to and Printing from a PC You may use your PC to create and print labels with your LABXPERT printer. First download the printer driver provided on your product CD (or download the latest printer driver firmware from Brady’s website). - Page 17 2. The COM 1 Properties display screen appears; make sure the properties are set as shown, then click OK: 3. Follow the prompts to complete the installation. 4. Connect the communications cable provided with your printer from the LABXPERT to your PC’s communication port. Then do the following: Step 1.
-
Page 18: Menu Selections
Menu Selections To perform types of formatting, press [MENU] and the corresponding softkey. Following is a list of the high-level menu selections and the corresponding softkeys: Menu Selection Softkey Vial – Choose from available sizes of .6 ml, 1.5 ml, 1.8 ml, 2-4 ml. [VIAL] 15 ml, and 50 ml, and AUTO. -
Page 19: Guide To Keys
Guide to Keys POWER – powers on the printer. Press the POWER button again to power off the printer. The printer automatically shuts off after 10 minutes of non-use. FUNCTION – accesses a secondary function or character when pressed along with the desired key. - Page 20 SPACE – creates a space between characters when creating legends. FUNCTION + – toggles CAPS on and off. FUNCTION + – brings up a selection of international characters. Use either the softkey or keypad arrows to navigate the character menu. FUNCTION + –...
-
Page 21: Chapter 5 Creating And Printing Labels
Chapter 5 Creating and Printing Labels This chapter provides information on creating and printing labels, including information on changing font sizes and bold status. It also provides instructions for adding symbols and international characters to a label. Creating a Basic Label Follow these steps to create and print a basic label. -
Page 22: Font Sizes
Note: Refer to Appendix B Font Size Chart to view samples of the available font sizes. Default Font Size When a cartridge is loaded and the unit is turned on, the LABXPERT printer reads the label size information stored in the smart-cell. This information is used to automatically set an initial font size for your label. - Page 23 Auto Sizing Text The auto size feature works on a whole label/all zones basis, not line by line. As you enter text and/or characters, if they do not fit, the printer calculates a new size, allowing the largest font size required to fit on the current line.
-
Page 24: Symbols
Symbols The LABXPERT Laboratory Labeling System offers a variety of symbols in these categories: Refer to Appendix C–Symbol Library for a list of symbols available for printing within each category. • Greek Symbols • First Aid/Fire • Laboratory Symbols • Hazardous Materials (WHIMIS) •... -
Page 25: International Characters
International Characters The LABXPERT Laboratory Labeling System offers these international characters corresponding to the 10 non-English languages offered. International Characters—Upper Case International Characters—Lower Case To select an international character: 1. Press [FUNCTION] . A selection of international characters appears on the display screen. -
Page 26: Formatting Labels Using Menu Choices
Chapter 6 Formatting Labels Using Menu Choices This chapter provides information on the formatting options available through the LABXPERT menu. See Menu Basics on page 9 for general menu use instructions. Note: Most label formatting default settings are based on the cartridge installed in the printer. -
Page 27: Setting Legend Justification
• For horizontal justification, press [HORIZ], then [LEFT], [CENT], or [RIGHT]. • For vertical justification, press [VERT], then [TOP] [CENT], or [BOT]. 3. Press [ENTER]. Note: The LABXPERT printer allows you to specify justification within separate zones. See Chapter 8–Advanced Features for more information. User Manual... -
Page 28: Rotating Legends
Note: The LABXPERT printer allows you to specify rotation within separate zones in a multi-zone label. See Chapter 8–Advanced Features for more information. Mirroring Legends Use the Menu selections to reverse text on a label (renders it readable, for instance, as a clear label on the bottom of a Petri dish). -
Page 29: Chapter 7 General Settings
Chapter 7 General Settings This chapter provides information on general settings. Settings for the LABXPERT printer are set using the menu and corresponding softkeys. Setting the Time/Date Stamp The printer allows you to print a real time and/or date field on your labels. First you must set the time and date on the printer. - Page 30 To set the date: 1. Press [MENU]. 2. Press the [NEXT] softkey three (3) times. 3. Press the [DATE] softkey. The following menu options appear, with the display screen showing the current date setting: 4. Press the following softkeys to cycle to the correct month, day, or year: [DAY] –...
-
Page 31: Printing The Time/Date Stamp
Printing the Time/Date Stamp Print Time To print the time stamp, press [FUNCTION] + [INSERT TIME] . If the time stamp fits on your label, the time symbol appears in the place in which you have your cursor. If it does not fit, you will receive this error message: Cannot Fit. The time prints on your label (Hour/Minute or 12/24 format), for example, 9:30 PM or 21:30. -
Page 32: Setting Menu Language
Setting Menu Language The printer allows you to view menu choices in eleven different languages. To set the default language: 1. Press [MENU]. 2. Press the [NEXT] softkey two (2) times. 3. Press the [LANG] softkey. The display screen shows the current language setting. -
Page 33: Chapter 8 Advanced Features
This chapter provides information on creating and printing continuous labels (both automatic and fixed length), serialized labels, barcode labels, and multi-zone labels. Continuous Media The LABXPERT Laboratory Labeling System allows you to set label length for continuous media and to insert separators between continuous media labels. -
Page 34: Serialized Labels
Serialized Labels The printer allows you to perform basic alpha or numeric serializations. Serializing a character results in a series of labels that increment the character by either one number or one letter. For example: Numeric Serialization when the 123, 124, 125, 126… serialized character is 3. - Page 35 General Guidelines for Serialization Following are general guidelines for serializing: • Both lowercase and uppercase characters can be serialized. • Serialized characters can be incremented only (cannot decrement). • Serialized text is limited to one line and one sequence per label. •...
-
Page 36: Barcode Labels
Barcode Labels The printer allows you to print Code 39 and Code 128 barcode labels. Barcode heights are available in inches or millimeters. Human Readable – Text in 4 pt., 6 pt., 7 pt., and 10 pt. font sizes can be toggled on or off. The human readable text will be centered and positioned below the barcode. -
Page 37: Multi-Zone Labels
• [HR] (Human Readable) Select ON or OFF (HR Font Size = 7 pt.). • [WIDTH] (Barcode Width) Select 2 dots or 3 dots. 4. Press [ENTER]. When you print the label, the line(s) designated as barcode will print as such (if HR has been selected, the text will be centered below). Multi-Zone Labels The multi-zone label feature works with numerous label media, for instance, a Lab Vial Side and Top cartridge such as X-98-499. - Page 38 To set justification of a legend within a multi-zone label: You may set legend justification within individual zones. For instance, the following example shows Zone 1 with vertical TOP and horizontal LEFT justification; Zone 2 shows vertical CENTER and horizontal CENTER justification. Zone 1 Zone 2 Note: Pressing FUNCTION +...
- Page 39 To serialize a multi-zone label: The printer allows you to perform basic alpha or numeric serializations within any one zone in a multi-zone label. Note the following: • The serialization cannot occur within more than one zone per label. • When performing multiple-zone serialization, the zone you are in when you select [SERIAL] is the zone that will serialize.
-
Page 40: Chapter 9 Memory
This chapter provides information on saving, retrieving, and deleting labels using the memory function. Note: You can create, recall, edit, and save labels on your LABXPERT Laboratory Labeling System without a cartridge. Labels are created and saved based on the attributes of the last cartridge installed. -
Page 41: Deleting A Label From Memory
Deleting a Label from Memory To delete a label from memory: 1. Press [MEMORY]. The grid appears showing the 10 storage locations, saving the label to memory. A bold number indicates a storage location is occupied. 2. Use the arrows on your keypad to navigate to the desired storage location on –... -
Page 42: Chapter 10 Maintenance
Chapter 10 Maintenance This chapter provides instructions on cleaning your LABXPERT Laboratory Labeling System as well as an accessory parts list. Cleaning Follow these instructions to keep your printer running at optimal performance. 1. Remove the label cartridge. 2. Use a cotton swab moistened with isopropyl alcohol and thoroughly wipe the following: WARNING: Make sure you use a foam swab (with black handle) provided in your cleaning kit. -
Page 43: Accessory Parts List
Accessory Parts List Description Catalog No. Hard side Carrying Case LABXPERT-HC-KEY AC Adapter – North America XPERT-AC AC Adapter – Europe XPERT-ACEUR AC Adapter – UK XPERT-ACUK PC Communication Cable PCCABLE-1 Cleaning Kit PCK-4 User Manual... -
Page 44: Chapter 11 Troubleshooting
Laboratory Labeling System is not performing as documented in this user manual, use the following troubleshooting and error message guides to determine the corrective action you should take. If the corrective action does not work, contact Brady’s Technical Support Group. -
Page 45: Error Messages
Error Messages Error Message Cause Corrective Action Head Open The printer head mechanism is not Lock the cartridge locking lever. engaged. No Cartridge A cartridge is not inserted into Install a label cartridge. See printer. Replace material cartridge on page 7. Cannot Fit The printable information will not Either reduce the font size of the... -
Page 46: Appendix Amenu Tree
Appendix A Menu Tree User Manual... -
Page 47: Appendix Bfont Size Chart
Appendix B Font Size Chart Point Inch PRINT SAMPLE Size BRADY 12345 BRADY 12345 BRADY 12345 BRADY 12345 BRADY 12345 BRADY 12345 BRADY 12345 BRADY 12345 BRADY 12345 BRADY 12345 BRADY 12324 BRADY 12345 10,4 BRADY 12345 11.0 BRADY 12345 13.0... - Page 48 Point Inch PRINT SAMPLE Size BRADY 123 15,0 BRADY 12 16,3 BRADY 12 17,5 BRADY 1 19.0 BRADY 1.00 25.0 1.25 33.0 Note: The 102-pt. and 126-pt font sizes print in uppercase only for characters and symbols. User Manual...
-
Page 49: Appendix Csymbol Library
Appendix C Symbol Library See the Symbols section on page 17 for instructions on selecting and printing the symbols shown below: Greek Symbols Laboratory Symbols PPE/ Mandatory Hazard Warning User Manual... - Page 50 Prohibition First Aid/ Fire Haz Mat’ls (WHIMIS) Haz Mat’ls (HSID) European Arrows/ Misc. User Manual...
-
Page 51: Appendix Dglossary Of Terms
Appendix D Glossary of Terms It may be helpful to review these terms while using this manual: Cartridge (Material Cartridge) – The cartridge containing the label material, ribbon, and smart-cell. Continuous Media (Labels) – Marking media in a continuous roll, not pre-cut or separated by spaces and notches.
Need help?
Do you have a question about the LabXpert and is the answer not in the manual?
Questions and answers