Brady BP-PR PLUS Quick Start Manual
Hide thumbs
Also See for BP-PR PLUS:
- Quick operator's manual (23 pages) ,
- Operator's manual (27 pages) ,
- Configuration instructions (66 pages)

Related Manuals for Brady BP-PR PLUS


Summary of Contents for Brady BP-PR PLUS
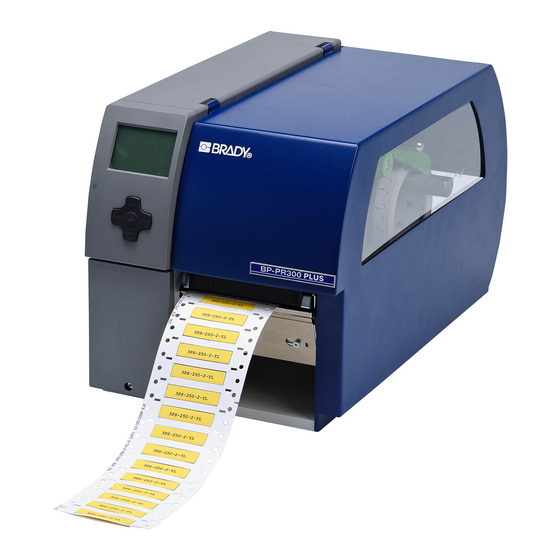
- Page 1 BP-PR PLUS Printer Quick Start Guide Configuration Instructions Edition 06/10 Edition 12/09...
- Page 2 The user is cautioned that any changes or modifi cations not expressly approved by Brady could void the user’s authority to use the equipment.
- Page 3 Notes on the Documentation The documentation for the BP-PR PLUS series transfer printers is comprised of the following parts: • Quick Start Guide • User Manual iii Edition 06/10 UICK TART UIDE...
-
Page 4: Table Of Contents
Contents 1 Safety and the Environment Intended Use ..........................1 Safety Notes ..........................2 Environmentally-friendly Disposal ..................2 2 Installation Unpacking the Transfer Printer ..................... 3 Setting up the Transfer Printer ....................4 Connecting the Transfer Printer .................... 4 Connecting to the Power Supply ..................5 connecting to a Computer or a Computer Network ............ -
Page 5: Safety And The Environment
1 Safety and the Environment Read these operating instructions carefully before using the transfer printer for the first time. The operating instructions describe all of the functions of the transfer printer during operation. The available functions depend on the version used for a specific job. -
Page 6: Safety Notes
Safety and the Environment Environmentally-friendly Disposal 1-2 Safety Notes • The transfer printer is designed for power supply systems from 100 V AC to 240 V AC. Connect the transfer printer only to electrical outlets with a ground contact. • Couple the transfer printer to devices using extra low voltage only. -
Page 7: Installation
Installation Unpacking the Transfer Printer 2 Installation 2-1 Unpacking the Transfer Printer • Lift the transfer printer out of the box via the straps. • Check transfer printer for damage which may have occurred during transport. • Check delivery for completeness. Scope of Delivery •... -
Page 8: Setting Up The Transfer Printer
Installation Connecting the Transfer Printer 2-2 Setting up the Transfer Printer CAUTION! The device and the print media can be damaged by moisture and water. ⇒ Setup transfer printer only in a dry place protected from sprayed water. • Set up printer on a level surface. •... -
Page 9: Connecting To The Power Supply
Installation Switching the transfer printer on and off 2-3-1 Connecting to the Power Supply The printer is equipped with a versatile power supply unit. The device may be operated with a mains voltage of 230 V AC/ 50 Hz or 115 V AC/60 Hz without any adjustments or modifications. -
Page 10: Operating Panel
Operating Panel Layout of the Operating Panel 3 Operating Panel 3-1 Layout of the Operating Panel The operating panel is comprised of the graphical display (1) and the navigator pad (2) with five integrated buttons. The graphical display informs you of the current status of the printer and the print job, reports errors and shows the printer settings in the menu. -
Page 11: Functions Of Operating Panel During Printing
Operating Panel Functions of Operating Panel during Printing 3-2 Functions of Operating Panel during Printing 3-2-1 Symbol Indicators The symbol indicators shown in the following table can appear on the status line of the screen, depending on the configuration of the printer. They inform you of the current status of the printer at a glance. -
Page 12: Power-Save Mode
Operating Panel Functions of Operating Panel during Printing 3-2-2 Power-Save Mode If the printer is not used for some time, it switches to Power-Save mode automatically. The display shows the graphic and button illumination is switched off. To exit Power-Save mode: 1. -
Page 13: Loading Media
Loading Media Loading labels from a roll 4 Loading Media Note: For adjustments and simple installation work, use the accompanying hexagonal wrench located in the bottom section of the print unit. See Figure 4, item 8. No other tools are required for the work described here. 4-1 Loading labels from a roll 4-1-1 Positioning the Label Roll on the Roll Retainer Figure 4. -
Page 14: Inserting A Label Strip Into Printhead
Loading Media Loading labels from a roll 4-1-2 Inserting a Label Strip into Printhead See Figure 4 for the following references. 1. Turn lever (9) counterclockwise to lift the printhead. 2. Push guide ring on axis (6) all the way out. 3. -
Page 15: Setting The Head Locking System
Loading Media Loading labels from a roll 4-1-4 Setting the Head Locking System The printhead is pushed on via two plungers. The location of the outer plunger must be set to the width of the label medium used so as to: •... -
Page 16: Loading Transfer Ribbon
Loading Media Loading Transfer Ribbon 4-2 Loading Transfer Ribbon Note: With direct thermal printing, do not load a transfer ribbon; if one has already been loaded, remove it. 1. Clean printhead before loading the transfer ribbon ("Cleaning the Printhead" on page 15.). 2. -
Page 17: Printing
Printing Synchronization 5 Printing CAUTION! The printhead can be damaged if handled improperly! - Do not touch bottom of printhead with your fingers or sharp objects. - Ensure that labels are clean. - Ensure smooth label surfaces. Raw labels are like emery and reduce service life of printhead. -
Page 18: Cleaning And Basic Maintenance
Cleaning and Basic Maintenance Cleaning the Print Roller 6 Cleaning and Basic Maintenance DANGER! Risk of death via electric shock! - Disconnect printer from power supply before performing any maintenance work. 6-1 General Cleaning When: as necessary. CAUTION! Abrasive cleaning agents can damage the printer! - Do not use abrasives or solvents to clean the outer surfaces or assemblies. -
Page 19: Cleaning The Printhead
Cleaning and Basic Maintenance Cleaning the Printhead 6-3 Cleaning the Printhead When: • Direct Thermal Printing: each time the label roll is changed • Thermal Transfer Printing: each time the transfer ribbon is changed or when the print image is adversely affected Substances may accumulate on the printhead during printing and adversely affect printing, e.g. -
Page 20: Cleaning The Label Sensor
Cleaning and Basic Maintenance Cleaning the Label Sensor 6-4 Cleaning the Label Sensor When: when the label roll is changed. CAUTION! Label sensor can be damaged! - Do not use sharp or hard objects or solvents to clean the label sensor. 1.
Need help?
Do you have a question about the BP-PR PLUS and is the answer not in the manual?
Questions and answers