Table of Contents
Advertisement
Advertisement
Table of Contents

Related Manuals for imagistics fx2100


Summary of Contents for imagistics fx2100
- Page 2 Supply Line 1-800-462-6797. For faster service, please have your machine model and serial number available before calling. Should your fx2100 develop a problem that cannot be remedied using maintenance troubleshooting procedures outlined in this manual, please contact the Imagistics National Diagnostic Center at 1-800-243-5556.
-
Page 3: Safety Precautions
Safety precautions To use the machine safely Save these instructions for later reference. WARNING There are high voltage Do not handle the plug with wet electrodes inside the machine. hands. Doing this might cause Before you clean the machine an electrical shock. or clear a paper jam, make sure you have unplugged the power cord from the power... - Page 4 To prevent injuries, be careful not to put your fingers in the area shown in the illustration. WARNING ■ When you move the machine, grasp the side handholds that are under the scanner. Do NOT carry the machine by holding it at the bottom. ■...
-
Page 5: Choosing A Location
Choosing a location Place your machine on a flat, stable surface that is free of vibration and shocks, such as a desk. Put the machine near a telephone jack and a standard, grounded power outlet. Choose a location where the temperature remains between 50°F and 95.5°F (10°-32.5°C). -
Page 6: Quick Reference Guide
Quick Reference Guide Sending faxes Press if you want to choose more settings and Automatic Transmission the LCD will return to the TX If it is not illuminated in Setting menu. green, press —OR— Press to fax. Place the original face up in the ADF, or face down on Enter the fax number. - Page 7 Storing Speed Dial numbers Using Search Menu Press If it is not illuminated in Enter a three-digit Speed green, press Dial number, and then press Search/Speed Dial Press Enter and then enter the first letter Enter a number (up to 20 of the name you’re looking for.
-
Page 8: Table Of Contents
Table of contens Introduction ................1-1 Using this Guide ............... 1-1 Finding information ..........1-1 Symbols used in this Guide ........1-1 Machine part names and operations ......1-2 Control panel overview ............. 1-5 Status LED indications ..........1-10 About fax machines ............1-12 Custom features ............ - Page 9 To load paper or other media in the multi-purpose tray (MP tray)............. 2-7 To use Automatic Duplexing for fax, copy and print operations............... 2-9 On-screen programming ............. 3-1 User-friendly programming ..........3-1 Menu table ..............3-1 Memory Storage ............3-1 Navigation keys ..............
- Page 10 Unique Ring.............. 5-12 What does your telephone company’s ‘Unique Ring’ do? ..........5-12 What does fx2100’s ‘Unique Ring’ do? ....5-12 Do you have Voice Mail?........5-13 Before you choose the ring pattern to register ..5-13 Registering the Unique Ring pattern ......5-14 Turning off the Unique Ring .........
- Page 11 Fax Resolution............6-7 Manual and automatic fax Redial ....... 6-8 Dual Access ............... 6-9 Real Time Transmission ........... 6-10 Checking job status ..........6-11 Canceling a job while scanning the original....6-11 Canceling a scheduled job........6-11 Advanced sending operations ........6-12 Composing the electronic Cover Sheet ....
- Page 12 Using R R Passcode ..........8-3 Remote commands ............ 8-4 Retrieving fax messages ..........8-5 Printing reports ..............9-1 Machine settings and journal..........9-1 Customizing the Job Status Report ......9-1 Setting the Journal Interval......... 9-2 Printing reports ............9-3 To print a report ............
- Page 13 Industry Canada Compliance Statement (Canada only) ............11-4 ® International ENERGY STAR Compliance Statement ......... 11-4 Laser safety .............. 11-4 FDA regulations ............11-5 Important safety instructions........... 11-6 Trademarks..............11-8 Troubleshooting and routine maintenance ..... 12-1 Troubleshooting ............. 12-1 Error messages ............12-1 Original jams.............
- Page 14 Specifications ..............S-1 Product description ............S-1 General................S-1 Print media ...............S-2 Copy .................S-2 Fax..................S-3 Scanner ................S-4 Printer ................S-5 Interfaces ................S-5 Computer requirements ............S-6 Index ..................I-1 Remote Retrieval Access card .......... R-1 xiii...
-
Page 15: Introduction
Introduction Using this Guide Thank you for buying an Imagistics fx2100. Your fx2100 is simple to use, with LCD screen instructions to guide you through programming it. You can make the most of your machine by taking a few minutes to read this Guide. -
Page 16: Machine Part Names And Operations
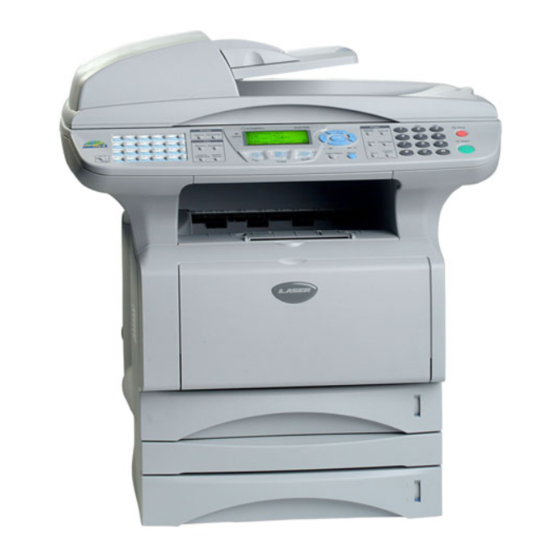
Machine part names and operations ■ Front view 5 Automatic Document Feeder (ADF) 6 ADF Document Support Extension 4 Control Panel 7 ADF Document Output Support 3 Face-down Output Tray Flap Support Flap with Extension 8 Document Cover 2 Front Cover Release Button 1 Multi-purpose Tray (MP Tray) 9 Power Switch 10 Front Cover... -
Page 17: Back View
■ Back view 16 ADF Cover 15 Face-up Output Tray (Back Output Tray) 17 Telephone Line Jack 14 AC Power Connector 18 USB Interface Connector 19 Parallel Interface 13 Duplex Tray Connector 20 External Telephone 12 Paper Adjustment Lever Line Jack for Duplex Printing No. - Page 18 ■ Inside view (Document cover open) 24 Document Cover 25 White Film 23 Scanner Lock Lever 22 Glass Strip 21 Document Guidelines 26 Scanner Glass No. Name Description Document Guidelines Use to center the original on the scanner glass. Glass Strip This is used to scan the original when using the ADF.
-
Page 19: Control Panel Overview
Control panel overview INTRODUCTION 1 - 5... - Page 20 Shift Status LED To access memory locations 21 (Light-Emitting Diode) through 40 in the One-Touch keys The LED will flash and change color hold down the Shift key. depending on the machine status. One-Touch keys 5-Line Liquid Crystal Display These 20 keys give you instant (LCD) access to 40 previously stored dial Displays messages on the screen to...
- Page 21 Mode keys: Lets you access Fax mode. Copy Lets you access Copy mode. Scan Lets you access Scan mode. Fax and telephone keys: Monitor Press before dialing if you want to make sure a fax machine will answer, and then press Start. Resolution Sets the resolution when you send a fax.
- Page 22 Navigation keys: Press to scroll forward or backward Menu to a menu selection. Lets you access the Menu to When using the speaker or ring, you program. can press these keys to adjust the Enter volume in fax mode. Lets you store your settings in the machine.
- Page 23 Copy keys Dial Pad (Temporary settings): Use these keys to dial telephone and fax numbers and as a keyboard Enlarge/Reduce for entering information into the Lets you reduce or enlarge copies machine. depending upon the ratio you The # key lets you temporarily select.
-
Page 24: Status Led Indications
Status LED indications The Status LED (Light Emitting Diode) will flash and change color depending on the machine status. The LED indications shown in the table below are used in the illustrations in this chapter. LED status LED is off. LED is on. - Page 25 If you cannot clear the error and see the same service call indication after turning the machine back on, please call the Imagistics National Diagnostic Center at 1-800-243-5556 (In USA). Cover open The cover is open. Close the cover. (See Error messages on page 12-1.)
-
Page 26: About Fax Machines
About fax machines Custom features Do you have Voice Mail on the phone line? If you have Voice Mail on the phone line where you will install your new machine, there is a strong possibility that Voice Mail and the machine may conflict with each other while receiving incoming calls. -
Page 27: Fax Tones And Handshake
Fax tones and handshake When someone is sending a fax, the machine sends fax calling tones (CNG tones). These are quiet, intermittent beeps every 4-seconds. Start You’ll hear them after you dial and press and they will continue for about 60 seconds after dialing. During that time, the sending machine must begin the “handshake”, or connection, with the receiving machine. -
Page 28: Ecm (Error Correction Mode)
ECM (Error Correction Mode) The Error Correction Mode (ECM) is a way for the machine to check a fax transmission while it is in progress. If the machine detects errors during fax transmission, if resends the pages of the fax that had an error. -
Page 29: Connecting An External Telephone Answering Machine (Tam)
Connecting an external telephone answering machine (TAM) Sequence You may choose to connect an answering device. However, when you have an external TAM on the same telephone line as the machine, the TAM answers all calls and the machine “listens” for fax calling (CNG) tones. - Page 30 Do not connect a TAM elsewhere on the same phone line (unless you have the Unique Ring service). 1 - 16 INTRODUCTION...
-
Page 31: Connections
Connections The external TAM must be plugged into the back of the machine, into the jack labeled EXT. Your machine cannot work properly if you plug the TAM into a wall jack (unless you are using Unique Ring). Plug the telephone line cord from the wall jack into the back of the machine, in the jack labeled LINE. -
Page 32: Special Line Considerations
Special line considerations Two-line phone system A two-line phone system is nothing more than two separate phone numbers on the same wall outlet. The two phone numbers can be on separate jacks (RJ11) or combined into one jack (RJ14). Your machine must be plugged into an RJ11 jack. -
Page 33: Installing Machine, External Two-Line Tam And Two-Line Telephone
Installing machine, external two-line TAM and two-line telephone When you are installing an external two-line telephone answering machine (TAM) and a two-line telephone, your machine must be isolated on one line at both the wall jack and at the TAM. The most common connection is to put the machine on Line 2, which is explained in the following steps. -
Page 34: Multi-Line Connections (Pbx)
Multi-line connections (PBX) Most offices use a central telephone system. While it is often relatively simple to connect the machine to a key system or a PBX (Private Branch Exchange), we suggest that you contact the company that installed your telephone system and ask them to connect the machine for you. -
Page 35: Paper
Type and size of paper The machine loads paper from the installed paper tray, multi-purpose tray or optional lower tray. Recommended paper Plain Paper: Imagistics 471-1 Letter Imagistics 472-2 Legal Transparency: 3M CG 3300 Labels: Avery laser label # 5160 ■... -
Page 36: Choosing Acceptable Paper
Choosing acceptable paper We recommend that you test paper (especially special sizes and types of paper) on the machine before purchasing large quantities. ■ Avoid feeding label sheets that are partly used or your machine will be damaged. ■ Avoid using coated paper, such as vinyl coated paper. ■... -
Page 37: Paper Capacity Of The Paper Trays
Paper capacity of the paper trays Paper size Number of sheets Multi-purpose tray Width: 69.8 to 220 mm 50 sheets (MP tray) (2.75 to 8.66 in.) (80 g/m or 20 lb) Height: 116 to 406.4 mm (4.57 to 16.0 in.) Paper tray A4, Letter, Legal, B5 (ISO), B5 250 sheets... -
Page 38: Paper Specifications For Each Paper Tray
Paper specifications for each paper tray Paper Multi- Plain paper, Bond paper, Recycled paper, Envelope types purpose Labels , and Transparency tray Paper tray Plain paper, Recycled paper, and Transparency Optional Plain paper, Recycled paper, and Transparency Lower tray Paper Multi- 60 to 161 g/m (16 to 43 lb) -
Page 39: How To Load Paper
How to load paper To load paper or other media in the paper tray Pull the paper tray completely out of the machine. While pressing the paper guide release lever, slide the adjusters to fit the paper size. Check that the guides are firmly in the slots. For Legal size paper, press the universal guide release button and pull out the back of the paper tray. - Page 40 Fan the stack of paper well to avoid paper jams and misfeeds. Put paper in the paper tray. Check that the paper is flat in the tray, below the maximum paper mark, and that the paper guide is flush against the paper stack.
-
Page 41: To Load Paper Or Other Media In The Multi-Purpose Tray (Mp Tray)
To load paper or other media in the multi-purpose tray (MP tray) When printing envelopes and labels you should only use the multi-purpose tray. Open the MP tray and lower it gently. Pull out and unfold the MP tray support flap. MP tray support flap When loading paper in the MP tray, make sure it touches the back of the tray. - Page 42 You can place up to 3 envelopes or up to 50 sheets of 80 g/m or 20 lb paper in the MP tray. While pressing the paper-guide release lever, slide the paper guide to fit the paper size. When you put paper in the MP tray, please remember the following: ■...
-
Page 43: To Use Automatic Duplexing For Fax, Copy And Print Operations
To use Automatic Duplexing for fax, copy and print operations If you want to print on both sides of the paper using the Duplex feature for fax, copy or print, you will need to set the Paper Adjustment Lever to the size of paper you are using. This feature is available for A4, Letter or Legal size paper. -
Page 44: On-Screen Programming
On-screen programming User-friendly programming Your machine is designed to be easy to use with LCD on-screen programming using the navigation keys. User-friendly programming helps you take full advantage of all the menu selections your machine has to offer. Since your programming is done on the LCD, we have created step-by-step on-screen instructions to help you program your machine. -
Page 45: Navigation Keys
Navigation keys * Access the menu * Go to the next menu level * Accept an option * Exit the menu by pressing repeatedly * Go back to the previous menu level * Scroll through the current menu level * Go back to the previous menu level * Go forward to the next menu level... - Page 46 Enter Then set an option by pressing when that option appears on the LCD. The LCD will then show the next menu level. Press to scroll to your next menu selection. Enter Press When you finish setting an option, the LCD shows Accepted. to scroll backward if you passed your choices or want to save keystrokes.
- Page 47 Menu To access the menu, press Press the Menu numbers. (ex. Press 2, 1 for Mode Timer) — — to select to select to accept exit Main Menu Submenu Menu Options Descriptions Page Selections — — Let you check 12-36 1.Page Total number of total...
- Page 48 Menu To access the menu, press Press the Menu numbers. (ex. Press 2, 1 for Mode Timer) — — to select to select to accept exit Main Menu Submenu Menu Options Descriptions Page Selections Sets the size of paper 2.System 3.Paper Size 1.Upper Tray in upper tray.
- Page 49 Menu To access the menu, press Press the Menu numbers. (ex. Press 2, 1 for Mode Timer) — — to select to select to accept exit Main Menu Submenu Menu Options Descriptions Page Selections — Selects the tray that 4-10 2.System 7.Tray Upper Tray...
- Page 50 Menu To access the menu, press Press the Menu numbers. (ex. Press 2, 1 for Mode Timer) — — to select to select to accept exit Main Menu Submenu Menu Options Descriptions Page Selections You can answer all 3.Fax 1.RX Settings 4.Remote (Continued) calls at an extension...
- Page 51 Menu To access the menu, press Press the Menu numbers. (ex. Press 2, 1 for Mode Timer) — — to select to select to accept exit Main Menu Submenu Menu Options Descriptions Page Selections — Set the time of day in 6-19 3.Fax 2.TX Settings...
- Page 52 Menu To access the menu, press Press the Menu numbers. (ex. Press 2, 1 for Mode Timer) — — to select to select to accept exit Main Menu Submenu Menu Options Descriptions Page Selections — Sets up a Group 3.Fax 3.Dialer 3.Setup number for...
- Page 53 Menu To access the menu, press Press the Menu numbers. (ex. Press 2, 1 for Mode Timer) — — to select to select to accept exit Main Menu Submenu Menu Options Descriptions Page Selections — Prohibits most 6-22 3.Fax 0.Miscellaneous 1.Mem functions except (Continued)
- Page 54 Menu To access the menu, press Press the Menu numbers. (ex. Press 2, 1 for Mode Timer) — — to select to select to accept exit Main Menu Submenu Menu Options Descriptions Page Selections — — You can print these 6.Print 1.Help List lists and reports.
-
Page 55: Lan Menu
Menu To access the menu, press Press the Menu numbers. (ex. Press 2, 1 for Mode Timer) — — to select to select to accept exit If you installed optional LAN board, the LCD shows the following LAN menu. Main Menu Submenu Menu Options... - Page 56 Menu To access the menu, press Press the Menu numbers. (ex. Press 2, 1 for Mode Timer) — — to select to select to accept exit Main Menu Submenu Menu Options Descriptions Page Selections Enter the mail 7.LAN 2.Setup 1.Mail address.
- Page 57 Menu To access the menu, press Press the Menu numbers. (ex. Press 2, 1 for Mode Timer) — — to select to select to accept exit Main Menu Submenu Menu Options Descriptions Page Selections Displays the subject 7.LAN 4.Setup Mail 1.Sender —...
- Page 58 Menu To access the menu, press Press the Menu numbers. (ex. Press 2, 1 for Mode Timer) — — to select to select to accept exit Main Menu Submenu Menu Options Descriptions Page Selections Selects Ethernet link 7.LAN 6.Setup Misc. 6.Ethernet Auto (Continued)
-
Page 59: Menu Options
If you have the optional paper tray, the LCD displays these Menu Menu Menu Menu options. ( Main Menu Submenu Menu Options Descriptions Page Selections — Select the tray that 4-10 2.System 7.Tray Upper Tray will be used for Setup Use:Copy Lower Tray copying. -
Page 60: Getting Started
Getting started Initial Setup Setting the Date and Time Your machine displays the date and time and if you set up the Machine ID it prints on every fax you send. If there is a power failure, you may have to reset the date and time. -
Page 61: Setting The Machine Id
Setting the Machine ID You should store your name or company name and fax number and telephone number to be printed on all fax pages that you send. Menu Press 03.Machine ID Enter your fax number (up to 20 digits). Fax: Enter Press... -
Page 62: Entering Text
Entering text When you are setting certain functions, such as the Machine ID, you may need to type text into the machine. Most number keys have three or four letters printed above them. The keys for not have printed letters because they are used for special characters. -
Page 63: Special Characters And Symbols
Special characters and symbols Press , and then press to move the cursor under Enter the special character or symbol you want. Then press select it. Press (space) ! " # $ % & ’ ( ) + , - . / Press : ;... -
Page 64: System Setup
System Setup Setting the Mode Timer The machine has three temporary mode keys on the control panel: Fax, Copy and Scan. You can change the number of seconds or minutes the machine takes after the last Copy or Scan operation before it returns to Fax mode. -
Page 65: Setting The Paper Size
Press to select Thin, 22.Paper Type Plain, Thick, Thicker or 1.MP Tray ▲ Plain Transparency. ▼ Thick Enter Press ▲ ▼ & Enter Stop Press You can select Transparency for Upper Tray and Lower Tray Menu only when A4, Letter or Legal is selected in Setting the Paper Size You can use eight sizes of paper for printing copies: A4, letter, legal, executive, A5, A6, B5 and B6 and three sizes of paper for printing... -
Page 66: Setting The Ring Volume
Setting the Ring Volume You can adjust the ring volume when your machine is idle (not being used). You can turn the ring Off or you can select the ring volume level. Menu Press 24.Volume 1.Ring Press to select ▲ (Low, Med, High or Off). -
Page 67: Setting The Speaker Volume
Setting the Speaker Volume You can adjust the machine’s one-way speaker volume. Menu Press 24.Volume 3.Speaker Press to select ▲ (Low, Med, High or Off). ▼ High Enter Press ▲ ▼ & Enter Stop Press —OR— In Fax mode, you can adjust the speaker volume by pressing Monitor , and then selecting a speaker volume level. -
Page 68: Sleep Timer
Sleep Timer Setting the Sleep Time reduces power consumption by turning off the fuser inside the machine, while it is idle. You can choose how long the machine is idle (from 00 to 99 minutes) before it goes into sleep mode. The timer is automatically reset when the machine receives a Fax or PC data, or makes a copy. -
Page 69: Setting The Tray Use For Copy Mode
Setting the Tray Use for Copy mode The default setting of Auto allows your machine to choose the optional Lower Tray or the MP tray when paper is out in Upper Tray when the size of the original will fit best on the paper in Lower Tray. -
Page 70: Setting The Tray Use For Fax Mode
Setting the Tray Use for Fax mode If your machine doesn’t have the optional Lower Tray, you can skip this setting. The default setting of Auto allows your machine to choose the optional Lower Tray if Upper Tray is out of paper or if incoming faxes will fit best on the paper in Lower Tray. -
Page 71: Setting The Lcd Contrast
Setting the LCD Contrast You can change the contrast to help the LCD look lighter or darker. Menu Press 28.LCD Contrast —OR— If you have the optional Lower & Enter Menu Tray, press Press to increase the contrast. —OR— Press to decrease the contrast. -
Page 72: Rx Settings
‘ RX Settings Basic receiving operations Choosing the Answer Mode There are four different Answer Modes for your machine. You can choose the mode that best suits your needs. How it works When to use it The machine For dedicated fax lines. Fax Only automatically answers (automatic receive) -
Page 73: To Select Or Change Your Answer Mode
To select or change your Answer Mode Menu Press 01.Answer Mode ▲ Fax Only Press to select Fax Fax/Tel Only, Fax/Tel, External TAM ▼ External TAM or Manual. ▲ ▼ & Enter Enter Press Stop Press If you are changing the Answer Mode while in another operation, the LCD will return to that operation. -
Page 74: Setting The F/T Ring Time (Fax/Tel Mode Only)
Setting the F/T Ring Time (Fax/Tel mode only) If you set the Answer Mode to Fax/Tel, you’ll need to decide how long the machine will signal you with its special pseudo/double-ring when you have a voice call. (If it’s a fax call, the machine prints the fax.) This pseudo/double-ring happens after the initial ringing from the phone company. -
Page 75: Ext. Tel. Rx
EXT. TEL. RX Start When you use this feature, you don’t have to press or the Fax Receive Code when you answer a fax call. Selecting On allows the machine to receive fax calls automatically, even if you lift the handset of an extension or external phone. -
Page 76: Printing A Reduced Incoming Fax (Auto Reduction)
Printing a reduced incoming fax (Auto Reduction) If you choose On, the machine automatically reduces an incoming fax to fit on one page of letter, legal or A4 size paper, regardless of the paper size of the original. The machine calculates the reduction ratio by using the page size of the original and your Paper Size Menu setting (... -
Page 77: Setting The Print Density
Setting the Print Density You can adjust print density, making your printed pages darker or lighter. If it is not illuminated in green, press Menu Press 31.RX Settings 6.Print Density Press to make the print darker. —OR— & Enter Press to make the print lighter. -
Page 78: Advanced Receiving Operations
Advanced receiving operations Operation from extension telephones If you answer a fax call on an extension telephone, or an external telephone in the EXT. jack, you can make your machine take the call by using the Fax Receive Code. When you press the Fax Receive Code , the machine starts to receive a fax. -
Page 79: Using A Cordless External Handset
Using a cordless external handset If your cordless telephone is connected to the EXT. jack of the machine and you typically carry the cordless handset elsewhere, it is easier to answer calls during the Ring Count. If you let the machine answer first, you will have to go to the machine so you can press Monitor to transfer the call to the cordless handset. -
Page 80: Polling
Polling Polling is the process of retrieving faxes from another fax machine. You can use your machine to ‘poll’ other machines, or you can have someone poll your machine. Everyone who is involved in Polling needs to set up their fax machines for Polling. -
Page 81: Setting Up Sequential Polling Receive
Setting up Sequential Polling Receive Your machine can ask for faxes from several fax units in a single operation (Sequential Polling Receive). Afterwards, a Sequential Polling Report will be printed. If it is not illuminated in green, press Menu Press 31.RX Settings 7.Poll RX Press... -
Page 82: Setting The Receive Tti
Setting the Receive TTI You can put the receive time and data on the top of each received fax. If it is not illuminated in green, press Menu Press 31.RX Settings 9.Receive TTI Press to select On (or ▲ Off). ▼... -
Page 83: Telephone Services
Please call your telephone company for availability and rates. What does fx2100’s ‘Unique Ring’ do? The fx2100 has a Unique Ring feature that allows you to use your machine to take full advantage of the telephone company’s Unique Ring service. The new phone number on your line can just receive faxes. -
Page 84: Do You Have Voice Mail
Do you have Voice Mail? If you have Voice Mail on the phone line that you will install your new machine on, there is a strong possibility that Voice Mail and the machine will conflict with each other while receiving incoming calls. However, the Unique Ring feature allows you to use more than one number on your line, so both Voice Mail and the machine can work together without any problems. -
Page 85: Registering The Unique Ring Pattern
■ The machine will only answer calls to its registered number. ■ The first two rings are silent on the machine. This is because the fax must «listen» to the ring pattern (to compare it to the pattern that was ‘registered’). (Other telephones on the same line will ring.) ■... -
Page 86: Caller Id
Caller ID The Caller ID feature lets you use the Caller ID subscriber service offered by many local telephone companies. This service provides you, by means of the LCD, the name or telephone number of your caller as the line rings. After a few rings, the LCD shows the telephone number of your caller (or name, if available). -
Page 87: Viewing Caller Id List
Viewing Caller ID List Caller ID memory stores information for up to thirty calls. When the thirty-first call comes in, information about the first call is erased. You can scroll through Caller ID information to review those calls made to your machine. -
Page 88: Tx Settings
TX Settings How to Fax You can send faxes from the ADF (Automatic Document Feeder) or from the scanner glass. Enter Fax mode Before sending faxes, make sure ) is illuminated in green. If not, press ) to enter Fax mode. The default setting is Fax. -
Page 89: Faxing From The Adf
Faxing from the ADF ADF Document If it is not illuminated in Support Extension green, press Document ). Pull out the ADF Output Support Document Support Flap Extension. Unfold the ADF Document Output Support Flap. Fan the pages well and stagger them at an angle. -
Page 90: Faxing From The Scanner Glass
Faxing from the scanner glass You can use the scanner glass to fax pages of a book or one page at a time. The originals can be up to letter, A4 or legal size (8.5 inches Stop to 14 inches). To cancel, press If it is not illuminated in green, press ). -
Page 91: Faxing Legal Size Originals From The Scanner Glass
Faxing legal size originals from the scanner glass When originals are legal size, you need to set the Glass Fax Size to Legal. If you do not, the bottom portion of the faxes will be missing. If it is not illuminated in green, press Menu Press Press... -
Page 92: Automatic Transmission
Automatic transmission This is the easiest way to send a fax. You must not pick up the handset of the external phone or press Monitor to listen for a dial tone. If it is not illuminated in green, press ). Place the original face up in the ADF, or face down on the scanner glass. -
Page 93: Basic Sending Operations
Basic sending operations Sending faxes using multiple settings When you send a fax you can choose any combination of these settings: cover sheet, contrast, resolution, overseas mode, delayed fax timer, polling transmission or real time transmission. After each setting is accepted, the LCD will ask if you want to enter more settings: Press to select more settings. -
Page 94: Fax Resolution
Start Press to send the fax from the ADF. The machine starts scanning the first page. If you are using the scanner glass, go to Step 7. Start To send a single page, press (or press again). The machine starts sending the original. —OR—... -
Page 95: Manual And Automatic Fax Redial
Manual and automatic fax Redial If you are sending a fax manually and the line is busy, press Redial/Pause Start , and then press to try again. If you want to make a second call to the last number dialed, you can save time by Redial/Pause Start pressing... -
Page 96: Dual Access
Dual Access You can dial a number, and begin scanning the fax into memory— even when the machine is receiving, sending or printing a fax from memory. The LCD shows the new job number and available memory. If you get a Out of Memory message while scanning the first Stop page of a fax, press to cancel scanning. -
Page 97: Real Time Transmission
Real Time Transmission When you are sending a fax, the machine will scan the originals into the memory before sending. Then, as soon as the phone line is free, the machine will start dialing and sending. If the memory becomes full, the machine will send the original in real time (even if TX from ADF is set to Off). -
Page 98: Checking Job Status
Checking job status Check which jobs are still waiting in the memory to be sent. (If there are no jobs, the LCD shows No Jobs Waiting.) Menu Press 36.View/Del. Jobs ▲ #001 12:34 ABC COM If you have more than one job #002 15:00 XYZ waiting, press ▼... -
Page 99: Advanced Sending Operations
Advanced sending operations Composing the electronic Cover Sheet The Cover Sheet is created at the receiving machine. Your Cover Sheet includes the name stored in the One-Touch or Speed Dial memory. If you’re dialing manually, the name is left blank. The Cover Sheet shows your Machine ID and the number of sheets you’re sending. -
Page 100: Composing Your Own Comments
Composing your own comments You can set up two comments of your own. If it is not illuminated in green, press Menu Press 32.TX Settings 8.Cover Message Press to choose 5 or ▲ 6 for your own comment. ▼ Enter Press ▲... -
Page 101: Cover Sheet For The Next Fax Only
Cover sheet for the next fax only This feature does not work without the Machine ID. So make sure it has been set. (See Setting the Machine ID on page 4-2.) If you only want to send a Cover Sheet with a particular fax, this Cover Sheet will include the number of sheets in your original. -
Page 102: Send A Cover Sheet For All Faxes
Send a cover sheet for all faxes This feature does not work without the Machine ID. Please be sure it has been set before continuing. (See Setting the Machine ID on page 4-2.) You can set the machine to send a cover sheet whenever you send a fax. -
Page 103: Broadcasting
Broadcasting Broadcasting is when the same fax message is automatically sent to Enter more than one fax number. Using the key, you can include Groups, One-Touch, Speed Dial numbers and up to 50 manually dialed numbers. If you did not use up any of the numbers for Groups, access codes or credit card numbers, you can ‘broadcast’... - Page 104 Enter the next number. (Example: Speed Dial number) When the LCD displays the fax number of the other party, press Enter Enter another fax number. (Example: Manual dialing using the dial pad.) Start Press If you are using the scanner glass, go to Step 8. To send a single page, Start press...
-
Page 105: Overseas Mode
Overseas Mode If you are having difficulty sending a fax overseas due to possible interference on the phone line, we recommend that you turn on the Overseas Mode. After you send a fax using this feature, the feature will turn itself off. If it is not illuminated in green, press ). -
Page 106: Delayed Send
Delayed Send During the day you can store up to 50 faxes in the memory to be sent within 24 hours. These faxes will be sent at the time of day you enter Enter in Step 3. Press to accept it, or enter another time for the faxes to be sent. -
Page 107: Delayed Batch Transmission
Delayed Batch Transmission Before sending the delayed faxes, your machine will help you economize by sorting all the faxes in the memory by destination and scheduled time. All delayed faxes that are scheduled to be sent at the same time to the same fax number will be sent as one fax to save transmission time. -
Page 108: Setting Up Polled Transmission
Setting up Polled Transmission Polled Transmission is when you set up your machine to wait with a paper original so another fax machine can call and retrieve it. If it is not illuminated in green, press ). Place the original that is going to be retrieved face up in the ADF, or face down on the scanner glass. -
Page 109: Memory Security
Memory Security Memory Security lets you prevent unauthorized access to the machine. The machine will not send faxes or print received faxes without the password you program. You will not be able to continue to schedule Delayed Send or Polling jobs. However, any pre-scheduled Delayed Send Faxes will be sent when you turn Memory Security On, so they won't be lost. -
Page 110: Turning Memory Security On
Turning Memory Security on Menu Press 30.Miscellaneous 1.Mem Security Press to select Set ▲ Set Security Security. ▼ Set Password ▲ ▼ & Enter Enter Press Enter the registered 4-digit password. Enter Press The machine goes offline and the LCD shows Secure Mode. If there is a power failure, the data in the memory will remain for up to 4 days. -
Page 111: Auto Dial Numbers And Dialing Options
Auto Dial numbers and dialing options Storing numbers for easy dialing You can set up your machine to do three types of easy dialing: One-Touch, Speed Dial and Groups for Broadcasting faxes. If you lose electrical power, the auto dial numbers that are in the memory will not be lost. -
Page 112: Storing Speed Dial Numbers
Enter a number (up to 20 digits). Enter Press ■ If you want to enter a pause in the dialing sequence (for example, to access Redial/Pause an outside line), press as you are entering the digits. Redial/Pause Each key press of enters a 3.5 second pause when the number is dialed, and a dash appears on the screen. -
Page 113: Changing One-Touch And Speed Dial Numbers
Enter the phone or fax number (up to 20 digits). Enter Press Use the dial pad to enter the name (up to 15 characters). Enter Press (You can use the chart on page 4-3 to help you enter letters.) —OR— Enter Press to store the number without a name. -
Page 114: Setting Up Groups For Broadcasting
Setting up Groups for Broadcasting Groups, which can be stored on a One-Touch key or a Speed Dial location, allow you to send the same fax message to many fax Start numbers by pressing only a One-Touch key and Search/Speed Dial Start , the three-digit location and First, you'll need to store each fax number as a One-Touch or Speed... -
Page 115: Dialing Options
Stop Press You can print a list of all One-Touch and Speed Dial numbers. (See Printing reports on page 9-3.) Group numbers will be marked in the column of 'Group'. Dialing options When you dial using an auto dial number, the LCD shows the name you’ve stored, or if you haven’t stored a name, the fax number you’ve stored. -
Page 116: Speed Dialing
Speed Dialing If it is not illuminated in green, press ). Place the original face up in the ADF, or face down on the scanner glass. Search/Speed Dial Press , and then the three-digit Speed Dial number. (See Storing Speed Dial numbers on page 7-2.) Start Press If you try to use a One-Touch or Speed Dial location with no... -
Page 117: Access Codes And Credit Card Numbers
Access codes and credit card numbers Sometimes you may want to choose from several long distance carriers when you make a call. Rates may vary depending on the time and destination. To take advantage of low rates, you can store the access codes or long-distance carriers and credit card numbers as One-Touch and Speed Dial numbers. -
Page 118: Pause
Pause Redial/Pause Press to insert a 3.5-second pause between Redial/Pause numbers. If you are dialing overseas, you can press as many times as needed to increase the length of the pause. Tone or Pulse If you have a Pulse dialing service, but need to send Tone signals (for example, for telephone banking), follow the instructions below. -
Page 119: Remote Fax Options
Remote Fax Options Fax Forwarding Programming a Fax Forwarding number When Fax Forwarding is selected, your machine stores the received fax in the memory. Then it dials the fax number you’ve programmed and forwards the fax message. Menu Press 35.Remote Fax Opt 1.RMT RTV/FX FWD Press to select Fax... -
Page 120: Setting Remote Retrieval
Setting Remote Retrieval You can call your machine from any fax machine using touch tone and use a Remote Retrieval Passcode and other button presses to retrieve fax messages. Cut out the Remote Retrieval Access Card on the last page and keep it in your wallet as an aid. Before you use the remote access and retrieval features, you have to set up your own code. -
Page 121: Using R R Passcode
Using R R Passcode Dial your fax number from a telephone or another fax machine using touch tone. When your machine answers, immediately enter your R R Passcode (3 digits followed by The machine signals if it has received fax messages: 1 long beep Fax messages —... -
Page 122: Remote Commands
Remote commands Follow the commands below to access features when you are away from the machine. When you call the machine and enter your R R Passcode (3 digits followed by ), the system will give two short beeps and you must enter a remote command. Remote Commands Operation Details Changing Remote... -
Page 123: Retrieving Fax Messages
Retrieving fax messages Dial your fax number. When your machine answers, immediately enter your R R Passcode (3 digits followed by ). If you hear one long beep, you have messages. As soon as you hear two short beeps, use the dial pad to press Wait for the long beep, and then use the dial pad to enter the number of the remote fax machine where you want your fax messages sent to followed by... -
Page 124: Printing Reports
Printing reports Machine settings and journal You need to set up the Job Status Report and Journal Interval in the menu selection table. Menu Press 34.Setup Reports —OR— 1.Job Status Rpt 2.Journal Menu Press ▲ ▼ & Enter Customizing the Job Status Report You can use the Job Status Report as proof that you sent a fax. -
Page 125: Setting The Journal Interval
Setting the Journal Interval You can set the machine to print journal at specific intervals (every 50 faxes, 6, 12 or 24 hours, 2 or 7 days). If you set the interval to Off, you can print the report by following the Steps on the next page. The default setting is Every 50 Faxes. -
Page 126: Printing Reports
Printing reports Five reports are available: Prints the Help List so you can see at-a-glance 1.Help List how to quickly program your machine. Lists names and numbers stored in the 2.Dialer Dir One-Touch and Speed Dial memory, in numerical order. Lists information about the last incoming and 3.Journal outgoing faxes. -
Page 127: Making Copies
Making copies Using the machine as a copier You can use your machine as a copier, making up to 99 copies at a time. Enter Copy mode (Copy) Before making copies, make sure that is illuminated (Copy) in green. If it is not, press to enter Copy mode. -
Page 128: Temporary Copy Settings
Temporary copy settings You can improve your copies by using the Temporary Copy Keys: Enlarge/Reduce Contrast Mode Tray Select Sort Duplex/N in 1 . These settings are temporary, and the machine returns to Fax mode 1 minute after it finishes copying. If you want to use these temporary settings again, place the next original in the ADF or on the scanner glass within that time. -
Page 129: Making A Single Copy From The Adf
Making a single copy from the ADF (Copy) Press to illuminate it in green. Place the original face up in the ADF. Start Press Do NOT pull on the original while copying is in progress. Stop To stop copying and eject the original, press Making multiple copies from the ADF (Copy) Press... -
Page 130: Single Or Multiple Copies Using The Scanner Glass
Single or multiple copies using the scanner glass You can make multiple copies using the scanner glass. Multiple copies will be stacked (all copies of page 1, then all copies of page 2, and so on). Use the Temporary Copy keys to choose more settings. (See Using the copy keys (Temporary settings) on page 10-6.) (Copy) Press... -
Page 131: Out Of Memory Message
Out of Memory message If the memory becomes full while you Out of Memory are making copies, the LCD message Copy:Press Start will guide you through the next step. Quit:Press Stop If the Out Of Memory message Stop Start appears, press to cancel or to copy scanned pages. -
Page 132: Using The Copy Keys (Temporary Settings)
Using the copy keys (Temporary settings) When you want to change the settings only for the next copy, use the Temporary Copy Keys. Temporary Copy Keys You can use different combinations. The large LCD shows your current Copy mode settings. Enlg/Red:100% Duplex/N in 1 Mode... -
Page 133: Enlarge/Reduce
Enlarge/Reduce You can select the following enlargement or reduction ratios. Auto sets the machine to calculate the reduction ratio that fits the size of your paper. (Auto appears only when you place the document in the ADF.) Custom allows you to enter a ratio from 25% to 400%. Enlarge/Reduce Press 100%... -
Page 134: Copy Mode (Type Of Original)
Press to select the enlargement or reduction ratio you want. Enter Press —OR— Enter You can select Custom and press Use the dial pad to enter an enlargement or reduction ratio from 25% to 400%. Enter Press (For example, press to enter 53%.) Start Press... -
Page 135: Sorting Copies Using The Adf
Sorting copies using the ADF If you want to sort multiple copies, use the ADF. Pages will be printed in the order 123, 123, 123, and so on. Copy Press ) to illuminate it in green. Place the original face up in the ADF. Use the dial pad to enter the number of copies you want (up to 99). -
Page 136: Tray Select
Tray Select You can change the tray use only for the next copy. (Copy) Press to illuminate it in green. Place the original face up in the ADF, or face down on the scanner glass. Use the dial pad to enter the number of copies you want (up to 99). -
Page 137: Duplex/N In 1
Duplex/N in 1 ‘Duplex’ prints on both sides of the paper. Temporary Level 1 Level 2 Option original Finished Layout Press — N in 1 2 in 1 (P) Duplex/N in 1 2 in 1 (L) 4 in 1 (P) 4 in 1 (L) —... -
Page 138: Duplex/N In 1 Copy
Duplex/N in 1 copy N in 1 copy You can save paper by copying either two or four pages onto one page. Please make sure paper size is set to A4, Letter or Legal. (Copy) Press to illuminate it in green. Place the original face up in the ADF, or face down on the scanner glass. -
Page 139: Poster
(P) means Portrait and (L) means Landscape. You can also combine the N in 1 and Duplex operations. (See Duplex (2 in 1) and Duplex (4 in 1) on page 10-15.) For 2 in 1(P), 2 in 1(L), 4 in 1 (P) or 4 in 1 (L), you can not use the Enlarge/Reduce setting. - Page 140 Press to select Portrait1, Portrait2, Landscape1 or Landscape2. Enter Press If you selected Portrait1 or Landscape2, go to Step 6. Press to select Single Sided for the original. Enter Press Start Press to scan the original. If you placed the original in the ADF, the machine starts printing. —OR—...
-
Page 141: Duplex (2 In 1) And Duplex (4 In 1)
Duplex (2 in 1) and Duplex (4 in 1) (Copy) Press to illuminate it in green. Place the original face up in the ADF, or face down on the scanner glass. Use the dial pad to enter the number of copies you want (up to 99). -
Page 142: Changing The Default Copy Settings
Changing the default copy settings You can adjust the copy settings that are shown in the chart. These settings will stay until you change them again. Submenu Feature Options Factory Settings Selections — 1.Copy Mode Text Auto Photo Auto — 2.Contrast Copy Mode Menu... -
Page 143: Important Information
Important information Standard telephone and FCC Notices These notices are in effect on models sold and used only in the United States. When programming emergency numbers or making test calls to emergency numbers: ■ Remain on the line and briefly explain to the dispatcher the reason for the call before hanging up. - Page 144 This equipment may not be used on coin service lines provided by the telephone company or connected to party lines. Imagistics cannot accept any financial or other responsibilities that may be the result of your use of this information, including direct, special or consequential damages.
-
Page 145: Federal Communications Commission (Fcc) Declaration Of Conformity (Usa Only)
AC outlet after checking the rating of the local power supply for the machine to operate properly and safely. Federal Communications Commission (FCC) Declaration of Conformity (USA only) Responsible Party: Imagistics International Inc. 100 Oakview Drive Trumbull, CT 06611, U.S.A. TEL: (203) 365-7000 declares, that the products Product Name: fx2100 comply with Part 15 of the FCC Rules. -
Page 146: Important
Important Changes or modifications not expressly approved by Imagistics International Inc. could void the user’s authority to operate the equipment. Important – about the interface cable A shielded interface cable should be used to ensure compliance with the limits for a Class B digital device. -
Page 147: Fda Regulations
FDA regulations and must be attached to laser products marketed in the United States. Manufactured: Imagistics International Inc. 100 Oakview Drive Trumbull, CT 006611, U.S.A. This product complies with FDA radiation performance standards, 21 CFR Subchapter J. -
Page 148: Important Safety Instructions
Important safety instructions Read all of these instructions. Save them for later reference. Follow all warnings and instructions marked on the product. Switch off before cleaning. Do not use liquid or aerosol cleaners. Use a damp cloth for cleaning. Do not use this product near water. Do not place this product on an unstable cart, stand, or table. - Page 149 Refer all servicing to the Imagistics National Diagnostic Center. Unplug this product from the wall outlet and refer servicing to Authorized Service Personnel under the following conditions: ■...
-
Page 150: Trademarks
Trademarks Imagistics is a registered trademark of Imagistics International Inc. The Imagistics logo is a registered trademark of Imagistics International Inc. © 2004 Imagistics International Inc. All rights reserved. Windows, Microsoft and Windows NT are registered trademarks of Microsoft in the U.S. and other countries. -
Page 151: Troubleshooting And Routine Maintenance
Troubleshooting and routine maintenance Troubleshooting IMPORTANT For technical help, you must call the country where you bought the machine. Calls must be made from within that country. Error messages As with any sophisticated office product, errors may occur. If this happens, your machine identifies the problem and displays an error message. - Page 152 The fuser cover is open. Please close the jam clear cover. Fuser Open (See Paper jams on page 12-6.) Machine has a mechanical problem. Call the Imagistics National Machine Error Diagnostic Center: In USA: 1-800-243-5556 You tried to make duplex printing with duplex Install the duplex tray correctly.
- Page 153 If the machine cannot reset itself and return to the date and time prompt, it will display Machine Error XX. Please call the Imagistics National Diagnostic Center: In USA: 1-800-243-5556 The paper is jammed in the machine.
-
Page 154: Original Jams
ERROR MESSAGES ERROR CAUSE ACTION MESSAGE Toner cartridge is not installed. Reinstall the toner cartridge. Toner Empty —OR— —OR— Toner is used up and printing is not possible. Replace the toner cartridge with a new one. (See Replacing the toner cartridge on page 12-27.) If the LCD shows Toner Low, you can still Order a new toner cartridge now. -
Page 155: Original Is Jammed Inside The Adf Unit
Original is jammed inside the ADF unit. Take out any paper from the ADF that is not jammed. Lift the document cover. Pull the jammed original out to the right. Close the document cover. Stop Press —OR— Take the ADF support out of the ADF unit. Pull the jammed original out to the right. -
Page 156: Paper Jams
Paper jams To clear paper jams, please follow the steps in this section. WARNING After you have just used the machine, some parts inside the machine are extremely hot. When you open the front cover or back output tray of the machine, never touch the shaded parts shown in the following diagram. - Page 157 Pull the paper tray completely out of the machine. Pull the jammed paper up and out of the machine. Press the cover release button and then open the front cover. Pull out the drum unit assembly. Pull the jammed paper up and out of the machine.
- Page 158 WARNING To prevent damage to the machine caused by static electricity, do not touch the electrodes shown in the following diagram. Open the back output tray. Pull the jammed paper out of the fuser unit. If the paper jam can be cleared, go to Step 7. If you have to pull the paper toward the back of the machine, the fuser may get dirty with toner powder and it may scatter on the next printouts.
- Page 159 WARNING After you have just used the machine, some internal parts of the machine are extremely HOT! Wait for the machine to cool down before you touch the internal parts of the machine. HOT! Back view Open the jam clear cover (fuser cover). Pull the jammed paper out of the fuser unit.
- Page 160 Push the lock lever down and take the toner cartridge out of the drum unit assembly. Take out the jammed paper if there is any inside the drum unit. Put the drum unit assembly back in the machine. Put the paper tray in the machine. Close the front cover.
-
Page 161: Paper Is Jammed In The Duplex Tray
Paper is jammed in the duplex tray Pull the duplex tray and paper tray out of the machine. Pull the jammed paper out of the machine. Put the duplex tray and paper tray back into the machine. TROUBLESHOOTING AND ROUTINE MAINTENANCE 12 - 11... - Page 162 ■ The Paper Jam message appears if you remove a sheet of paper from the Face Down Output Tray after only one side has printed. ■ If the Paper Adjustment Lever for Duplex Printing is not set correctly for the paper size, paper jams may occur and the printing will be out of position on the page.
-
Page 163: If You Are Having Difficulty With Your Machine
If the copy looks bad, clean the scanner and bottom of sentences are area. If there is still problem, call the Imagistics National Diagnostic Center cut off. at 1-800-243-5556. Poor quality print. - Page 164 DIFFICULTY SUGGESTIONS Vertical black lines when If the copy you made shows the same problem, your scanner is dirty. sending. (See Cleaning the scanner on page 12-24.) Handling Incoming Calls Machine ‘Hears’ Voice as If your machine is set to Easy Receive ON, it is more sensitive to CNG Tone.
- Page 165 If you are using Windows 95/98/98SE/Me, select ‘Printer Settings’ from characters are missing or the ‘Start’ menu. Select the properties of the ‘Imagistics fx2100 (USB) some characters are printed in Printer’. Click ‘Spool Setting’ on the ‘Details’ tab. Select ‘RAW’ from their place.
- Page 166 DIFFICULTY SUGGESTIONS Print Quality Difficulties Printed pages are curled. Thin or thick paper below the standard can cause this problem. Make sure you select the Paper Type that suits the media type you use. (See Setting the Paper Type on page 4-5 and Media Type on page 2-4 in Software User's Guide.) Printed pages are smeared.
-
Page 167: Improving The Print Quality
Improving the print quality This section provides information on the following topics: Examples of poor print Recommendation quality Check the printer’s environment. Conditions such as humidity, high temperatures, and so on may cause this print fault. (See Choosing a ABCDEFGH CDEF location on page iii.) abcdefghijk... - Page 168 Examples of poor print Recommendation quality If the problem is not solved after printing a few pages, the drum unit may have glue from label stock on the OPC drum surface. 94 mm (3.7 in.) Clean the drum unit as follows: 94 mm (3.7 in.) 1 Position the print sample in front of the drum unit, and find the exact...
- Page 169 Examples of poor print Recommendation quality The drum unit may be damaged. Put in a new drum unit. (See Replacing the drum unit on page 12-33.) ABCDEFGH Make sure that you use paper that meets our specifications. (See About abcdefghijk A B C D paper on page 2-1.) a b c d e...
- Page 170 Examples of poor print Recommendation quality Make sure that paper is loaded properly. Check the paper type and quality. (See About paper on page 2-1.) B DEFGH abc efghijk Try printing using the straight-through output path. (See How to load paper on page 2-5.) b c d e Turn over the stack of paper in the tray or try rotating the paper 180°...
-
Page 171: Packing And Shipping The Machine
Packing and shipping the machine Whenever you transport the machine, use the packing materials that came with your machine. If you do not pack the machine correctly, you may void your warranty. Turn the machine power switch off. Unplug the machine from the telephone wall jack. Unplug the machine from the AC outlet. - Page 172 Remove the drum unit and toner cartridge assembly. Leave the toner cartridge installed in the drum unit. Place the drum unit and toner cartridge assembly into the plastic bag and seal the bag. Close the front cover. Fold down the face-down output tray flap. Remove the telephone line cord.
- Page 173 Pack the drum unit and toner cartridge assembly, telephone line cord, AC cord and printed materials in the original carton as shown below: Close the carton and tape it shut. TROUBLESHOOTING AND ROUTINE MAINTENANCE 12 - 23...
-
Page 174: Routine Maintenance
White Film Glass strip Document Cover White film If the screen still displays a scanner error, call the Imagistics National Diagnostic Center at 1-800-243-5556. 12 - 24 TROUBLESHOOTING AND ROUTINE MAINTENANCE... -
Page 175: Cleaning The Printer
Cleaning the printer Caution ■ Do not use isopropyl alcohol to remove dirt from the control panel. It may crack the panel. ■ Do not use isopropyl alcohol to clean the laser scanner window. ■ Do not touch the scanner window with your finger. ■... -
Page 176: Cleaning The Drum Unit
Cleaning the drum unit We recommend placing the drum unit and toner cartridge assembly on a cloth or large disposable paper to avoid spilling and scattering toner. Clean the primary corona wire inside the drum unit by gently sliding the blue tab from right to left several times. Return the blue tab and snap it into the Home position (▼). -
Page 177: Replacing The Toner Cartridge
Replacing the toner cartridge When the toner cartridge is running low, the LCD shows Toner Low. It is a good idea to keep a new toner cartridge ready for use when you see the Toner Low warning. Discard the used toner cartridge according to local regulations, keeping it separate from domestic waste. -
Page 178: How To Replace The Toner Cartridge
How to replace the toner cartridge WARNING Just after you use the machine, some internal parts of the machine will be extremely HOT! So, never touch the shaded parts shown in the illustration. HOT! Open the front cover and pull out the drum unit. Caution ■... - Page 179 Hold down the lock lever on the right and pull the toner cartridge out of the drum unit. Lock Lever Caution Handle the toner cartridge carefully. If toner scatters on your hands or clothes, immediately wipe it off or wash it with cold water. TROUBLESHOOTING AND ROUTINE MAINTENANCE 12 - 29...
- Page 180 If a toner cartridge is left unpacked for a long period of time, the toner life is shortened. ■ Imagistics strongly recommends that you do not refill the toner cartridge provided with your machine. We also strongly recommend that you continue to use only Genuine Imagistics replacement toner cartridges (484-5).
- Page 181 Remove the protective cover. Insert the new toner cartridge in the drum unit until it clicks into place. If you put it in properly, the lock lever will lift automatically. Drum Unit Toner Cartridge Clean the primary corona wire inside the drum unit by gently sliding the blue tab from right to left several times.
- Page 182 Reinstall the drum unit and toner cartridge assembly and close the front cover. 12 - 32 TROUBLESHOOTING AND ROUTINE MAINTENANCE...
-
Page 183: Replacing The Drum Unit
Replacing the drum unit The machine uses a drum unit to create print images on paper. If the LCD shows Change Drum Soon, the drum unit is near the end of its life and it is time to purchase a new one. Even if the LCD shows Change Drum Soon, you may be able to continue printing without having to replace the drum unit for a while. - Page 184 Follow these steps to replace the drum unit: Press the cover release button and then open the front cover. Remove the old drum unit and toner cartridge assembly. Place it on a drop cloth or disposable paper to avoid scattering toner. Caution To prevent damage to the printer from static electricity, do not touch the electrodes shown below.
- Page 185 Hold down the lock lever on the right and pull the toner cartridge out of the drum unit. (See Replacing the toner cartridge on page 12-27.) Lock Lever Discard the used drum unit according to local regulations, keeping it separate from domestic waste. Be sure to seal the drum unit tightly so toner powder does not spill out of the unit.
-
Page 186: Page Counter
Page Counter You can see number of total pages, copy pages, print pages and List/Fax (total fax print + total list print) pages that your machine has printed. Menu Press 1.Page Counter The LCD shows number of pages ▲ Total :123456 for Total and Copy. -
Page 187: Optional Accessories
Optional accessories Memory board The memory board is installed on the main controller board inside the machine. When you add the optional memory board, it increases the performance for both copier and printer operations. Optional Memory 32MB TECHWORKS 12457-0001 64MB TECHWORKS 12458-0001 128MB TECHWORKS 12459-0001 In general, the DIMM must have the following specifications: Type:... -
Page 188: Installing The Optional Memory Board
Installing the optional memory board WARNING ■ DO NOT touch the surface of the main board within 15 minutes after turning off the power. ■ Before installing the optional memory board, make sure there are no faxes in the memory. Disconnect the telephone line cord, turn the machine power switch off, unplug the machine power cord from the AC outlet, and then disconnect the interface cable. - Page 189 WARNING DIMM boards can be damaged by even a small amount of static electricity. Do not touch the memory chips or the board surface. Wear an antistatic wrist strap when you install or remove the board. If you do not have an antistatic wrist strap, frequently touch the bare metal on the printer.
-
Page 190: Network (Lan) Board
WARNING If the Status LED turns Red for a Service Error, please call the Imagistics National Diagnostic Center at: 1-800-243-5556. Network (LAN) board When you add the optional Network (LAN) Board, you can connect your machine into the network to use the Internet FAX, Network Scanner, Network Printer and Network Management operations. -
Page 191: Before Starting Installation
Before starting installation Be careful when handling the Network board. There are many delicate electronic components that are susceptible to damage from static electricity. To avoid such damage, use the following precautions when handling the board. ■ Leave the Network board in its anti-static bag until you are ready to install it. - Page 192 WARNING Turn the machine power switch off, before installing (or removing) the Network board. Remove the side cover. Loosen the two screws, and then remove the metal shield plate. Loosen the two screws, and then remove the metal cover plate. Cover Plate 13 - 6 OPTIONAL ACCESSORIES...
- Page 193 Plug the Network board into connector P1 located on the main board as shown in the illustration (press firmly) and secure the Network board with the two screws. Put the metal shield plate back on and secure it with the two screws.
-
Page 194: Step 2: Connecting The Network Board To An Unshielded Twisted Pair 10Base-T Or 100Base-Tx Ethernet Network
Step 2: Connecting the Network board to an Unshielded Twisted Pair 10BASE-T or 100BASE-TX Ethernet Network To connect the Network board to a 10BASE-T or 100BASE-TX Network, you must have an Unshielded Twist Pair Cable. One side of the cable must be connected to a free port on your Ethernet hub and the other side must be connected to the 10BASE-T or 100BASE-TX connector (an RJ45 Connector) of the Network board. -
Page 195: Test Switch
Holds approx. 250 sheets of 20 lb (80 g/m Basis Weight 16 to 28 lb (60 to 105 g/m Moisture Content 4% to 6% by weight We Recommend: Imagistics 471-1 Letter Cut sheet: Imagistics 472-2 Legal OPTIONAL ACCESSORIES 13 - 9... -
Page 196: Glossary
Glossary ADF (Automatic Document Feeder) The original can be placed in the ADF and scanned one page at a time automatically. Automatic fax transmission Sending a fax without picking up the Monitor handset of an external phone (or pressing Automatic Redial A feature that enables your machine to redial the last fax number if the fax did not go through because the line was busy. - Page 197 Coding Method Method of coding the information contained in the original. All fax machines must use a minimum standard of Modified Huffman (MH). Your machine is capable of greater compression methods, Modified Read (MR), Modified Modified Read (MMR) and JBIG, if the receiving machine has the same capability.
- Page 198 Extension phone A telephone on the fax number that is plugged into a separate wall jack. External phone A TAM (telephone answering device) or telephone that is plugged into the EXT jack of your machine. F/T Ring Time The length of time that the machine rings (when the Answer Mode setting is Fax/Tel) to notify you to pick up a voice call that it answered.
- Page 199 LCD (liquid crystal display) The display screen on the machine that shows interactive messages during On-Screen Programming and shows the date and time when the machine is idle. Machine ID The stored information that appears on the top of faxed pages.
- Page 200 Real Time Transmission When memory is full, you can send faxes in real time. Remote Retrieval Access The ability to access your machine remotely from a touch tone phone. Resolution The number of vertical and horizontal lines per inch. See: Standard, Fine, Extra Fine and Photo. Ring Count The number of rings before the machine answers in FAX mode.
- Page 201 Transmission The process of sending faxes over the phone lines from your machine to the receiving fax machine. ® True Type fonts The fonts that are used in the Windows operating systems. If you install the True Type fonts, more types of fonts will ®...
-
Page 202: Specifications
Specifications Product description Five performance modes are available for the 5 in 1 model fx2100: Printer, Copier, Color Scanner, Fax, and PC-Fax (via your PC). General Memory Capacity 32 MB Optional Memory 1 DIMM slot; Memory expandable up to 160 MB... -
Page 203: Print Media
Temperature Operating: 50 - 90.5 (10 - 32.5 °F °C Storage: 32 - 104 (0 - 40 °F °C Humidity Operating: 20 to 80% (without condensation) Storage: 10 to 90% (without condensation) Print media Paper Input Paper Tray ■ Paper type: Plain paper, recycled paper and transparencies, envelopes (Multi-purpose Tray) -
Page 204: Fax
Compatibility ITU-T Group 3 Coding System MH/MR/MMR/JBIG Modem Speed 33600-2400 bps Automatic Fallback Original Size ADF Width: 5.8" to 8.5" (148 mm to 216 mm) ADF Height: 5.8" to 14.0" (148 mm to 356 mm) Scanner Width: Max. 8.48" (212 mm) Scanner Height: Max. -
Page 205: Scanner
Scanner Color/Monochrome Color/Monochrome ® TWAIN Compliant Yes (Windows 95/98/98SE/Me/2000 Professional ® and Windows NT Workstation Version 4.0) ® ® Mac OS 8.6-9.2/Mac OS X 10.2.1 or greater ® WIA Compliant Yes (Windows Up to 9,600 × 9,600 dpi (interpolated)* Resolution Up to 600 ×... -
Page 206: Printer
Printer ® Emulation PCL6 (Printing System for Windows emulation ® mode of HP LaserJet) and BR-Script (PostScript Level 3 ® Printer Driver Windows 95/98/98SE/Me/2000 Professional/XP ® and Windows NT Workstation Version 4.0 driver supporting Native Compression mode and bi-directional capability ®... -
Page 207: Computer Requirements
Computer requirements Minimum System Requirements Available Hard Disk Space Processor Recomm- Computer Platform & Operating Minimum Minimum ended Application System Version Driver Speed Software*1 Pentium 98, 98SE 24 MB 32 MB 75MHz Pentium 150MHz 32 MB 64 MB 100 MB ®... -
Page 208: Index
Index The items in the upper case represent LCD messages. control panel, overview ..1-6 copy access codes, storing and contrast ......10-16 dialing ........ 7-7 default settings, changing ADF (Automatic Document ........10-16 Feeder) ......6-1 Duplex/N in 1 ....10-11 ADF cover ......12-4 Enlarge/Reduce ....10-7 Answer mode enter Copy mode ....10-1... - Page 209 from an external phone ..7-6 printing from ..... 5-5 Groups ......6-16 fax, stand-alone Search ......7-5 receiving ......5-1 Speed Dial numbers ..7-6 difficulty ..... 12-13 drum unit duplex printing ..... 5-10 replacing ...... 12-33 forwarding ..... 8-4 Dual Access .......
- Page 210 gray scale ....S-3, S-4 Page Counter ....12-36 Groups for Broadcasting ..7-4 Paging programming your pager number ......8-1 Paper ......2-1, S-2 HELP ........3-1 capacity ......2-3 Help List ......9-3 jam ........12-4 Size ........4-6 size of original ....6-1 jacks phone line convert to RJ11 jack ..
- Page 211 Remote Retrieval ....8-2 troubleshooting ....12-1 commands ....... 8-4 error messages on LCD . 12-1 getting your faxes .... 8-5 if you are having difficulty Reports ....... 9-1 incoming calls .... 12-14 resolution paper handling ..12-15 fax (standard, Fine, Ex-Fine, phone line difficulties .
-
Page 212: Remote Retrieval Access Card
Remote Retrieval Access card If you plan to receive fax messages while away from your machine, carrying the Remote Retrieval Access Card printed below will serve as a convenient reminder of the retrieval procedures. Simply cut out the card and fold it to fit your wallet or organizer. Keeping it handy will help you derive the full benefit of your machine’s Forwarding and Remote Retrieval features. - Page 213 Fold Fold R - 2...
- Page 214 EQUIPMENT ATTACHMENT LIMITATIONS (Canada only) NOTICE This product meets the applicable Industry Canada technical specifications. NOTICE The Ringer Equivalence Number is an indication of the maximum number of devices allowed to be connected to a telephone interface. The termination on an interface may consist of any combination of devices subject only to the requirement that the sum of the RENs of all the devices does not exceed five.
- Page 215 LF6091001...
Need help?
Do you have a question about the fx2100 and is the answer not in the manual?
Questions and answers