Table of Contents
Advertisement
Quick Links
Advertisement
Table of Contents

Subscribe to Our Youtube Channel
Related Manuals for Altusen MP0101


Summary of Contents for Altusen MP0101
- Page 1 Matrix Plus™ MP0101 User Manual www.aten.com...
-
Page 2: Fcc Information
MP0101 User Manual FCC Information This is an FCC Class A product. In a domestic environment this product may cause radio interference in which case the user may be required to take adequate measures. This equipment has been tested and found to comply with the limits for a Class A digital device, pursuant to Part 15 of the FCC Rules. -
Page 3: User Notice
MP0101 User Manual User Notice All information, documentation, and specifications contained in this manual are subject to change without prior notification by the manufacturer. The manufacturer makes no representations or warranties, either expressed or implied, with respect to the contents hereof and specifically disclaims any warranties as to merchantability or fitness for any particular purpose. -
Page 4: Safety Instructions
MP0101 User Manual Safety Instructions General Read all of these instructions. Save them for future reference. Follow all warnings and instructions marked on the device. Do not place the device on any unstable surface (cart, stand, table, etc.). If the device falls, serious damage will result. - Page 5 MP0101 User Manual Position system cables and power cables carefully; Be sure that nothing rests on any cables. When connecting or disconnecting power to hot pluggable power supplies, observe the following guidelines: Install the power supply before connecting the power cable to the power supply.
-
Page 6: Rack Mounting
MP0101 User Manual Rack Mounting Before working on the rack, make sure that the stabilizers are secured to the rack, extended to the floor, and that the full weight of the rack rests on the floor. Install front and side stabilizers on a single rack or front stabilizers for joined multiple racks before working on the rack. -
Page 7: Package Contents
Copyright © 2006 ATEN® International Co., Ltd. Manual Part No. PAPE-0269-1AXG Printing Date: 10/2006 Altusen and the Altusen logo are registered trademarks of ATEN International Co., Ltd. All rights reserved. All other brand names and trademarks are the registered property of their respective owners. -
Page 8: Table Of Contents
MP0101 User Manual Contents FCC Information ..........ii RoHS . - Page 9 MP0101 User Manual Chapter 3. Basic Operation Topology Considerations ........17 Hot Plugging .
- Page 10 MP0101 User Manual Chapter 7. The Firmware Upgrade Utility Introduction ..........45 Before You Begin .
-
Page 11: About This Manual
Chapter 2, Installation, takes you through the procedures for installing the MP0101 both as a chained component of a Matrix KVM Switch setup, and in an independent, standalone, chained configuration. Chapter 3, Basic Operation, explains the fundamental concepts involved in MP0101 operations. -
Page 12: Conventions
MP0101 User Manual Conventions This manual uses the following conventions: Monospaced Indicates text that you should key in. Indicates keys you should press. For example, [Enter] means to press the Enter key. If keys need to be chorded, they appear together in the same bracket with a plus sign between them: [Ctrl+Alt]. -
Page 13: Altusen Information
MP0101 User Manual ALTUSEN Information Technical Support North America Technical Registered ALTUSEN product owners are entitled to Phone Support telephone technical support. Call the ALTUSEN Technical Support Center: 949-453-8885. International Technical 1. Contact your local dealer. Phone Support 2. Call the ALTUSEN Technical Support Cen- ter:(886-2) 8692-6959. -
Page 14: Product Information
ALTUSEN on the web or contact an ALTUSEN Authorized Reseller. In the United States of America, call: 866-ALTUSEN (258-8736) In Canada and South America, call: 949-453-8885 In all other locations, call: 886-2-8692-6789 Visit ALTUSEN on the web at http://www.aten.com for a list of locations and telephone numbers... -
Page 15: Chapter 1 Introduction
KVM switch installations on a one server at a time basis. With the MP0101, they can expand at their own pace, rather than having to purchase an entire KVM switch when it comes time to add a server or two. - Page 16 MP0101 User Manual With the independent, standalone configuration, a Console Module is used to bridge between a keyboard/video/mouse console and the KVM Adapter Cable. Up to 61 additional KVM Adapter Cables can be daisy chained from the first one, so that up to 62 servers can be controlled from a single KVM console.
-
Page 17: Features
Chapter 1. Introduction Features MP0101M Master Module Chain down from any available Matrix KVM Switch computer port - supports a chain of up to 16 KVM Adapter Cables plus a single USB PC connection MP0101M Master Module can be up to 150 m away from the Matrix KVM Switch Hot pluggable;... -
Page 18: Kvm Adapter Cables
MP0101 User Manual KVM Adapter Cables Auto Signal Compensation (ASC), no DIP switch setting needed for the different distances of up to 150 meters between the Console Module and the KVM Adapter Cable Chain Alive function supports power from both the attached computers... -
Page 19: Requirements
Sun systems, a Sun style keyboard port (8 pin mini-DIN). Note: The computer that attaches to the MP0101M (Master Module), must have a USB port for the attachment. Cables and Modules The following cables and modules are required for use with the MP0101 Matrix Plus KVM system: Function Cable... -
Page 20: Mp0101M (Master Module) Components
MP0101 User Manual MP0101M (Master Module) Components Component Description KVM Cables These cables connect to the video and USB ports of the computer attached to the MP0101M. Chain In Port The Cat 5 cable that connects the unit to a port on the Matrix KVM Switch plugs in here. -
Page 21: Console Module Components
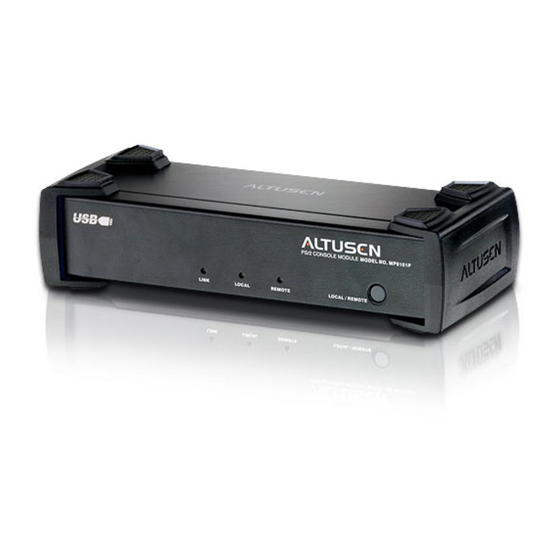
Chapter 1. Introduction Console Module Components Console Modules are used in a standalone installation. They provide the OSD and Hotkey control of the computers on your installation. They also provide flexibility by allowing either PS/2 or USB based keyboards and mice to be used with the system. -
Page 22: Rear View
Upgrade should be in the NORMAL position. Section The Firmware Upgrade Cable that transfers the firmware upgrade data to the MP0101 system’s modules plugs into the UPGRADE jack. Firmware upgrading details are discussed in Chapter 7. Console Port The cables from your keyboard, monitor, and mouse Section plug in here. -
Page 23: Kvm Adapter Cables
Chapter 1. Introduction KVM Adapter Cables Overview KVM Adapter Cables are used as signal translation intermediaries between the Console Modules and the computers, allowing either console (PS/2 or USB) to control any combination of PS/2 port computers; PC and Mac USB port computers;... -
Page 24: Kvm Adapter Cable Components
MP0101 User Manual KVM Adapter Cable Components Component Description Mounting You can use this bracket to attach the module to a Bracket system rack. Firmware During normal operation this switch should be in the Upgrade Switch NORMAL position. Firmware upgrading details are discussed in Chapter 7. -
Page 25: Chapter 2. Installation
Installation Matrix KVM Switch Cascade Chain To install the MP0101 system as a chain cascaded from a Matrix KVM Switch port, refer to the Installation Diagrams on pp. 12 and 13 (the numbers in the diagram correspond with the numbers of the instruction steps), and do the following: 1. - Page 26 MP0101 User Manual Matrix KVM Switch Cascade Chain Installation Diagram...
- Page 27 Chapter 2. Installation KVM Adapter Cable Connection Diagram MP0120 MP0130 MP0131...
-
Page 28: Standalone Chain
Console Module. Each port is marked with an icon to indicate itself. 2. Use the KVM cable supplied with your module to connect your Local computer (one that is not part of your MP0101 chain) to the LOCAL PC port of the Console Module. - Page 29 Chapter 2. Installation Standalone Chain Installation Diagram...
- Page 30 MP0101 User Manual This Page Intentionally Left Blank...
-
Page 31: Chapter 3. Basic Operation
Hot Plugging The MP0101 supports hot plugging - modules can be removed and added back into the installation by unplugging their cables from the ports without the need to shut down any of the components on the installation. -
Page 32: Port Selection
Port ID Numbering Each computer port on an MP0101 installation is assigned a unique Port ID. You can access and control any computer on the installation by specifying the Port ID of the port that it is connected to. -
Page 33: Chapter 4. Osd Operation
OSD Overview On a Matrix KVM Switch Chain Installation, the switch's OSD governs the computers attached to the MP0101 modules as part of its cascaded OSD setup. Therefore, this chapter only deals with the OSD operation of a standalone MP0101 installation. You can refer to the switch’s User Manual for its OSD operation details. - Page 34 MP0101 User Manual Note: If this is the first time that the OSD is being run, or if the password function has not been set, simply press [Enter]. The OSD Main Screen comes up in Super Administrator Mode. In this mode, you have access to all Administrator and User functions, and can set up operations (including password authorization for the future), as you would like.
-
Page 35: Osd Navigation
Chapter 4. OSD Operation OSD Navigation To dismiss the Main Screen, and deactivate OSD, Click the X at the upper right corner of the OSD Window; or press [Esc]. To Logout, Click F8 or the symbol at the top of the Main Screen, or press [F8]. -
Page 36: Osd Functions
2. In the Submenus that appear make your choice either by Double Clicking it, or moving the Highlight Bar to it, then pressing [Enter]. 3. Press [Esc] to return to the previous menu level. A complete description of the MP0101's OSD operations are given in the sections that follow. F1 GOTO GOTO allows you to switch directly to a port either by keying in the port's Name, or its Port ID. -
Page 37: F2 List
Chapter 4. OSD Operation F2 LIST Many of the OSD functions only operate on the computers that are currently displayed (listed) on the Main Screen. This function lets you broaden or narrow the scope of which ports the OSD lists on the Main Screen. The submenu choices and their meanings are given in the table below: Choice Meaning... -
Page 38: F3 Set
The changes only become permanent when you Log out of the OSD (see p. 33). If you shut down the MP0101 without first logging out, your changes are discarded. The settings are explained in the following table:... - Page 39 Chapter 4. OSD Operation (Continued from previous page.) Setting Function PORT ID Determines how long a Port ID displays on the monitor after a port DISPLAY change has taken place. The choices are: User Defined - which DURATION lets you select the amount of time (from 1 - 255 sec.); and Always On - which displays the Port ID at all times.
-
Page 40: F4 Adm
Note: All your setting changes are stored in temporary memory and remain in effect for the duration of your session. The changes only become permanent when you Log out of the OSD (see p. 33). If you power off the MP0101 without first logging out, your changes are discarded. Setting Function... - Page 41 Chapter 4. OSD Operation (Continued from previous page.) Setting Function EDIT PORT To help remember which computer is attached to a particular port, NAMES every port can be given a name. This function allows the Administrator to create, modify, or delete port names. To Edit a port name: 1.
- Page 42 MP0101 User Manual (Continued from previous page.) Setting Function SET QUICK This function lets the Administrator select which Ports to include as VIEW PORTS Quick View ports. To select/deselect a port as a Quick View Port, Double Click the port you want, or use the Navigation Keys to move the highlight bar to it, then press [Enter].
- Page 43 Mac; and Sun. The default is Windows (PC compatible). FIRMWARE In order to upgrade the MP0101's firmware (see Chapter 7), you UPGRADE must first invoke Firmware Upgrade Mode with this setting. Only the Super Administrator on the Master Station can utilize this...
-
Page 44: F5 Skp
MP0101 User Manual F5 SKP This function enables you to easily skip backward or forward - switching the console focus from the currently active computer port to the previous or next available one. The selection of computers to be available for Skip Mode switching is made with the Scan/Skip Mode setting under the F3 SET function (see p. -
Page 45: F6 Brc
Chapter 4. OSD Operation F6 BRC F6 is a Super Administrator or Administrator only function. Clicking the F6 field, or pressing [F6], invokes Broadcast (BRC) Mode. When this function is in effect, commands sent from the console are broadcast to all available computers on the installation. -
Page 46: F7 Scan
MP0101 User Manual F7 SCAN This function allows you to automatically switch among the available computers at regular intervals so that you can monitor their activity without having to take the trouble of switching yourself. The selection of computers to be included for Auto Scanning is made with the Scan/Skip Mode setting under the F3 SET function (see p. -
Page 47: F8 Lout
Chapter 4. OSD Operation F8 LOUT LOUT (Log Out) logs you out of OSD control of the computers, and blanks the Console screen. This is different from simply pressing [Esc] to deactivate the OSD when you are at the Main Screen. With this function you must log in all over again to regain access to the OSD, whereas with [Esc], all you have to do to reenter the OSD is tap the OSD hotkey. - Page 48 MP0101 User Manual This Page Intentionally Left Blank...
-
Page 49: Chapter 5. Hotkey Operation
On a Matrix KVM Switch Chain Installation, the switch's Hotkey feature governs the computers attached to the MP0101 modules. Therefore, this chapter only deals with the Hotkey operation of a standalone MP0101 installation. You can refer to the switch’s User Manual for its Hotkey operation details. -
Page 50: Local Or Chained (Remote) Selection
MP0101 User Manual When HKM is active: The Caps Lock, and Scroll Lock LEDs flash in succession to indicate so. They stop flashing and revert to normal status when you exit HKM. A Command Line appears at the bottom of the monitor screen. The command line prompt is the word Hotkey: in white text on a blue background. -
Page 51: Auto Scanning
Chapter 5. Hotkey Operation Auto Scanning Auto Scan switches among all the computer ports that are accessible to the current Operator at regular intervals (see Scan/Skip Mode, p. 25, for information regarding accessible ports). This function is convenient for automatically monitoring the activity of the computers on the installation. Setting the Scan Interval: The amount of time Auto Scan dwells on each port is set with the Scan Duration setting of the OSD F3 SET function (see p. -
Page 52: Invoking Auto Scan
MP0101 User Manual Invoking Auto Scan: To start Auto Scanning, key in the following Hotkey combination: 1. Invoke HKM (see p. 35). 2. Press [A]. After you press A, you automatically exit HKM, and enter Auto Scan Mode, and Auto Scanning begins. -
Page 53: Skip Mode
Chapter 5. Hotkey Operation Skip Mode This feature allows you to switch between computers in order to monitor them manually. In contrast to Auto Scanning, which automatically switches after a fixed interval, Skip Mode lets you dwell on a particular port for as long or as little as you like. -
Page 54: Hotkey Beeper Control
MP0101 User Manual Hotkey Beeper Control The Beeper (see Activate Beeper, p. 27) can be Hotkey toggled On and Off. To toggle the Beeper, key in the following Hotkey combination: 1. Invoke HKM (see p. 35). 2. Press [B] After you press B, the Beeper toggles On or Off. The Command Line displays Beeper On or Beeper Off for one second;... -
Page 55: Chapter 6. Keyboard Emulation
Chapter 6 Keyboard Emulation The MP0101 provides the utmost in flexibility for your installation by offering multiplatform support. Through the use of Console Modules and KVM Adapter Cables, PS/2 and USB interfaces can be mixed and matched at the console side, and PS/2, USB and Sun interfaces can be mixed and matched at the computer side. -
Page 56: Mac Keyboard Emulation
MP0101 User Manual Mac Keyboard Emulation PC Keyboard Mac Keyboard [Shift] Shift [Ctrl] Ctrl [Ctrl] [1] Mute [Ctrl] [2] V_DN [Ctrl] [3] V_UP [Ctrl] [4] [Alt] L Alt/Option [Prt_Sc] [Scroll Lock] [Enter] Return [Back Space] Delete [Ins] Help [Ctrl] Note: When using key combinations, press and release the first key (Ctrl),... -
Page 57: Sun Keyboard Emulation
Chapter 6. Keyboard Emulation Sun Keyboard Emulation PC Keyboard Sun Keyboard [Ctrl] [T] Stop [Ctrl] [F2] Again [Ctrl] [F3] Props [Ctrl] [F4] Undo [Ctrl] [F5] Front [Ctrl] [F6] Copy [Ctrl] [F7] Open [Ctrl] [F8] Paste [Ctrl] [F9] Find [Ctrl] [F10] [Ctrl] [1] [Ctrl] [2] [Ctrl] [3]... - Page 58 MP0101 User Manual This Page Intentionally Left Blank...
-
Page 59: The Firmware Upgrade Utility
The purpose of the Windows-based Firmware Upgrade Utility (FWUpgrade.exe) is to provide an automated process for make upgrading the MP0101's firmware as smooth and painless as possible. The Utility comes as part of a Firmware Upgrade Package that is specific for each device. -
Page 60: Before You Begin
Before You Begin To prepare for the firmware upgrade, do the following: 1. From a computer that is not part of your MP0101 installation go to our Internet support site and choose the model name that relates to your device to get a list of available Firmware Upgrade Packages. -
Page 61: Performing The Upgrade
Chapter 7. The Firmware Upgrade Utility 5. Shut down all of the computers on the MP0101 chain. 6. From your console, bring up the OSD (see p. 19) and select the F4ADM function. 7. Scroll down to FIRMWARE UPGRADE. Press [Enter], then press [Y] to invoke Firmware Upgrade Mode. - Page 62 MP0101 User Manual 3. Click Next to continue. The Firmware Upgrade Utility main screen appears: The Utility inspects your installation. The devices capable of being upgraded by the package are listed in the Device List panel. Note: 1. Although only one device type is shown in the list (MP0131, for example), all units of that type receive the upgrade.
- Page 63 Chapter 7. The Firmware Upgrade Utility 4. When the list is complete, click Next to start the upgrade. If you enabled Check Firmware Upgrade, the Utility compares the device's firmware level with that of the upgrade files. If it finds that the device's version is higher, it brings up a dialog box informing you of the situation and gives you the option to Continue or Cancel.
-
Page 64: Upgrade Failed
MP0101 User Manual As each device update completes, its status is reported in the Status Messages panel. When a device group upgrade is successful, the background behind the device group name changes to pink to indicate so; if a member of a... -
Page 65: Firmware Upgrade Recovery
Chapter 7. The Firmware Upgrade Utility Firmware Upgrade Recovery If the firmware upgrade procedure is unnaturally aborted (due to a power outage, for example), the switch that was being upgraded at the time may become inoperable, and may be incapable of accepting a normal firmware upgrade. - Page 66 MP0101 User Manual This Page Intentionally Left Blank...
-
Page 67: Appendix
Appendix Specifications Master Module Function MP0101M Connectors Local Computer KB & Mouse 1 x USB Type A (On Molded Cable) Local Computer Video 1 x HDB-15 Male (On Molded Cable) Link to Matrix KVM Switch 1 x RJ-45 Female Link to KVM Adapter Cable 1 x RJ-45 Female Firmware Upgrade 4 Pin Earphone Jack... -
Page 68: Console Modules
MP0101 User Manual Console Modules Function MP0101P MP0101U Connectors Console KB 1 x mini-DIN-6 Female 1 x USB Type A Female Console Video 1 x HDB-15 Female Console Mouse 1 x mini-DIN-6 Female 1 x USB Type A Female Link to KVM Adapter... -
Page 69: Kvm Adapter Cables
Appendix KVM Adapter Cables Function MP0120 MP0131 MP0130 Connectors 1 x mini-DIN-6 M 1 x USB Type A M 1 x mini-DIN-8 M Mouse 1 x mini-DIN-6 M Video 1 x HDB-15 M 1 x 13W3 M Chain In 1 x RJ-45 Female Chain Out 1 x RJ-45 Female LEDs... -
Page 70: Clear Login Information
MP0101 User Manual Clear Login Information If you are unable to perform an Administrator login (because the Username and Password information has become corrupted, or you have forgotten it, for example), you can clear the login information with the following procedure: 1. -
Page 71: Osd Factory Default Settings
Appendix OSD Factory Default Settings The factory default settings are as follows: Setting Default OSD Hotkey [Scroll Lock] [Scroll Lock] Port ID Display Position Upper Left Corner Port ID Display Duration 3 Seconds Port ID Display Mode The Port Number plus the Port Name Scan Duration 5 Seconds Scan/Skip Mode... - Page 72 MP0101 User Manual This Page Intentionally Left Blank...
-
Page 73: Index
Index F7 SCAN, 32 Activate Beeper, 27 F8 LOUT, 33 ADM, 26 Factory Default Settings, 57 Administrator functions, 26 FCC Information, ii Advanced Firmware Upgrade, 50 Firmware Upgrade ALTUSEN Information, xiii Advanced, 50 Auto Scanning, 32, 37 Firmware upgrade, 45 Invoking Auto Scan, 38 utility, 45 Pausing Auto Scan, 38... - Page 74 MP0101 User Manual Limited Warranty, 57 Quick View Ports, 28 LIST, 23 Local selection, 7, 36 Remote selection, 7 Logout, 33 Restore Default Values, 27 Logout Timeout, 26 LOUT, 33 Safety Instructions General, iv Master Module, 6 Rack Mounting, vi...
Need help?
Do you have a question about the MP0101 and is the answer not in the manual?
Questions and answers