
Subscribe to Our Youtube Channel
Related Manuals for Electrolux EOB 53003


Summary of Contents for Electrolux EOB 53003
- Page 1 Gebrauchsanleitung User manual Návod na používanie Einbau-Backofen Built-in oven Zabudovaná rúra EOB 53003...
- Page 2 2 electrolux...
- Page 3 Willkommen bei Electrolux! Wir möchten uns bedanken, dass Sie sich für ein erstklassiges Produkt von Electrolux entschieden haben, welches Ihnen sicherlich viel Freude bereiten wird. Es ist unser Bestreben, eine breite Vielfalt von Qualitätsprodukten anzubieten, die helfen, Ihr Leben etwas komfortabler zu machen. Sie finden einige Beispiele auf der vorletzten Seite in diesem Heft.
-
Page 4: Table Of Contents
Wass etwas falsch läuft Technische Daten Anweisungen für den Installateur Einbau-Anweisungen Kundendienst Europäische Garantie Anleitung zur Gebrauchsanweisung Sicherheitsanweisung Schritt-für-Schritt-Anweisung Ratschläge Umweltinformationen Dieses Gerät entspricht den folgenden EWG-Richtlinien: 2006/95 (Niederspannungsrichtlinie); 89/336 (EMC Richtlinie); 93/68 (algemeine Richtlinie); und weitere Änderungen. 4 electrolux... -
Page 5: Warnungen Und Wichtige Hinweise
Metallschaber. Sie können die Türscheiben verkratzen und dadurch zum Zerspringen der Scheiben führen. Stellen Sie sicher, daß die Schaltknöpfe sich in der «0» Stellung befinden wenn der Backofen nicht mehr benutzt wird. Dieser Backofen wurde je nach Ausführung electrolux 5... - Page 6 Versuchen Sie nicht, das Gerät bei Funktionsstörungen oder Schäden selbst zu reparieren. Durch Reparaturen seitens ungeschulter Personen können Schäden oder Verletzungen hervorgerufen werden. 6 electrolux oder Das Symbol Verpackung weist darauf hin, dass dieses Produkt nicht als normaler Haushaltsabfall zu behandeln Sammelpunkt für das Recycling von...
-
Page 7: Erst-Installation
Es wird empfohlen, das oben beschriebenen Verfahren durch Auswählen der Garfunktion Doppelgrill sowie die Funktion Heissluft etwa 5-10 Minuten lang zu wiederholen. Um die Backofentür zu öffnen, immer den Griff in der Mitte anpacken (Abb. 1). aller Abb. 1 electrolux 7... -
Page 8: Gerätebeschreibung
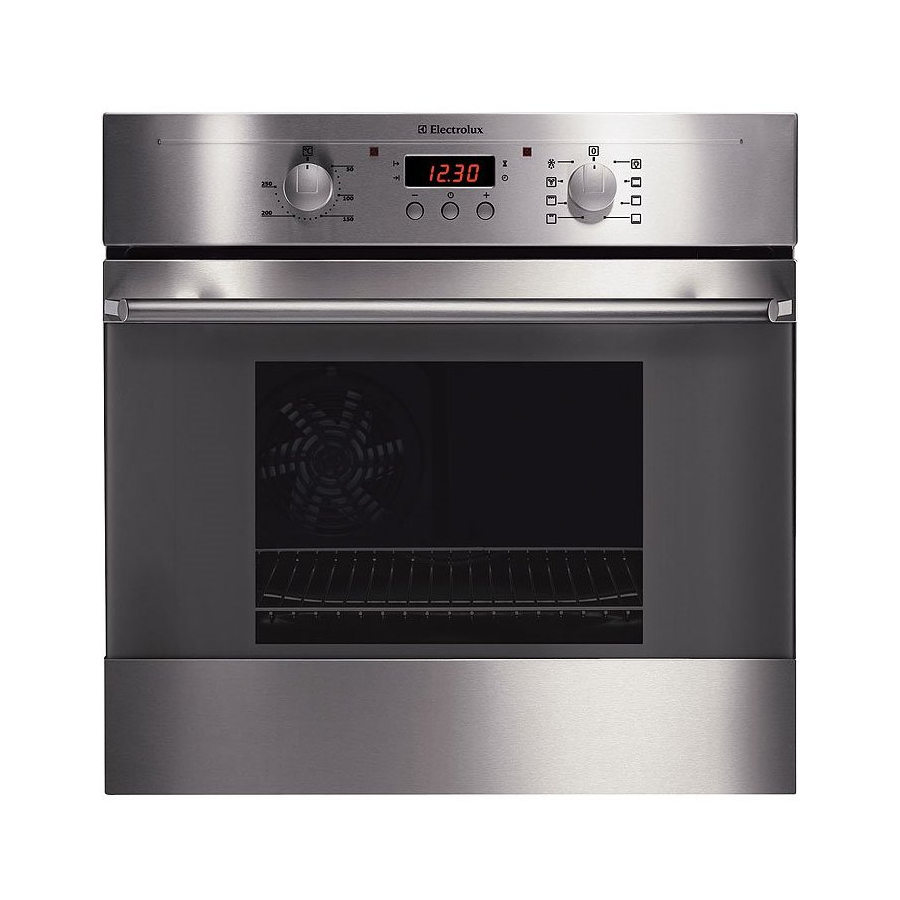
Gerätebeschreibung 1. Bedienungsblende 2. Knebel für Backofen-Temperaturregler 3. Thermostat-Kontrollampe 4. Elektronik-Uhr 5. Betriebskontrollampe 8 electrolux 6. Knebel für Backofen-Funktionswähler 7. Grill 8. Backofen-Lampe 9. Typenschild... -
Page 9: Elektro-Backofen
— dann Thermostat-Knebel auf die geeignete Temperatur einstellen. Unterhitze — Wahlschalter-Knebel auf — dann Thermostat-Knebel auf die geeignete Temperatur einstellen. Oberhitze — Wahlschalter-Knebel auf — dann Thermostat-Knebel auf die geeignete Temperatur einstellen. drehen, drehen, drehen, Abb. 2 Abb. 3 electrolux 9... - Page 10 Temperatur im Backofen erreicht ist, und leuchtet jeweils beim Aufheizen wieder auf. Betriebskontrollampe Sie zeigt an, daß ein oder mehrere Heizkörper des Backofens eingeschaltet sind. 10 electrolux Sicherheits-Thermostat oder Um gefährliche Überhitzung zu vermeiden (durch unsachgemässen Gebrauch des Gerätes oder defekte Bestandteile), ist der...
-
Page 11: Elektronik-Uhr
Funktionsleuchte "Dauer" folgt: 1. Taste Funktionsauswahl 2. Minus-Taste “ ” 3. Plus-Taste “ ” 4. Displayanzeige 5. Funktionsleuchte “Kochdauer” 6. Funktionsleuchte “Ende” 7. Funktionsleuchte “Timer” 8. Funktionsleuchte “Tageszeit” oder Ende so oft, bis die blinkt. Dann, verfahren Sie wie electrolux 11... - Page 12 3. Wenn die Zeit abgelaufen ist, blinkt die Funktionsleuchte, es ertönt ein Signalton und der Ofen schaltet sich selbsttätig aus. Funktions- wahlschalter und Thermostat-Knebel auf "Aus" stellen. 12 electrolux ” die gewünschte so oft drücken, bis die blinkt. Im Display wird blinkt. Dann,...
- Page 13 Ablauf einer Kurzzeit ein Signalton ertönt.BITTE BEACHTEN: Der Timer hat keinen Einfluß auf den Backofenbetrieb. Kurzzeit einstellen: 1. Taste Auswahl Funktionsleuchte "Timer" so oft drücken, bis die blinkt. Im Display kombiniert (genauso vorgehen (genauso vorgehen so oft drücken, bis die blinkt. electrolux 13...
- Page 14 Display ausschalten 1. Zwei Tasten 5 Sekunden gedrückt halten. Das Display schaltet sich aus. 2. Zum Einschalten des Displays eine beliebige Taste drücken. Das Display kann nur ausgeschaltet werden, wenn Automatikfunktion eingestellt ist. 14 electrolux ” die warten: leuchtet. blinkt. keine...
-
Page 15: Praktische Tipps
Um eine gute Bräunung zu erzielen, wird der Rost in die 4. Einschiebeleiste, also dicht unter den Grill geschoben. Mit etwas Wasser in der Fettpfanne wird die Reinigung erleichtert. Fettpfanne in die erste Einschiebeleiste von unten einschieben. Heißluftbetrieb Abb. 4 electrolux 15... - Page 16 Bratenpfanne gegeben, andernfalls werden sie in der letzten halben Stunde zugegeben. Ob das Fleisch gar ist, können Sie mit einem 16 electrolux Löffel prüfen: lässt es sich nicht eindrücken, so ist es durchgebraten. Roastbeef und Filet, die innen rosa bleiben sollen, müssen bei höherer Temperatur in kürzerer Zeit gebraten...
-
Page 17: Back- Und Brattabelle
Rost 70-80 auf dem Rost 120-150 mit Schwarte 110-130 Bein 60-80 komplett 210-240 komplett 120-150 komplett 150-200 komplett 60-80 A-Stücke 100-120 2 Stücke 40-60 in Brotpfanne 150-200 A-Stücke 90-120 komplett 30-40 3-4 Fische 25-535 4-6 Stücke electrolux 17... - Page 18 Grilwürste Schweinenacksteaks Hamburger Hähnchenbrürste Hähnchen, (in 2 Hälften) Spieße Fischfilet (Seezunge) Belegte Toastbrote Weißbrotscheiben Die angegebenen Temperaturen sind Richtwerte. Vielleicht müssen die Temperaturen persönlichen Ansprüchen angepaßt werden. 18 electrolux Menge Grill Stücke Ebene — 1000 — — — Kochzeit in...
-
Page 19: Pflege Und Wartung
Flecken hinterlassen. Solche Flecken in der Hochglanzoberfläche der Emaille beeinträchtigen die Funktion des Backofens jedoch nicht. Reinigen Sie den Backofen grundsätzlich nach jedem Gebrauch. Verschmutzungen lassen sich so am leichtesten entfernen. Ein weiteres Einbrennen wird damit vermieden. oder Dampf- electrolux 19... - Page 20 5. ziehen Sie die Tür nach vorne aus ihrem Sitz (Abb. 7); 6. legen Sie die Tür auf festem Boden ab (Abb. 8) und schützen Sie die Oberfläche des Griffs mit einem weichen Tuch; 20 electrolux Abb. 5 Abb. 6 Abb. 7 Abb. 8...
- Page 21 Nach der Reinigung die Innenscheiben wieder in die Tür einsetzen. Die Tür in den Ofen einbauen; gehen Sie dabei in der zum Ausbau umgekehrten Reihenfolge vor. Achten Sie auf die richtige Ausrichtung der Scheiben. Metallwolle, Abb. 9 90° Abb. 10 Abb. 11 electrolux 21...
- Page 22 Zustand der Dichtung. Die Dichtung bei Bedarf reinigen, ohne dazu Gegenstände oder Scheuermittel zu verwenden. Beschädigungen der Dichtung feststellen, rufen Sie sofort den nächsten Kundendienst an. Benutzen Sie den Ofen nicht, solange die Dichtung nicht ersetzt worden ist. 22 electrolux Scheiben Wenn Abb. 12...
-
Page 23: Austausch Der Backofenlampe
2. Drehen Sie Glasabdeckung nach links. 3. Entfernen Sie die durchgebrannte Lampe und setzen Sie eine neue ein. 4. Bringen Sie die Glasabdeckung wieder 5. Schalten Sie den Strom wieder ein. Ofens Abb. 13 Abb. 14 Abb. 15 electrolux 23... -
Page 24: Wass Etwas Falsch Läuft
Wenn das Gerät nicht richtig arbeitet, bitte vor Anforderung des Electrolux Service-Centers folgendes überprüfen: PROBLEM Der Backofen schaltet nicht ein. Die Backofen-Temperaturlampe brennt nicht. Die Backofen-Glühlampe brennt nicht. Die Zubereitung der Gerichte dauert zu lange oder sie garen zu schnell. -
Page 25: Technische Daten
560 mm 550 mm 335 mm 395 mm 400 l 53 1000 W 800 W 1800 W 1650 W 2450 W 2000 W 25 W 25 W 25 W 2500 W 50 °C - 250 °C 230 V electrolux 25... -
Page 26: Anweisungen Für Den Installateur
(z.B. Sicherungen, LS-Schalter) mit Mindestabstand zwischen den Kontakten von 3 mm angebracht werden. Der Schalter darf den Schutzleiter an keinem Punkt 26 electrolux unterbrechen. Der Gelb-grüne Schutzleiter sollte 2-3 cm länger als alle anderen Kabel sein. Das Anschlusskabel muss jedenfalls so aus- Gerät... -
Page 27: Einbau-Anweisungen
An die andere Seitenwand dürfen jedoch nur andere Geräte oder Möbel mit gleicher Höhe wie das Gerät angestellt werden. Abb. 18 Backofenmasse (Abb. 17) Einbau-Anweisungen Zur einwandfreien Funktion des eingebauten Gerätes muss das Einbaumöbel bzw. die Einbaunische passende Abmessungen haben (Abb. 18-19). Abb. 19 electrolux 27... -
Page 28: Kundendienst
Produktionsnummer (Prod. Nr.) sowie die Fabrikations-nummer (Ser. Nr.) an, welche Sie auf dem Typenschild des Ofens finden. Die Original-Ersatzteile des Herstellers, welche mit dem folgenden Markenzeichen gekennzeichnet sind, ausschließlich in den Zentralen unseres Kundendienstes sowie autorisierten Ersatzteil-Geschäften. 28 electrolux finden Abb. 20... -
Page 29: Europäische Garantie
Für dieses Gerät besteht in den am Ende dieser Benutzerinformation aufgeführten Län- dern eine Garantie von Electrolux für den Zeitraum, der in der Gerätegarantie oder andern- falls gesetzlich festgelegt ist. Wenn Sie aus einem dieser Länder in ein anderes der auf- geführten Länder ziehen, wird die Gerätegarantie unter folgenden Voraussetzungen mit... - Page 30 30 electrolux...
- Page 31 Thank you for choosing a first class product from Electrolux, which hopefully will provide you with lots of pleasure in the future. The Electrolux ambition is to offer a wide variety of quality products that make your life more comfortable. You find some examples on the cover in this manual.
-
Page 32: For Your Safety
Ensure that the shelves are put in place in the correct way. This oven (even if it is linked to an electrical cooking table) is made to function at 230 V monophase with neutral. People safety... -
Page 33: Guide To Use The Instructions
Environmental information After installation, please dispose of the packaging with due regard to safety and the environment. -
Page 34: When The Oven Is First Installed
The oven will work only if the time of day has been set (please read the relevant instructions). Once the oven has been installed: 1. -
Page 35: Description Of The Appliance
Description of the appliance 1. Control panel 2. Oven Thermostat control knob 3. Oven thermostat control light 4. Electronic programmer 5. Overall control light 6. Oven Function control knob 7. Grill 8. Oven lamp 9. Rating plate electrolux 35... -
Page 36: Electric Oven
OFF position Oven light - The oven light will be on without any cooking function Conventional cooking - The heat comes from both the top and bottom element, ensuring even heating inside the oven. -
Page 37: Safety Thermostat
It indicates that one or more of the heating elements are turned on. Oven thermostat control light This light goes off when the oven heats up to the temperature set and comes on again every time the thermostat cuts in to stabilize temperature. -
Page 38: Setting The Time Of Day
Electronic programmer The oven will work only if the time of day has been set. Moreover, the oven can also be operated without any programme. In the event of a power failure, all the settings (time of day, programme setting or programme in operation) will be cancelled. -
Page 39: End Of Cooking" Function
“End of cooking” function Thanks to this function, you can set the oven to switch off automatically when a programmed end of cooking time is over. Place food in the oven, select a cooking function and adjust the cooking temperature. -
Page 40: "Minute Minder" Function
End of cooking setting as described in the relevant chapter) set the end of cooking time. The relevant pilot lamps will come on and the display will show the time of day. The oven will switch on and off according to the set programmes. “Minute minder” function The minute minder alarm will sound at the end of a timed period, but THE OVEN WILL REMAIN ON, if it is in use. - Page 41 1. Press two programmer push buttons simoultaneously and keep them pressed for about 5 seconds. The display will switch off. 2. To switch on the display, press any button. The display can be switched off only if no other functions have been set. electrolux 41...
-
Page 42: Fan Cooking
42 electrolux by a fan set on the rear wall of the oven itself. Heat thus reaches all parts of the oven evenly and fast and this means that you can simulta- neously cook different types of foods positioned on the various oven shelves (Fig. -
Page 43: Cooking Times
To prevent the formation of too much smoke in the oven during roasting, it is a good idea to pour a little water into the dripping pan and— to prevent steam—to add a little bit more dur- ing cooking if the original amount dries up too much. -
Page 44: Cooking Tables
Cooking tables Cooking times do not include pre-heating time. A short oven pre-heating (about 10 minu- tes) is necessary before any cooking. Traditional cooking and fan ducted cooking TYPE OF DISH CAKES Whipped up kneading Shortbread dough Butter-milk cheese cake... - Page 45 Chicken (cut in two) Kebabs Chicken (breast) Hamburger Fish (fillets) Sandwiches Toast The oven temperatures are intended as a guide only. It may be necessary to increase or decrease the temperatures to suit individual preferences and requirements. Quantity Pieces Weight Level — 1000 —...
-
Page 46: Cleaning And Maintenance
Another alternative is a drop of hot vinegar. When cleaning the oven door with the glass top cover use just hot water, taking care to avoid using coarse cloths or abrasive products. -
Page 47: The Oven Door
The oven door The oven door consists of two panes of glass. The oven door can be disassembled and the internal panes can be removed to make cleaning easier. Important - Remove the oven door before cleaning it. The oven door... - Page 48 9. gently lift and carefully take off the uppermost pane marked by a decorative frame on 4 sides (Fig. 11). Clean the oven door with lukewarm water and a soft cloth. Do not use products such as scouring pads, steel wool, abrasive sponges...
- Page 49 8. in reverse to ensure they are locked. Do not clean the oven door when it is still hot, as the glass could shatter. If scratches or deep cracks are...
-
Page 50: Oven Shelves And Shelf Supports
Oven Shelves and Shelf Supports To clean the oven shelves, soak in warm soapy water and remove stubborn marks with a well wetted soap impregnated pad. Rinse well and dry with a soft cloth. The shelf supports can be removed for easy cleaning. -
Page 51: What Happens If Something Goes Wrong
Turn the oven function control knob on a function Buy a new oven light bulb, asking for it to your local Service Centre and replace it by following the instruction provided in this booklet. Refer to the contents of this booklet, especially to the chapter "Hints and tips for... -
Page 52: Technical Data
Full Oven (Top+Bottom) Grill heating elements Fan Oven heating element Oven lamp Convection fan Cooling fan Maximum power rating Voltage tension (50 Hz) 52 electrolux 600 mm 560 mm 550 mm 335 mm 395 mm 400 mm 53 l 1000 W... -
Page 53: Instructions For The Installer
Prior to making the electrical connection, make sure that: — the protection fuse and the domestic wiring system are suitable to carry the total electric load of the oven (see rating plate); — your domestic wiring system has an efficient earth connection in compliance with rules and laws in force;... -
Page 54: Building-In
“live” (current carrying) parts of the oven. All parts ensuring such a protection, including any covering panel (for instance, Fig. 17 if the appliance is installed at the end or at... -
Page 55: Securing The Oven To The Cabinet
Securing the oven to the cabinet 1. Fit the appliance into the cabinet recess. 2. Open the oven door and secure the oven to the kitchen cabinet by placing the four distance holders (A) in the holes provided in the oven frame and then inserting the four wood screws (B) (Fig. -
Page 56: European Guarantee
This appliance is guaranteed by Electrolux in each of the countries listed at the back of this user manual, for the period specified in the appliance guarantee or otherwise by law. If you move from one of these countries to another of the countries listed below the appliance guarantee will move with you subject to the following qualifications: •... - Page 57 57...
- Page 58 Vitajte vo svete Electrolux Ďakujeme vám za výber prvotriedneho výrobku spoločnosti Electrolux, ktorý vám prinesie veľa radosti v budúcnosti. Cieľom našej spoločnosti je ponuka širokej palety kvalitných spotrebičov, ktoré zabezpečia väčšie pohodlie pre váš život. Niekoľko príkladov nájdete aj na obálke tohto návodu. Nájdite si pár minút a preštudujte si ho, aby ste mohli využiť...
-
Page 59: Pre Vašu Bezpečnosť
Počas pečenia a grilovania sa dvierka rúry a okolitý povrch veľmi zohrejú a dosiahnu vysokú teplotu. Buďte opatrní a nedovoľte deťom, aby sa priblížili k rúre, kým ju používate. Ak do sieťovej zásuvky v blízkosti rúry zapojíte iné spotrebiče, dbajte na to, aby electrolux 59... - Page 60 2006/95 (Smernica pre nízke napätie); 89/336 (Smernica o elektromagnetickej kompatibilite); 93/68 (Všeobecná smernica) v znení následných úprav. 60 electrolux Symbol znamená, že sa s ním nemôže zaobchádzať ako s komunálnym odpadom. Musíte ho odovzdať v stredisku na zber a recykláciu elektrických a elektronických zariadení.
-
Page 61: Pri Prvej Inštalácii Rúry
Pri otváraní dvierok uchopte rukoväť vždy v jej strednej časti (Obr. 1). Pred prvým použitím starostlivo umyte všetky časti príslušenstva rúry. Obr. 1 electrolux 61... -
Page 62: Popis Spotrebiča
Popis spotrebiča 1. Ovládací panel 2. Ovládací gombík termostatu rúry 3. Kontrolka termostatu rúry 4. Elektronický programátor 5. Všeobecná kontrolka rúry 62 electrolux 6. Ovládací gombík funkcií rúry 7. Gril 8. Osvetlenie rúry 9. Typový štítok... -
Page 63: Elektrická Rúra
Celý gril - Zapne sa celý grilovací článok. Horúci vzduch - Umožňuje pečenie mäsa alebo pečenie mäsa a koláčov súčasne na ľubovoľnom rošte bez miešania sa chutí. Rozmrazovanie - Táto funkcia je určená zmrazených potravín. množstva rozmrazovanie Obr. 2 Obr. 3 electrolux 63... - Page 64 Ventilátor sa zapína automaticky po niekoľkých minútach pečenia. Teplý vzduch sa vyfukuje otvorom nachádzajúcim sa v blízkosti rukoväte dvierok. Po vypnutí rúry ostane ventilátor v činnosti, aby udržiaval ovládacie gombíky chladné, potom sa automaticky vypne. 64 electrolux...
-
Page 65: Elektronický Programátor
1. Stlačením tlačidla nastavte funkciu 2. Ovládací gombík na zníženie hodnoty “ ” 3. Ovládací gombík na zvýšenie hodnoty “ ” 4. Displej 5. Kontrolka „Doba pečenia” 6. Kontrolka „Koniec pečenia” 7. Kontrolka „Časomiera” 8. Kontrolka „Presný čas” aby ste zvolili funkciu electrolux 65... - Page 66 1. Opakovane stláčajte tlačidlo “ ” alebo “ ”. 2. Po nastavení počkajte 5 sekúnd: kontrolka “Čas ukončenia pečenia znovu zobrazí presný čas. 66 electrolux aby ste zvolili funkciu začne blikať. aby ste zvolili sa rozsvieti a na displeji sa...
- Page 67 Alarm časomiery zaznie po ukončení nastavenej doby, ale RÚRA OSTANE ZAPNUTÁ, ak sa používa. Nastavenie kuchynského časovača: 1. Opakovane stláčajte tlačidlo “Časomiera. Príslušná kontrolka aby ste zvolili funkciu začne blikať a „Čas ukončenia (vykonajte kroky na (vykonajte aby ste zvolili funkciu začne blikať. electrolux 67...
- Page 68 Ako sa vypína displej 1. Súčasne stlačte programátora a pridržte ich stlačené pribl. 5 sekúnd. Displej sa vypne. 2. Displej znovu zapnete stlačením ktoréhokoľvek tlačidla. Displej môžete vypnúť, iba ak nie je nastavená žiadna iná funkcia. 68 electrolux sa rozsvieti. aby ste tlačidlá...
-
Page 69: Rady A Tipy Pri Používaní Rúry
Polohu v rúre upravte v závislosti od hrúbky surovín. Na najnižšiu polohu v rúre vždy vsuňte nádobu na zachytávanie odkvapkávajúcej šťavy, pričom do nej vlejte trochu vody, aby ste zabránili tvorbe dymov a nepríjemných pachov. Pečenie horúcim vzduchom Obr. 4 electrolux 69... - Page 70 Ináč ich treba pridať počas poslednej polhodiny. Pri jednoduchej kontrole, či je mäso upečené, ho stlačte lyžicou; ak sa mäso lyžicou nedá stlačiť, znamená to, že je hotové. V prípade pečenia roastbeefu a steakov, ktoré majú ostať vnútri ružové, 70 electrolux...
- Page 71 Odporúčame vám, aby ste si poznamenali výsledky pečenia v rúre, pretože pečením rovnakých jedál za rovnakých podmienok dosiahnete približne rovnaké výsledky. Iba skúsenosť vám umožní urobiť vhodné zmeny hodnôt uvedených v tabuľkách. Nikdy electrolux 71...
-
Page 72: Tabuľky Pečenia
1500 Zajac Bažant Sekaná RYBY 1200 Pstruh/morský okúň 1500 Tuniak/Losos (*) Ak chcete piecť viac ako jedno jedlo naraz, odporúčame vám uložiť ich na úrovne uvedené v zátvorkách. 72 electrolux Horný/Spodný Horúci vzduch ohrev Úroveň teplota. °C 2 (1 a 3)*... - Page 73 5 ~ 7 2 ~ 4 Horná strana 12 ~ 14 6 ~ 8 10 ~ 12 12 ~ 14 25 ~ 30 10 ~ 12 12 ~ 14 8 ~ 10 10 ~ 12 2 ~ 3 electrolux 73...
-
Page 74: Údržba A Cistenie
šťava, šťava z varených sliviek a pod.) zanechávajú na smaltovaných povrchoch ťažko odstrániteľné škvrny; škvrny môžu poškodiť smalt, ale neovplyvnia činnosť rúry. po použití rúru starostlivo vyčistite; zvyšky jedál sa tak odstránia ľahšie a predídete tým ich pripečeniu pri nasledujúcom použití rúry. 74 electrolux umývacieho... - Page 75 NEZATVÁRAJTE ich (Obr. 7); 5. potiahnite dvierka vpred, vyberte ich (Obr. 7); 6. položte dvierka na stabilný povrch chránený mäkkou handrou, aby ste predišli ich poškodeniu (Obr. 8); Obr. 5 Obr. 6 Obr. 7 Obr. 8 electrolux 75...
- Page 76 špeciálny povrch na vnútornej strane skla, ktorý odráža teplo. Po čistení panely znovu namontujte na dvierka a potom namontujte dvierka na rúru, vykonajte úkony v opačnom postupe. Skontrolujte správne umiestnenie panelov. 76 electrolux Obr. 9 90° Obr. 10 Obr. 11...
- Page 77 Gumové tesnenie po obvode otvoru rúry zaručuje jej správnu funkčnosť. Tesnenie pravidelne kontrolujte. Ak ho treba vyčistiť, nepoužívajte drsné predmety, ani abrazívne čistiace prostriedky. spozorujete, že je tesnenie poškodené, zavolajte servisné stredisko a rúru nepoužívajte, kým nebude opravená. podľa Obr. 12 praskliny, hliníkové electrolux 77...
- Page 78 1. Skontrolujte, či je rúra odpojená od elektrickej siete. 2. Otočte sklenený kryt smerom vľavo (Obr. 15). 3. Vyberte vypálenú žiarovku a nahraďte ju novou. 4. Namontujte späť sklenený kryt. 5. Zapojte rúru do elektrickej siete. 78 electrolux Obr. 13 Obr. 14 Obr. 15...
-
Page 79: Čo Robiť, Keď Niečo Nefunguje
Pozrite obsah tohto návodu, najmä kapitolu “Elektrická rúra”. rúry Po ukončení pečenia nenechávajte jedlá vnútri rúry dlhšie ako 15-20 minút. Nastavte presný čas (pozrite kapitolu “Nastavenie presného času”). electrolux 79... -
Page 80: Technické Údaje
Ohrievacie články grilu stredný 1650 W Ohrevací článok ventilátora rúry 2000 W Žiarovka rúry Ventilátor horúceho vzduchu Chladiaci ventilátor Maximálny príkon Elektrické napätie (50 Hz) 80 electrolux 600 mm 560 mm 550 mm 335 mm 395 mm 400 mm 53 l... -
Page 81: Pokyny Pre Inštalatéra
H05 RR-F, H05 VV-F, H05 V2V2-F (T90), vám H05 BB-F. Svorkovnica s koncovkami Rúra je vybavená ľahko prístupnou svorkovnicou určenou pre jednofázové napájanie pri 230 V (Obr. 16). Výrobca zodpovednosť na zranenia a škody v prípade- nedodržania uvedených pokynov. elektrické odmieta akúkoľvek Obr. 16 electrolux 81... -
Page 82: Zabudovanie
Celkové rozmery rúry (Obr. 17) Rozmery otvoru v hornej skrinke Otvor musí mať rozmery uvedené na Obr. 18. Rozmery otvoru pod pracovnou plochou Otvor musí mať rozmery uvedené na Obr. 19. 82 electrolux kuchynským Obr. 17 Obr. 18 Obr. 19... -
Page 83: Servis A Náhradné Diely
štítku. Tento štítok sa nachádza na prednom okraji otvoru rúry. Originálne náhradné diely, certifikované výrobcom spotrebiča a s jeho označením, dostanete výhradne v našom servisnom stredisku a u t o r i z o v a n ý c h predajniach. Obr. 20 electrolux 83... -
Page 84: Záruka/Servisná Služba
• Spotrebic bol nainštalovaný apoužívaný vsúlade spokynmi vydanými spolocnost’ou Electrolux apoužíva sa iba vrámci domácnosti, t. j. nepoužíva sa na komercné úcely. • Spotrebic bol nainštalovaný vsúlade so všetkými príslušnými predpismi platnými vo vašej novej krajine pobytu. - Page 85 85...
- Page 86 86 electrolux EOB 53003 0,79 kWh 0,78 kWh 53,0 43 min. 41 min. 1130 cm²...
- Page 88 35694-2703 07/08 R.A...
Need help?
Do you have a question about the EOB 53003 and is the answer not in the manual?
Questions and answers