Table of Contents
Advertisement
Quick Links
BP7307 Larissa KF220
1/9/06
READ AND SAVE THESE INSTRUCTIONS
Emerson Fans
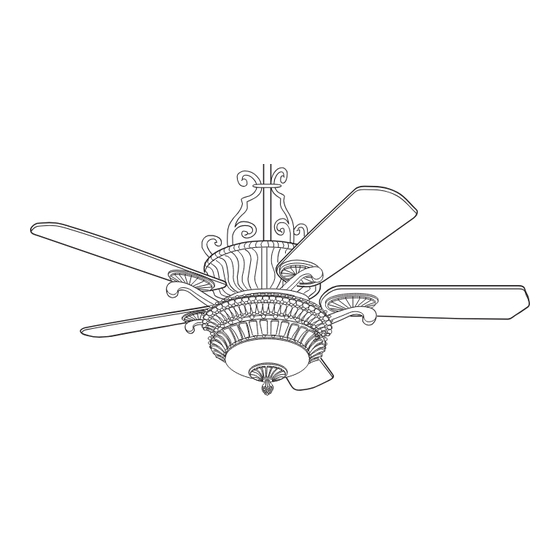
Ceiling Fan Owner's Manual
KF220TZG00
Tannery Bronze
with Gold Accents and
Dark Cherry/Walnut
Blades
Part No. F40BP73070000
8:36 AM
Page 1
Designed by
LARISSA
Model Numbers
KF220GLZ00
¨
Housing
Gilded Silver with
Mahogany Blades
KF220AGW00
Aged Walnut with
Teak/Mahogany Blades
33.7
Net Weight:
Lbs.
Natural Cherry/
Form No. BP7307
Advertisement
Table of Contents

Related Manuals for Emerson LARISSA KF220TZG00


Summary of Contents for Emerson LARISSA KF220TZG00
- Page 1 BP7307 Larissa KF220 1/9/06 8:36 AM Page 1 READ AND SAVE THESE INSTRUCTIONS Emerson Fans Designed by LARISSA Ceiling Fan Owner's Manual Model Numbers KF220TZG00 KF220GLZ00 Tannery Bronze ¨ Housing Gilded Silver with with Gold Accents and Natural Cherry/ Dark Cherry/Walnut...
-
Page 2: Safety Instructions
BP7307 Larissa KF220 1/9/06 8:36 AM Page 2 WARNING WARNING: To avoid fire, shock, and serious personal injury, follow these instructions. Safety Instructions 1. Read your owner’s manual carefully and keep it for future reference. 2. Before servicing or cleaning unit, switch power off at service panel and lock service panel disconnecting means to prevent power from being switched on accidentally. -
Page 3: Unpacking Instructions
BP7307 Larissa KF220 1/9/06 8:36 AM Page 3 This Manual Is Designed to Make it as Easy as Possible for You to Assemble, Install, Operate and Maintain Your Ceiling Fan Tools Needed for Assembly Installed Wire Length Wire Size A.W.G. Up to 50 ft. - Page 4 BP7307 Larissa KF220 1/9/06 8:36 AM Page 4 q. One loose parts bag containing: NOTE: Place the parts from the loose parts bags in a small container to keep 1. Two 1-1/4” threaded studs them from being lost. 2. Two knurled knobs 3.
-
Page 5: Electrical Requirements
BP7307 Larissa KF220 1/9/06 8:36 AM Page 5 Electrical Requirements Ceiling Fan Procedures IMPORTANT: Your ceiling fan will not General function properly, Your Emerson ceiling fan comes supplied damaged, if used with any wall dimmer with a Fan/Light Wall Control which switch or control other than the consists of a wall control (transmitter) and Emerson... - Page 6 BP7307 Larissa KF220 1/9/06 8:36 AM Page 6 5. Gently snug all flange screws to the 10-24 X 8mm PAN motor hub, working around the hub in a HEAD SCREW (3) clockwise sequence. Next, securely FLAT WASHER (3) tighten all flange screws, again working in a clockwise sequence.
- Page 7 BP7307 Larissa KF220 1/9/06 8:36 AM Page 7 8. Carefully rest the decorative ring/light fitter/switch cup assembly on the fan blades, then engage the connector of the switch cup assembly with the motor SWITCH CUP connector (Figure ASSEMBLY connectors are keyed and color-coded and must be mated correctly (color-to- color) before they can be engaged.
- Page 8 BP7307 Larissa KF220 1/9/06 8:36 AM Page 8 11. Remove the hanger ball by loosening WARNING the setscrew in the hanger ball until It is critical that the clevis pin in the motor the ball falls freely down the downrod coupling is properly installed and the (Figure 7).
- Page 9 BP7307 Larissa KF220 1/9/06 8:36 AM Page 9 WARNING It is critical that the pin in the hanger ball SCROLL SCROLL COLLAR is properly installed and the setscrew RETAINING securely tightened. Failure to verify that SCREW the pin and setscrew are properly SETSCREW DOWNROD installed could result in the fan falling.
-
Page 10: Your Ceiling Fan How To Hang
BP7307 Larissa KF220 1/9/06 8:36 AM Page 10 How to Hang WARNING Your Ceiling Fan Hanger bracket must seat firmly against outlet box. If the outlet box is WARNING recessed, remove wall board until bracket contacts box. If bracket The fan must be hung with at least 7' and/or outlet box are not securely of clearance from floor to blades attached, the fan could wobble or... -
Page 11: How To Wire Your Ceiling Fan
BP7307 Larissa KF220 1/9/06 8:36 AM Page 11 How to Wire including ground, and that no bare wire is visible at the wire connectors, except Your Ceiling Fan for the ground wire. If you feel that you do not have enough 2. - Page 12 BP7307 Larissa KF220 1/9/06 8:36 AM Page 12 SW101 FAN/LIGHT WALL CONTROL (SUPPLIED) BLACK BLACK (HOT) BLACK LIGHT 120- FAN OFF VOLT WHITE ® EMERSON SUPPLY WHITE WHITE GROUND TWO-CONDUCTOR BLUE WHITE CABLE (WITH GROUND) BLACK GREEN WIRE (GROUND) BLUE FROM HANGER BALL AND WHITE HANGER BRACKET...
- Page 13 BP7307 Larissa KF220 1/9/06 8:36 AM Page 13 ANTENNA WIRE DECORATIVE RING 40-WATT (max.) CANDELABRA CODE WALL CONTROL BULBS (3) RECEIVER LEVERS SWITCH SOCKET RECEIVER SWITCH LEVERS THREADED LIGHT FITTER NIPPLE CODE SWITCH RUBBER WASHER WALL CONTROL METAL LOWER WASHER GLASS Figure 18 DECORATIVE...
- Page 14 BP7307 Larissa KF220 1/9/06 8:36 AM Page 14 3. Before installing wall control, place wall WARNING control in “OFF” mode by pushing Do not connect any neutral (white) “ON/OFF” switch to the “OFF” position. wire to this control. Incorrect wiring will damage this control.
-
Page 15: Operating Your Ceiling Fan
BP7307 Larissa KF220 1/9/06 8:36 AM Page 15 Place the second wall control into the 4. To set the level of light brightness, wall box. Screw in place and install press and hold the LIGHT button. The decorator style faceplate (included). light brightness will... -
Page 16: Maintenance
BP7307 Larissa KF220 1/9/06 8:36 AM Page 16 Maintenance Accessories IMPORTANT CARE INSTRUCTIONS 1. Downrod Extension Kits (see store or for your Ceiling Fan catalog). 2. Ceiling Fan Controls (see store or Periodic cleaning of your new ceiling fan is catalog). -
Page 17: Troubleshooting
BP7307 Larissa KF220 1/9/06 8:36 AM Page 17 WARNING: FOR YOUR OWN SAFETY TURN OFF POWER AT FUSE BOX OR CIRCUIT BREAKER BEFORE TROUBLE SHOOTING YOUR FAN. Trouble Shooting TROUBLE PROBABLE CAUSE SUGGESTED REMEDY 1. Fan will not 1. Fuse or circuit breaker 1. -
Page 18: How To Order Repair Parts
BP7307 Larissa KF220 1/9/06 8:36 AM Page 18 Repair Parts LIGHT FAN OFF EMERSON ® Before discarding packaging material, be certain all parts have been removed. HOW TO ORDER REPAIR PARTS WHEN ORDERING REPAIR PARTS, ALWAYS GIVE THE FOLLOWING INFORMATION: •... - Page 19 BP7307 Larissa KF220 1/9/06 8:36 AM Page 19 Repair Parts Listing Part Numbers Model No. Model No. Model No. Description KF220AGW00 KF220GLZ00 KF220TZG00 Hanger Pack, Consisting of: 761655-56 761655-55 761655-54 Hanger Bracket — — — Hanger Ball — — —...
-
Page 20: Limited Warranty
BP7307 Larissa KF220 1/9/06 8:36 AM Page 20 LIMITED WARRANTY What The Warranty Covers: This warranty covers the motor and the other components and accessories of your Emerson Electric Co. ceiling fan against all defects in workmanship and materials. You must be the original purchaser or user of the product to be covered.
Need help?
Do you have a question about the LARISSA KF220TZG00 and is the answer not in the manual?
Questions and answers