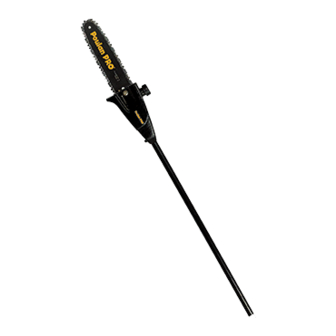
Poulan Pro PP5000P Instruction Manual
Hide thumbs
Also See for Poulan Pro PP5000P:
- Instruction manual (15 pages) ,
- Instruction manual (13 pages) ,
- Instruction manual (36 pages)
Table of Contents
Advertisement
Quick Links
Manual de Instrucciones
WARNING:
Read and follow all Safety Rules and Operating Instructions before
using this product. Failure to do so can result in serious injury.
ADVERTENCIA:
Lea el manual de instrucciones y siga todas las advertencias e
instrucciones de seguridad. El no hacerlo puede resultar en le-
siones graves.
AVERTISSEMENT:
Lire le manuel d'instructions et bien respecter tous les avertisse-
ments et toutes les instructions de sécurité. Tout défaut de le
faire pourrait entraîner des blessures graves.
Electrolux Home Products, Inc.
250 Bobby Jones Expressway
Augusta, GA 30907
Copyright E2003 Electrolux Home Products, Inc.
Instruction Manual
Manuel d'Instructions
PP5000P
530163467
R
1/21/03
Advertisement
Table of Contents

Summary of Contents for Poulan Pro Poulan Pro PP5000P
- Page 1 Instruction Manual Manual de Instrucciones Manuel d’Instructions PP5000P WARNING: Read and follow all Safety Rules and Operating Instructions before using this product. Failure to do so can result in serious injury. ADVERTENCIA: Lea el manual de instrucciones y siga todas las advertencias e instrucciones de seguridad.
-
Page 2: Identification Of Symbols
IDENTIFICATION OF SYMBOLS DANGER! Read and understand the This pruner can instruction manual before be dangerous! Careless or im- using the pruner. proper use can cause serious or even fatal injury. Always wear appropriate ear protection, eye protection and head protection. DANGER! Falling objects can cause severe head injury. -
Page 3: Electrical Safety
S Do not handle or operate a pruner when you still does not fit, contact a qualified electrician are fatigued, ill, or upset, or if you have taken to install the proper wall outlet. Do not change alcohol, drugs, or medication. You must be in the equipment plug, extension cord recep- good physical condition and mentally alert. - Page 4 S Inspect entire unit before each use. Replace S Use only in daylight or good artificial light. S Use only for jobs explained in this manual (or damaged parts. Check for fuel leaks. Make sure all fasteners are in place and securely manuals for optional attachments).
-
Page 5: Maintain Control
S Watch for shifting of wood or other forces that Symmetrical Guide Bar could close a cut and pinch or fall into chain. S Use the Reduced--Kickback Guide Bar and Low--Kickback Chain specified for your unit. MAINTAIN CONTROL Large Radius Tip S Low--Kickback Chain, designed with a con- toured depth gauge and guard link which deflect kickback force and allow wood to... -
Page 6: Tools Required
ASSEMBLY NOTE: The lower shoulder strap clamp has WARNING: If received assembled, two spacer tabs attached. These tabs are provided to adapt this attachment for use with repeat all steps to ensure your unit is properly powerheads that have a 1" diameter upper assembled and all fasteners are secure. -
Page 7: Operation
7. Adjust the strap, allowing the hook to be ADJUSTING THE ASSIST HANDLE about 3 -- 6 inches below the waist. 8. Fasten the strap hook to the upper clamp WARNING: When adjusting the as- and lift the tool to the operating position. sist handle, be sure it remains directly above the coupler on the engine end tube to ensure proper balancing of unit. - Page 8 Upper Tube S Never use waste oil for bar and chain lubri- cation. Coupler S Always stop the engine before removing the oil cap. LOOSEN INSTALLING ATTACHMENT Lower HANGER Attachment An attachment hanger is provided for storage when attachment is not in use. To install hanger on attachment: 1.
-
Page 9: Maintenance
S Watch out for springpoles. Springpoles are 1. Make the first cut 6 inches from the tree small size limbs which can catch the chain trunk on the bottom of the limb. Use top of and whip toward you or pull you off balance. guide bar to make this cut. - Page 10 1. Use a screwdriver to move chain around CHECK CHAIN SHARPNESS guide bar to ensure kinks do not exist. The A sharp chain makes wood chips. A dull chain chain should rotate freely. makes a sawdust powder and cuts slowly. See CHAIN SHARPENING in the SERVICE Chain Adjustment Tool AND ADJUSTMENTS section.
-
Page 11: Service And Adjustments
SERVICE AND ADJUSTMENTS Depth Gauge Cutters WARNING: Always stop unit and dis- connect spark plug wire (or disconnect pow- erhead from power source) before performing maintenance , service, or adjustments except for carburetor adjustments. CHAIN SHARPENING Drive Links Chain sharpening is a complicated task that requires special tools. -
Page 12: Seasonal Storage
STORAGE If your pruner attachment is to be stored for a WARNING: period of time: Perform the following S Clean the entire attachment. steps after each use: S Lightly oil external metal surfaces and S Allow attachment to cool before storing or guide bar.


Need help?
Do you have a question about the Poulan Pro PP5000P and is the answer not in the manual?
Questions and answers