Table of Contents
Advertisement
Quick Links
Advertisement
Table of Contents
Troubleshooting

Subscribe to Our Youtube Channel
Related Manuals for Chamberlain MIRACLE-ONE


Summary of Contents for Chamberlain MIRACLE-ONE
- Page 1 The Chamberlain Group, Inc. 845 Larch Avenue Elmhurst, Illinois 60126-1196 www.liftmaster.com ™ MIR ACLE - ON E VEHICULAR ACTUATOR GATE OPERATOR OWNER’S MANUAL THE MIRACLE-ONE™ IS FOR USE ON VEHICULAR PASSAGE GATES ONLY AND NOT INTENDED FOR USE ON PEDESTRIAN PASSAGE GATES.
-
Page 3: Table Of Contents
T A B L E O F C O N T E N T S SPECIFICATIONS AND WARNINGS WARNING Carton Inventory and ....... . . 2 Mechanical Specifications . -
Page 4: Carton Inventory And
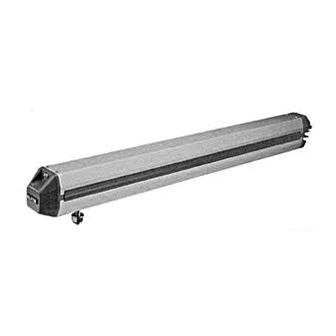
C A R T O N I N V E N T O R Y Arm (Sold Individually) 2 Keys Flexible Conduit with Attachment Fitting Front Steel Operator Arm Mounting Back Steel Bracket Mounting Bracket Single Controller Accessory Kit 34 Vdc 1.7 A Transformer Battery Manual... -
Page 5: Specifications
S P E C I F I C A T I O N S Mechanical Specifications Motor – 24 Vdc, 12 Amps. Cycles – 100 / Day. (Consult factory for solar applications) Shipping Weight: Single Unit: 58 lbs. – Master/Second: 89 lbs. Torque –... -
Page 6: Model Classification
U L 3 2 5 M O D E L C L A S S I F I C A T I O N S The Miracle-One™ is intended for use in Class vehicular swing gate applications: I - III Class I –... -
Page 7: Safety Installation Information
S A F E T Y I N S T A L L A T I O N I N F O R M A T I O N Vehicular gate systems provide convenience and security. Gate systems are comprised of many component parts. The gate operator is only one component. -
Page 8: Suggested Entrapment Protection Device Locations
S U G G E S T E D E N T R A P M E N T P R O T E C T I O N D E V I C E L O C A T I O N S WARNING To prevent SERIOUS INJURY or DEATH from a moving gate: •... -
Page 9: Safety Precautions
S A F E T Y P R E C A U T I O N S The Miracle-One™ is for use on Vehicular Passage Gates ONLY and NOT INTENDED for use on Pedestrian Passage Gates. WARNING To prevent SERIOUS INJURY or DEATH from a moving gate: •... -
Page 10: Installation
Installation I N S T A L L A T I O N S E T U P S Single Operator Maximum gate length 15 ft. Warning Placard on Maximum gate weight is 600 lbs. both sides of gate. Control Box 40-50399A UL Alarm Radio Receiver... -
Page 11: Mounting Operator That Opens To The Outside
M O U N T I N G O P E R A T O R T H A T O P E N S T O T H E O U T S I D E NOTE: Weld Gate Hinge Gate Hinge Re-Bar Behind Gate Hinges for... -
Page 12: Mounting Operator That Opens To The Inside
M O U N T I N G O P E R A T O R T H A T O P E N S T O T H E I N S I D E NOTE: Weld Re-Bar Behind Gate Hinge Gate Hinge Gate Hinges for... -
Page 13: Mounting Operator
If using a gate crossbar, weld bar across all pickets. Do not weld the crossbar on The Miracle-One™ can be mounted on top of just a few pickets, or they could bend. the gate frame. NOTE: See page 7 for mounting limitations. - Page 14 Back Bracket Washer on top of bracket. Front Bracket Position the Miracle-One™ horizontally level on the closed gate, where desired. For strength purposes, the front steel bracket must be attached in an area that can withstand heavy forces. Additional reinforcement steel plates may be necessary for mounting.
-
Page 15: Mounting Control Box
M O U N T I N G O P E R A T O R ( C O N T I N U E D ) After permanently mounting operator back on brackets, lock the operator by turning the key to the vertical position while pushing or pulling on the gate until you hear the key release click into place. -
Page 16: Mounting Operator(S) To Control Box
C O N N E C T I N G O P E R A T O R ( S ) T O C O N T R O L B O X NOTE: Reinstall all components back into control box when finished connecting operator(s) to control box. See previous page. Single Operator CAUTION To AVOID damaging operator: DO NOT... -
Page 17: Control Board Descriptions
C O N T R O L B O A R D S D E S C R I P T I O N S Master/Second Single CAUTION To AVOID damaging the control board, replace fuses ONLY with same type and rating specified below. 1. -
Page 18: Surge Suppressor Connections
MOTOR BRAKE LIMITS 9 10 11 12 13 14 15 16 Removable Terminal Connectors Refer to Page 19 Miracle-One™ Single NOTE: You MUST use Shielded Wire for the blue and green lines. Shield must be grounded. Black White Brown Blue... -
Page 19: Surge Suppressor Connections
S U R G E S U P P R E S S O R C O N N E C T I O N S Green Ground Wire Refer to Page 18 Refer to Page 20 Refer to Page 20 Solar Power 34 Vdc 1.7 A Transformer... -
Page 20: Wiring
Wiring WARNING To reduce the risk of SEVERE INJURY or DEATH: • ANY maintenance to the operator or in the area near the • DO NOT install ANY wiring or attempt to run the operator operator MUST NOT be performed until disconnecting the without consulting the wiring diagram. -
Page 21: Wiring Operator(S) To Control Board
W I R I N G O P E R A T O R ( S ) T O C O N T R O L B O A R D Single Controller WARNING CAUTION To prevent SERIOUS INJURY or DEATH To ENSURE proper operation of external devices: from a moving gate: •... -
Page 22: Dc Power Connection
D C P O W E R C O N N E C T I O N NOTE: Master/second control board shown to demonstrate proper conduit arrangement. The same connection sequence applies to the single control board. Plug in the transformer and connect the battery plug into the surge suppressor J1 battery plug. -
Page 23: Ul Alarm Connection
U L A L A R M C O N N E C T I O N This UL alarm is required for UL-325. It will go off after 2 consecutive events on the reverse sensor or UL sensor occur. The UL alarm will sound for a period of 5 minutes unless the Stop/Reset button is pressed or a new command is received by the Strike... -
Page 24: Wiring Additional Inputs (Strike Input)
W I R I N G A D D I T I O N A L I N P U T S Strike Input #21 and #22 Wiring at #21 and #22 will be recognized as an Open Only command, and Will Not close the gate. -
Page 25: Vdc External Loop Detector Wiring
2 4 V D C E X T E R N A L L O O P D E T E C T O R W I R I N G NOTE: Refer to the loop detector manual for more specific information. Part # (Sold Individually) 24 Vdc “Center”... -
Page 26: Entrapment Protection Devices (Non-Contact Sensors)
UL 325 intended to be used in class I or class II gate operator, like the following: LiftMaster 24 Vdc Photo Electric Sensors. Follow the installation instructions provided with the photo electric sensors for accurate placement of the sensors. -
Page 27: Maglock Or Solenoid Connection
M A G L O C K O R S O L E N O I D C O N N E C T I O N NOTE: ONLY the optional relay module will allow interface with the maglock or solenoid. The gate opening direction must be previously set, see page 26. -
Page 28: Adjustments
Adjustments CAUTION To reduce the risk of SERIOUS INJURY or DEATH: Disconnect power BEFORE performing ANY adjustments. S E T G A T E O P E N I N G D I R E C T I O N Inside Gate Opens Outward Property... -
Page 29: Limit Switch Adjustments
L I M I T S W I T C H A D J U S T M E N T S Remove operator cover and unlock the operator to adjust the gate’s traveling distance with the limit switches. Loosen the 2 screws of each limit switch armature. Position the second limit switches of each armature to stop the gate in the “full open”... -
Page 30: Adjusting Reverse Sensor
A D J U S T I N G R E V E R S E S E N S O R Adjust the reverse sensor so when the gate hits any object while opening, it will STOP, and when the gate hits any object while closing, it will REVERSE. -
Page 31: 315 Mhz Radio Receiver Programming
3 1 5 M H Z R A D I O R E C E I V E R P R O G R A M M I N G Setting Output Duration (M) or (C): The receiver is factory set at (M) Momentary. To verify, refer to the label next to jumper P2. (See illustration below) For commercial applications, the receiver can be set to either (C) constant or (M) momentary closure. -
Page 32: Close Delay For Overlapping Gates
C L O S E D E L A Y F O R O V E R L A P P I N G G A T E S Master/Second Gates with Overlap Overlap positioned on the Outside. Inside Property Inside Property Overlap positioned on the Inside. -
Page 33: Maintenance And Operation
4. Test the gate operator monthly. The gate MUST reverse on contact with a rigid object or stop when an object 9. ALL maintenance MUST be performed by a LiftMaster activates the non-contact sensors. After adjusting the professional. force or the limit of travel, retest the gate operator. -
Page 34: Built-In Reset Button
B U I L T - I N R E S E T B U T T O N When the gate operator’s audio alarm (See below) has been tripped, the reset button must be pushed for the operator to function again. The reset button will shut off an activated audio alarm and reset the operator to function again. -
Page 35: Emergency Manual Release
E M E R G E N C Y M A N U A L R E L E A S E Step 1: To move the gate during an emergency or power failure, insert key and turn counterclockwise to Unlock the operator from the gate. -
Page 36: Troubleshooting
Troubleshooting The Gate Will Not Operate with Remote: The radio receiver LED on the control board remains “ON” when using the remote control. Probable Causes: Solutions: 1. Stuck remote control button. Unstick remote control button. 2. The radio receiver has malfunctioned Cycle the power to the radio receiver. -
Page 37: Troubleshooting
T R O U B L E S H O O T I N G C O N T I N U E D Check the Fuses If the gate is not moving in any direction be sure to check all of the LED displays on the control board. If the board power or charging power LEDs are on, change the corresponding fuse on the right side of the board. -
Page 38: Wiring Schematics (Single And Master/Second)
W I R I N G D I A G R A M • M I R A C L E - O N E ™ S I N G L E ® LAKE FOREST, CALIFORNIA www.eliteaccess.com REV A SINGLE OR MASTER ONLY SECOND ONLY MOTOR BRAKE... - Page 39 W I R I N G D I A G R A M T A B L E • M I R A C L E - O N E ™ S I N G L E Miracle-One™ Single Control Board...
- Page 40 W I R I N G D I A G R A M • M I R A C L E - O N E ™ M A S T E R / S E C O N D NOTE: See table on next page.
- Page 41 WIRING DIAGRAM TABLE • MIRACLE-ONE™ MASTER/SECOND Miracle-One™ Master/Second Control Board J Pin # Signal Type Direction Level (+/- 10%) Surge Pin # Device Connection Reset Button - Red – Reset Button Input Reset Button - Black – Limits - Green Second –...
-
Page 42: Repair Parts
Repair Parts R E P A I R P A R T I L L U S T R A T I O N S NOTE: See part names on next page. -
Page 43: Part Names And Numbers
R E P A I R P A R T N A M E S A N D N U M B E R S INDIVIDUAL PARTS NOT SHOWN ITEM PART# DESCRIPTION ITEM PART# DESCRIPTION Q162 1.5 Amp Fuse K94-50838 6 Conductor Wire Cable per ft. -
Page 44: Accessories
Accessories Outdoor Siren with Strobe Light Power Hinges Part # ASSA For more information about accessories: www.liftmaster.com Magnetic Locks (Outdoor) 24 Vdc Photo Sensors Page 25 Page 24 Part # MG1300 Part # CPSN4 24 Vdc External Loop Detectors Page 23... -
Page 45: How To Order Repair Parts
[and that the Miracle-One™ is free from defect in materials and/or workmanship for a period of three years from the date of purchase]. -
Page 46: Installation Checklist
Installation Checklist 1. Owner and Installer must read all warnings and safety precautions. (Pages 4-7) 2. Make sure control box is securely mounted. (Page 13) 3. Operator arm must be securely and correctly fastened to mounting brackets. (Page 12) 4. Operator arm must be level in both directions. (Page 11) 5. - Page 48 01-50593B ® 2011, The Chamberlain Group, Inc. - All Rights Reserved...
Need help?
Do you have a question about the MIRACLE-ONE and is the answer not in the manual?
Questions and answers
On my elite miracle one unit, the Power and Charge lites are lit and the motors are not engaging. I hear a clicking sound when remote is pressed, however, the gats do not open.
The motors on a Chamberlain Miracle-One unit may not engage despite the Power and Charge lights being lit and a clicking sound being heard due to the following possible causes:
1. Incorrect Installation – The gate operator or gate may not be installed correctly.
2. Gate Hinges Issues – Hinges may be too tight or broken, preventing movement.
3. Obstruction – The gate may be hitting the driveway, curb, or another object, causing it to get stuck.
4. Overload or Fault Condition – The alarm LED may indicate that the gate is too heavy or there is a mechanical issue.
5. Electrical Malfunction – A stuck relay or a wiring issue could cause the clicking sound without actual motor engagement.
Checking for these issues and ensuring proper installation and gate movement should help diagnose and resolve the problem.
This answer is automatically generated