Electrolux EKC6461AOK User Manual
Hide thumbs
Also See for EKC6461AOK:
- User manual (32 pages) ,
- User manual (28 pages) ,
- User manual (32 pages)

Related Manuals for Electrolux EKC6461AOK


Summary of Contents for Electrolux EKC6461AOK
- Page 1 ..................... EKC6461AOK EN COOKER USER MANUAL EKC6461AOW EKC6461AOX...
-
Page 2: Table Of Contents
www.electrolux.com CONTENTS 1. SAFETY INFORMATION ........... 3 2. -
Page 3: Safety Information
ENGLISH 1. SAFETY INFORMATION Before the installation and use of the appliance, carefully read the supplied instructions. The manufacturer is not responsible if an incorrect installation and use causes in- juries and damages. Always keep the instructions with the appliance for future reference. 1.1 Children and vulnerable people safety WARNING! Risk of suffocation, injury or permanent disability. -
Page 4: Safety Instructions
www.electrolux.com • Never try to extinguish a fire with water, but switch off the appliance and then cover flame e.g. with a lid or a fire blanket. • Do not store items on the cooking surfaces. • Do not use a steam cleaner to clean the appliance. •... - Page 5 ENGLISH • The appliance must be earthed. • Deactivate the appliance after each use. • Make sure that the electrical information on the rating plate agrees with the pow- • Internally the appliance becomes hot er supply. If not, contact an electrician. when in operation.
-
Page 6: Care And Cleaning
www.electrolux.com • Do not try to extinguish a fire with wa- • Make sure the appliance is cold. There ter. Disconnect the appliance and cover is the risk that the glass panels can the flame with a lid or a fire blanket. break. -
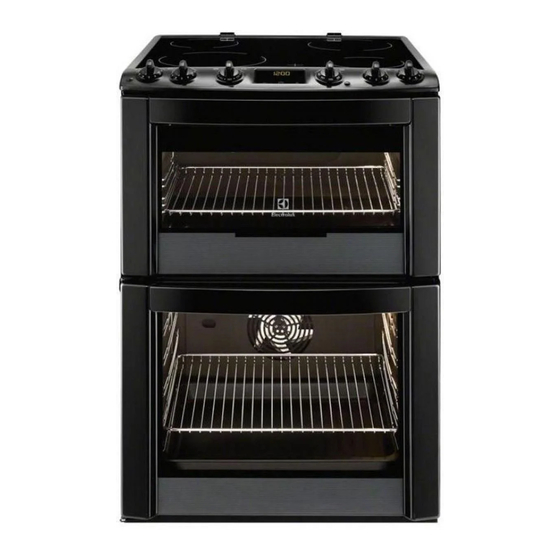
Page 7: Product Description
ENGLISH 3. PRODUCT DESCRIPTION 3.1 General overview Air vents for cooling fan Heating element Oven lamp Heating element Oven lamp Fan and heating element Shelf positions of the main oven Shelf positions of the top oven 3.2 Cooking surface layout Cooking zone 1200 W 145 mm 180 mm... -
Page 8: Before First Use
www.electrolux.com • Roasting pan grid For cookware, cake tins, roasts. To put in the deep roasting pan. • Oven shelf 4. BEFORE FIRST USE WARNING! After approximately five seconds, the Refer to the Safety chapters. flashing stops and the display shows the time of day you set. -
Page 9: Hob - Helpful Hints And Tips
ENGLISH To stop the cooking, turn the knob to 5.2 Residual heat indicator the 0 position. The residual heat indicator comes on Use the residual heat to decrease when a cooking zone is hot. energy consumption. Deactivate WARNING! the cooking zone approximately 5 Risk of burns from residual heat! - 10 minutes before the cooking is completed. -
Page 10: Hob - Care And Cleaning
10 www.electrolux.com Heat Use to: Time Hints set- ting Gentle fry: escalope, veal cordon as re- Turn halfway through bleu, cutlets, rissoles, sausages, quired liver, roux, eggs, pancakes, doughnuts Heavy fry, hash browns, loin 5-15 Turn halfway through steaks, steaks Boil large quantities of water, cook pasta, sear meat (goulash, pot roast), deep fry chips 7. - Page 11 ENGLISH 8.3 Top oven functions Oven function Application OFF position The appliance is OFF. Oven lamp To activate the oven lamp without a cooking function. 100-25 Conventional To bake and roast food on one shelf position. Cooking Dual Circuit To grill food items in medium quantities in the middle Grill of the shelf.
- Page 12 12 www.electrolux.com Installing the oven shelf and the deep roasting pan together Put the oven shelf on the deep roasting pan. Push the deep roasting pan between the guide-bars of one of the oven levels. 8.6 Grilling set You can use the roasting pan grid in two positions: turned up or down.
-
Page 13: Oven - Clock Functions
ENGLISH 9. OVEN - CLOCK FUNCTIONS 9.1 Electronic programmer Function indicators Time display Button + Selection button Button - Clock function Application Time of day To set, change or check the time of day. Minute Minder To set a countdown time. This function has no effect on the operation of the oven. -
Page 14: Oven - Helpful Hints And Tips
14 www.electrolux.com 10. OVEN - HELPFUL HINTS AND TIPS WARNING! fore. Adapt your usual settings (temper- Refer to the Safety chapters. ature, cooking times) and shelf levels to the values in the tables. The temperature and baking times • With longer baking times, the oven can in the tables are guidelines only. -
Page 15: Top Oven
ENGLISH Baking results Possible cause Remedy Oven temperature too Set a higher oven temperature Cake is too dry Cake is too dry Baking time too long Set a shorter baking time Oven temperature too Set a lower oven temperature and Cake does not high and baking time a longer baking time... -
Page 16: Main Oven
16 www.electrolux.com Approx Cook Temperature Food Shelf Position Time [°C] (mins) Convenience Follow manufacturer`s instructions Foods Fish 170 - 190 20 - 30 Fish Pie (Potato 190 - 200 20 - 30 Topped) Fruit Pies, Crum- 190 - 200 30 - 50 bles Milk Puddings 150 - 170... - Page 17 ENGLISH Baking Approx Cook Temperature Food Time Shelf Position [°C] (mins) Biscuits 180 - 190 10 - 20 1 / 3 Bread 190 - 210 30 - 35 Cakes: Small & 150 - 170 18 - 25 1 / 3 Queen Cakes: Sponges 160 - 170...
- Page 18 18 www.electrolux.com 10.7 Thermaflow or Conventional Cooking (if available) Roasting Meat Temperature [°C] Cooking Time Beef/Beef boned 20-35 minutes per 0.5 kb (1 170 - 190 lb) and 20-30 minutes over Mutton/Lamb 20-35 minutes per 0.5 kb (1 170 - 190 lb) and 25-35 minutes over Pork/Veal/Ham 30-40 minutes per 0.5 kb (1...
-
Page 19: Oven - Care And Cleaning
ENGLISH Food Grill Time (min) Chops - Lamb 15 - 25 Chops - Pork 20 - 25 Fish - Whole/Trout/Makarel 10 - 12 Fillets - Plaice/Cod 4 - 6 Kebabs 12 - 18 Kidneys - Lamb/Pig 6 - 10 Sausages 20 - 30 Steaks: Rare 4 - 6... -
Page 20: Removing The Shelf Supports
20 www.electrolux.com • Clean the oven interior after each use. To support this self-cleaning process Thus you can remove dirt more easily heat the oven without any food and it does not burn on. regularly: • Clean stubborn dirt with a special oven •... -
Page 21: Oven Lamp
ENGLISH Removing the glass: Installing the shelf supports Push the door trim at one side to re- Install the shelf supports in the opposite move it. Refer to the diagram. sequence. Pull up the trim. Valid with telescopic runners: Remove the glass panels. The retaining pins on the tele- scopic shelf runners must point to the front! -
Page 22: What To Do If
22 www.electrolux.com Install the glass cover. 12. WHAT TO DO IF… WARNING! Refer to the Safety chapters. Problem Possible cause Remedy The hob does not oper- The heat setting is not set Set the heat setting The oven does not heat The oven is not switched Switch on the oven The oven does not heat... -
Page 23: Technical Data
ENGLISH 13.1 Technical data Minimum distances Dimensions Dimen- sion Height 894-912 mm Width 599 mm Depth 600 mm Top oven capaci- 40 l 13.3 Levelling Main oven ca- 79 l Use small feet on the bottom of appliance pacity to set same level of cooker top surface with other surfaces 13.2 Location of the appliance You can install your freestanding appli-... -
Page 24: Electrical Installation
24 www.electrolux.com 13.4 The anti-tilt protection WARNING! You must install the anti-tilt pro- tection (A+B). If you do not install it, the appliance can tilt. Before you install the anti-tilt pro- tection, adjust the appliance to the correct height. The anti-tilt protection has two compo- nents (A+B). -
Page 25: Great Britain & Ireland - Guarantee/Customer Service
ENGLISH Make sure that the cover is securely fas- tened. To open the cover of terminal board obey the procedure in op- posite sequence. 13.7 Terminal board Do not remove blanking plates. Make sure that the links are fitted as shown. -
Page 26: European Guarantee
26 www.electrolux.com For Customer Service in The Custom- Tel: (Calls may be re- Republic of Ireland please er Care corded for training pur- contact us at the address Depart- poses) ment, below: Electrolux 08445 613 613 Electrolux Group (Irl) Ltd, Long Mile Road, Dublin 12, Republic of Ireland AEG- 08445 611 611... - Page 27 ENGLISH España +34 902 11 63 88 Carretera M-300, Km. 29,900 Al- calá de Henares Madrid France 08 92 68 24 33 www.electrolux.fr (0.34€/min) Great Britain +44 8445 616 616 Addington Way, Luton, Bedford- shire LU4 9QQ Hellas +30 23 10 56 19 70 4, Limnou Str., 54627 Thessalo- niki Hrvatska...
-
Page 28: Environment Concerns
28 www.electrolux.com Россия 8-800-200-3589 129090 Москва, Олимпийский проспект, 16, БЦ "Олимпик" Україна +380 44 586 20 60 04074 Київ, вул.Автозаводська, 2а, БЦ "Алкон" 17. ENVIRONMENT CONCERNS Recycle the materials with the symbol and electronic appliances. Do not dispose . Put the packaging in applicable appliances marked with the symbol containers to recycle it. - Page 29 ENGLISH...
- Page 30 30 www.electrolux.com...
- Page 31 ENGLISH...
- Page 32 www.electrolux.com/shop...
Need help?
Do you have a question about the EKC6461AOK and is the answer not in the manual?
Questions and answers