
Related Manuals for Oakton pH 5/6


Summary of Contents for Oakton pH 5/6
- Page 1 Instruction Manual pH 5/6 & Ion 6 pH/mV & Ion/pH Meter Series 68X243601 Technology Made Easy ... Rev 6 11/02...
- Page 2 Instruction Manual pH 5/6 & Ion 6 Preface This instruction manual serves to explain the use of the pH 5/6 and Ion 6 meters. It functions in two ways: first as a step by step guide to help you operate the meter;...
-
Page 3: Table Of Contents
Instruction Manual pH 5/6 & Ion 6 Table of Contents INTRODUCTION GETTING STARTED Description of Keypad Functions Description of LCD Annunciators Inserting & Removing the Rubber Boot Inserting New Batteries Battery Replacement Connecting the Electrode and Temperature Sensor Condition the pH Electrode... -
Page 4: Introduction
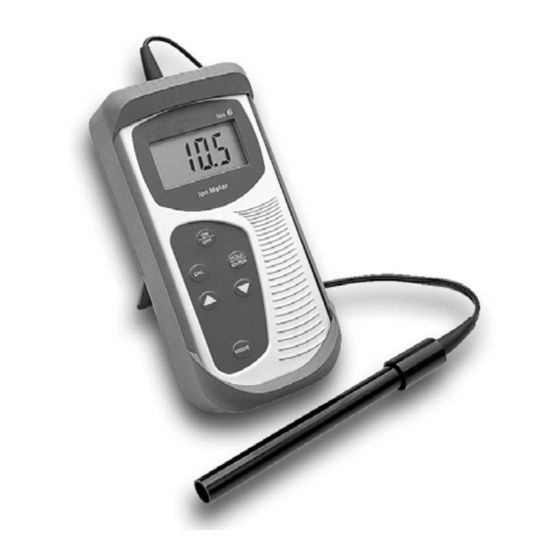
5/6 & Ion 6 1. INTRODUCTION Thank you for purchasing pH 5/6 or Ion 6 meter series. These microprocessor- based handheld meters are economical and easy to use. It has a large custom LCD (Liquid Crystal Display) for clear and easy reading. -
Page 5: Getting Started
2. GETTING STARTED 2.1 Description of Keypad Functions pH 5/6 has four keys and Ion 6 meter has six keys on its splash-proof keypad with tactile feedback. The common keys include ON/OFF, HOLD/ENTER, CAL and MODE keys. Ion 6 meter has additional keys. -
Page 6: Description Of Lcd Annunciators
Instruction Manual pH 5/6 & Ion 6 2.2 Description of LCD Annunciators The meter has a large custom LCD that consists of 3½-digit segments and operation annunciators for pH, mV or C (Temperature). Note that there is no annunciator shown in Ion mode. Other annunciators include “HO” (when the HOLD function is activated) and “LO”... -
Page 7: Inserting New Batteries
Instruction Manual pH 5/6 & Ion 6 2.4 Inserting New Batteries The battery compartment is found at the back of instrument. To open the battery compartment, push in the direction of arrow and lift up the cover. Note the polarity of battery before inserting into position. After replacement, place cover back and press down until it locks tight. -
Page 8: Condition The Ph Electrode
Instruction Manual pH 5/6 & Ion 6 BNC of pH/ORP Phono jack of electrode or ISE Temperature probe Insert the mini phono jack of temperature sensor into the socket on the meter. Unplug the phono jack when not in use or you measure pH without any temperature compensation. -
Page 9: Calibration
Instruction Manual pH 5/6 & Ion 6 3. CALIBRATION 3.1 pH Calibration The meter is capable of calibrating up to 3 points using USA or NIST (nSt) pH buffer standards or 2 points with Low Ionic (Pb) pH buffer standard. All new calibration values will automatically override existing data. -
Page 10: Selection Of Ph Buffer Standards
Instruction Manual pH 5/6 & Ion 6 3.2 Selection of pH buffer standards You must set the meter to accept either USA, NIST (nSt) or Low Ionic (Pb) pH buffer standard values before calibration. The factory default is USA standard. If you wish to abort this operation press the CAL key at any sequence and the meter reverts to pH measurement mode. -
Page 11: Ph Calibration Using Usa Standard Buffers
Instruction Manual pH 5/6 & Ion 6 3.2.2 pH Calibration using USA standard buffers 1. Pour a known pH buffer standard solution into a clean, dry container, e.g. pH 7.00. Power on the meter and it automatically enters into measurement mode. Select pH mode by pressing MODE key if necessary. -
Page 12: Ph Calibration Using Nist Standard Buffers
Instruction Manual pH 5/6 & Ion 6 3.2.3 pH Calibration using NIST standard buffers Pour a known pH buffer standard solution into a clean container, e.g. pH 6.86. Power on meter, and it automatically enters into measurement mode. Select pH mode by pressing MODE key if necessary. -
Page 13: Ph Calibration Using Pb Standard Buffers
Instruction Manual pH 5/6 & Ion 6 3.2.4 pH Calibration using Pb standard buffers Pour a known pH buffer standard solution into a clean container, e.g. pH 6.97. Power on meter, and it automatically enters into measurement mode. Select pH mode by pressing MODE key if necessary. -
Page 14: Ion Calibration (For Ion 6 Only)
Instruction Manual pH 5/6 & Ion 6 3.3 Ion Calibration (For Ion 6 only) The Ion 6 meter is capable of up to 3-point ion calibration (minimum 2 point) with standard solutions to ensure accuracy across the entire range of the meter. -
Page 15: Multi-Point Ion Calibration
Instruction Manual pH 5/6 & Ion 6 3.3.1 Multi-point Ion Calibration 1. In case if you need to start calibration using 1.0 ppm standard solution, you can skip the 0.1 ppm calibration option (as mentioned * below). 2. For this instance let’s take 1.0 ppm calibration. To begin, pour a known 1.0 ppm standard solution into a clean container. - Page 16 Instruction Manual pH 5/6 & Ion 6 9. Press ENTER key to confirm 2 point calibration (e.g. 10.0 ppm) and the display will show the next calibration option, 100.0 ppm. To exit from 2-point calibration, press CAL key and the LCD shows “PXX mV”...
-
Page 17: Millivolt (Mv) Calibration (For Ph 6 Only)
Instruction Manual pH 5/6 & Ion 6 3.4 Millivolt (mV) Calibration (for pH 6 only) mV calibration is performed for ORP or Redox measurements, where you can adjust its mV value as a base value for measurements. 1. Press MODE key to enter mV mode, the LCD displays “mV”. -
Page 18: Temperature Calibration
3. Press CAL key to enter temperature calibration mode. The LCD shows “CA” momentarily and displayed reading flashes. 4. Press keys (for Ion 6) or INC key (for pH 5/6) until the LCD display shows the desired temperature. The meter allows an adjustable maximum value of ± 5 from factory default. -
Page 19: Without Temperature Probe (No Atc)
C or last set temperature value. 4. Press key (for Ion 6) or INC key (for pH 5/6) until the displays shows the desired temperature. You can set any value from 0 to 100 5. To cancel or abort this operation, press CAL key. Note no new value will be stored into its meter‘s non-volatile memory. -
Page 20: Measurement
Instruction Manual pH 5/6 & Ion 6 4. MEASUREMENT 4.1 Taking Measurements 1. Before measurement, rinse pH/ORP electrode or Ion Selective Electrode (ISE) and temperature probe (except Ion 5) thoroughly with tap or distilled water to remove any impurities stuck onto the bodies of probes. -
Page 21: Electrode Care And Maintenance
Instruction Manual pH 5/6 & Ion 6 5. ELECTRODE CARE AND MAINTENANCE For best results, always keep the ISE capped dry and pH/ORP electrode bulb wet. Store the pH/ORP glass bulb with pH electrode storage solution. Other pH buffers are also suitable. NEVER use deionised water for storage. Wash the probes thoroughly with distilled water after each use. -
Page 22: Specifications
Instruction Manual pH 5/6 & Ion 6 7. SPECIFICATIONS Model pH 5 pH 6 Ion 6 Ion Range 0.01 to 1999 ppm Resolution 0.01 ppm for 0.01 to 0.99 ppm; 0.1 ppm for 1.0 to 199.9 ppm; 1 ppm for 200 to 1999 ppm... -
Page 23: Accessories
Instruction Manual pH 5/6 & Ion 6 8. ACCESSORIES Replacement Meter and Meter accessories Item Eutech Instruments Oakton Instruments Ordering Code No. Ordering Code No. Epoxy-body pH Combination EC-FC72521-01B 35801-00 Electrode, Single Junction, 12 x 110 mm (1m cable length)). - Page 24 Instruction Manual pH 5/6 & Ion 6 Calibration Solutions Item Eutech Instruments Oakton Instruments Ordering Code No. Ordering Code No. pH 4.01 buffer solution, 480 ml EC-BU-4BT 00654-00 bottle (1 pint) pH 7.00 buffer solution, 480 ml EC-BU-7BT 00654-04 bottle (1 pint) pH 10.01 buffer solution, 480 ml...
-
Page 25: Warranty
Instruction Manual pH 5/6 & Ion 6 9. WARRANTY This meter is supplied with a warranty against significant deviations in material and workmanship for a period of THREE years from date of purchase whereas probe with a SIX-month warranty. If repair or adjustment is necessary and has not been the result of abuse or misuse within the designated period, please return –... -
Page 26: Return Of Items
Instruments will not be responsible for damage resulting from careless or insufficient packing. A restocking charge will be made on all unauthorized returns. NOTE: Eutech Instruments Pte Ltd/ Oakton Instruments reserves the right to make improvements in design, construction, and appearance of products without notice. - Page 27 For more information on Eutech Instruments/ Oakton Instruments’ products, contact your nearest distributor or visit our website listed below: Oakton Instruments Eutech Instruments Pte Ltd. Distributed by: P.O Box 5136, Blk 55, Ayer Rajah Crescent, Vernon Hills, IL60061, USA #04-16/24 Singapore 139949...
Need help?
Do you have a question about the pH 5/6 and is the answer not in the manual?
Questions and answers
Cannot calbrate ph 6 Also get Or in pH solution
To calibrate the Oakton pH 5/6 meter using a pH 6.86 solution (NIST standard buffer), follow these steps:
1. Pour the pH 6.86 buffer solution into a clean container.
2. Power on the meter; it enters measurement mode automatically.
3. Select pH mode by pressing the MODE key if necessary.
4. Dip both the pH electrode and temperature probe into the buffer solution.
5. Swirl gently and wait for the reading to stabilize (approximately 30 seconds).
6. Press the CAL key to enter pH calibration mode. The display shows "CA" momentarily, then flashes the current uncalibrated reading.
7. Follow the on-screen prompts to complete calibration.
For higher accuracy, perform a 2 or 3-point calibration using additional buffers (e.g., pH 4.01 and 10.01).
This answer is automatically generated
Cannot calibrate pH 6
To calibrate the Oakton pH 6 meter for pH:
1. Turn on the Meter: Press the power button to switch on the device.
2. Select pH Mode: Ensure the meter is in pH mode.
3. Prepare Buffers: Use standard pH buffer solutions (USA, NIST, or Pb standards).
4. Enter Calibration Mode: Press the CAL key. The LCD will display "CA" momentarily, followed by a flashing reading.
5. First Calibration Point:
- Rinse the electrode with distilled water.
- Dip it into the first buffer solution (e.g., pH 7.00).
- Wait for the reading to stabilize.
- Press ENTER to confirm.
6. Second Calibration Point (Optional for 2-point calibration):
- Rinse the electrode.
- Dip it into the second buffer solution (e.g., pH 4.00 or 10.00).
- Wait for stabilization and press ENTER.
7. Third Calibration Point (Optional for 3-point calibration):
- Repeat the rinsing and dipping process with the third buffer solution.
- Press ENTER to confirm.
8. Finish Calibration:
- The meter will display the electrode slope.
- If calibration is successful, the values are stored in memory.
- If unsuccessful, an error message appears.
The meter is now calibrated and ready for use.
This answer is automatically generated