
Related Manuals for Oakton PH550


Summary of Contents for Oakton PH550
- Page 1 PH550 Benchtop pH Meter Instruction Manual Oakton Instruments www.4oakton.com Manual Version 3.2...
-
Page 2: Table Of Contents
Table of Contents Brief Introduction ......................- 1 - Main Features ........................- 1 - Technical Specifications....................- 1 - What’s in the Box? ......................- 2 - Instrument Description ....................- 2 - LCD Display .......................... - 2 - Keypad .......................... -
Page 3: Brief Introduction
This instrument is an outstanding combination of advanced electronics design and sensor technology. It’s the most economical choice of a reliable lab-grade benchtop pH meter. Please read this maual carefully to properly use and maintain the meter. Oakton Instruments reserves the right to update the contents of this manual without giving prior notices. -
Page 4: What's In The Box
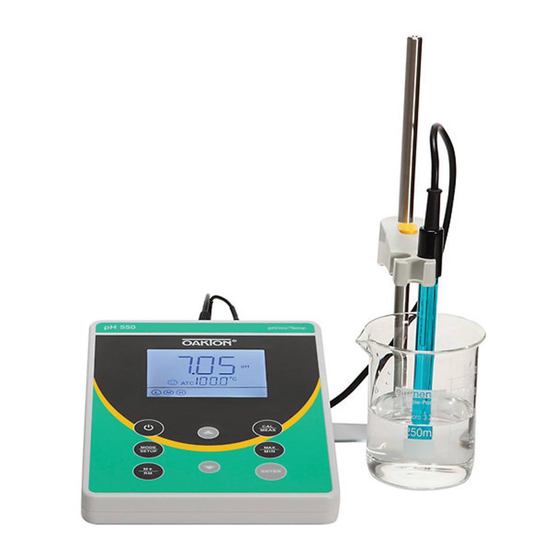
What’s in the Box? Content Quantity 35419-30, PH550 Benchtop pH Meter 35419- 31, Plastic 3-in-1 Combination pH Electrode pH standard buffer solutions (4.00/7.00/10.01 pH; 1 for each (50ml for each) 9V Power Adapter Electrode Holder 1 set Instruction Manual Instrument Description 4.1 LCD Display... -
Page 5: Keypad
4.2 Keypad Figure-2 3.2.1. Keypad operations Short press ----- <1.5 seconds; Long press ----- >1.5 seconds. 3.2.2 For keypad operation, please see Table-1. Table – 1 Keypad operations and descriptions Keypad Operation Functions • Short Press Power on/off • Short Press Select measuring mode: pH→mV. -
Page 6: Connectors
4.3 Connectors Symbol Connector Name Connector Type Socket for reference electrode Φ2 banana type pH/mV Socket for pH and ORP electrode TEMP Socket for temperature sensor DC9V DC9V power socket Φ2.5 direct type 4.4 Stable reading display mode When the measuring value is stable, smiley face icon appears on LCD, see Figure-3. -
Page 7: Max/Min Function
Clear stored data The meter can store 50 groups of data. Once the storage is full, if user presses again, the FUL icon will be displayed on LCD (see Figure-6). The storage needs to be cleared in parameter setting P4 so as to keep storing data. -
Page 8: Information Regarding Calibration
Technical Specifications of the 201T-F pH Electrode Measurement Range: 0 - 14 pH, 0 - 80˚C (32 – 176˚F) Junction: Single Ceramic Reference Electrode: Ag/AgCl Connector: BNC Size: ø12*160 mm Temperature unit: 30K Thermistor Electrode Connectors The pH electrode has two connectors: the BNC connector connects the pH probe; the RCA connector connects the temperature sensor. - Page 9 Table-3 Calibration Mode Calibration When to adopt icon 1-Point 7.00 pH 6.86 pH accuracy≤ ±0.1 pH Calibration 7.00 pH and 6.86 pH and Measuring range: 0 to 7.00 pH 4.00/1.68 pH 4.01/1.68 pH 2-Point Calibration 7.00 pH and 10.01 pH 6.86 pH and 9.18 pH Measuring range: >7.00 pH 3-Point 7.00pH, 4.00/...
-
Page 10: Ph Meter Calibration
5.4 pH Meter Calibration 1) Press to enter calibration mode. CAL1 icon will flash in the upper right corner of the LCD. 7.00 pH will flash in the lower right corner of the LCD, reminding you to use pH 7.00 buffer to conduct 1 point of calibration. -
Page 11: Measuring Ph
6) During the calibration process, press key to exit from the calibration mode. The meter can perform one-point, two-point and three-point calibration. Calibration guide icons appear on LCD. 5.5 Measuring pH Screw off the KCL storage bottle, and put it aside (do not dump or spill the KCL solution). Prepare a cup of distilled water, and rinse the electrode in it for a few seconds. - Page 12 5.5.1 According to the pH isothermal measurement principle, the closer the test sample’s temperature is to the calibration solution’s, the higher the accuracy of the measurement. This principle is recommended to follow when conducting tests for the best result. Example: If users were to test samples at 150˚F, we recommend warming up the calibration solutions to the same temperature before performing calibrations in order to get the most accurate readings.
-
Page 13: Parameter Setting
5.6 Parameter Setting Table-6 Symbol Parameter setting content Parameter Factory default setting USA - NIST Select pH buffer series Select resolution 0.1/0.01 pH 0.01 pH ℃ - ℉ ℃ Select temperature unit Clear stored data No-Yes Return to factory default No-Yes 5.6.1 How to do the parameter setting: In measurement mode, long press... -
Page 14: Ph Electrode's Maintenance
Loosen the cap, take out the electrode and rinse in distilled or water before taking a measurement. Insert the electrode and tighten the cap after measurements to prevent the solution from leaking. If the storage solution is cloudy or moldy, replace the 3M KCL solution. Oakton electrode storage solution 00653-04. -
Page 15: Mv Measurement
5.7.5 Clean contaminated glass bulb and junction (please refer to Table-8) Table-8 Clean contaminated glass bulb and junction Contamination Cleaning Solutions Inorganic metal oxide Dilute acid less than 1mol/L Organic lipid Dilute detergent (weak alkaline) Resin macromolecule Dilute alcohol, acetone, ether Proteinic haematocyte sediment Acidic enzymatic solution (saccharated yeast tablets) Paints... -
Page 16: Recommended Ph Electrodes For Specific Applications
We warrant this instrument to be free from defects in material and workmanship and agree to repair or replace free of charge, at option of OAKTON INSTRUMENTS, any malfunctioned or damaged product attributable to responsibility of OAKTON INSTRUMENTS, for a period of THREE YEARS (SIX MONTHS for the probe) from the delivery.
Need help?
Do you have a question about the PH550 and is the answer not in the manual?
Questions and answers