
Related Manuals for Steel City 50110


Summary of Contents for Steel City 50110
-
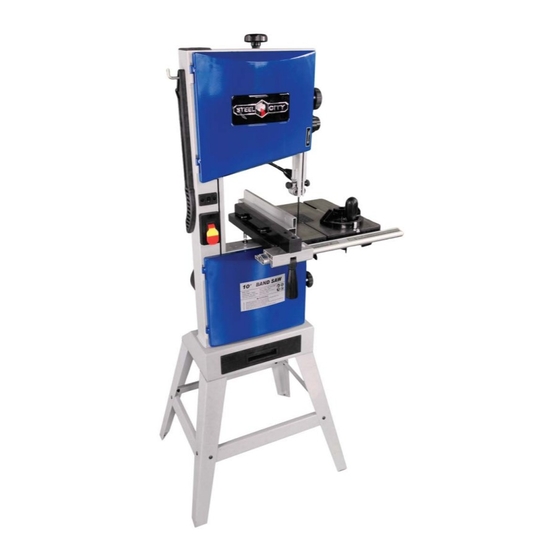
Page 1: User Manual
User Manual Read and understand this manual before using machine. 10” 2 SPEED BANDSAW Model Number 50110 STEEL CITY TOOL WORKS VER. 10.13... -
Page 2: Table Of Contents
TABLE OF CONTENTS Product Specifications................................3 Safety....................................4 Accessories and Attachments.............................. 5 Carton Contents................................... 6 Installation .................................... 7 Adjustment ................................... 8 Operations ..................................Maintenance..................................14... -
Page 3: Product Specifications
PRODUCT SPECIFICATIONS ATTENTION: Please choose proper power source, voltage and frequency that are shown in the label for your bandsaw. MODEL 50110 MOTOR POWER 1/2 HP THROAT WIDTH 9.5” / 245mm CUTTING CAPACITY 6” / 150mm 15’/min / 400m/min CUTTING SPEED HIGH 31’/min / 800m/min... -
Page 4: Safety
GENERAL SAFETY RULES WARNING: Failure to follow these rules may result in serious personal injury. For your own safety, read the instruction manual Use the proper extension cord. Make sure your before operating the machine. Learning the machine’s extension cord is in good condition. When using an application, limitations, and specific hazards will greatly extension cord, be sure to use one heavy enough to carry minimize the possibility of accidents and injury. -
Page 5: Accessories And Attachments
ELECTRICAL REQUIREMENTS POWER SUPPLY AND MOTOR SPECIFICATIONS WARNING: To avoid electrical hazards, fire hazards, or damage to the tool, use proper circuit protection. Use a separate electrical circuit for your tools. To avoid shock or fire, if power cord is worn or cut or damaged in any way, have it replaced immediately. -
Page 6: Carton Contents
CARTON CONTENTS UNPACKING AND CHECKING CONTENTS Carefully unpack the bandsaw and all its parts. Compare against the illustration drawing below. WARNING: To avoid injury from unexpected starting, do not plug the power cord into a power source receptacle during unpacking and assembly. -
Page 7: Installation
INSTALLATION 1. Securing the bandsaw stand. Put down the machine on an angle according to the figure on the right. Attach legs to bandsaw by using M6x10 socket bolts and 6mm flat washers. Fix short braces and long braces to legs by using M6x12 carriage bolts, 6mm flat washers and M6 hex nuts. -
Page 8: Adjustment
ADJUSTMENT WARNING: Always be sure that the tool is switched OFF and unplugged before any adjustments. 1. Tilting table. • Loosen the locking handle, then turn the table to adjust it to the desired angle. • Use the angle indicator scale to find the desired angle. •... - Page 9 4. Upper blade guide adjustment. The height of blade guide needs to be adjusted prior to every cutting/operation, to accommodate the height of workpiece (the upper blade guide should be set approximately 1/8” / 3mm above the workpiece). Set the upper blade guide with the adjusting knob to the desired height by loosening the locking knob. After adjustment, be sure to tighten the lock knob.
- Page 10 6. Cutting speed adjustment. Open the lower cover. Slacken the driving belt by turning the knob clockwise. Put the driving belt on required pulley of the driving wheel (lower bandsaw wheel) and the corresponding motor pulley. Adjusting belt tension. If necessary, adjust the motor position to adjust the belt tension. Loosen the motor locking bolt and turn the motor counter-clockwise to reduce the driving belt tension, turn the motor clockwise to increase the driving belt tension.
-
Page 11: Operations
OPERATIONS WARNING: To reduce the risk of personal injury, the following safety recommendations should be observed when operating the saw. DO NOT touch the saw blade when cutting. During saw operation, wear safety glasses, but DO NOT wear gloves. Cut only ONE workpiece at a time. ALWAYS hold the workpiece down on the table. - Page 12 Clamping the rip fence. Place rip fence on the guide rail. Move the fence to a needed position. The scale indicates distance from saw blade to the fence. Tighten the lock lever to clamp the rip fence. Lock lever Fence height can be lowered when cutting thin materials.
- Page 13 Sawing. Set upper blade guide 1/8” / 3mm above the workpiece. Place workpiece on the table. Plug in. Start saw. Cut workpiece in a single pass. Switch OFF if no further cutting is to be done immediately afterwards. Connecting to dust collector. The bandsaw provides a dust port.
-
Page 14: Maintenance
MAINTENANCE WARNING: Always be sure the tool is switched OFF and disconnect the plug from the power supply before inspection and maintenance. 1. FREQUENT INSPECTION The bandsaw should be inspected frequently. The cord, in-lead, plug and switch should be inspected for good condition. Inspect if there is any damage on the drive part. - Page 15 STEEL CITY TOOL WORKS www.steelcitytoolworks.com 1-877-SC4-TOOL (1-877-724-8665)
- Page 16 NOTES www.steelcitytoolworks.com Steel City Tool Works, LLC Bolingbrook, IL. USA 60440 Tech Service: 1.877.724.8665...
Need help?
Do you have a question about the 50110 and is the answer not in the manual?
Questions and answers