
Related Manuals for Steel City 50125


Summary of Contents for Steel City 50125
-
Page 1: Model Number
14" GRANITE BAND SAW Model Number 50125 STEEL CITY TOOL WORKS VER. 02.09 Manual Part No. OR74409... -
Page 3: Table Of Contents
The drawings, illustrations, photographs, and specifications in this user manual represent your machine at time of print. However, changes may be made to your machine or this manual at any time with no obligation to Steel City Tool Works. -
Page 4: Warranty
2 YEAR LIMITED WARRANTY Steel City Tool Works, LLC (SCTW) warrants this SCTW machinery to be free of defects in workmanship and materials for a period of 2 years from the date of the original retail purchase by the original owner for domestic use. Granite components are warranted for 2 years based on normal use and is void if non SCTW accessories are used that cause the break or chip. -
Page 5: Warranty Card
City:______________________________________________ ___ Vacuum Veneer Press ___ Wide Belt Sander Other____________________________________________ How did you first learn of Steel City Tool Works? ___ Advertisement ___ Mail Order Catalog 11. Which benchtop tools do you own? Check all that apply. ___ Web Site... - Page 6 FOLD ON DOTTED LINE PLACE STAMP SteelCityToolWorks #4 Northpoint Court Bolingbrook, IL 60440 FOLD ON DOTTED LINE...
-
Page 7: Product Specifications
Hertz 60Hz 1725 There are a variety of accessories available for your Steel City Product. For more information on any accessories associated with this and other machines, please contact your nearest Steel City distributor, or visit our website at: www.steelcitytoolworks.com. -
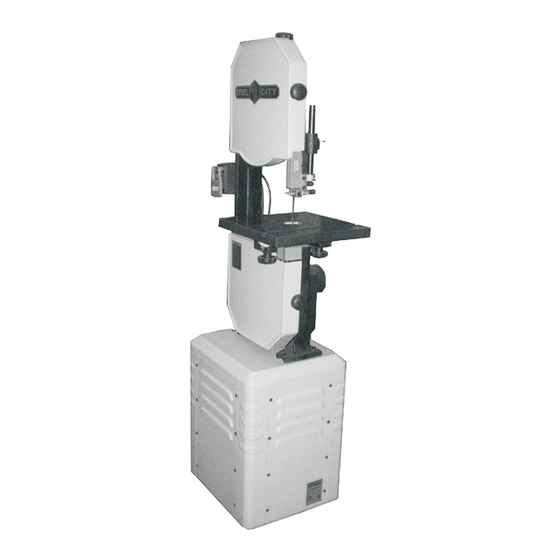
Page 8: Feature Identification
FEATURE IDENTIFICATION A. Power Switch B. Table C. Blade Guard D. Post Guide... -
Page 9: General Safety
GENERAL SAFETY WARNING WARNING TO AVOID serious injury and damage to the machine, read and follow all Safety and Operating Instructions before assembling and operating this machine. This manual is not totally comprehensive. It does not Exposure to the dust created by power sanding, saw- and can not convey every possible safety and opera- ing, grinding, drilling and other construction activities tional problem which may arise while using this... - Page 10 11. DO NOT FORCE the machine to perform an opera- WARNING tion for which it was not designed. It will do a safer and higher quality job by only performing operations for which the machine was intended. 12. DO NOT stand on a machine. Serious injury could result if it tips over or you accidentally contact any 3.
-
Page 11: Product Safety
25. USE ONLY recommended accessories. Use of 28. SAVE these instructions and refer to them frequent- incorrect or improper accessories could cause seri- ly and use them to instruct other users. ous injury to the operator and cause damage to the 29. -
Page 12: Electrical Requirements
ADJUST all blade guides as specifided in the accessories only recommended by Steel City. operating instructions. DO NOT pull the bandsaw by the power cord. NEVER ADJUST the upper guide to a point about 1/4” allow the power cord to come in contact with sharp above the workpiece being cut. - Page 13 120/240...
-
Page 14: Unpacking & Inventory
“ON” after all the parts have been for and remove protective shipping materials around obtained and installed correctly. For missing parts, motors and moving parts. Lay out all parts on a clean contact Steel City at 1-877-SC4-TOOL. work surface. E. Cabinet Top Plate A. Poly-V Belt B. - Page 15 I. Table J. Table Lock Knobs (2) K. Table Insert L. 2.5mm Hex Wrench M. 3mm Hex Wrench N. M8X40mm Hex Head Screw (4) O. Leveling Feet (4) P. M6X12mm Hex Head Flange Screw (19) Q. M8 Lock Washer (4) R.
-
Page 16: Assembly
ASSEMBLY CABINET ASSEMBLY 4. Fixed the motor on the top plate using Motor ixed Φ rod (H) and 12 ring (I)and cotter pin(J). Using M5X12mm Pan head screw(K) and cable clamp to fix the motor power cord(L). SEE FIG. 3 Fig.3 1. - Page 17 ATTACHING BAND SAW TO BASE INSTALLING BELT AND BELT GUARD 1. Install Belt by “walking” the belt onto the Band saw Pulley (B) and the Motor pulley (C). SEE FIG.6 Fig. 6 1. Place the bandsaw on top of the base making sure to line up the four holes in the base with the four Holes in the casting of the bandsaw.
-
Page 18: Section 11 Adjustments
Fig.8 2. Once the belt is installed, confirm that the pulleys are aligned using a straight edge on the outer face of both pulleys. If an adjustment is necessary, loosen pulley and set the motor itself can be repositioned by loosening the four bolts that attach the motor to the motor plate, repositioning the motor, and then retightening the four bolts. -
Page 19: Mounting The Table
MOUNTING THE TABLE 3. Position the two threaded bolts so that they line up with the holes in the trunnion. Once the bolts are through the holes, fasten the table using the two Table lock knobs (A). SEE FIG. 11. Fig.11 1. -
Page 20: Adjustments
ADJUSTMENT TABLE TILT SETTING BLADE TENSION The table on your bandsaw is designed to tilt up to 45 The blade tension is set by using the blade tension knob. degrees to the right and up to 3 degrees to the left. To MUST be set prior to initial operation as it plays a vital tilt the table:... - Page 21 2. As you rotate the knob you will notice a red 3. If the blade does not ride on the center of the wheel, marker(C) on the inside of the scale. This is to be or starts to move towards the edge of the wheel, used asa guideline for the blade tension depending loosen the wingnut (A) and turn the tracking on the width of the blade.
- Page 22 3. Place a gage on the tabletop and up against the ADJUSTING TABLE saw blade. SEE FIG.19. POSITIVE STOPS Fig.19 DO NOT attempt to set the positive stops until you have checked and/ or adjusted both the blade tension and blade tracking.
- Page 23 UPPER BEARING ADJUSTMENT LOWER BEARING ADJUSTMENT NOTICE: Make certain that you have followed all of the steps in the SETTING BLADE TENSION section in the ADJUSTMENTS section of this manual prior to starting this section. 1. Loosen (A) and slide thrust bearing(B) adjust nut until it is within .003 of the saw blade.
-
Page 24: Section 13 Maintenance
BELT TENSION CHANGING MOTOR VOLTAGE Belt tension is adjusted using the Motor Tensioning Bolt. The motor supplied with your bandsaw is a dual It should be adjusted on initial setup and when the belt is voltage120 / 240V motor. The motor comes prewired replaced. -
Page 25: Operations
OPERATION PRE RUN CHECK Before you begin using your new bandsaw, you should give it a thorough inspection and ask yourself the fol- lowing questions: 1.Are the blade bearings properly adjusted? 2.Is the blade tension and blade tracking properly set? 3.Is the unit stable, does it rock or wobble? 4.Have you read all the warnings associated with this saw? -
Page 26: Blade Selection
BLADE SELECTION PITCH The unit of measure for pitch is teeth per inch. A fine Using the proper saw blade for the job you are perform- pitch, meaning having more teeth per inch, will deliver ing will optimize the efficiency of your bandsaw and a smoother cut, but will take a longer time to complete. -
Page 27: Maintenance
MAINTENANCE Fig.24 GENERAL CLEANUP •Keep the bearing guides clean and free of buildup of pitch, resin, etc. •Remove any deposits from the wheels to help avoid vibration and premature blade breakage •Keep the inside of bandsaw clear of sawdust. Occasionally vacuum out the inside of the unit or blowout the inside of the unit with an air hose. -
Page 29: Parts List
PARTS... - Page 30 PART PART DESCRIPTION DESCRIPTION OR74410 UPPER WHEEL OR74442 PULLEY OR74411 TIPE OR93552 M6X8 HEX SOC SET SCR OR74412 PAN HD SCR M4 X P0.7 X 8mm OR74443 MOTOR PULLEY OR74413 HINGE UPPER OR93906 M5X6 HEX SOC SET SCR OR74419 UPPER WHEEL REAR COVER OR74444 KEY 5X35 OR94833...
- Page 31 PART PART DESCRIPTION DESCRIPTION OR74472 CABINET TOP PLATE 3.2X22 CUTTER PIN OR74484 OR74473 PULLEY COVER MOTOR FIXED ROD OR74485 OR94197 M6X12 HEX HD FLANGE SCR 12 RETAINING RING OR74486 OR74474 OR74487 CABLE CLAMP PLATE FIXED MOTOR OR74475 M5X12 PAN HD SCR MOTOR (3/4HP 1725RPM) OR92137 OR94618...
- Page 32 x NOTES x...
Need help?
Do you have a question about the 50125 and is the answer not in the manual?
Questions and answers