
Related Manuals for Kramer VP-460


Summary of Contents for Kramer VP-460
-
Page 1: User Manual
K R A ME R E LE CT R O N IC S L T D . USER MANUAL MODEL: VP-460 Video Scaler P/N: 2900-300146 Rev 4... -
Page 4: Table Of Contents
Contents Introduction Getting Started Achieving the Best Performance Safety Instructions Recycling Kramer Products Overview Defining the VP-460 Video Scaler Connecting the VP-460 The OSD Menu OSD Menu Operation Example The Input Menu The Audio Menu The Process Menu The Picture Menu... - Page 5 Figures Figure 1: VP-460 Video Scaler Figure 2: Connecting the VP-460 Video Scaler Figure 3: Input Menu Figure 4: Select the Display Mode Figure 5: changing the size of the Window Figure 6: Increasing the Width Figure 7: Increasing the Height...
-
Page 6: Introduction
Scan Converters and Scalers; GROUP 8: Cables and Connectors; GROUP 9: Room Connectivity; GROUP 10: Accessories and Rack Adapters and GROUP 11: Sierra Video Products. Congratulations on purchasing your Kramer VP-460 Video Scaler. This product, which incorporates HDMI™ technology, is ideal for: •... -
Page 7: Getting Started
Avoid interference from neighboring electrical appliances that may adversely influence signal quality • Position your Kramer VP-460 away from moisture, excessive sunlight and dust This equipment is to be used only inside a building. It may only be connected to other equipment that is installed inside a building. -
Page 8: Safety Instructions
Kramer Electronics has made arrangements with the European Advanced Recycling Network (EARN) and will cover any costs of treatment, recycling and recovery of waste Kramer Electronics branded equipment on arrival at the EARN facility. For details of Kramer’s recycling arrangements in your particular country go to our recycling pages at http://www.kramerelectronics.com/support/recycling/. -
Page 9: Overview
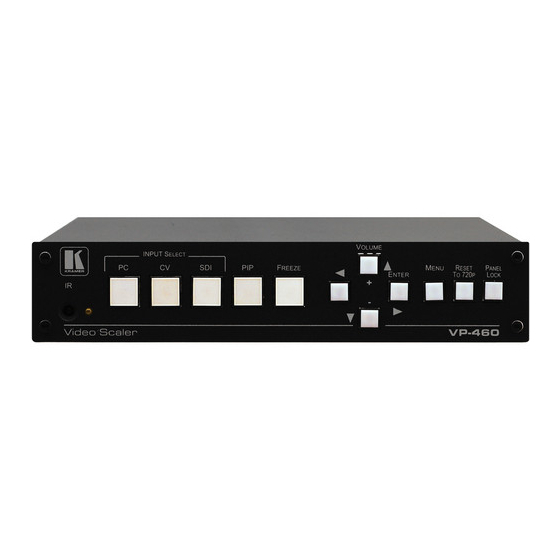
Overview The Kramer VP-460 is a high quality Video Scaler. It accepts one of three inputs: a computer graphics signal on a 15-pin HD connector, a composite video signal on an RCA connector and an SDI signal on a BNC connector. It scales the video, embeds the audio and simultaneously outputs the signal to the HDMI output, as well as to the SDI output together with a digital audio output. - Page 10 Selectable Power Save modes for energy efficient usage • SDI channeling, letting you select one active audio signal from eight embedded stereo audio channels In addition, the VP-460 Video Scaler: • Includes luma keying via the PiP window • Includes advanced EDID management per input •...
-
Page 11: Defining The Vp-460 Video Scaler
• Remotely, from the infrared remote control transmitter The VP-460 is housed in a desktop enclosure, letting 2 units to be rack mounted side-by-side in a 1U rack space with the optional RK-1 rack adapter. Defining the VP-460 Video Scaler This section defines the VP-460. - Page 12 HDMI OUT Connector Connect to an HDMI acceptor RS-232 9-pin D-sub Port Connect to the PC or the remote controller SDI OUT BNC Connector Connect to an SDI acceptor 5V DC +5V DC connector for powering the unit VP-460 - Overview...
-
Page 13: Connecting The Vp-460
Connecting the VP-460 Always switch off the power to each device before connecting it to your VP-460. After connecting your VP-460, connect its power and then switch on the power to each device. You do not have to connect all the inputs and outputs, connect only those that are required. -
Page 14: Figure 2: Connecting The Vp-460 Video Scaler
10. Connect the 5V DC power adapter to the power socket and connect the adapter to the mains electricity (not shown in Figure Figure 2: Connecting the VP-460 Video Scaler VP-460 - Connecting the VP-460... -
Page 15: The Osd Menu
The OSD Menu The VP-460 OSD menu lets you set the operation parameters for the: • Main Window Control • PIP Window Control • Entire System Control The nature of the operation setup appears in the OSD title, as shown in the example in Section 5.1... - Page 16 PIP window separately (by defining Window Control, see Section 5.8 General characteristics which apply to the entire system (for example, setting the volume) are changed without needing to shift control (the title line will state: Entire System Control). VP-460 - The OSD Menu...
- Page 17 Data is saved per window and per input (to a dedicated input + window memory), as applicable The control buttons let you control the VP-460 via the OSD menu. Press the: • MENU (or ) button to enter the menu, exit the menu, and when in the OSD menu, move to the previous level and change menu settings in the OSD screen.
-
Page 18: The Input Menu
Select the input source: PC, CV or SDI Input Source Note that any change in the input source may cancel the freeze and blank settings. VP-460 - The OSD Menu... - Page 19 The PiP window maximum horizontal active image area is 1600 pixels The display mode setup, shown in Figure 4, is part of the entire system control and the selected Single Window also shows the current aspect ratio (Best Fit): VP-460 - The OSD Menu...
-
Page 20: Figure 4: Select The Display Mode
Miscellaneous menu, see Section 5.8 Note that if the VP-460 is set to the single window display mode, only the Main Window control applies. If the VP-460 is set to any of the dual window display modes, you have to select Main/PiP window control to move and/or resize the selected window. -
Page 21: Figure 5: Changing The Size Of The Window
3. Select H width (an OSD slide bar appears) and press + to increase the width, or – to decrease the width, see Figure The following example shows how to decrease the width of the window Figure 6: Increasing the Width VP-460 - The OSD Menu... -
Page 22: Figure 7: Increasing The Height
Use the H Position and V Position items in the OSD to change the position of the window using the + and – buttons on the front panel or remote control transmitter (as illustrated in Figure Figure 8: Positioning the Window To move the position of the window, do the following: VP-460 - The OSD Menu... -
Page 23: Figure 9: Window Customization
1. Check that window control is set as required (for example, PiP Window Control). 2. Select Window Customization. The following Window appears: Figure 9: Window Customization 3. To move the picture to the right, select H Position. An OSD slide bar appears: Figure 10: H-Position Slide Bar VP-460 - The OSD Menu... -
Page 24: Figure 11: Moving The Pip Window
Figure 11: Moving the PiP Window Note that the sequence in which you change the size and position of the window is insignificant, as long as you make sure that the resized image does not go beyond the window boundaries. VP-460 - The OSD Menu... -
Page 25: The Audio Menu
By default, group A is connected and groups B, C and D are disconnected Set the SDI channeling for groups A, B, C and D to: Activate CH1 or Activate CH2 If other groups are set to Activate, the remaining groups are read as None VP-460 - The OSD Menu... -
Page 26: Figure 13: Set The Output Volume Level
14, groups A, C and D are disconnected (None) and channel B is connected (CH1 in group B is mute and CH2 in group B is active). The CH2 active channel is input to the Kramer 6810HDXL as Group A, CH1, processed and output to an audio acceptor. -
Page 27: Figure 14: Sdi Channeling Example
In the OSD setup that is illustrated in Figure 16, CH 2 in group B (active) is routed via the VP-460 SDI output to the input of 6810HDXL; CH1 in group B is muted; groups A, C and D are disconnected (see example in Figure 14). -
Page 28: Figure 16: Sdi Channeling Example
If a different channel within a connected group is activated, the other channel will automatically become mute. If a channel in a disconnected group is activated, the system will automatically disconnect the other groups as well as the other channel in the active group. VP-460 - The OSD Menu... -
Page 29: The Process Menu
Set (from Level 1 to Level 5) Select the motion detection sensitivity for filtering of interlaced images. Set a high value for video where there is generally a large amount of motion, or a low value for little motion VP-460 - The OSD Menu... -
Page 30: The Picture Menu
Set the image color (back to its default values) and position per window (centers it correctly on the screen) See Auto Positioning menu item in Section 5.2 Note that Auto Adjust is disabled when in the Freeze state VP-460 - The OSD Menu... -
Page 31: The Enhance Menu
Block NR – as the level is set higher, the block noise disappears and the image appears softer Input noise reduction (except for Temporal NR) is enabled for interlaced video processing only and is inactive in the progressive scan. The Scale Menu Figure 20: Scale Menu VP-460 - The OSD Menu... - Page 32 Lets you “move” the zoom area (same as scanning an area with a magnifying glass) Zoom Set the zoom Zooms into the center of the display Note that any change in the display mode, the input source and/or the output resolution will cancel the zoom setting. VP-460 - The OSD Menu...
- Page 33 By setting the output resolution to Native, the VP-460 is triggered to read the EDID of the main display and change the output resolution value according to the native resolution of the display.
-
Page 34: The Miscellaneous Menu
EDID of that display and updates the output resolution accordingly • If the VP-460 cannot find the EDID of the Master Connection output, it cannot obtain the Native resolution, and the output resolution is set to 720p @60 (default) - Page 35 When using the VP-460 for audio only, we recommend that you turn this feature off Luma Keying – to set the transparency level of the PIP window (see Section 5.8.1...
- Page 36 When the luma keying feature is On, any change in the setup (either by the user or by resetting due to a setup change) may cause the screen to flicker once. The luma keying will recover automatically after resetting. VP-460 - The OSD Menu...
-
Page 37: The Display Modes
OSD menu. 6.1.1 Activating the Single window Mode Set the VP-460 to the single window display mode in any of the following ways: • Press and hold (for 3 seconds) the illuminated front panel PIP button until the button no longer illuminates •... - Page 38 (main window and PiP window) to any size. You can superimpose any input type over any or the same input type except for the limit below: Note that you cannot superimpose PC over CV or CV over PC. VP-460 - The Display Modes...
- Page 39 6. You can press the MENU button several times to exit the menu and save changes, or modify PiP window parameters via the other menu items. To return to Main Window control, repeat the procedure above but select Main Window in the Window Control submenu. VP-460 - The Display Modes...
-
Page 40: Figure 22: Pc 1 Superimposed Over Pc 1
6.2.3 Selecting the PIP Source To select a PiP source you have to set the VP-460 to any of the PiP display mode configurations and then select the desired input. 6.2.3.1 Selecting the PiP Source via the Front Panel Buttons Press and hold the PIP front panel button while pressing the input button of the required PiP source. - Page 41 7. Scroll to the Input menu and press ENTER. 8. Select Input Source and press ENTER. 9. Choose the input for the PiP window. 10. Press the MENU a few times until you exit the OSD menu (changes are saved upon exit). VP-460 - The Display Modes...
-
Page 42: Controlling The Vp-460
• The infrared remote control transmitter (see Section 7.3 Controlling via the Front Panel Buttons The VP-460 includes the following front panel buttons: • Input selector buttons for selecting the required input: PC, CV and SDI (see Section 7.1.1 •... -
Page 43: Controlling Via The Osd Menu
To connect to the VP-460 via RS-232, Connect the RS-232 9-pin D-sub rear panel port on the VP-460 unit via a 9-wire straight cable (only pin 2 to pin 2, pin 3 to pin 3, and pin 5 to pin 5 need to be connected) to the RS-232 9-pin D-sub port on your PC... -
Page 44: Controlling Via The Infrared Remote Control Transmitter
This IR remote control transmitter is compatible with various Kramer machines, therefore not all its buttons are applicable to the VP-460. The table below defines buttons that are relevant to the VP-460; the functionality of the other buttons is marked N/A. -
Page 45: Flash Memory Upgrade
Flash Memory Upgrade You can upgrade the VP-460 via the Kramer K-UPLOAD software. Three types of upgrade files are available for upgrade: video core, peripherals and audio/graphics. The latest firmware version, the Flash Memory Upgrade user guide, as well as the latest version of K-UPLOAD and installation instructions can be downloaded from the Kramer Web site at www.kramerelectronics.com... -
Page 46: Technical Specifications
0.9kg (1.98lbs) approx. ACCESSORIES: Power adapter (5.2V / 4A), IR remote control OPTIONS: RK-1 rack adapter Specifications are subject to change without notice For the most updated resolution list, go to our Web site at http://www.kramerelectronics.com VP-460 - Technical Specifications... -
Page 47: Default Communication Parameters
1366x768_60 1920x1200_60RB 800x600_60 1024x768_85 1280x960_85 1440x900_60 1080_P50 800x600_72 1152x864_75 1280x768_60 1400x1050_60 1080_P60 9.2.2 SDI Input Resolutions SDI Input Resolution NTSC 720_P60 1080_P24 1080_P50 1080_I50 1080_P25 1080_P60 720_P50 1080_I60 1080_P30 9.2.3 CV Input Resolutions NTSC and PAL VP-460 - Technical Specifications... -
Page 48: Output Resolutions
2K60 1280x768@50 1600x900@60 720p60 1280x768@60 1600x1200@50 1080p23.976 1280x800@60 1600x1200@60 1080p24 9.3.1 SDI Output Resolutions Technical Specifications of the SDI Output Signal Resolution Resolution 480i60 1080p25 576i50 1080p29.97 720p50 1080p30 720p59.94 1080p50 720p60 1080p59.94 1080p23.976 1080p60 1080p24 VP-460 - Technical Specifications... -
Page 49: The Vp-460 Rs-232 Communication Protocol
The VP-460 RS-232 Communication Protocol The Kramer Protocol lets you control the VP-460 from any standard terminal ® software (for example, the Windows HyperTerminal Application). This section describes the: • Protocol 3000 common commands, see Section 10.1 • Audio video control commands (via protocol 3000), see Section 10.2... - Page 50 MODEL? MODEL MACHINE_MODEL Read device serial SN SERIAL_NUMBER number Read device VERSION? VERSION MAJOR .MINOR firmware version .BUILD .REVISION Read device BUILD-DATE? BUILD-DATE YYYY/MM/DD build date HH:MM:SS Read device PROT-VER? PROT-VER 3000:MAJOR protocol VP-460 - The VP-460 RS-232 Communication Protocol...
-
Page 51: Audio/Video Communication Protocol
Using the Communication Protocol with Protocol 3000 (the “Y” Command) Set Command: Type in: “Y Control_Type=0,Function,Param” Reply: “~id=01Y Control_Type=0,Function,Param OK” Set command example, set window control (721) to PiP: Send: “#y 0,721,1” Reply: “~01@Y 0,721,1 OK” VP-460 - The VP-460 RS-232 Communication Protocol... - Page 52 In case the window is inactive -1 will be returned Input Settings H Image Shift 20:790 Volatile Parameter V Image Shift 4:240 Auto Positioning Not applicable to HD/SD video types Normal Scan Wide Scan VP-460 - The VP-460 RS-232 Communication Protocol...
- Page 53 Group C None 0 (read only) Activate CH1 Activate CH2 Group D None 0 (read only) Activate CH1 Activate CH2 Process Deinterlacing Method Line Doubler Volatile parameter unavailable in Motion Adaptive progressive scan VP-460 - The VP-460 RS-232 Communication Protocol...
- Page 54 Mode5: In-frame 12:10 conversion Mode6: Intra-frame 12:10 conversion Auto Adjust Self-clearing Enhance H Sharpness -10:10 V Sharpness -10:10 Noise Mosquito NR unavailable in progressive scan Reduction Combing NR Temporal NR Block NR unavailable in progressive scan VP-460 - The VP-460 RS-232 Communication Protocol...
- Page 55 1024x768@50 1024x768@60 1024x768@75 1280x768@50 1280x768@60 1280x800@60 1280x1024@50 1280x1024@60 1280x1024@75 1360x768@60 1366x768@50 1366x768@60 1400x1050@50 1400x1050@60 1600x900@60 1600x1200@50 1600x1200@60 1680x1050@60 1920x1200@60 480i60 480p60 576i50 576p50 720p50 720p59.94 720p60 1080p23.976 1080p24 1080p25 1080p29.97 1080p30 1080p50 VP-460 - The VP-460 RS-232 Communication Protocol...
- Page 56 N443 NTSC_4 In the protocol – SECAM Get command returns the Input video format only PALNC NTSC_8 525p60 625p50 720p60 720p50 720p24 720p25 720p30 1080i60 1080i50 1080i100 1080p60 1080p50 1080p30 1080p23_976 1080p24 VP-460 - The VP-460 RS-232 Communication Protocol...
- Page 57 Main Win When in the single window mode, only PiP Win Main Win is valid H Position 0:2047 The value range is dynamic, FW V Position 0:2047 prevents exceeding of boundaries Transparency Transparency 0.1:1.6 VP-460 - The VP-460 RS-232 Communication Protocol...
- Page 58 Keying the PiP window Pause Freeze Blank Mute Disable Outputs Test Pattern Slide Bar Non-HDCP content sinusoid sound Color Bar HDCP content sinusoid sound Factory Reset Special OSD MENU screen, follow OSD instructions. Self-clearing. VP-460 - The VP-460 RS-232 Communication Protocol...
-
Page 59: Keystroke Codes
The following table defines the keystroke function codes: Keystroke Keystroke Keystroke Button Button Button Code Code Code MENU FREEZE CH2_SDI ENTER LOCK MUTE MINUS CH1_CV1 POWER PLUS CH1_VGA1 LEFT RESET CH1_SDI RIGHT CH2_CV1 DUMMY BLANK CH2_VGA1 VP-460 - The VP-460 RS-232 Communication Protocol... - Page 61 For the latest information on our products and a list of Kramer distributors, visit our Web site where updates to this user manual may be found. We welcome your questions, comments, and feedback. Web site: www.kramerelectronics.com E-mail: info@kramerel.com SAFETY WARNING...
Need help?
Do you have a question about the VP-460 and is the answer not in the manual?
Questions and answers