Sign In
Upload
Download
Table of Contents
Contents
Add to my manuals
Delete from my manuals
Share
URL of this page:
HTML Link:
Bookmark this page
Add
Manual will be automatically added to "My Manuals"
Print this page
×
Bookmark added
×
Added to my manuals
Manuals
Brands
N-Tron Manuals
Switch
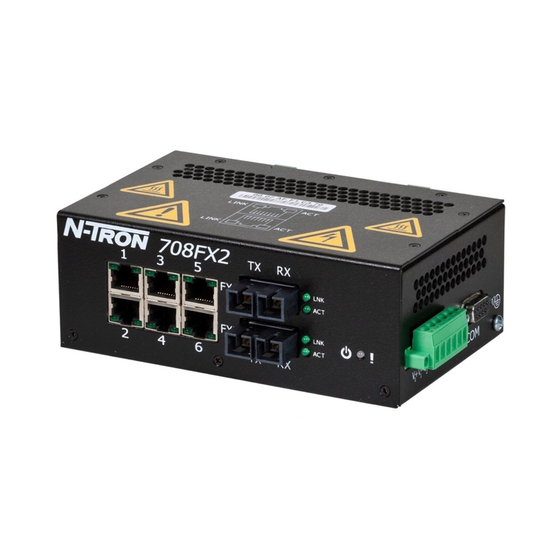
708TX
User manual & installation manual
N-Tron 708TX User Manual & Installation Manual
700 series managed industrial ethernet switch
Hide thumbs
Also See for 708TX
:
User manual & installation manual
(101 pages)
1
Table Of Contents
2
3
4
5
6
7
8
9
10
11
12
13
14
15
16
17
18
19
20
21
22
23
24
25
26
27
28
29
30
31
32
33
34
35
36
37
38
39
40
41
42
43
44
45
46
47
48
49
50
51
52
53
54
55
56
57
58
59
60
61
62
63
64
65
66
67
68
69
70
71
72
73
74
75
76
77
78
79
80
81
82
83
84
85
86
87
88
89
90
91
92
93
94
95
96
97
98
99
100
101
102
103
104
105
106
107
108
109
110
111
112
113
114
115
116
117
118
119
120
121
122
123
124
125
126
127
128
129
130
131
132
133
134
135
136
137
138
139
140
141
142
143
144
145
146
147
148
149
150
151
152
153
154
page
of
154
Go
/
154
Contents
Table of Contents
Bookmarks
Table of Contents
User Manual
Table of Contents
708TX, 708FX2, 708FXE2, 716TX, 716FX2, and 716FXE2 Industrial Ethernet Switch Installation Guide
Installation
Connecting the Unit
Overview of Advanced Features
Mode of Operation
Port Mirroring
Port Trunking
Quality of Service (Qos)
Virtual LAN
Rapid Spanning Tree Protocol
SNMP Traps
IGMP Snooping
N-Ring
N-Link
Cip
Dhcp
DHCP Client
DHCP Relay Agent
DHCP Server
Lldp
Port Security-MAC Address Based
Web Software Configuration
Web Management
Web Management - Home
Administration - System
Administration - SNMP
Administration - Fault
DHCP - Server - Setup Profiles
DHCP - Server - Setup IP Maps
DHCP - Server - View Bindings
DHCP - Relay & Local IP - Setup
LLDP - Configuration
LLDP - Ports
LLDP - Status
LLDP - Statistics
Ports - Configuration
Ports - MAC Security - Learning
Ports - MAC Security - Authorization List
Ports - MAC Security - Intruder Log
Ports - Mirroring
Ports - Trunking
Ports - QOS
Statistics - Port Statistics
Statistics - Port Utilization
VLAN - Configuration
Bridging - Aging Time
Bridging - Unicast Addresses
Bridging - Multicast Addresses
Bridging - Show MAC by Port
RSTP - Configuration
IGMP - Configuration
IGMP - Show Group and Show Router
IGMP - Rfilter
N-View - Configuration
N-View - Ports
N-Ring - Configuration
N-Ring - Advanced Configuration
N-Ring - Status
N-Link - Configuration
N-Link - Status
CIP - Configuration
CIP - Status
Firmware/Config - TFTP
Support - Web Site and E-Mail
BPCL - Broadcast Packet Count Limit Configuration
User Management - Adding Users
User Management - Removing Users
Logicalview
Configuration - Save or Reset
Help - Overview
Help - Administration
Help - DHCP
Help - LLDP
Help - Ports
Help - Statistics
Help - VLAN
Help - Bridging
Help - RSTP
Help - IGMP
Help - N-View
Help - N-Ring
Help - N-Link
Help - CIP
Help - BPCL
Help - User Management
CLI Commands
(Help)
Logout
Show, Add, or Delete ARL Entries
Show or Set CIP Configuration
Save or Reset the Configuration Settings
Show or Set IGMP Configuration
Show or Set Mirror Configuration
Show or Set N-Ring Configuration
Show or Set N-View Configuration
Ping a Host
Show or Set Port Configuration
Reset the Switch
Show or Set SNMP Configuration
Show or Clear the Last System Error
Show System Information
Set or Show the System IP Configuration
Show or Set System Configuration
VLAN Addition and Deletion Example
VLAN Configuration Examples
Example 1 - Basic Understanding of Port-Based Vlans
Example 2 - Basic Understanding of Tagged Vlans (Admit - Tagged Only)
Example 3 - Basic Understanding of Tagged Vlans (Admit - All)
Example 4 - Basic Understanding of Hybrid Vlans
Example 5 - Basic Understanding of Overlapping Vlans
Example 6 - Basic Understanding of Vlans with Multicast Filtering
Key Specification - 708Tx, 708Fx2, 708Fxe2
Key Specification - 716Tx, 716Fx2, 716Fxe2
Regulatory Approvals
N-TRON Limited Warranty
Advertisement
Quick Links
1
User Manual
2
708Tx, 708Fx2, 708Fxe2, 716Tx, 716Fx2, and 716Fxe2 Industrial Ethernet Switch Installation Guide
3
Installation
4
Connecting the Unit
5
Web Software Configuration
Download this manual
700 Series
Managed Industrial
Ethernet Switch
User Manual &
Installation
Guide
Page 1 of 154
(Revised 2013-06-21)
Table of
Contents
Previous
Page
Next
Page
1
2
3
4
5
Advertisement
Table of Contents
Need help?
Do you have a question about the 708TX and is the answer not in the manual?
Ask a question
Questions and answers
Related Manuals for N-Tron 708TX
Network Router N-Tron 700 Series User Manual & Installation Manual
700 series managed industrial ethernet switch (101 pages)
Switch N-Tron 702-W Features
N-tron hub/switch product manual (2 pages)
Switch N-Tron 708FX2 Specifications
Industrial ethernet switch (2 pages)
Switch N-Tron 7014TX User Manual & Installation Manual
7014 series industrial gigabit ethernet switch (152 pages)
Switch N-Tron 708M12 User Manual & Installation Manual
Managed industrial ethernet switch (169 pages)
Switch N-Tron 716M12 User Manual & Installation Manual
Managed industrial ethernet switch (169 pages)
Switch N-Tron 7010TX User Manual & Installation Manual
Managed industrial ethernet switch (157 pages)
Switch N-Tron 708 Series Technical Instructions
Managed industrial ethernet switch dynamic host configuration protocol (33 pages)
Switch N-Tron 7012FX2 User Manual & Installation Manual
Managed industrial ethernet switch (170 pages)
Switch N-Tron 709FX User Manual & Installation Manual
Managed industrial ethernet switch (196 pages)
Switch N-Tron 7018TX User Manual & Installation Manual
7018 series managed industrial ethernet switch (157 pages)
Switch N-Tron 7018FX2 User Manual & Installation Manual
7018 series managed industrial ethernet switch (157 pages)
Switch N-Tron 708FXE2 User Manual & Installation Manual
700 series managed industrial ethernet switch (154 pages)
Switch N-Tron 7014 Series Firmware Upgrade Procedure
(5 pages)
Switch N-Tron 7026 Series User Manual & Installation Manual
Managed industrial ethernet switch (169 pages)
Switch N-Tron 7026 Series Installation Manual
Industrial ethernet switch (17 pages)
This manual is also suitable for:
708fx2
708fxe2
716tx
716fx2
716fxe2
700 series
...
Show all
708fx2-st
Table of Contents
Save PDF
Print
Rename the bookmark
Delete bookmark?
Delete from my manuals?
Login
Sign In
OR
Sign in with Facebook
Sign in with Google
Upload manual
Upload from disk
Upload from URL


Need help?
Do you have a question about the 708TX and is the answer not in the manual?
Questions and answers