Advertisement
Table of Contents
- 1 Important Safety Information
- 2 General Power Tool Safety Warnings
- 3 Double Insulated Tools: Tools with Two Prong Plugs
- 4 Extension Cords
- 5 Specifications
- 6 Assembly/Mounting/Functions
- 7 Instructions for Putting into Use
- 8 Operating Instructions
- 9 Maintenance and Servicing
- 10 Cleaning/Lubrication
- 11 Troubleshooting
- 12 Parts List
- 13 Please Read the Following Carefully
- 14 Assembly Diagram
- Download this manual
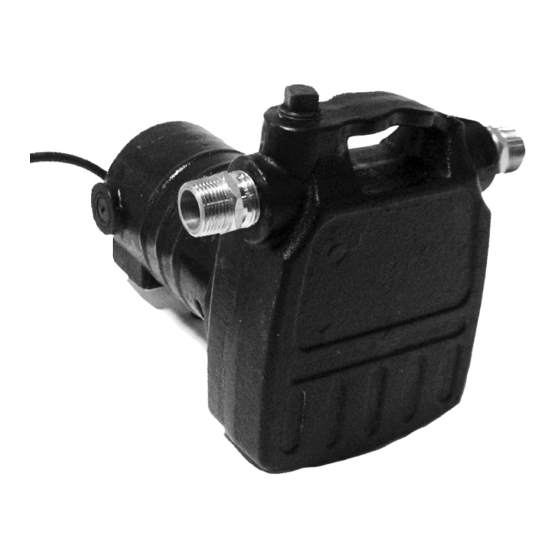
Portable Utility PUmP
Set UP and oPerating inStrUctionS
distributed exclusively by Harbor Freight tools
Visit our website at: http://www.harborfreight.com
read this material before using this product.
Failure to do so can result in serious injury.
SaVe tHiS manUal.
©
Copyright
2008 by Harbor Freight Tools
contained herein may be reproduced in any shape or form without the express written consent of
Harbor Freight Tools. Diagrams within this manual may not be drawn proportionally. Due to continuing
improvements, actual product may differ slightly from the product described herein. Tools required for
assembly and service may not be included.
For technical questions or replacement parts, please call 1-800-444-3353.
3491 Mission Oaks Blvd., Camarillo, CA 93011
®
. All rights reserved. No portion of this manual or any artwork
65836
®
.
Advertisement
Table of Contents

Summary of Contents for Pacific hydrostar Pacific Hydrostar Portable Utility Pump 65836
- Page 1 Harbor Freight Tools. Diagrams within this manual may not be drawn proportionally. Due to continuing improvements, actual product may differ slightly from the product described herein. Tools required for assembly and service may not be included.
-
Page 2: Important Safety Information
SaVe tHiS manUal notice is used to address practices Keep this manual for the safety warn- not related to personal injury. ings and precautions, assembly, operat- caUtion, without ing, inspection, maintenance and cleaning the safety alert procedures. Write the product’s serial symbol, is used to address number in the back of the manual near the practices not related to... - Page 3 plugs with grounded power tools. Safety equipment such as dust mask, Unmodified plugs and matching out- non-skid safety shoes, hard hat, or lets will reduce risk of electric shock. hearing protection used for appropri- ate conditions will reduce personal avoid body contact with grounded injuries.
- Page 4 These carry important safety tools. Such preventive safety mea- information. If unreadable or miss- sures reduce the risk of starting the ing, contact Harbor Freight Tools for a power tool accidentally. replacement. Store idle power tools out of the Avoid unintentional starting.
- Page 5 groUnding • Properly maintain and inspect to avoid electrical shock. to PreVent • Any power cord must be properly electric SHocK grounded. Ground Fault Circuit Inter- and deatH From rupter (GFCI) should also be imple- incorrect groUnding mented – it prevents sustained elec- Wire connection: trical shock.
-
Page 6: Double Insulated Tools: Tools With Two Prong Plugs
of electric shock. (See 3-Prong Plug Double insulated tools may be used and outlet.) in either of the 120 volt outlets shown in the preceding illustration. (See The grounding prong in the plug is outlets for 2-Prong Plug.) connected through the green wire in- side the cord to the grounding system extension cords in the tool. - Page 7 dition. Always replace a damaged extension cord or have it repaired by a qualified electrician before using it. Protect the extension cords from sharp objects, excessive heat, and damp or wet areas. recommended minimUm Wire gaUge For eXtenSion cordS* (120/240 Volt) eXtenSion cord namePlate lengtH...
-
Page 8: Specifications
If dard garden hose fitting will work. any parts are missing or broken, please call Harbor Freight Tools at the number Attach the Accessory Basket Filter shown on the cover of this manual as soon included with the Pump to the inlet as possible. - Page 9 tool Set Up Never operate this tool in explosive atmospheres. to PreVent SerioUS injUry general operating instructions From accidental oPeration: Attach inlet and outlet hoses (not turn the Power Switch of the included) to pump. Standard garden tool to its “oFF” position and hoses will work.
-
Page 10: Maintenance And Servicing
maintenance and Remove the brush cap on each side of the motor housing. SerVicing Remove the carbon brushes from Procedures not specifically the housing. Keep track of which explained in this manual orientation the old carbon brush- must be performed only by a es were in to prevent needless qualified technician. -
Page 11: Troubleshooting
troubleshooting Problem Possible causes likely Solutions Tool will not start No power at outlet. Check power at outlet. Cord not connected. Check that cord is plugged in. Worn out or damaged Carbon Replace Carbon Brushes. Brushes. Pump operates Pump is not primed. Prime pump, see instructions page 9. -
Page 12: Assembly Diagram
aSSembly diagram SKU 65836 For technical questions, please call 1-800-444-3353. Page 12...


