Oki ML1120 User Manual
Hide thumbs
Also See for ML1120:
- Technical reference manual (254 pages) ,
- User manual (108 pages) ,
- Installation manual (58 pages)
Table of Contents
Advertisement
Quick Links
Advertisement
Table of Contents

Subscribe to Our Youtube Channel
Related Manuals for Oki ML1120


Summary of Contents for Oki ML1120
- Page 1 ML1100 User’s Guide ML1120/ML1190...
-
Page 2: Ontents Preface
Every effort has been made to ensure that the information in this document is complete, accurate, and up-to-date. Oki Printing Solutions assumes no responsibility for the results of errors beyond its control. Oki Printing Solutions also cannot guarantee that changes in software and equipment made by other manufacturers and referred to in this guide will not affect the applicability of the information in it. -
Page 3: Table Of Contents
Control panel ......40 ML1120....... 40 ML1190. - Page 4 Specifications ......74 ML1120 ....... . . 74 ML1190 .
-
Page 5: Notes, Cautions And Warnings
A caution provides additional information which, if ignored, may result in equipment malfunction or damage. WARNING! A warning provides additional information which, if ignored, may result in a risk of personal injury. ML1120/ML1190 User’s Guide – Notes, cautions and warnings. > 5... -
Page 6: Introduction
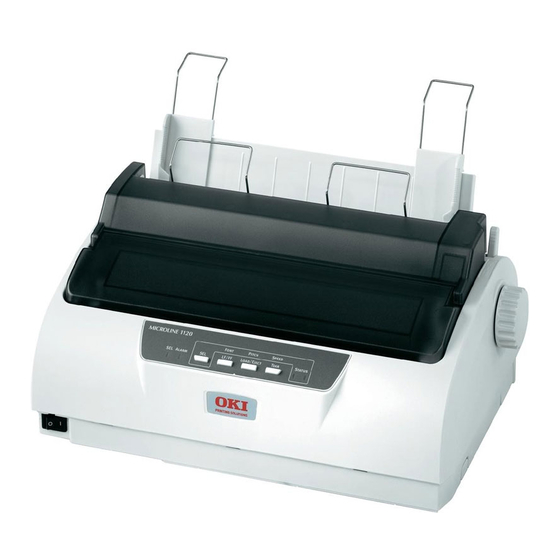
NTRODUCTION Congratulations on purchasing this Oki Printing Solutions printer! The ML1120 (9-pin) and ML1190 (24-pin) are designed to provide highly reliable letter quality printing and high resolution graphics for the desktop/office printing environment. Both models combine state-of-the-art serial impact dot matrix printing technology with advanced materials and superior construction to provide high performance and versatility in a desktop sized unit. -
Page 7: On-Line Usage
RINTING PAGES The whole manual, individual pages, or sections may be printed. The procedure is: From the toolbar, select File > Print (or press the Ctrl + P keys). ML1120/ML1190 User’s Guide – Introduction > 7... - Page 8 [All pages], (1), for the entire manual. [Current page], (2), for the page at which you are looking. [Pages from] and [to], (3), for the range of pages you specify by entering their page numbers. Click on OK. ML1120/ML1190 User’s Guide – Introduction > 8...
-
Page 9: Getting Started
The main parts of your printer are identified and briefly explained below. RONT VIEW Print Head: prints the characters on the paper. Paper Type Lever: set according to the type of paper used – cut sheet or continuous forms. ML1120/ML1190 User’s Guide – Getting started > 9... - Page 10 STATUS ALARM LF/FF LOAD/EJECT TEAR Power Switch: to turn the printer power ON/OFF. Ribbon Cartridge: holds the printer ribbon. Pull Up Roller Assembly: aids paper exit. Pull Up Guide: prevents paper skew. ML1120/ML1190 User’s Guide – Getting started > 10...
-
Page 11: Rear View
Pin Tractor: to load and feed continuous forms. Rear Cover. Serial connector: connect to serial interface cable. USB connector: connect to USB interface cable. Parallel connector: connect to parallel interface connector. ML1120/ML1190 User’s Guide – Getting started > 11... -
Page 12: Locating Your Printer
Platen Knob and the various paper feed paths. > Make sure a grounded power outlet is available nearby. OWERING ON YOUR PRINTER Ensure that your printer Power Switch is set to OFF. ML1120/ML1190 User’s Guide – Getting started > 12... -
Page 13: Producing A Test Print
ON after turning it OFF. A shorter time interval between turning ON/OFF operations may cause printer power failure. Do not turn the printer OFF while it is printing as this may result in damage to the print head. ML1120/ML1190 User’s Guide – Getting started > 13... - Page 14 NOTE If you want to stop the test print for any reason, press the SEL button followed by the LOAD/EJECT button to eject the paper. Turn the printer Power Switch to OFF. ML1120/ML1190 User’s Guide – Getting started > 14...
-
Page 15: Connecting To A Computer
NTERCONNECTION Ensure that both printer and computer are turned OFF. Connect the required interface cable, serial (1), USB (2), or parallel (3), to the printer and then to the computer. ML1120/ML1190 User’s Guide – Connecting to a computer > 15... -
Page 16: Installing The Printer Driver
Use File > Properties to show the Properties window. On the General tab, click the Print Test Page button. Ensure that a test page has printed, verifying your printer – computer setup. ML1120/ML1190 User’s Guide – Connecting to a computer > 16... -
Page 17: Printing From A Computer
These driver windows have been designed to be easy to use and intuitive while supplementary on-line help is available by clicking each window Help button. ML1120/ML1190 User’s Guide – Printing from a computer > 17... -
Page 18: Paper Handling
“Removing continuous forms” on page Ensure that the Pin Tractor covers are closed to avoid the possibility of paper jams. Ensure the Paper Type Lever (1) is set to Cut Sheet. ML1120/ML1190 User’s Guide – Paper handling > 18... - Page 19 If the Paper Thickness Lever setting does not match the paper being used, paper feeding and printing may not work properly. With the printing side facing downwards and the left edge aligned with the Paper Guide (1), carefully insert the ML1120/ML1190 User’s Guide – Paper handling > 19...
-
Page 20: Ejecting Cut Sheet Paper
Press the SEL button to put the printer off-line. Press the LOAD/EJECT button and the paper is ejected to the Paper Tray. NOTE Paper longer than A4 length (297 mm) may overlap and possibly fall off the Paper Tray. ML1120/ML1190 User’s Guide – Paper handling > 20... -
Page 21: Loading Continuous Forms
Ensure that the printer is turned ON. NOTE If there is a cut sheet in the printer, eject it as described in “Ejecting cut sheet paper” on page Set the Paper Type Lever to Continuous Forms ML1120/ML1190 User’s Guide – Paper handling > 21... - Page 22 Remove the Input Tray and Rear Cover together by gripping the Input Tray at both sides and pulling it up and away from the printer. ML1120/ML1190 User’s Guide – Paper handling > 22...
- Page 23 (4) Pin Tractors. Open the left and right Pin Tractor covers and feed the continuous forms in the direction of the arrows, locating the sprocket holes in the forms onto the sprocket pins. ML1120/ML1190 User’s Guide – Paper handling > 23...
- Page 24 Tractors. Press the locking lever down to lock the right Pin Tractor in the desired position. Replace the Input Tray and Rear Cover by fitting the Rear Cover into the grooves at the back of the printer and ML1120/ML1190 User’s Guide – Paper handling > 24...
-
Page 25: Feeding Continuous Forms (Bottom Feed)
If there is a cut sheet in the printer, eject it as described in “Ejecting cut sheet paper” on page Moving tractor assembly Ensure that the printer is switched OFF. Disconnect the power cord. ML1120/ML1190 User’s Guide – Paper handling > 25... - Page 26 Remove the Access Cover. WARNING! Be careful as the printhead may be hot after operation. Allow it to cool before touching it. Move the printhead assembly to the left. ML1120/ML1190 User’s Guide – Paper handling > 26...
- Page 27 Pull Up Roller Assembly. The Pull Up Guide may become detached. If necessary, replace the Pull Up Guide. Turn the printer, so that the back of the printer is facing you. ML1120/ML1190 User’s Guide – Paper handling > 27...
- Page 28 Remove the tractor assembly. Squeeze the handles to release the clamps on both sides. Continue to squeeze and rotate and lift the assembly out of the printer. ML1120/ML1190 User’s Guide – Paper handling > 28...
- Page 29 Locate the arms over the pivot points and rotate the unit backwards until the clamps close over the back pins. Turn the printer so that the front of the printer is facing you. ML1120/ML1190 User’s Guide – Paper handling > 29...
- Page 30 Replace the Input Tray and Rear Cover by fitting the Rear Cover into the grooves at the back of the printer and pulling gently forward until the Input Tray clips into place. Replace the Access Cover. ML1120/ML1190 User’s Guide – Paper handling > 30...
- Page 31 Loading continuous forms (bottom feed) Ensure the printer is turned off. Remove the Access Cover. Set the Paper Type Lever to Continuous Forms ML1120/ML1190 User’s Guide – Paper handling > 31...
- Page 32 Tractor in the desired position. Lift the locking lever (1) of the right Pin Tractor and slide the Pin Tractor to the required position (2) to accommodate the width of the continuous forms to be ML1120/ML1190 User’s Guide – Paper handling > 32...
- Page 33 Open the left and right Pin Tractor covers (1) and feed the continuous forms (2) in the direction of the arrow, locating the sprocket holes in the forms onto the sprocket pins. ML1120/ML1190 User’s Guide – Paper handling > 33...
- Page 34 Pin Tractors. Press the locking lever down (2) to lock the right Pin Tractor in the desired position. Replace the Access Cover. ML1120/ML1190 User’s Guide – Paper handling > 34...
-
Page 35: Tearing Off Continuous Forms
If the tear-off perforations are not aligned with the paper cutter, align them as follows: Remove the Access Cover of your printer. With the SEL indicator illuminated, press and hold the TEAR button to move the tear-off perforations to the paper cutter. ML1120/ML1190 User’s Guide – Paper handling > 35... -
Page 36: Removing Continuous Forms
Pin Tractors. NOTE If sprocket holes of the last page of the forms disengage from the sprocket pins, do not attempt to eject the paper to avoid the possibility of a paper jam. ML1120/ML1190 User’s Guide – Paper handling > 36... - Page 37 Lift the Pin Tractor covers and remove the forms. Close the Pin Tractor covers. Replace the Input Tray and Rear Cover by fitting the Rear Cover into the grooves at the back of the printer and ML1120/ML1190 User’s Guide – Paper handling > 37...
-
Page 38: Setting The Paper Thickness Lever
Cut sheet paper See below 52 – 80 gsm 81 – 127 gsm Envelope Carbon paper or Pressure- See below sensitive paper (40 gsm) 2 part 3 part 4 part 5 part 6 part ML1120/ML1190 User’s Guide – Paper handling > 38... - Page 39 Printing can be carried out with the lever position set to 4 for paper thickness up to 0.32 mm. When lever positions 5-6 are selected, printing quality for carbon paper may decline resulting in illegible characters for example. ML1120/ML1190 User’s Guide – Paper handling > 39...
-
Page 40: Operating Instructions
PERATING INSTRUCTIONS ONTROL PANEL ML1120 FONT PITCH SPEED STATUS ALARM LF/FF LOAD/EJECT TEAR The status/alarm indicators and button switches on the control panel allow you to check printer status and control the printer. ML1120/ML1190 User’s Guide – Operating instructions > 40... - Page 41 ON again, contact your dealer. High temperature alarm status STATUS Menu printing mode Normal printing mode Flashing High temperature indication Quiet print mode Normal speed printing mode Flashing High multipart printing mode ML1120/ML1190 User’s Guide – Operating instructions > 41...
-
Page 42: Ml1190
ML1190 FONT PITCH SPEED STATUS ALARM LF/FF LOAD/EJECT TEAR The status/alarm indicators and button switches on the control panel allow you to check printer status and control the printer. ML1120/ML1190 User’s Guide – Operating instructions > 42... - Page 43 Normal printing mode Flashing High temperature indication Quiet print mode Normal speed printing mode Flashing High multipart printing mode Printer power is ON Printer power is OFF Flashing Low power consumption mode ML1120/ML1190 User’s Guide – Operating instructions > 43...
-
Page 44: Buttons
Cut sheet manual mode Off-line Ineffective SEL+POWER ON Enters menu mode. Switch LOAD/EJECT+SEL On-line and off-line Microfeed down 0.366 mm (1/144 in) step. LOAD/EJECT+LF/ On-line and off-line Microfeed up 0.366 mm (1/ 144 in) step. ML1120/ML1190 User’s Guide – Operating instructions > 44... -
Page 45: Setting Menu Values
While holding down the SEL button set the printer Power Switch to ON. Place the cut sheet on the Paper Tray. The printer prints the firmware details. Press the TEAR button to print out the current menu settings. ML1120/ML1190 User’s Guide – Operating instructions > 45... -
Page 46: Menu Setting
To exit menu settings confirmation, save the current settings and eject the paper, press and hold TEAR, then press LOAD/EJECT and then LF/FF. NOTE Switching the printer OFF does not save the new settings. ML1120/ML1190 User’s Guide – Operating instructions > 46... -
Page 47: Menu Items And Settings
10 CPI, 12 CPI, 15 pitch. CPI, 17.1 CPI, 20 Proportional Select whether to Spacing use proportional spacing or not. Style Select either font Normal, Italics style. Size Select the character Single, Double scale size. ML1120/ML1190 User’s Guide – Operating instructions > 47... - Page 48 Swiss I, Swiss II, Publisher Zero Character Select either print Unslashed font pattern to Slashed receive a zero character located at 30H in ANK code or at AA30H in a single-byte code. ML1120/ML1190 User’s Guide – Operating instructions > 48...
- Page 49 Cyrillic Latvian Roman-8 Icelandic-861 Multilingual 858 ISO 8859-15 Greek_737 Asmo449+ Asom708 Arabic864 Windows Arabic Slashed Letter Set whether to convert slashed 0 located at 9BH and 9DH in USA code page or not. ML1120/ML1190 User’s Guide – Operating instructions > 49...
- Page 50 (For continuous form mode only.) Cut position Select an -20 – -1 adjust adjustment value for the position to +20 – +1 cut the end of a continuous form. (In 1/90 in increments) ML1120/ML1190 User’s Guide – Operating instructions > 50...
- Page 51 25.4 mm (1 in) 27.52 mm (13/12 in) Use top of form Continuous Select an paper LF adjust adjustment value for the line feed position. Centring for Find centre position Valid paper top Invalid (continuous) ML1120/ML1190 User’s Guide – Operating instructions > 51...
- Page 52 127.0 mm(5 in) 76.2 mm(3 in) 82.6 mm(3.25 in) 84.7 mm(10/3 in) 93.1 mm(11/3 in) 101.6 mm(4 in) 139.7 mm(5.5 in) 152.4 mm(6 in) 177.8 mm(7 in) 203.2 mm(8 in) 215.9 mm(8.5 in) ML1120/ML1190 User’s Guide – Operating instructions > 52...
- Page 53 23.28 mm (11/12 in) 25.4 mm (1 in) 27.52 mm (13/12 in) Use top of form Cut sheet LF Adjust a line feed -14 – -1 adjustment amount in cut-paper mode. +14 – +1 ML1120/ML1190 User’s Guide – Operating instructions > 53...
- Page 54 Select full or limited Full operation function operation. Limited operation Reset inhibit Set whether to enable or disable an initial command. Print suppress Set whether to effective enable or disable a print suppress setup command. ML1120/ML1190 User’s Guide – Operating instructions > 54...
-
Page 55: Initialising Menu Settings
The values adjusted by the Adjustment menus are not initialised by the following procedure. Set the Power Switch to OFF. Press and hold down the SEL and LF/FF buttons together and then set the Power Switch to ON. ML1120/ML1190 User’s Guide – Operating instructions > 55... -
Page 56: Adjusting Tof Position
LOAD/EJECT button and then press the LF/ FF button. NOTE If the specified correction range is more than +- 0.366 mm (1/144 in), the QUIET indicator flashes and the paper cannot be moved. ML1120/ML1190 User’s Guide – Operating instructions > 56... -
Page 57: Printer Style (Impact Mode) Settings
IMPACT MODE SETTINGS The impact mode settings available are Normal, Quiet and Quick (ML1120 only) and the required mode can be set by using the Set-up>Printer Style menu. When switched ON, the printer enters the impact mode selected in this menu. -
Page 58: Troubleshooting
Set the Paper Thickness lever to the Replace Ribbon position (position 6). WARNING! The Print Head may be hot after printing. Allow it to cool before touching it. Remove the ribbon cartridge. See “Changing a ribbon cartridge” on page 70. ML1120/ML1190 User’s Guide – Troubleshooting > 58... - Page 59 Paper Tray and turn the Platen Knob to pass the folded sheet through and push out the paper fragment. ML1120/ML1190 User’s Guide – Troubleshooting > 59...
-
Page 60: Continuous Forms Jammed In Printer
Set the Power Switch to OFF. Tear off any unprinted continuous forms. Remove the Input Tray and Rear Cover together by gripping the Input Tray at both sides and pulling it up and away from the printer. ML1120/ML1190 User’s Guide – Troubleshooting > 60... - Page 61 Rear Cover by fitting the Rear Cover into the grooves at the back of the printer and pushing gently forward until the Input Tray clips into place. Set the Power Switch to ON. ML1120/ML1190 User’s Guide – Troubleshooting > 61...
-
Page 62: Responding To Alarm Conditions
The power cable is not Check the power cable properly connected. is properly connected at both power outlet and printer. Power outlet problem or Plug another appliance power outage. into this outlet to check if it works. ML1120/ML1190 User’s Guide – Troubleshooting > 62... - Page 63 PE warning The print carriage does There is contamination Clean any paper dust not operate. on the carriage shaft. and contamination from the carriage with a dry cloth. ML1120/ML1190 User’s Guide – Troubleshooting > 63...
- Page 64 The input application Print in hex dump mode control signal is not and verify the data correct. content. Make corrections in the application. The interface cable is Reconnect the cable not properly connected. correctly. ML1120/ML1190 User’s Guide – Troubleshooting > 64...
- Page 65 When continuous forms Tear-off perforation Cancel tear-off are used, several blank spacing is selected. perforation spacing. lines appear in the printout. ML1120/ML1190 User’s Guide – Troubleshooting > 65...
- Page 66 Paper with wrinkles, Change paper. folds or other defects. Paper not specified for Use paper types the printer. specified for the printer. Unable to eject. The LF/FF button is Press the LOAD/EJECT pressed. button. ML1120/ML1190 User’s Guide – Troubleshooting > 66...
- Page 67 Set the Paper Type lever feed. sheet mode. to continuous forms mode. Paper feed operations The cut sheet is not Eject the cut sheet. for both cut sheets and ejected. continuous forms are actuated. ML1120/ML1190 User’s Guide – Troubleshooting > 67...
-
Page 68: Cleaning Your Printer
Do not use any flammable solvents for cleaning the printer to avoid any risk of fire or electric shock. Clean the interior of the printer every 6 months or 300 hours of operation, whichever comes first. ML1120/ML1190 User’s Guide – Cleaning your printer > 68... - Page 69 Do not clean any interior working parts with the suction nozzle to avoid possible damage to the printer. ML1120/ML1190 User’s Guide – Cleaning your printer > 69...
-
Page 70: Consumables And Accessories
Do not change the ribbon cartridge with the Power Switch set to ON. Set the Power Switch to OFF. Set the Paper Thickness lever to Replace Ribbon (position Remove the Access Cover. ML1120/ML1190 User’s Guide – Consumables and accessories > 70... - Page 71 Dispose of the cartridge in accordance with your local guidelines. Remove the new ribbon cartridge from its wrapping and note the position of the Ribbon Guide (1), blue Knob (2) and Pin (3). ML1120/ML1190 User’s Guide – Consumables and accessories > 71...
- Page 72 Do not turn the knob clockwise as the ribbon might jam. Make sure that the ribbon is not twisted or damaged when it goes through the gap between the Print Head and the ribbon guide. ML1120/ML1190 User’s Guide – Consumables and accessories > 72...
-
Page 73: Consumable Order Information
(See “Setting the Paper Thickness lever” on page 38.) Set the printer Power Switch to ON. ONSUMABLE ORDER INFORMATION ITEM LIFE ORDER NO. Ribbon cartridge (Black) 4 million characters 43571082 (EU) 43571803 (Non- EU) ML1120/ML1190 User’s Guide – Consumables and accessories > 73... -
Page 74: Specifications
46 mm long. It can, however, print till about 6 mm from the paper bottom (measured at the centre of the characters). (The print accuracy of the last page cannot be guaranteed.) ML1120/ML1190 User’s Guide – Specifications > 74... - Page 75 When the printer is stored, it should be in its original packaging, with no moisture formation. Standard usage Average power on time 200 h/month Average printing time 50 h/month (text density on page: 35%) ML1120/ML1190 User’s Guide – Specifications > 75...
- Page 76 ITEM SPECIFICATION Noise level The acoustic noise of this product is less than 70 dB (A) as measured in accordance with EN ISO 7779. ML1120/ML1190 User’s Guide – Specifications > 76...
-
Page 77: Ml1190
46 mm long. It can, however, print till about 6 mm from the paper bottom (measured at the centre of the characters). (The print accuracy of the last page cannot be guaranteed.) ML1120/ML1190 User’s Guide – Specifications > 77... - Page 78 When the printer is stored, it should be in its original packaging, with no moisture formation. Standard usage Average power on time 200 h/month Average printing time 50 h/month (text density on page: 35%) ML1120/ML1190 User’s Guide – Specifications > 78...
- Page 79 ITEM SPECIFICATION Noise level The acoustic noise of this product is less than 70 dB (A) as measured in accordance with EN ISO 7779. ML1120/ML1190 User’s Guide – Specifications > 79...
-
Page 80: Index
....... 55 list ......... 47 paper jams continuous forms ..... 60 cut sheet ........ 58 printer control panel ......40 location ........12 parts ........9 test print......... 13 printing files ........ 17 ML1120/ML1190 User’s Guide – Index > 80... -
Page 81: Oki Printing Solutions Contact Details
4-11-22 Shibaura, Minato-ku, Tokyo 108-8551, Japan Tel:(81) 3 5445 6158 Fax:(81) 3 5445 6189 http://www.okidata.co.jp Oki Data (Singapore) Pte. Ltd. 78 Shenton Way, #09-01, Singapore 079120 Tel:(65) 221 3722 Fax:(65)421 1688 http://www.okidata.com.sg ML1120/ML1190 User’s Guide – Oki Printing Solutions contact details > 81... - Page 82 Oki Europe Limited Central House Balfour Road Hounslow TW3 1HY United Kingdom Tel: +44 (0) 208 219 2190 Fax: +44 (0) 208 219 2199 www.okiprintingsolutions.com 07080201 iss2...
Need help?
Do you have a question about the ML1120 and is the answer not in the manual?
Questions and answers