Table of Contents
Advertisement
Quick Links
Advertisement
Table of Contents

Related Manuals for Oki ML1190


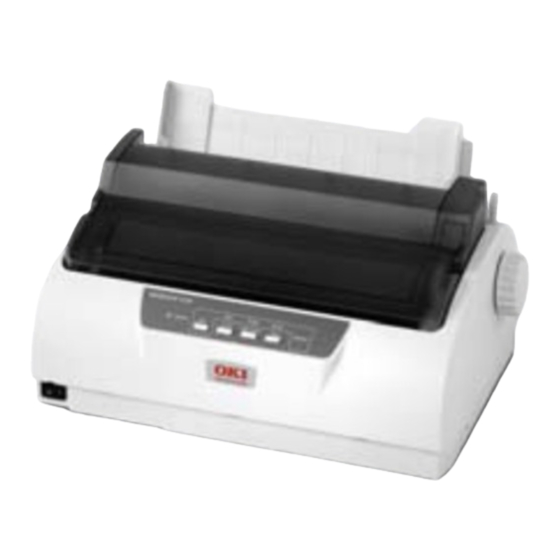
Summary of Contents for Oki ML1190
- Page 1 ML1120/ML1190 User’s Guide ML1120/ML1190...
- Page 2 Every effort has been made to ensure that the information in this document is complete, accurate, and up-to-date. Oki Printing Solutions assumes no responsibility for the results of errors beyond its control. Oki Printing Solutions also cannot guarantee that changes in software and equipment made by other manufacturers and referred to in this guide will not affect the applicability of the information in it.
-
Page 3: Table Of Contents
Windows ........19 OKI DIPUS (Dot Impact Printer Utilities) ....19 General information . - Page 4 ........88...
- Page 5 A caution provides additional information which, if ignored, may result in equipment malfunction or damage. WARnInG! A warning provides additional information which, if ignored, may result in a risk of personal injury. ML1120/ML1190 User’s Guide - Notes, cautions and warnings. > 5...
-
Page 6: Introduction
NtroductioN Congratulations on purchasing this Oki Printing Solutions printer! The ML1120 (9-pin) and ML1190 (24-pin) are designed to provide highly reliable letter quality printing and high resolution graphics for the desktop/office printing environment. Both models combine state-of-the- art serial impact dot matrix printing technology with advanced materials and superior construction to provide high performance and versatility in a desktop sized unit. -
Page 7: On-Line Usage
Pages The whole manual, individual pages, or sections may be printed. The procedure is: From the toolbar, select File > Print (or press the Ctrl + P keys). ML1120/ML1190 User’s Guide - Introduction > 7... - Page 8 [All pages], (1), for the entire manual. [Current page], (2), for the page at which you are looking. [Pages from] and [to], (3), for the range of pages you specify by entering their page numbers. Click on OK. ML1120/ML1190 User’s Guide - Introduction > 8...
-
Page 9: Getting Started
The main parts of your printer are identified and briefly explained below. roNt view Print Head: prints the characters on the paper. Paper Type Lever: set according to the type of paper used - cut sheet or continuous forms. ML1120/ML1190 User’s Guide - Getting started > 9... - Page 10 Control Panel: contains button switches and indicators (described in detail later) that allow you to operate the printer. ML1120 ML1190 Power Switch: to turn the printer power ON/OFF. Ribbon Cartridge: holds the printer ribbon. ML1120/ML1190 User’s Guide - Getting started > 10...
-
Page 11: Rear View
Pin Tractor: to load and feed continuous forms. Serial connector: connect to serial interface cable. USB connector: connect to USB interface cable. Parallel connector: connect to parallel interface connector. ML1120/ML1190 User’s Guide - Getting started > 11... -
Page 12: Locating Your Printer
Platen Knob and the various paper feed paths. 60cm 75cm > Make sure a grounded power outlet is available nearby. oweriNg oN your PriNter Ensure that your printer Power Switch is set to OFF. ML1120/ML1190 User’s Guide - Getting started > 12... -
Page 13: Producing A Test Print
A shorter time interval between turning on/oFF operations may cause printer power failure. Do not turn the printer oFF while it is printing as this may result in damage to the print head. ML1120/ML1190 User’s Guide - Getting started > 13... - Page 14 NOTE If you want to stop the test print for any reason, press the SEL button followed by the LOAD/EJECT button to eject the paper. Turn the printer Power Switch to OFF. ML1120/ML1190 User’s Guide - Getting started > 14...
-
Page 15: Connecting To A Computer
NtercoNNectioN Ensure that both printer and computer are turned OFF. Connect the required interface cable, serial (1), USB (2), or parallel (3), to the printer and then to the computer. ML1120/ML1190 User’s Guide - Connecting to a computer > 15... -
Page 16: Installing The Printer Driver
Use File > Properties to show the Properties window. On the General tab, click the Print Test Page button. Ensure that a test page has printed, verifying your printer - computer setup. ML1120/ML1190 User’s Guide - Connecting to a computer > 16... -
Page 17: Printing From A Computer
These driver windows have been designed to be easy to use and intuitive while supplementary on-line help is available by clicking each window Help button. ML1120/ML1190 User’s Guide - Printing from a computer > 17... -
Page 18: Utilities
These utilities support Windows operating systems using parallel, USB, or network connections. See the help for details on using these utilities. The utilities are: Status Monitor Menu Setup Utility Top of Form Setup Utility Switch Setup Utility ML1120/ML1190 User’s Guide - Utilities > 18... -
Page 19: Installing The Utilities
Normally, the Status Monitor appears on the task bar as an icon, which changes color to show the printer’s status. You can set it to pop up in a window when an alert or error condition occurs. ML1120/ML1190 User’s Guide - Utilities > 19... -
Page 20: Menu Setup Utility
This utility lets you disable buttons on the printer from your computer. It is mainly for use by administrators to keep multiple users from accidentally changing settings on the printer. ML1120/ML1190 User’s Guide - Utilities > 20... -
Page 21: Paper Handling
Ensure that the printer is turned ON. NOTE If there are any continuous forms in the printer, eject them as described in "Removing continuous forms" on page Ensure the Paper Type Lever (1) is set to Cut Sheet ML1120/ML1190 User’s Guide - Paper handling > 21... - Page 22 See "Setting the Paper Thickness lever" on page CAUtIon! If the Paper thickness Lever setting does not match the paper being used, paper feeding and printing may not work properly. ML1120/ML1190 User’s Guide - Paper handling > 22...
- Page 23 • Ensure that the paper is accurately aligned along the Paper Guide to avoid the possibility of skew printing. • When printing an envelope, do not fold up the flap. A flap aligned along the Paper Guide can lead to skew printing. ML1120/ML1190 User’s Guide - Paper handling > 23...
-
Page 24: Ejecting Cut Sheet Paper
Press the SEL button to put the printer off-line. Press the LOAD/EJECT button and the paper is ejected to the Paper Tray. NOTE Paper longer than A4 length (297 mm) may overlap and possibly fall off the Paper Tray. ML1120/ML1190 User’s Guide - Paper handling > 24... -
Page 25: Loading Continuous Forms
Ensure that the printer is turned ON. NOTE If there is a cut sheet in the printer, eject it as described in "Ejecting cut sheet paper" on page Set the Paper Type Lever to Continuous Forms ML1120/ML1190 User’s Guide - Paper handling > 25... - Page 26 Remove the Paper Tray and Input Tray together, by gripping the Input Tray at both sides and pulling it up and away from the printer. ML1120/ML1190 User’s Guide - Paper handling > 26...
- Page 27 Tractor to the required position to accommodate the width of the continuous forms to be used. Move the rear paper guide (2) to midway between the left (3) and right (4) Pin Tractors. ML1120/ML1190 User’s Guide - Paper handling > 27...
- Page 28 Pin Tractors. Press the locking lever down to lock the right Pin Tractor in the desired position. ML1120/ML1190 User’s Guide - Paper handling > 28...
- Page 29 Press the LOAD/EJECT button. The continuous forms will be taken into the printer and positioned at the first line print position and the SEL indicator will illuminate. ML1120/ML1190 User’s Guide - Paper handling > 29...
- Page 30 When the paper is to be set in Tractor, adjust the position of Tractor so that will not get loose or too tense. (Fit the pin of Tractor with the center of the sprocket hole.) ML1120/ML1190 User’s Guide - Paper handling > 30...
-
Page 31: Tearing Off Continuous Forms
Check the position of the tear-off perforations (1) relative to the paper cutter (2). To advance the forms, continue to hold down the TEAR button and then the SEL button. ML1120/ML1190 User’s Guide - Paper handling > 31... -
Page 32: Removing Continuous Forms
Remove the Input Tray by gripping it at both sides and pulling it up and away from the printer. ML1120/ML1190 User’s Guide - Paper handling > 32... - Page 33 Close the Pin Tractor covers. Replace the Input Tray and Paper Tray by fitting the Input Tray into the gooves at the back of the printer and pushing gently forward until the tray clips into place. ML1120/ML1190 User’s Guide - Paper handling > 33...
-
Page 34: How To Use Bottom Tractor
Remove the access cover. Access cover Assy Remove the pull up Assy. Pull up Assy ML1120/ML1190 User’s Guide - Paper handling > 34... - Page 35 Remove the sheet guide Assy. Sheet guide Assy Remove the left and right knobs of the tractor Assy. Tractor Assy Knob ML1120/ML1190 User’s Guide - Paper handling > 35...
- Page 36 Sheet guide Assy Fit the U ditch of the tractor Assy to post , turn it in the direction of using the post as fulcrum and lock it to the printer proper. Tractor Assy ML1120/ML1190 User’s Guide - Paper handling > 36...
- Page 37 Insert the paper from the paper insertion opening as shown in the diagram. Paper insertion opening Set the paper to the tractor Assy. (As regards the ways of choosing the paper size and setting, see the paper setting of the rear tractor. ML1120/ML1190 User’s Guide - Paper handling > 37...
- Page 38 , the pitch between the first and second lines may get narrower. Be sure to finish aligning by pushing down the LF/FF switch. Platen knob AC switch LF/FF switch ML1120/ML1190 User’s Guide - Paper handling > 38...
- Page 39 Move the cursor in conformity with the width of the paper. cursor * When a sheet of narrow width is to be used, set the cursor as shown in the diagram. ML1120/ML1190 User’s Guide - Paper handling > 39...
- Page 40 If the media is set outside the platen, a crease may occur to the paper. Platen Platen Fix the access cover Assy. (The access cover B will not close tightly.) Access cover Assy Access cover B ML1120/ML1190 User’s Guide - Paper handling > 40...
-
Page 41: Setting The Paper Thickness Lever
Set the Paper Thickness lever for overall paper thickness as follows: oveRALL PAPeR tHICkness LeveR PosItIon 0.06 - 0.10 mm 0.11 - 0.18 mm 0.19 - 0.25 mm 0.26 - 0.32 mm 0.33 - 0.39 mm 0.40 - 0.46 mm ML1120/ML1190 User’s Guide - Paper handling > 41... -
Page 42: Operating Instructions
PeratiNg iNstructioNs oNtrol PaNel ml1120 The status/alarm indicators and button switches on the control panel allow you to check printer status and control the printer. ML1120/ML1190 User’s Guide - Operating instructions > 42... - Page 43 : Utility : HSD Flashing : SSD For character pitch setting: : 10CPI : 12CPI : 15CPI : 17CPI : 20CPI : Proportional For print mode setting: : Normal : High-Speed : Quiet ML1120/ML1190 User’s Guide - Operating instructions > 43...
-
Page 44: Ml1190
The status/alarm indicators and button switches on the control panel allow you to check printer status and control the printer. ML1120/ML1190 User’s Guide - Operating instructions > 44... - Page 45 : LQ Swiss Bold : LQ Orator Flashing : LQ Gothic : LQ Prestige : Utility : HSD For character pitch setting: : 10CPI : 12CPI : 15CPI : 17CPI : 20CPI : Proportional ML1120/ML1190 User’s Guide - Operating instructions > 45...
-
Page 46: Buttons
On-line and off-line Quieter print mode Each press of the button pair progresses the printer through Quieter print mode > High multipart print mode > Normal print mode (Effective only for ML1120) ML1120/ML1190 User’s Guide - Operating instructions > 46... -
Page 47: Setting Menu Values
To exit menu settings confirmation, save the current settings and eject the paper, press LOAD EJECT continuously while pressing TEAR and press LF/FF . To change menu settings, see "Menu setting" on page ML1120/ML1190 User’s Guide - Operating instructions > 47... -
Page 48: Menu Setting
To exit menu setting, press LOAD EJECT continuously while pressing TEAR and press LF/FF to save the new settings and exit menu setting mode. NOTE Switching the printer OFF does not save the new settings. ML1120/ML1190 User’s Guide - Operating instructions > 48... -
Page 49: Ml1120
American, French Canadian, Dutch, Publisher Unslashed Zero Character Select either print font pattern to receive a zero Slashed character located at 30H in ANK code or at AA30H in a single-byte code. ML1120/ML1190 User’s Guide - Operating instructions > 49... - Page 50 TOF position +20 - +1 of a continuous form. The position moves to the rear of the form by [+] and to the top of the form by [-] in 1/144 in increments. ML1120/ML1190 User’s Guide - Operating instructions > 50...
- Page 51 82.6 mm(3.25 ) 84.7 mm(10/3 ) 88.9 mm(3.5 ) 93.1 mm(11/3 ) 101.6 mm(4 ) 127.0 mm(5 ) 139.7 mm(5.5 ) 152.4 mm(6 ) 177.8 mm(7 ) 203.2 mm(8 ) 215.9 mm(8.5 ) ML1120/ML1190 User’s Guide - Operating instructions > 51...
- Page 52 TOF position +20 - +1 of cut-paper/passbooks. The position moves to the rear of the form by [+] and to the top of the form by [-] in 1/144 in increments. ML1120/ML1190 User’s Guide - Operating instructions > 52...
- Page 53 Print Registration Adjust the print starting -10 - -1 position on printing in the reverse direction. (The +10 - +1 position moves to the right or left in 1/720 in increments.) ML1120/ML1190 User’s Guide - Operating instructions > 53...
- Page 54 Time out print Select valid or invalid. Invalid Auto Select Select whether to automatically set Select Mode after paper feeding or not. Auto Interface Host Interface Select interface settings. Parallel Serial ML1120/ML1190 User’s Guide - Operating instructions > 54...
- Page 55 Select the validity of a Command linefeed pitch command. Invalid valid Font Command Select the validity of a font command. Invalid valid Pitch Command Select the validity of a character pitch command. Invalid ML1120/ML1190 User’s Guide - Operating instructions > 55...
- Page 56 Select/ Deselect or hold it after power-on. 0.2 sec Busy Time Set the minimum time it takes to switch from a busy 1.0 sec state to a ready state. ML1120/ML1190 User’s Guide - Operating instructions > 56...
-
Page 57: Ml1190
American, French Canadian, Dutch, Publisher Zero Character Select either print font Unslashed slashed pattern to receive a zero character located at 30H in ANK code or at AA30H in a single-byte code. ML1120/ML1190 User’s Guide - Operating instructions > 57... - Page 58 +30 - +1 position of a continuous form. The position moves to the rear of the form by [+] and to the top of the form by [-] in 1/180 in increments. ML1120/ML1190 User’s Guide - Operating instructions > 58...
- Page 59 82.6 mm(3.25 ) 84.7 mm(10/3 ) 88.9 mm(3.5 ) 93.1 mm(11/3 ) 101.6 mm(4 ) 127.0 mm(5 ) 139.7 mm(5.5 ) 152.4 mm(6 ) 177.8 mm(7 ) 203.2 mm(8 ) 215.9 mm(8.5 ) ML1120/ML1190 User’s Guide - Operating instructions > 59...
- Page 60 +30 - +1 TOF position of cut-paper/ passbooks. The position moves to the rear of the form by [+] and to the top of the form by [-] in 1/180 in increments. ML1120/ML1190 User’s Guide - Operating instructions > 60...
- Page 61 Print Registration Adjust the print starting -10 - -1 position on printing in the reverse direction. (The +10 - +1 position moves to the right or left in 1/720 in increments.) ML1120/ML1190 User’s Guide - Operating instructions > 61...
- Page 62 Host Interface Select interface settings. Parallel Serial 15 sec I/F Time Out Select timeout time for auto interfacing. 30 sec 45 sec 1 min 2 min 3 min 4 min 5 min ML1120/ML1190 User’s Guide - Operating instructions > 62...
- Page 63 Set whether to enable Valid Invalid or disable Auto Feed XT signal of the Centronics interface. (EPSON emulation only) enable Bi-Direction Set whether to enable or disable Two-way Disable communication of the Centronics interface. ML1120/ML1190 User’s Guide - Operating instructions > 63...
-
Page 64: Initialising Menu Settings
The values adjusted by the Adjustment menus are not initialised by the following procedure. Set the Power Switch to OFF. Press and hold down the SEL and LF/FF buttons together and then set the Power Switch to ON. ML1120/ML1190 User’s Guide - Operating instructions > 64... -
Page 65: Adjusting Tof Position
LOAD/EJECT button and then press the LF/FF button. NOTE If the specified correction range is more than +- 3.53 mm (20/144 in) for ML1120 and +- 4.23 mm (30/180 in) for ML1190, the paper cannot be moved. When the paper is positioned at the required TOF, release the buttons in Step 5 above. -
Page 66: Printer Speed Settings
PriNtiNg Use this for quieter printing. Ensure the SEL indicator is illuminated. Hold down the SEL button and press the TEAR button. Status Indicator 1 and Status Indicator 2 are illuminated. ML1120/ML1190 User’s Guide - Operating instructions > 66... -
Page 67: Setting Tof Position At The Place Of User's Choice
To save this position as the TOF, press and hold down the LOAD/ EJECT and the LF/FF buttons together for 3 seconds under the Select condition. NOTE Do not turn the Platen Knob or switch off the printer during the above procedure. ML1120/ML1190 User’s Guide - Operating instructions > 67... -
Page 68: Troubleshooting
Set the Paper Thickness lever to the Replace Ribbon position (position 6). WARnInG! the Print Head may be hot after printing. Allow it to cool before touching it. Remove the ribbon cartridge. See "Changing a ribbon cartridge" on page 79. ML1120/ML1190 User’s Guide - Troubleshooting > 68... - Page 69 Paper Tray and turn the Platen Knob to pass the folded sheet through and push out the paper fragment. ML1120/ML1190 User’s Guide - Troubleshooting > 69...
-
Page 70: Continuous Forms Jammed In Printer
Set the Power Switch to OFF. Tear off any unprinted continuous forms. Remove the Paper Tray and Input Tray together, by gripping the Input Tray at both sides and pulling it up and away from the printer. ML1120/ML1190 User’s Guide - Troubleshooting > 70... - Page 71 When the paper jams are cleared, replace the Input Tray and Paper Tray by fitting the Input Tray into the gooves at the back of the printer and pushing gently forward until the tray clips into place. Set the Power Switch to ON. ML1120/ML1190 User’s Guide - Troubleshooting > 71...
-
Page 72: Responding To Alarm Conditions
SEL indicator is unlit. The printer driver is not Re-install the printer driver installed properly. correctly. The printer has just Press the SEL button. stopped printing. There is no paper in the Load paper. printer. ML1120/ML1190 User’s Guide - Troubleshooting > 72... - Page 73 Replace the ribbon cartridge wound incorrectly. by a new one. The ribbon is not Replace the ribbon cartridge transferring properly. by a new one. A line of print is missing. Broken wire pins. Contact your dealer. ML1120/ML1190 User’s Guide - Troubleshooting > 73...
- Page 74 When continuous forms Tear-off perforation Cancel tear-off perforation are used, several blank spacing is selected. spacing. lines appear in the printout. ML1120/ML1190 User’s Guide - Troubleshooting > 74...
- Page 75 No line feed, and no Paper is off the Pin Reload paper correctly. paper feed. Tractors. The adjust lever position Set the adjust lever to the does not match the paper correct position. type. ML1120/ML1190 User’s Guide - Troubleshooting > 75...
- Page 76 Set the Paper Type lever to feed. mode. continuous forms mode. Paper feed operations The cut sheet is not Eject the cut sheet. for both cut sheets and ejected. continuous forms are actuated. ML1120/ML1190 User’s Guide - Troubleshooting > 76...
-
Page 77: Cleaning Your Printer
Do not use any flammable solvents for cleaning the printer to avoid any risk of fire or electric shock. Clean the interior of the printer every 6 months or 300 hours of operation, whichever comes first. ML1120/ML1190 User’s Guide - Cleaning your printer > 77... - Page 78 Do not clean any interior working parts with the suction nozzle to avoid possible damage to the printer. ML1120/ML1190 User’s Guide - Cleaning your printer > 78...
-
Page 79: Consumables And Accessories
Do not change the ribbon cartridge with the Power switch set to on. Set the Power Switch to OFF. Set the Paper Thickness lever to Replace Ribbon (position 6). Remove the Top Cover. ML1120/ML1190 User’s Guide - Consumables and accessories > 79... - Page 80 Dispose of the cartridge in accordance with your local guidelines. Remove the new ribbon cartridge from its wrapping and note the position of the Ribbon Guide (1), blue Knob (2) and Pin (3). ML1120/ML1190 User’s Guide - Consumables and accessories > 80...
- Page 81 Do not turn the knob clockwise as the ribbon might jam. Make sure that the ribbon is not twisted or damaged when it goes through the gap between the Print Head and the ribbon guide. ML1120/ML1190 User’s Guide - Consumables and accessories > 81...
-
Page 82: Consumable Order Information
Set the Paper Thickness lever to match the paper being used. (See "Setting the Paper Thickness lever" on page 41.) Set the printer Power Switch to ON. oNsumable order iNformatioN IteM LIFe oRDeR no. Ribbon cartridge (Black) 4 million characters 43571806 ML1120/ML1190 User’s Guide - Consumables and accessories > 82... -
Page 83: Specifications
(The print accuracy of the last page cannot be guaranteed.) Character sets Standard ASCII Epson (Italics/Graphics) IBM (Set1/Set2) Foreign Code Page Media See "Setting the Paper Thickness lever" on page 41. ML1120/ML1190 User’s Guide - Consumables and accessories > 83... - Page 84 Average printing time 50 h/month (text density on page: 35%) Noise level The acoustic noise of this product is less than 55 dB (A) as measured in accordance with EN ISO 7779. ML1120/ML1190 User’s Guide - Consumables and accessories > 84...
-
Page 85: Ml1190
See "Setting the Paper Thickness lever" on page 41. Original OKI cartridge ribbon Ink color Black Ribbon life 4 million characters (Utility mode) Print head life 200 million characters (Utility mode) ML1120/ML1190 User’s Guide - Consumables and accessories > 85... - Page 86 Average printing time 50 h/month (text density on page: 35%) Noise level The acoustic noise of this product is less than 53 dB (A) as measured in accordance with EN ISO 7779. ML1120/ML1190 User’s Guide - Consumables and accessories > 86...
-
Page 87: Index
............ 49, 57 normal speed printing ......66 paper jams continuous forms ........70 cut sheet ..........68 printer control panel ........42, 44 location ..........12 parts ............9 test print ..........13 ML1120/ML1190 User’s Guide - Index > 87... -
Page 88: Oki Contact Details
Oki Data(S) P Ltd. Malaysia Rep Office Suite 21.03, 21st Floor Menara IGB, Mid Valley City, Lingkaran Syed Pura 59200, Kuala Lumpur, Malaysia Tel: (60) 3 2287 1177 Fax: (60) 3 2287 1166 ML1120/ML1190 User’s Guide - Oki contact details > 88... - Page 89 43471832EE Rev1...
Need help?
Do you have a question about the ML1190 and is the answer not in the manual?
Questions and answers