Table of Contents
Advertisement
Quick Links
Advertisement
Table of Contents

Related Manuals for Ricoh PJ WX5461


Summary of Contents for Ricoh PJ WX5461
-
Page 3: Table Of Contents
Table of Contents Table of Contents ......1 OPTIONS ..........51 3D ............55 Usage Notice ........2 Lan Control ........57 Precautions .........2 Controlling this Device with Web Safety Labels of This Machine ..12 Browser ..........57 Regulation & Safety Notices .....13 Connecting to the device ...... 57 Other Information ......18 Log in............ -
Page 4: Usage Notice
Usage Notice Precautions Follow all warnings, precautions and maintenance as recommended in this user’s guide to maximize the life of your unit. ■ Indicates a potentially hazardous situation which, if in- Warning- structions are not followed, could result in death or serious injury. - Page 5 Usage Notice ■ There are burn marks on the plug. ■ The prongs on the plug are deformed. If any of the above conditions exist, do not use the plug and consult your dealer or service representative. Use of the plug could result in fire or electric shock. ■...
- Page 6 Usage Notice ■ Warning- If metal objects, or water or other fluids fall inside this machine, you must turn off its power immediately. After turning off the power, be sure to disconnect the power cord plug from the wall outlet. Then contact your service representative and report the problem.
- Page 7 Usage Notice b) Do not open the lamp cover of a machine that is installed on a wall or ceiling. Doing so may cause the lamp cover to fall down. If the lamp is broken, pieces of glass may fall and cause an injury. c) Contact your sales or service representative to clean or replace parts for a machine that is installed on a wall or ceiling.
- Page 8 Usage Notice ■ Caution- Do not place the machine in a location where air flow is poor. Doing so may cause fire due to internal compo- nents becoming overheated. ■ Caution- Do not place or store the machine in a location where direct sunlight or heat generation might occur.
- Page 9 Failing to take these precautions could result in fire or electric shock. ■ Caution- Do not use attachments not recommended by RICOH. Use of an incompatible attachments could cause haz- ards or damage to the product. ■ Caution-...
- Page 10 Usage Notice ■ Caution- Unauthorized substitutions may result in fire, electric shock, or other hazards. (Only the replacement of the lamp should be made by users.) Upon completion of any service or repairs to this product, ask the service technician to perform safety checks to verify that the product is in proper operat- ing condition.
- Page 11 Usage Notice ABOUT THE LAMP ■ Warning- When the lamp reaches the end of its life, it will burn out and may make a loud popping sound. If this happens, the projector will not turn back on until the lamp module has been replaced. To replace the lamp, follow the procedures listed under “Replacing the Lamp”.
- Page 12 Usage Notice ■ If the lamp explodes, a very small amount of mercury vapor in the lamp tube and broken glass pieces may be ejected from the vents or other opening. What to do if a lamp has exploded If the lamp explodes, remove the power cord from the projector, leave the room while making sure it is thoroughly ventilated.
- Page 13 Usage Notice REMOTE CONTROL BATTERY Warning • Never throw batteries into a fire. Using the batteries improperly may cause them to explode or leak and may result in serious injury. If battery-leaking fluid contacts skin, wash the fluid off immediately with clean water and consult a doctor.
-
Page 14: Safety Labels Of This Machine
Usage Notice Safety Labels of This Machine 1. To replace the lamp, unplug the power cord and then wait for 60 minutes. 2. Do not look into the lens while the lamp is on. The strong light from the lamp may cause damage to your eyesight. 3. -
Page 15: Regulation & Safety Notices
This appendix lists the general notices of your Projector. Notice: Users in the United States of America FCC notice MODEL NAME: RICOH PJ X5461 / WX5461 / HD5451 TRADE NAME: PROJECTOR MODEL NAME: RICOH PJ X5461 / WX5461 / HD5451... - Page 16 Usage Notice RESPONSIBLE PARTY: Ricoh Americas Corporation 5 Dedrick Place, West Caldwell, NJ 07006 Phone: 973-882-2000 Notice: Shielded cables All connections to other computing devices must be made using shielded cables to maintain compliance with FCC regulations. Caution Changes or modifications not expressly approved by the manufacturer could void the user’s authority,...
- Page 17 Low Voltage Directive 2014/35/EU Notice: Users in EU countries CE Marking Traceability Information (For EU Countries Only) Manufacturer: Ricoh Co., Ltd. 3-6 Nakamagome 1-chome, Ohta-ku, Tokyo. 143-8555, Japan Importer: Ricoh Europe PLC 20 Triton Street, London. NW1 3BF, United Kingdom...
- Page 18 Usage Notice • The lamp contains mercury. Please dispose of this product or used lamps in accordance with local regulations. The symbol indicates that the product must not be treated as municipal waste. It must be disposed of separately via the appropriate return and collection systems available.
- Page 19 Usage Notice Notice: Users in the EU Note for the Battery and/or Accumulator Symbol In accordance with the Battery Directive 2006/66/EC Article 20 Information for end-users Annex II, the above symbol is printed on batteries and accumulators. This symbol means that in the European Union, used batteries and accumulators should be disposed of separately from your household waste.
-
Page 20: Other Information
Usage Notice Other Information Copyrights to Images When projecting images using the projector, be careful not to infringe the copyright of protected materials. The following are examples that may infringe the copyright of protected materials. • Broadcasting images or movies for commercial purposes •... -
Page 21: Introduction
Introduction Product Features Outstanding features include: True 1024 x 768(XGA) / 1280 x 800(WXGA) / ■ 1920 x 1080(1080p) resolution, 16.7M for XGA / WXGA, 1073M for 1080p True colors Light weight <7.05lb (3.2 kg) ■ Manual focus projection 1:1.36 zoom lens ■... -
Page 22: Package Overview
Introduction Package Overview This projector comes with all the items shown below. Check to make sure your unit is complete. Contact your dealer immediately if anything is missing. AV Mute Auto Input Enter Menu Keystone Volume Computer Video HDMI Digital A Digital B Magnify Aspect... -
Page 23: Product Overview
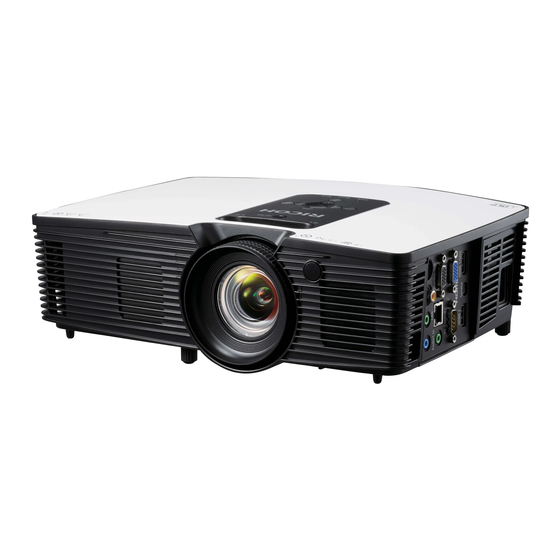
Introduction Product Overview 1. Control panel 9. Zoom lever 2. Speaker 10. Adjustable feet 3. Ventilation (inlet) 11. Anti-theft lock hole 4. Filter (Kensington™ lock) 5. Connection ports 12. Lens Shift 6. Remote receiver 13. Lens 7. Lens cap 14. Ventilation (outlet) 8. -
Page 24: Connection Ports
Introduction Connection Ports 1. S-Video In terminal The interface is subject to model’s 2. Monitor Out terminal specifications. 3. Computer In terminal Compatible with 4. HDMI 1/MHL terminal MHL version 2.2, the charging current 5. Service terminal 5V@0.9A. 6. AC In socket 7. -
Page 25: Control Panel
Introduction Control Panel Menu Enter Mute Four to select items or , , or Directional make adjustments to your selection. Select Keys AV Mute Momentarily turn off/on the audio and video. Power Refer to the “Power On/Off the Projector” section. (pages 30~31) Temp indicator Indicate the inside of the projector’s temperature status. -
Page 26: Remote Control
Introduction Remote Control AV Mute Auto Input Enter Menu Keystone Volume Computer Video HDMI Digital A Digital B Magnify Aspect Freeze Status Picture Power Refer to the “Power On/Off the Projector” section. (See pages 30~31) Input Press “Input” to choose your desired input source. - Page 27 Introduction Dim the projector lamp which will lower power consumption and extend the lamp life. Volume +/- Increase or decrease speaker volume. Video Press “Video” to choose between Video In and S-Video In terminal. HDMI Press “HDMI” to choose between HDMI1/MHL In and HDMI2 In terminal.
-
Page 28: Remote Control Battery Installation
Introduction Remote Control Battery Installation Push the clip to Install new batteries (AAA/ Close the battery cover release the battery R03). Ensure that you have and press it down until it cover. the batteries’ polarity (+/–) clicks into place. Do not mix aligned correctly. -
Page 29: Remote Control Operating Range
Introduction Remote Control Operating Range Point the remote control toward the projector (Remote Receiver) when pressing any button. Maximum operating range for the remote control is about 23.0’ (7m) and ±30° (horizontally), ±20° (vertically) in front of the projector. 23.0’ (7m) ±30°... -
Page 30: Basic Operations
Basic Operations Connecting the Projector Connect to Computer/Notebook Monitor Make sure that the power plug is fully inserted into both the projector AC inlet and the wall outlet. The AC outlet must be near this equipment and must be easily accessible. -
Page 31: Connect To Av Equipment
Basic Operations Connect to AV Equipment Make sure that the DVD player, HDTV receiver power plug is fully inserted into both the projector AC inlet and the wall outlet. Component The AC outlet must be near this equipment and must be easily accessible. -
Page 32: Powering On/Off The Projector
Basic Operations Powering On/Off the Projector Powering On the Projector 1. Ensure that the power cord and signal cable are securely connected. The Power indicator will turn red. 2. Remove the lens cap. 3. Turn on the lamp by pressing the button on the control panel or the button on the remote control. -
Page 33: Powering Off The Projector
Basic Operations Powering Off the Projector 1. Press the button and you will see a message as below on the on-screen display. Power Off? Press power key again. 2. Press the button to turn off the projector lamp. 3. The cooling fan continues to operate for about 30 seconds for cooling cycle and the Power indicator will flash red. -
Page 34: Warning Indicator
Basic Operations Warning Indicator When the “Temp” indicator lights red, it indicates the projector has overheated. The projector will automatically shut itself down. Warning! TEMPERATURE TOO HIGH Please: 1. Make sure air in and outlets are not blocked. 2. Make sure the environment temperature is under 40 degress C. When the “Lamp”... -
Page 35: Adjusting The Projected Image
Basic Operations Adjusting the Projected Image Adjusting the Position of Projector Image The projector is equipped with adjustable feet to raise and lower the image to fill the screen. 1. Locate the adjustable foot you wish to modify on the underside of the projector. -
Page 36: Adjusting The Projector Zoom And Focus
Basic Operations Adjusting the Projector Zoom and Focus You may turn the zoom lever to zoom in or out. To focus the image, rotate the focus ring until the image is clear. Focus at distances from: - XGA: 4.27 to 27.89 feet (1.3 to 8.5m) - WXGA and 1080p: 4.27 to 23.62 feet (1.3 to 7.2m) Zoom Lever Focus Ring... -
Page 37: Adjusting The Lens Position
Basic Operations Adjusting the Lens Position To shift the lens upward: - Remove a rubber cap covered the Lens Shift slot on the control panel. - Using a 4mm (5/32 inch) hex key, place it into the Lens Shift slot and turn it clockwise to move the projected image up. -
Page 38: Adjusting Projection Image Size
Basic Operations Adjusting Projection Image Size Projection Image Size for XGA: - Wide: Adjustable from 46” to 300.7” (Focus range) (Diagonal). - Tele: Adjustable from 33.6” to 219.8” (Focus range) (Diagonal). Projection Image Size for WXGA: - Wide: Adjustable from 54.23” to 300.3” (Focus range) (Diagonal). - Page 39 User Settings X5461 Diagonal Screen Size W x H Projection Distance (D) Offset (Hd) length (inch) (inch) (feet) (cm) (feet) size of 4:3 Width Height Width Height Wide Tele Wide Tele Screen 40.0 0.81 0.61 32.00 24.00 1.55 5.09 -0.03 0.30 60.0 1.22...
- Page 40 User Settings HD5451 Diagonal Screen Size W x H Projection Distance (D) Offset (Hd) length (inch) (inch) (feet) (cm) (feet) size of 16:9 Width Height Width Height Wide Tele Wide Tele Screen 40.0 0.89 0.50 35.04 19.69 1.28 4.20 -0.03 0.27 60.0 1.33...
-
Page 41: User Settings
User Settings Using the On Screen Display (OSD) The Projector has a multilingual On Screen Display that allows you to make image adjustments and change a variety of settings. How to operate To open the OSD, press “Menu” on the Control Panel or Remote Control. -
Page 42: Picture
User Settings Picture Picture Mode Vivid Wall Color White Color Temperature Gamma Brightness Contrast PICTURE Sharpness Saturation Tint Select Enter Exit Picture Mode There are factory presets optimized for various types of images. The available options: Picture Mode Bright Standard Natural Vivid User... - Page 43 User Settings Gamma Use this function to optimize the image output. The available options: 1.8 / 2 / Standard(2.2) / 2.4 / Shine. Gamma Standard(2.2) Shine NCE (Natural Color Enhancer) Use this function to enhance color and reproduce vivid colors. ...
- Page 44 User Settings Sharpness Adjust the sharpness of the image. “Sharpness”, “Saturation” and Sharpness “Tint” functions are only supported under Press the key to decrease the sharpness. Video/S-Video sources. Press the key to increase the sharpness. Saturation Adjust the color saturation of the image. Saturation Press the key to decrease the amount of color in the image.
-
Page 45: Screen
User Settings Screen Aspect Ratio Auto Phase Clock H. Position V. Position Magnify Keystone Rear Ceiling P r o j e c t i o n M o d e SCREEN RGB Input Range Auto Select Enter Exit Aspect Ratio Use this function to choose your desired aspect ratio. - Page 46 User Settings H. Position (Horizontal Position) Shift the projected image position horizontally. “H. Position” and “V. Position” functions H. Position are only supported under Computer Signal Press the key to move the image left. source. Press the key to move the image right. ...
- Page 47 User Settings V. Keystone: Adjust the vertical keystone. V. Keystone H. Keystone: Adjust the horizontal keystone. H. Keystone Four Corners: Compensate for image distortion by adjusting one corner at a time. a. Use the key to select the item to select which corner to adjust and press the “Enter”...
- Page 48 User Settings Projection Mode Use this function to select the projector mode, depending upon how the projector is mounted. Projection Mode Front Front Ceiling Rear Rear Ceiling Front: This is the default selection. The image is projected straight on the screen. Front Ceiling: When selected, the image will turn upside down.
-
Page 49: Setting
User Settings Setting Language English Monitor Out (Standby) Network (Standby) Network Reset SETTING Select Enter Exit Language Choose the Language. Press “Enter” to open the sub menu and then use the , , or key to select your preferred language. Press “Enter”... - Page 50 User Settings Network (Standby) Enable/Disable the network function. Network (Standby) On: Enable the network function at projector standby status. Off: Disable the network function at projector standby status. Network Configure the network settings. Network State Connected DHCP IP Address Subnet mask Gateway Apply...
- Page 51 User Settings DNS: Display the IP address of the domain name system (DNS) server. Apply: Select Yes to apply the changes made in network configuration settings. Apply MAC: Display MAC address. Reset Return the adjustments and settings to the factory default values. Choose “Yes”...
-
Page 52: Volume
User Settings Volume Mute Volume VOLUME Select Enter Exit Mute Temporarily turn off the sound. “Mute” function affects both internal Mute and external speaker volume. Choose “On” to mute the sound. Choose “Off” to turn mute off. Volume Adjust the volume level. -
Page 53: Options
User Settings Options Auto Source Input Auto Power Off (Min) Lamp Settings High Altitude Dust Filter Reminder Information OPTIONS Select Exit Enter Auto Source When this function is turned “On”, the projector will search for other signals if the current input signal is lost. When this function is turned “Off”, it will only search a specified connection port. - Page 54 User Settings Lamp Settings Use this option to view the lamp life status and configure the lamp settings. Press the ► key to enter the sub menu and configure the desired settings. Lamp Settings Lamp Hours Used (Normal) Lamp Life Reminder Lamp Power Mode Normal Image Eco...
- Page 55 User Settings High Altitude When “On” is selected, the fans will spin faster. Set High Altitude mode to “On” when the projector is used over 2500ft (750m) elevation. High Altitude Dust Filter Reminder Use this option to view the filter status and configure the filter settings.
- Page 56 User Settings Information Display the projector information. Information Source Computer Resolution Software Version Color Space No Data Aspect Ratio Auto Exit Source: Display the input source that is currently connected to. Resolution: Display the resolution setting of the current input ...
- Page 57 User Settings 3D Sync Invert 3D Format Select Enter Exit Use this option to disable/enable the 3D function. Compatible 3D source, 3D content and Optical 3D glasses are required for 3D viewing. Off: Choose “Off” to display normal (2D) picture. ...
- Page 58 User Settings 3D Format Use this option to select the appropriate 3D format content. 3D Format Side by Side Top and Bottom Frame Sequential Select Enter Exit Side by Side: Use this mode for “Side by Side” format 3D content.
-
Page 59: Lan Control
LAN Control Controlling this Device with Web Browser When you are connecting the device You can control this device from a PC by using a web browser. to an existing network, set according to the Connecting to the device instructions of the network administrator. -
Page 60: Log In
LAN Control Log in 1. When you open the web page, you will see a screen like the one below. If you are controlling by web browser, select "Admin". When controlling by Crestron, choose "Crestron". 2. Enter the password in the "Password" field. When a password is enabled, you must enter the password. -
Page 61: System Status
LAN Control When you log in, a navigation bar for setting the projector will be displayed on the left side of the home screen. System Status The current status of the projector is displayed. You can check information such as firmware version number of the projector and IP address. -
Page 62: General Settings
LAN Control General Settings You can change the projector name and password with this item. The projector name set here is also used in PJLink control. Only alphanumeric characters and symbols can be used as projector name. The maximum number of characters is You can use ... -
Page 63: Control
LAN Control Control You can control the projector with this item. The items for control are described in this section. Control button: When you click a button, the corresponding function will be performed. Power On The power of the projector turns on. To turn ON, click "Settings"... - Page 64 LAN Control Adjustment button: Projector can be adjusted by +/ - button. Input Select input signal from the pull-down list. Brightness Adjust brightness by +/ - button. Value will return to the initial value when you click the Reset button. Contrast Adjust contrast by +/- button.
-
Page 65: Network Settings
LAN Control Network Settings Set the network of the projector. ► Automatically configuring the network settings from DHCP. Check automatic setting and then click “Apply”. ► Configuring the network settings manually. IPV6 cannot be used in this device. Check manual setting, enter appropriate values in the IP address, Subnet Mask, Default Gateway (Gateway) and DNS Server fields, and then click "Apply". -
Page 66: Alert Settings
LAN Control Alert Settings You can send email alerts when an error occurs. Only alphanumeric You can carry out settings for alert mail in this section. characters and symbols can be used in the password. The maximum number of characters is 32. -
Page 67: Crestron
LAN Control Enter the IP address of projector in *xxx.xxx.xxx.xxx. Send Test Mail When you click [Send Test Mail], test email will be sent. The text will be "Email Test xxx.xxx.xxx.xxx *". Even if an error occurs during the e-mail transmission, no error will appear in the web browser. -
Page 68: Crestron Tools
LAN Control Crestron Tools You can perform settings of the projector network and Crestron Room View. After setting the user password, you will be able to access Crestron’s page by entering the password. After enabling the Admin password, you will be able to access the page of Crestron tool only upon entering... -
Page 69: Contacting The It Administrator Of Crestron
LAN Control Contacting the IT administrator of Crestron You can contact the IT administrators who are using X-Panel. Crestron offers the following two types of files. a)RoomViewExpress _6_3_3_7.exe b)Xpanel.exe Reset to Default You can reset the network to factory settings. Press the reflect button. -
Page 70: Reboot System
LAN Control Reboot System You can restart the system. Press the restart button. English... -
Page 71: Control The Projector Via The Projector Management Utility
LAN Control Control the Projector via the Projector Management Utility Projector Management Utility conforms to the PJLink class 1 standards, and is compatible with all class 1 commands. This software A maximum of 100 projectors connected to the network can be is to control and managed using one computer. - Page 72 LAN Control 6. Install the application by following the on-screen instruction. 7. When the installation is complete, exit the installer. A shortcut icon is created on the desktop. Register projectors 1. Registers the projectors with Auto search -Click [Register Projector] button. -Click [Auto Search] button.
- Page 73 LAN Control -List of projectors which support PJLink are displayed in the window. Projector name is displayed as “********” until authorization if password is enable. -Select the desired projector and click [Register] button. Password authorization is required if password of the projector is set to enable.
-
Page 74: Control The Projector With The Projector Management Utility
LAN Control 2. Directly specifies the IP address and registers the projector. -Enter IP address of the desired projector and click [Confirm] button then the projector name will be displayed. After confirming the projector name, click [Register] button. Control the projector with the projector Management Utility Click [Remote Control] tab and select the desired projector in the list. - Page 75 LAN Control Turn "On/Off " the muting of the projectors or groups selected from the Projector (/Group) List. The projector only supports Video & Audio mute. [Detail Information] button Show detail information of the selected projector. English English...
-
Page 76: Troubleshooting
Troubleshooting If you experience trouble with the projector, refer to the following information. If the problem persists, please contact your local dealer or service center. Problem: No image appears on screen Ensure all the cables and power connections are correctly and ... - Page 77 Troubleshooting Problem: The screen of the Notebook computer is not displaying a presentation If you are using a Notebook PC: Some Notebook PCs may deactivate their own screens when a second display device is in use. Each has a different way to be reactivated.
- Page 78 Troubleshooting Problem: Image is reversed Select “SCREEN > Projection Mode” from the OSD menu to adjust the image. Problem: Lamp burns out or makes a popping sound When the lamp reaches its end of life, it will burn out and may ...
- Page 79 Troubleshooting Problem: Message Reminders Temperature Error - the projector is overheat inside. Check the environmental condition. Warning! TEMPERATURE TOO HIGH Please: 1. Make sure air in and outlets are not blocked. 2. Make sure the environment temperature is under 40 degress C. Replacing the lamp - the lamp is about to reach its maximum ...
-
Page 80: Replacing The Lamp
Replacing the lamp The projector will detect the lamp life itself. It will show you a warning message Warning! Lamp Lamp is approaching the end of its useful life. R e p l a c e m e n t S u g g e s t e d ! When you see this message, change the lamp as soon as possible. - Page 81 Replacing the lamp Used Lamps This projector’s lamp contains trace amounts of environmentally harmful inorganic mercury. Be careful not to break used lamps, and dispose of them in accordance with local regulations or contact your sales representative. English English...
-
Page 82: Appendices
Appendices List of Compatible Signals A. VGA Analog (1) VGA Analog - PC Signal V.Frequency H.Frequency Modes Resolution (Hz) (kHz) 640 x 480 31.47 640 x 480 37.86 640 x 480 37.5 640 x 480 43.27 800 x 600 35.2 800 x 600 37.88 SVGA... - Page 83 Appendices A. VGA Analog (2) VGA Analog - Extended Wide Timing V.Frequency H.Frequency Modes Resolution (Hz) (kHz) WSVGA 1024 x 600 37.3 1280 x 768 47.78 1280 x 768 60.29 1280 x 768 68.63 WXGA 1280 x 720 44.8 1280 x 800 49.6 1366 x 768 47.71...
- Page 84 Appendices B. HDMI (1) HDMI - PC Signal V.Frequency H.Frequency Modes Resolution (Hz) (kHz) 640 x 480 31.47 640 x 480 37.86 640 x 480 37.5 640 x 480 43.27 800 x 600 35.2 800 x 600 37.88 SVGA 800 x 600 48.08 800 x 600 46.88...
- Page 85 Appendices B. HDMI (2) HDMI - Extended Wide Timing V.Frequency H.Frequency Modes Resolution (Hz) (kHz) WSVGA 1024 x 600 37.3 1280 x 768 47.78 1280 x 768 60.29 1280 x 768 68.63 WXGA 1280 x 720 44.8 1280 x 800 49.6 1366 x 768 47.71...
- Page 86 Appendices C. 3D Timing Input timing 1280 X 720P @ 50Hz Top - and - Bottom 1280 X 720P @ 60Hz Top - and - Bottom HDMI 3D 1280 X 720P @ 50Hz Frame packing Input (with 3D 1280 X 720P @ 60Hz Frame packing Info Frame 1920 X 1080i @ 50 Hz...
-
Page 87: Configurations Of Terminals
Appendices Configurations of Terminals Terminal: Computer In (Mini D-sub 15 pin) [Monitor Out] Red (R/Cr) Input [R Output] DDC 5V [NC*] Green (G/Y) Input [G Output] Ground (Ver. sync.) Blue (B/Cb) Input [B Output] DDC Data [NC*] Ground (Horiz.sync.) Horiz. sync. Input [Output] (Composite H/V sync. -
Page 88: Specifications
Appendices Specifications ■ List of general specifications RICOH PJ X5461 RICOH PJ WX5461 RICOH PJ HD5451 Item DLP chip 0.55” DMD XGA 0.65” DMD WXGA 0.65” DMD 1080P Lamp Type 260W lamp dimmable to 210W Projection Lens F#2.5 - 2.93, f=15.98 - 21.42mm @ 60”, 1.36x Zoom Lens Projection 1.3~8.5m (Mechanical... -
Page 89: Cabinet Dimensions
Appendices Cabinet Dimensions Unit: mm 314.2 154.3 RICOH PJ X5461 85.0 Holes for ceiling mount 140.0 Screw size and max. length: M4 x 12.5mm English English... -
Page 90: Trademarks
Appendices Trademarks • DLP is trademarks or registered trademark of Texas Instruments. • Microsoft, Windows, Windows Vista, Internet Explorer and PowerPoint are either a registered trademark or trademark of Microsoft Corporation in the United States and/or other countries. • HDMI, the HDMI Logo and High-Definition Multimedia Interface are trademarks or registered trademarks of HDMI Licensing LLC.
Need help?
Do you have a question about the PJ WX5461 and is the answer not in the manual?
Questions and answers