Frymaster CF Series Installation And Operation Manual
Cf series gas fryers
Hide thumbs
Also See for CF Series:
- Manual d’installation et d’utilisation (54 pages) ,
- Operating instructions manual (10 pages)
Advertisement
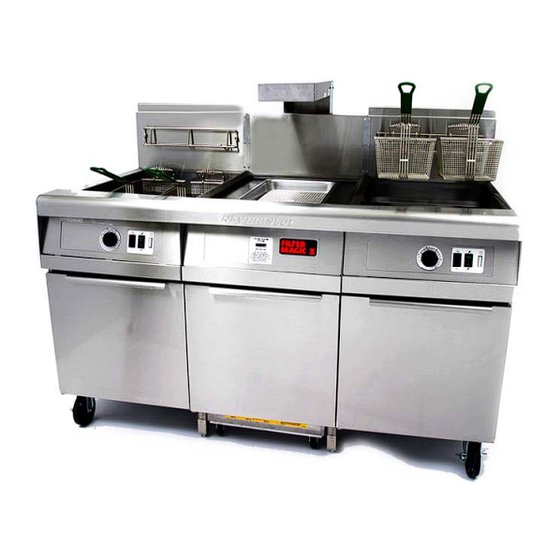
Series FMCF, FMCFE, FMCFEC,
MJCF, MJCFE, MJCFEC, KJ3FC,
JCFX, J3F & J65X.
NON-CE &
Frymaster, a member of the Commercial Food Equipment Service Association, recommends
using CFESA Certified Technicians.
24-Hour Service Hotline 1-800-551-8633
PRINTED IN
*8195613*
THE UNITED
www.frymaster.com
STATES
Email: service@frymaster.com
APRIL 2005
Advertisement
Troubleshooting

Related Manuals for Frymaster CF Series


Summary of Contents for Frymaster CF Series
- Page 1 Series FMCF, FMCFE, FMCFEC, MJCF, MJCFE, MJCFEC, KJ3FC, JCFX, J3F & J65X. NON-CE & Frymaster, a member of the Commercial Food Equipment Service Association, recommends using CFESA Certified Technicians. 24-Hour Service Hotline 1-800-551-8633 PRINTED IN *8195613* THE UNITED www.frymaster.com STATES Email: service@frymaster.com...
- Page 2 No structural material on the fryer should be altered or removed to accommodate placement of the fryer under a hood. Questions? Call the Frymaster/Dean Service Hotline at 1-800-551-8633. NOTICE NOTICE NOTICE TO U.S.
- Page 3 If a flexible gas line is used, an additional restraining cable must be connected at all The front ledge of the fryer is not a step! Do not stand on the fryer. Serious injury can result Do not store or use gasoline or other flammable liquids or vapors in the vicinity of this or any Instructions to be followed in the event the operator smells gas or otherwise detects a gas leak must be posted in a prominent location.
-
Page 4: Table Of Contents
Troubleshooting Fryers with Solid State (Analog), Digital, or CM III.5 Controllers ...6-2 Troubleshooting Fryers with Thermostat Controls...6-3 Troubleshooting the Built-In Filtration System...6-4 Troubleshooting Abnormal Burner Operation...6-6 Replacing the Controller or Controller Wiring Harness...6-7 CF Series Gas Fryers TABLE OF CONTENTS PAGE #... -
Page 5: Chapter 1: Introduction
Parts orders must be placed directly with your local FASC or distributor. Included with fryers when shipped from the factory is a list of Frymaster FASCs. If you do not have access to this list, contact the Frymaster Technical Service Department at 1-800-551-8633 or 1-318-865-1711. -
Page 6: Safety Information
Whenever there is a difference between CE and non-CE standards, the information or instructions concerned are identified by shadowed boxes similar to the one below. mbar = 10,2 mm H CF SERIES GAS FRYERS CHAPTER 1: INTRODUCTION CAUTION... -
Page 7: Equipment Description
CF Series fryers may be equipped with an optional melt cycle feature, which pulses the burner on and off at a controlled rate. The melt cycle feature is designed to prevent scorching and uneven heating of the frypot for customers who use solid shortening. -
Page 8: Installation, Operating, And Service Personnel
Frymaster equipment parts. A list of Frymaster Factory Authorized Service Centers (FASC) was included with the fryer when it was shipped from the factory. Failure to use qualified service personnel will void the Frymaster... -
Page 9: Shipping Damage Claim Procedure
1.8 Shipping Damage Claim Procedure Your Frymaster equipment was carefully inspected and packed before leaving the factory. The transportation company assumes full responsibility for safe delivery upon acceptance of the equipment for transport. What to do if your equipment arrives damaged: 1. -
Page 10: Chapter 2: Installation Instructions
Failure to use qualified, licensed, and/or authorized installation or service personnel (as defined in Section 1.7 of this manual) to install, convert to another gas type or otherwise service this equipment will void the Frymaster warranty and may result in damage to the equipment or injury to personnel. - Page 11 (450 mm) should be maintained between the flue outlet and the lower edge of the grease filter. " Frymaster recommends that the minimum distance be 24 in. (600 mm) from the flue outlet to the bottom edge of the filter when the appliance consumes more than 120,000 BTU per hour.
- Page 12 Frymaster computers have been tested and found to comply with the limits for a Class A digital device, pursuant to Part 15 of the FCC rules. While these devices are verified as Class A devices, they have been shown to meet the Class B limits.
-
Page 13: Caster/Leg Installation
2.3 Pre-Connection Preparations Do not connect this appliance to the gas supply before completing each step in this After the fryer has been positioned under the fry station exhaust hood, ensure the following has been accomplished: 1. Adequate means must be provided to limit the movement of fryers without depending upon the gas line connections. - Page 14 3. Level fryers equipped with legs by screwing out the legs approximately 1 inch, and then adjust them so that the fryer is level and at the proper height in the exhaust hood. Frymaster recommends that the minimum distance from the flue outlet to the bottom edge of the filter be 24 inches (600 mm) when the appliance consumes more than 120,000 BTU per hour.
-
Page 15: Connection To Gas Line
½ PSIG (3.45 kPa, 13.84 inches W.C.) or greater to avoid damage to the fryer’s gas tubes and gas valve(s). The CF Series fryer has received the CE mark for the countries and gas categories indicated in the table below. - Page 16 2. Open the gas-supply valve to the fryer and check all piping, fittings, and gas connections for leaks. A soap and water solution should be used for this purpose.
-
Page 17: Converting To Another Gas Type
CHAPTER 2: INSTALLATION INSTRUCTIONS 3. Close the fryer drain valve and fill the frypot with water and boil-out solution to the bottom OIL- LEVEL line at the rear of the frypot. Light the fryer and perform the boil-out procedures that are described in the "Lighting Instructions"... - Page 18 Section 1.7 of this manual. Non-CE Gas Conversion Instructions Call Frymaster Service (1-800-551-8633) to determine the conversion kit appropriate for your configuration and altitude. Contact your local FASC to order the kit and arrange for installation. 1. Between G20- and G25-type Natural Gas, adjust the gas pressure at the regulator. (Refer to the CE Standard Burner Manifold Gas Pressure Chart.) Do not change the orifice or pilot.
- Page 19 CF SERIES GAS FRYERS CHAPTER 2: INSTALLATION INSTRUCTIONS The following gas-conversion components and kits are available from your FASC: CE Only: Propane (G31) to Natural (G20/G25) Regulator only: P/N 810-1292 Pilot, regulator, and orifices kit: P/N 826-1478 Natural (G20/G25) to Propane (G31)
-
Page 20: Chapter 3: Operating Instructions
CAUTION The cooking oil/shortening capacity of the CF Series fryer is 80 pounds (43 liters) at 70°F (21°C). Before lighting the fryer, make sure the fryer is OFF and the frypot drain valve is closed. - Page 21 5 minutes, and then rotate the gas valve knob to the PILOT position (see Figure 1). 2. Push the knob in and light the pilot. (If the fryer is equipped with a piezo ignitor, repeatedly press the piezo ignitor button while depressing the gas valve knob until the pilot lights.) Continue to hold the knob in for about 60 seconds after the flame appears on the pilot.
- Page 22 5 minutes then repeat this step. PLACING THE FRYER INTO OPERATION If this is the first time the fryer is being used after installation, refer to Section 3.2, Boiling-Out the Frypot. (non-KFC co-branded locations) For units equipped with Thermostat Controls (non-KFC co-branded locations) Place the Melt Cycle switch (if so equipped) to the ON position.
-
Page 23: Boiling-Out The Frypot
PILOT. Allow the solution to set for 30 minutes. Turn the fryer back on and allow the solution to come to a boil. Turn gas valve knob to OFF and allow solution to set for 30 minutes. - Page 24 8. After the solution simmers for 1 hour [all except Thermostat or Solid State (Analog) Controller- See Step #2], turn the fryer off, allow the solution to cool, and then add 2 gallons (8 liters) of cold water and stir. Drain the solution into a suitable container and clean the frypot thoroughly.
-
Page 25: Shutting The Fryer Down
(if the fryer is so equipped). When shutting the fryers down at closing time, place the fryer power switch in the OFF position, place the gas valve in the OFF position, and put the frypot covers in place (if the fryer is so equipped). -
Page 26: Chapter 4: Filtration Instructions
If the fryer is not equipped with built-in filtration, the oil must be drained into another suitable container. For safe, convenient draining and disposal of used oil, Frymaster L.L.C. recommends the use of the Frymaster shortening disposal unit (SDU). The SDU is available through your local distributor. - Page 27 CHAPTER 4: FILTRATION INSTRUCTIONS If you are using a Frymaster filter cone holder, be sure that the cone holder rests securely on the metal container. 3. Open the drain valve slowly to avoid splattering. If the drain valve becomes clogged with food particles, use the Fryer’s Friend (poker-like tool) to clear the blockage.
-
Page 28: Filter Magic Ii Filtration System Operation
CF SERIES GAS FRYERS CHAPTER 4: FILTRATION INSTRUCTIONS 4.2 Filter Magic II Filtration System Operation The Filter Magic II filtration system allows the oil in one frypot to be filtered while the other frypots in a battery remain in operation. - Page 29 5. Position the hold-down ring over the filter paper and lower the ring into the pan, allowing the paper to fold up around the ring as it is pushed to the bottom of the pan. CF SERIES GAS FRYERS...
- Page 30 For powder quantity, see the filter powder manufacturer’s instructions. 7. Replace the crumb tray in the filter pan. 8. Install the filter into the cabinet. Ensure the pan connection securely connects to the cabinet connection. The system is ready for filtering. CF SERIES GAS FRYERS...
-
Page 31: Operation Of The Filter Unit
DO NOT hammer on the drain valve with the cleanout rod or other objects. Damage to the ball inside will result in leaks and will void the Frymaster warranty. 2. When the frypot is empty, use a long- handled, stiff brush to remove sediment from the sides of the frypot. - Page 32 10 to 12 seconds longer to clear the lines and prevent shortening from hardening in them, then PUSH the filter handle to the OFF position (arrow). CF SERIES GAS FRYERS DANGER Continue Oil-return handle in the open position.
- Page 33 If the thermal overload switch trips, turn off power to the filter system and allow the pump motor to cool 20 to 45 minutes before CF SERIES GAS FRYERS WARNING attempting to reset the switch.
-
Page 34: Chapter 5: Preventative Maintenance
Filter Oil The oil used in your fryer should be filtered at least once every day (more often if the fryer is in constant use). Refer to Chapter 4, Filtration Instructions, for details. -
Page 35: Weekly Checks And Services
300°F (149°C), stop the stopwatch or record the time. Clean Float Switch and Shaft If the fryer is equipped with a float switch, the float switch will need to be cleaned on a regular basis to ensure proper operation. - Page 36 If your fryer is not equipped with the built-in Filter Magic II Filtration system, the oil must be drained into another suitable container. For safe, convenient draining and disposal of used oil, Frymaster recommends the use of our shortening disposal unit (SDU). The SDU is available through your local distributor.
- Page 37 Check Computer Magic III Set Point Accuracy (NOTE: This check applies only to units equipped with Computer Magic III.5 Controllers.) 1. Insert a good-grade thermometer or pyrometer into the oil, with the end touching the fryer temperature probe. 2. When the computer displays (indicating that the frypot contents are within the cooking range), press the display the temperature of the cooking oil or shortening as sensed by the temperature probe.
-
Page 38: Semi-Annual Checks And Services
(located inside the cabinet at the back) are present and in good condition. NOTE: With fresh paper and properly installed O-rings, the system should refill the fryer in 2 to 3 minutes. Immediately after each use, drain the Power Shower completely. If you suspect blockage, unscrew the clean-out plugs at each corner of the frame. -
Page 39: Annual/Periodic System Inspection
5.3 Annual/Periodic System Inspection This appliance should be inspected and adjusted periodically by qualified service personnel as part of a regular kitchen maintenance program. Frymaster recommends that this appliance be inspected at least annually by a Factory Authorized Service Technician as follows: Fryer •... - Page 40 ON position. Allow all oil to return to the frypot (indicated by bubbles in the oil or, on units with Power Showers, cessation of oil flow from the Power Shower). Return the oil return handle to the OFF position. The frypot should have refilled in no more than 2 minutes and 30 seconds. CF SERIES GAS FRYERS...
-
Page 41: Chapter 6: Operator Troubleshooting
If you are in doubt as to the proper action to take, do not hesitate to call the Frymaster Technical Service Department or your local Frymaster Factory Authorized Service Center for assistance. -
Page 42: Troubleshooting Fryers With Solid State (Analog), Digital, Or Cm Iii.5 Controllers
CM III.5 will not go A. Temporary controller malfunction into programming caused by voltage surge. mode. CF SERIES GAS FRYERS A. Light pilot per instructions in Chapter 3 of this manual. B. Verify that drain valve is fully closed. C. Verify that unit is plugged in and that circuit breaker is not tripped. - Page 43 A. Burner is not lit. Heating mode indicator is on but fryer is not heating properly. B. Failed controller. CF SERIES GAS FRYERS B. If available, substitute controller known to be good for suspect controller (see Section 6.6). If fryer operates normally, order replacement controller from FASC.
-
Page 44: Troubleshooting Fryers With Thermostat Controls
45 minutes, and then press the reset button on the pump motor. Attempt to activate the pump. CF SERIES GAS FRYERS Probable Causes A. Light pilot per instructions in B. Verify drain valve is fully closed. C. Verify that unit is correctly D. - Page 45 A. Oil/shortening is too cold for filtering. or the transfer is very slow. CF SERIES GAS FRYERS B. If the switch is loose, tighten the screws holding it in place, ensuring that when the handle is placed in the ON position, the lever on the microswitch is pressed firmly against the switch.
- Page 46 Power Shower, but also squirting of oil from around the gasket.) CF SERIES GAS FRYERS B. Remove the oil from the filter pan and replace the filter paper, ensuring that the filter paper support screen is in place under the paper.
-
Page 47: Troubleshooting Abnormal Burner Operation
Fryer is operating normally, but flames Obstructed gas valve vent tube. are rolling out of the front of the burner. CF SERIES GAS FRYERS A. Call FASC to adjust pressure to recommended standard. B. Remove and clean vent tube and reinstall. -
Page 48: Replacing The Controller Or Controller Wiring Harness
6. Reverse the procedure to install a new controller or wiring harness. CF SERIES GAS FRYERS If replacing harness, disconnect the harness from the controller and interface board (arrows). If replacing controller, disconnect the ground wire... - Page 49 THIS PAGE INTENTIONALLY LEFT BLANK...
- Page 50 Frymaster, L.L.C., 8700 Line Avenue, PO Box 51000, Shreveport, Louisiana 71135-1000 Shipping Address: 8700 Line Avenue, Shreveport, Louisiana 71106 TEL 1-318-865-1711 FAX (Parts) 1-318-219-7140 FAX (Tech Support) 1-318-219-7135 Price: $12.00 SERVICE HOTLINE 819-5613 PRINTED IN THE UNITED STATES 1-800-551-8633 APRIL 2005...
Need help?
Do you have a question about the CF Series and is the answer not in the manual?
Questions and answers