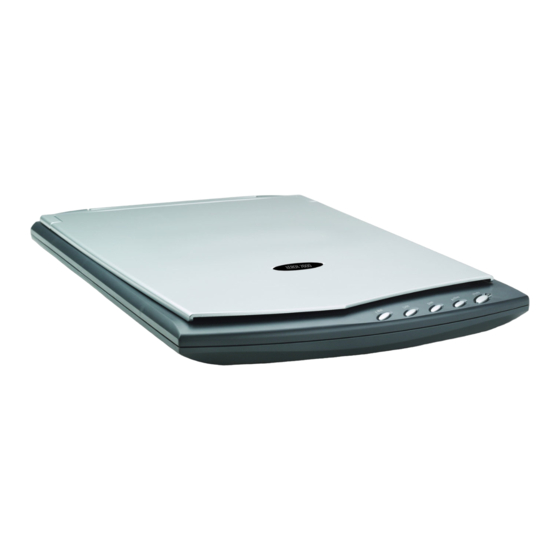
Xerox 7600 User Manual
Xerox scanner user's guide
Hide thumbs
Also See for 7600:
- Specifications (2 pages) ,
- Specifications (2 pages) ,
- User manual (88 pages)
Table of Contents
Advertisement
Quick Links
Advertisement
Table of Contents
Troubleshooting

Related Manuals for Xerox 7600


Summary of Contents for Xerox 7600
- Page 1 7600 scanner user’s guide...
- Page 2 XEROX ® is a trademark of Xerox Corporation in the United States and/or other countries and is used under license. DocuMate ® is a registered trademark of Xerox Corporation used under license. All other Xerox product names and product numbers mentioned in this publication are trademarks of Xerox Corporation.
-
Page 3: Table Of Contents
Xerox 7600 Scanner Specifications ........ - Page 4 ................53 Xerox Scanner User’s Guide...
-
Page 5: Welcome
Some of the illustrations in this guide may not look exactly as they appear on your computer’s screen. The differences are minor and do not affect the steps to use the new features. What’s in the Box (7600) Scanner USB Cable... -
Page 6: Installation
350 MB minimum of free hard disk space A VGA or SVGA Monitor The recommended settings for your monitor are: • Color quality of 16-bit or 32-bit • Resolution set to at least 800 x 600 pixels Xerox Scanner User’s Guide... -
Page 7: Install The Software
The Installation menu for the disc should now open. If the menu does not open: • From the list of files on the disc, double-click the file named START32.EXE. 3. On the Installation menu, select Install Products. Xerox Scanner User’s Guide... - Page 8 The Welcome to the One Touch 4.0 Setup Wizard opens. 6. Click Next. 7. On the Xerox License Agreement window, read the license agreement. If you accept the terms, select I Agree then click Next. If you choose not to accept the license agreement, the installation will terminate and the scanner driver will not be installed.
- Page 9 If your computer is running Windows XP or Windows Vista, Microsoft’s Windows Image Acquisition (WIA) interface for scanning is always available, regardless of your selection on this window. Refer to your Windows documentation for instructions on using this interface. Xerox Scanner User’s Guide...
- Page 10 11. Select the option that looks best to you and click Next. 12. STOP when you see the “Complete the installation by connecting your hardware” window. Do NOT click OK yet. Leave the window open and proceed to the next section. Xerox Scanner User’s Guide...
-
Page 11: Connect The Usb Cable And Turn On The Power
USB port and automatically loads the appropriate software to run the scanner. 7600: The 7600 scanner does not have a power switch. Plugging the USB cable into the scanner, and the computer, turns on the power. If your computer is running Windows XP or Windows Vista, you will see a message similar to the following. - Page 12 You can also click More to see a quick overview about accessing and navigating the One Touch software. When you’re finished reading the additional information, click OK. 6. Click Close on the Installation Complete window to close and exit the software installer. Xerox Scanner User’s Guide...
-
Page 13: View The User Guides
3. When you’re finished, click Main Menu to return to the Main Menu window and click Exit. 4. Remove the disc and store it in a safe place. That’s it! Installation is finished and your Xerox scanner is ready to scan. Xerox Scanner User’s Guide... -
Page 14: Loading Documents To Scan
Misuse as described here will void your scanner’s warranty. 7600 1. Lift the scanner lid and place an item face down on the glass. 2. Align the top edge of the item with the reference marks on the scanner. Then close the lid. Xerox Scanner User’s Guide... -
Page 15: Scanning From One Touch
“Email”, “Copy”, and “Scan”. The button panel will have also have those 3 buttons with the same name. This is similar to the 7600, which has 5 buttons on the scanner and 5 buttons on the One Touch Button Panel. -
Page 16: Scanning With The One Touch Button Panel
Single-Left-Click on the detailed information to open the One Touch Properties. The Hardware View • Left-click on the scanner icon to return to the Button view. • Right-click on the scanner icon to open the scanner’s hardware properties. Xerox Scanner User’s Guide... -
Page 17: Configuring The One Touch Buttons
For scanners with multiple buttons on the scanner, such as the DocuMate 515 and 7600, there will be one tab for each button on the scanner across the top of the One Touch Properties window. 2. Click on an application name in the Select Destination list. -
Page 18: Creating A New Scan Configuration
Drag the sliders to set the Brightness and Contrast. 2. Select scan settings for the new scan configuration. Mode—Select a scanning mode: • Black&White to scan in black and white. Xerox Scanner User’s Guide... - Page 19 Custom—Enter the horizontal and vertical page dimensions in the boxes. Click the name of the units, inches or millimeters, to toggle between them. Improvements and Settings—One the options that apply to the selected scanning mode on the Scan Settings tab are available. Xerox Scanner User’s Guide...
- Page 20 Color Filter—Color filter is the ability of your scanner to automatically remove a color from a scanned item. Color filter applies to Black&White or Grayscale Mode. The original with a red The scanned item with watermark over black text. the red filtered out. Xerox Scanner User’s Guide...
- Page 21 4. If there are no other settings you want to change, click OK to save the new configuration. It will now be in the list of Scan Configurations on the One Touch Properties window for the appropriate Destination Applications. Xerox Scanner User’s Guide...
-
Page 22: Selecting Document And File Format Options
For instance, PaperPort has a basic OCR engine that One Touch accesses to create editable text files. The DocuMate 510 and the 7600 scanners came with PaperPort and the optional text files are limited to TEXT, RTF, XLS and HTML. - Page 23 Destination Application supports several file types, and you can right-click on the icon to choose the particular file type for that application. The specific text format; this example is for Microsoft Word Rich Text Format. Xerox Scanner User’s Guide...
-
Page 24: Scanning With Optical Character Recognition (Ocr)
4. On the One Touch button panel, click the button you set for scanning with OCR. The scanner starts scanning and your scanned pages appear in the Destination Application with the text ready for editing and other text processing. Xerox Scanner User’s Guide... -
Page 25: Selecting One Touch Properties Options
Use create copies of scanned documents if you want a copy saved on your hard drive. Selecting this option enables the Folder Copy Options field for you to choose where the files are saved. Xerox Scanner User’s Guide... -
Page 26: Scan And Burn To A Cd
8. Click the Burn to CD button. The CD burner begins and your scanned documents are written to the CD. NOTE: If other files are also waiting to be burned to the CD, they will get written with the One Touch files on the CD. Xerox Scanner User’s Guide... -
Page 27: Transferring Scanned Documents To Storage
5. Choose a Scan Configuration. Click OK. Now scan the document using the button you set to use the Destination Application as Transfer to Storage. Xerox Scanner User’s Guide... -
Page 28: Scanning To Multiple Archive Folders
5. To help you remember which folder it is, give the new configuration a name that indicates the folder name, such as “Business Receipts.” 6. Click the Scan Settings, Page Settings, and Advanced Settings tabs, and select the settings you want. Xerox Scanner User’s Guide... - Page 29 Make sure to designate separate folders as the Storage Locations for the new configurations. 12. You will now have multiple configurations set up for the Transfer to Storage destination, and each configuration scans documents to separate folders. Xerox Scanner User’s Guide...
- Page 30 3. When scanning is finished, insert the next set of documents. 4. On the One Touch Button Panel, click on the next button that you set to scan to a Storage folder. When scanning is finished, the documents are stored in the two separate folders. Xerox Scanner User’s Guide...
-
Page 31: Scanning With Kofax Vrs
The VRS icon on the top of the One Touch Panel and on the scan configuration indicates that the feature is enabled for the current scan configuration. The summary of the scan settings also indicates VRS settings. Xerox Scanner User’s Guide... -
Page 32: Checking The Hardware And Setting The Lamp Power Saving
1. Right-click on the One Touch icon and choose Show Hardware from the pop-up menu. 2. The Hardware Properties dialog box opens and shows information about your Xerox scanner. 3. Click the Properties button. Your scanner has a built-in power saving feature that is set to power down after 15 minutes of idle time. -
Page 33: Scanning From Twain
Scan and select TWAIN from the menu. 4. Click OK. 5. Click on the button you set for Configure Before Scan. In the example above, button 9 is being used. 6. The TWAIN interface will now open. Xerox Scanner User’s Guide... -
Page 34: Scanning From The Twain Basic Interface
Microsoft Office applications can access the TWAIN interface from the Insert menu, by choosing Picture then From Scanner or Camera. Select your Xerox scanner from the drop-down menu. Then click Custom Insert. Note that your scanner may be listed twice. One listing is for choosing TWAIN Interface, the other is usually for choosing the WIA Interface. - Page 35 • Autorotate 90—This option rotates the image 90 degrees to the right. Xerox Scanner User’s Guide...
-
Page 36: Scanning From The Twain Advanced Interface
• Black&White is for letters, memos, pen and ink drawings, and other black and white material. 4. Click the Scan button. 5. When you’re finished scanning items, click Done to close the Advanced Interface. Xerox Scanner User’s Guide... -
Page 37: Adjusting The Image With The Advanced Interface
Brightness/Contrast Color (Gamma, Saturation, and Hue) Scan Size NOTE: The scan settings for a configuration applies only to that type of configuration. For example, the Black&White Configuration does not have a setting for the Color Hue. Xerox Scanner User’s Guide... - Page 38 To scan the image and limit or eliminate moiré patterns, select the Reduce Moiré option. This option is not available for high resolution settings. Xerox Scanner User’s Guide...
- Page 39 You can also type a number directly into the brightness or contrast setting boxes, or click the up and down arrows next to the box to increase or decrease the setting. 3. Click Reset to return the settings to their original numbers Xerox Scanner User’s Guide...
- Page 40 You can also type a number directly into the setting boxes, or click the up and down arrows next to the boxes. 2. Click Reset to return the settings to their original numbers. Xerox Scanner User’s Guide...
- Page 41 To resize the selected area, put the pointer on a dotted line, then click and drag the mouse. 5. If you want to remove the selected area and start over, click Remove on the Scan Info box. 6. When the settings are what you want, click Scan. Xerox Scanner User’s Guide...
-
Page 42: The Ruler Units
Preview window. Size of the file of the scanned image. Current location of Click to remove the the pointer as you selected area. drag it on the The space on your Preview window. computer’s hard drive. Xerox Scanner User’s Guide... -
Page 43: Creating A New Advanced Interface Profile
To change or delete a profile you created: 1. Select your profile from the configuration list. 2. Make changes to the profile as needed, and then click Save. 3. If you want to delete the selected profile, click Delete. Xerox Scanner User’s Guide... -
Page 44: Troubleshooting
Make sure the paper is fully seated in the scanner’s input tray. The paper sensor might be triggered but the paper isn’t far enough in the scanner to allow the rollers to pick up the pages. Xerox Scanner User’s Guide... -
Page 45: Status Light Troubleshooting
If the problem persists, order a replacement power supply from Xerox. • The ADF pad may not be fully seated in the scanner body. Open the scanner, press down on the ADF pad and make sure it snaps into place. Xerox Scanner User’s Guide... -
Page 46: Uninstalling Your Scanner
Troubleshooting Uninstalling Your Scanner To uninstall our Xerox scanner, remove the One Touch software, and any other scanning software provided with the scanner. Uninstalling the Scanner and One Touch Software 1. On the Windows taskbar, click Start, point to Settings, then click Control Panel. -
Page 47: Maintenance
USB cable 185 cm, 28AWG, with core Safety and agency certifications UL, C-UL, FCC Class B, CE, TUV/GS, RoHS Xerox 7600 Spare Part List Please use the following part name and number when ordering a replacement USB cable for your scanner. -
Page 48: Notices
Your Xerox product and supplies have been designed and tested to meet strict safety requirements. These include safety agency evaluation and certification, and compliance with electromagnetic regulations and established environmental standards. -
Page 49: Section 3: Operational Safety Information
Section 3: Operational Safety Information Your Xerox equipment and supplies have been designed and tested to meet strict safety requirements. These include safety agency examination, approval, and compliance with established environmental standards. To ensure the continued safe operation of your Xerox equipment, follow... -
Page 50: Section 4: Electrical Information
If you are not sure whether or not an outlet is correctly grounded, consult an electrician. 5. Do not use an adapter to connect any Xerox equipment to an electrical outlet that lacks a ground connection terminal. 6. Do not place this equipment where people might step or trip on the power cable. -
Page 51: Section 5: Emergency Power Off
Section 5: Emergency Power Off If any of the following conditions occur, turn off the machine immediately and disconnect the power cable(s) from the electrical outlet(s). Contact an authorized Xerox Service Representative to correct the problem: • The equipment emits unusual odors or makes unusual noises. -
Page 52: Section 8: Regulatory Information
Product Recycling & Disposal: USA & Canada Xerox operates a worldwide equipment take back and reuse/recycle program. Contact your Xerox sales representative (1-800-ASK-XEROX) to determine whether this Xerox product is part of the program. For more information about Xerox environmental programs, visit: www.xerox.com/ environment.html. - Page 53 Xerox ENERGY STAR equipment is preset at the factory. Your machine will be delivered with the timer for switching to Power Save Mode from the last copy/print out, set at 15 minutes. A more detailed description of this feature can be found in the Machine Setup Section of this guide.
-
Page 54: Section 10: Illegal Copies
Copyright Office, Library of Congress, Washington, D.C. 20559. Ask for Circular R21. 5. Certificates of Citizenship or Naturalization. (Foreign Naturalization Certificates may be photographed.) 6. Passports. (Foreign Passports may be photographed.) Xerox Scanner User’s Guide... - Page 55 9. Copyrighted material or trademarks of any manner or kind without the consent of the copyright or trademark owner. Xerox Scanner User’s Guide...
-
Page 56: Section 11: Eh&S Contact Information
In case of doubt, contact your legal counsel. Section 11: EH&S Contact Information Contact Information For more information on Environment, Health, and Safety in relation to this Xerox product and supplies, please contact the following customer help lines: USA: 1-800-828-6571... -
Page 57: Index
Moiré Patterns 16, 34 dots-per-inch 34 dpi 34 OCR 19 On/Off Switch 7 Error codes 41 One Touch Button Panel Button View 12 Detail View 12 Hardware View 12 File Format 13 OCR 20 One Touch icon 12, 13 Xerox Scanner User’s Guide... - Page 58 Staples 10 Status light 7, 40 Troubleshooting 41 Straighten Image 16 System requirements 2 text file format 19 Text Formats 19 TIFF 19 Transfer to Storage 23 Troubleshooting 40 TWAIN 5 Uninstall Software 42 USB port 7 Xerox Scanner User’s Guide...
- Page 59 VC-000...
Need help?
Do you have a question about the 7600 and is the answer not in the manual?
Questions and answers