Table of Contents
Advertisement
Advertisement
Table of Contents
Troubleshooting

Related Manuals for Xerox Xerox Mobile Scanner


Summary of Contents for Xerox Xerox Mobile Scanner
-
Page 1: User Guide
June 2012 05-0844-200 Xerox Mobile Scanner ® User Guide... - Page 2 Design © 2012 Xerox Corporation. All rights reserved. XEROX®, XEROX and Design® are registered trademarks of Xerox Corporation in the United States and/or other countries. BR111 Content © 2012 Visioneer, Inc. All rights reserved. The Visioneer brand name and OneTouch® logo are registered trademarks of Visioneer, Inc.
-
Page 3: Table Of Contents
Download and Install Xerox DocToMe ........ - Page 4 Xerox Mobile Scanner Specifications ........
-
Page 5: Safety
• Electrical Information on page 8 • Emergency Power Off on page 9 • Maintenance Information on page 10 • Product Safety Certification on page 11 • Environmental Health and Safety Contacts on page 12 Xerox Mobile Scanner User’s Guide... -
Page 6: Safety Introduction
Please read the following instructions carefully before operating the machine and refer to them as needed to ensure the continued safe operation of your machine. Your Xerox product and supplies have been designed and tested to meet strict safety requirements. These include safety agency evaluation and certification, and compliance with electromagnetic regulations and established environmental standards. -
Page 7: Operational Safety Information
• Always unplug this equipment from the electrical outlet before cleaning. Note: Your Xerox machine is equipped with an energy saving device to conserve power when the machine is not in use. The machine may be left on continuously. Do Not Do These •... -
Page 8: Electrical Information
Plug the power cable directly into a correctly grounded electrical outlet. If you are not sure whether or not an outlet is correctly grounded, consult an electrician. Do not use an adapter to connect any Xerox equipment to an electrical outlet that lacks a ground connection terminal. -
Page 9: Emergency Power Off
Emergency Power Off If any of the following conditions occur, turn off the machine immediately and disconnect the power cable(s) from the electrical outlet(s). Contact an authorized Xerox Service Representative to correct the problem: • The equipment emits unusual odors or makes unusual noises. -
Page 10: Maintenance Information
Do not remove covers or guards that are fastened with screws. There are no parts behind these covers that you can maintain or service. Do not perform any maintenance procedures unless you have been trained to do them by an authorized local dealer or unless a procedure is specifically described in the user manuals. Xerox Mobile Scanner User’s Guide... -
Page 11: Product Safety Certification
Product Safety Certification This product is certified by the following Agency using the Safety standards listed: Standard UL60950-1 (USA) CSA 22.2 No. 60950-1 (Canada) IEC 60950-1 Xerox Mobile Scanner User’s Guide... -
Page 12: Environmental Health And Safety Contacts
Environmental Health and Safety Contacts Contact Information For more information on Environment, Health, and Safety in relation to this Xerox product and supplies, please contact the following customer help lines: USA & Canada: 1-800-828-6571 Europe: +44 1707 353 434 Xerox Mobile Scanner... -
Page 13: Welcome
• Register Your Scanner on page 20 Thank you for purchasing the Xerox Mobile Scanner. With this scanner you can scan directly to a memory card or USB flash drive without connecting the scanner to a computer. Xerox Mobile Scanner... -
Page 14: What's In The Box
What’s in the Box Before proceeding, check the contents of the box. If items are missing or damaged, contact the dealer where you purchased the scanner. Windows™ Xerox Mobile Scanner Quick Install Guide Technical Support Card Installation Disc Carrying bag... -
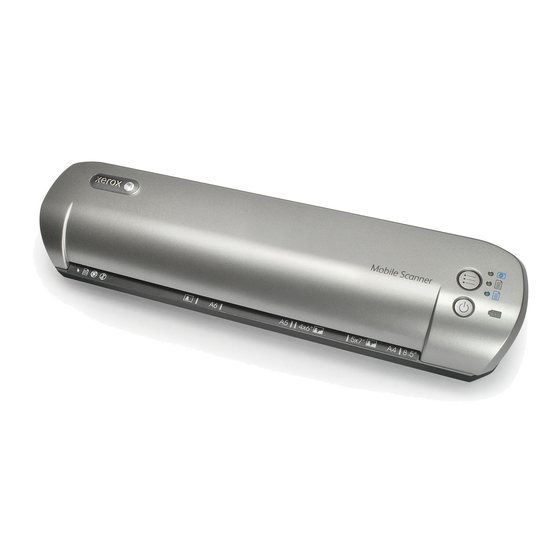
Page 15: The Xerox Mobile Scanner
The Xerox Mobile Scanner Paper feed slot Control panel USB cable port USB flash drive port Memory card slot Battery Glass release compartment button Paper feed slot—Insert an item face up in the scanner, aligned to the arrow at the end of the paper feed slot. - Page 16 Memory card slot—Insert an SD memory card into this slot to scan directly to a memory card. Battery compartment—Holds the rechargeable battery that powers the scanner. Glass release button—Separates the glass and rollers inside the scanner so that you can clean the scanner using the cleaning swab. Xerox Mobile Scanner User’s Guide...
-
Page 17: Insert The Battery
Open the battery cover on the underside of the scanner. Insert the battery into the compartment. Make sure the battery is inserted in the correct position. Lower the compartment lid and slide the lid in place to lock it. Xerox Mobile Scanner User’s Guide... -
Page 18: Connect The Scanner To Charge The Battery
North America, U.K., Europe Slide the power plug adapter into the power supply base. Charging the Battery: Insert the small end of the USB cable into the USB port on the back of the scanner. Xerox Mobile Scanner User’s Guide... - Page 19 Plug the flat end into the power supply base. Plug the power supply into a wall outlet. Note: You can also charge the scanner battery when it is connected to a USB port in your computer. Xerox Mobile Scanner User’s Guide...
-
Page 20: Register Your Scanner
Press Enter on your computer’s keyboard or click the option on screen to go to the web address. When the Xerox scanners web page loads click on Register Your Product. Fill in the registration form, all required fields have an asterisk (*). -
Page 21: Scanning To Removeable Media
Follow the instructions in this section to scan and transfer images with a standard SDHC memory card or USB thumb drive. If you want to transfer images wirelessly, please refer to Scan and Transfer Images Wirelessly with Eye-Fi page 31 for configuring the Eye-Fi card for wireless image transfer. Xerox Mobile Scanner User’s Guide... -
Page 22: Memory Card Or Usb Flash Drive
Scans in color at 300dpi and creates a JPG (*.jpg) file. Scans in black & white at 300dpi and creates an Adobe PDF (*.pdf) file. Scans in color at 300dpi and creates an Adobe PDF (*.pdf) file. Xerox Mobile Scanner User’s Guide... -
Page 23: Creating Multiple Page Pdf Files
If you are using a USB flash drive, remove it from the scanner and plug it into a USB port on your computer. The memory card or USB flash drive will be detected by the computer as a disc drive from which you can copy or move the images. Xerox Mobile Scanner User’s Guide... - Page 24 Alternatively, you can copy the images directly from the scanner when the scanner is connected to a computer with its USB cable. Turn on the scanner power and the scanner will be detected as a disc drive for you to copy the images from the scanner. Xerox Mobile Scanner User’s Guide...
-
Page 25: Android® Devices (Smartphones And Tablets)
Scans in color at 300dpi and creates a JPG (*.jpg) file. Scans in black & white at 300dpi and creates an Adobe PDF (*.pdf) file. Scans in color at 300dpi and creates an Adobe PDF (*.pdf) file. Xerox Mobile Scanner User’s Guide... -
Page 26: Retrieving The Scanned Images
Problem: The phone is connected as a disc drive but the LEDs never stop flashing. • Solution 1: Check to see if you have a memory card installed on the phone (such as a mini-SD or micro-SD card). Xerox Mobile Scanner User’s Guide... - Page 27 Change the device’s USB connection type from the “disc drive” option to the “sync” option. Immediately change the device’s USB connection type back to “disc drive”. The device should now initialize its storage properly and the scanner LEDs should stop flashing. Xerox Mobile Scanner User’s Guide...
-
Page 28: Apple Ipad
All of the LEDs will flash as the scanner initializes. When the scanner is ready to scan, a single LED will be lit next to the first function represented by a camera icon. Make sure the camera function on the scanner is selected. Scans in color at 300dpi and creates a JPG (*.jpg) file. Xerox Mobile Scanner User’s Guide... - Page 29 When the scanner is plugged in, but turned off, the scanner will attempt to charge the battery. This is the expected behavior and will result in a message displaying on the iPad that the device is requiring too much power. Xerox Mobile Scanner User’s Guide...
-
Page 30: Other Mobile Devices
BlackBerry Curve 9300. If you have a BlackBerry or Wndows mobile device, you can try following the directions Android® Devices (Smartphones and Tablets) on page 25 to see if you can connect your scanner and scan. Xerox Mobile Scanner User’s Guide... -
Page 31: Scan And Transfer Images Wirelessly With Eye-Fi
An Eye-Fi card is a secure digital high-capacity (SDHC) memory card with wireless function. Using an Eye-Fi card you can scan and transfer images wirelessly from the Xerox Mobile Scanner to your computer, online file sharing site, or mobile device. -
Page 32: Install The Eye-Fi Center Application
You can also try plugging the scanner into a different USB port if the scanner is not being detected properly. Click or double-click the EYE-FI drive to open it. Open the START HERE folder. Open the Mac OS X or Windows folder. Xerox Mobile Scanner User’s Guide... - Page 33 If a newer version is found it will be downloaded to your computer and then the installer will launch when the download is complete. Follow the installation prompts on-screen to install the Eye-Fi Center application. Xerox Mobile Scanner User’s Guide...
- Page 34 The Eye-Fi Center automatically opens when you click on Close or Finish at the end of the installation. If the application does not open automatically, launch the application from the programs list for your computer. Xerox Mobile Scanner User’s Guide...
-
Page 35: Log In And Activate The Eye-Fi Card
The lights will stop flashing when the firmware update is complete. When the firmware update is complete, you can proceed with activating the card and configuring the card settings. Xerox Mobile Scanner User’s Guide... - Page 36 The next window allows you to select the Wi-Fi network you want to add to the Eye-Fi card. Select your network from the list and then input the network password. Click Continue. Xerox Mobile Scanner User’s Guide...
- Page 37 When scanning is finished the image is saved to the Eye-Fi card and transmitted over your wireless network to your computer. It will display in the Eye-Fi Center application when the transfer is complete. Xerox Mobile Scanner User’s Guide...
- Page 38 • Scan and Send Files to aniOS Mobile Device (iPad, iPod, and iPhone) on page 49 • Scan and Send Files to an Android Mobile Device on page 63 Xerox Mobile Scanner User’s Guide...
-
Page 39: The Eye-Fi Card Settings
Helper by clicking on its icon in the Eye-Fi folder located in the applications list for your computer. To prevent the Eye-Fi Helper utility from starting automatically each time the computer starts, click on the icon and then click on Auto-start Eye-Fi Helper to deselect that option. Xerox Mobile Scanner User’s Guide... -
Page 40: Adding Or Removing Private Wireless Networks
Enter the name for the other network. Select the security type for the other network from the drop down menu. Enter that network’s password. Select Network is out of range. Click add Network to Card. Xerox Mobile Scanner User’s Guide... -
Page 41: Direct Mode
If you have configured a mobile device to receive scanned images, the device that the files will be sent to is displayed in this dialogue. Click on the Save button when you are done making changes in this dialogue. Xerox Mobile Scanner User’s Guide... -
Page 42: Transferring Raw Files (Pdf Files)
If you have configured a mobile device to receive scanned files, the device that the files will be sent to is displayed in this dialogue. Click on the Save button when you are done making changes in this dialogue. Xerox Mobile Scanner User’s Guide... -
Page 43: Eye-Fi View
With digital camera you can protect a file and whatever options you select in this dialogue will apply only when you use this Eye-Fi card in your digital camera. Xerox Mobile Scanner User’s Guide... - Page 44 Endless Memory—the Endless Memory option in the Eye-Fi Center software may not work with the custom Eye-Fi card provided with your scanner. Please refer to Access and Delete Images from the Eye-Fi Card on page 72 for instructions on how to enable the option for automatically deleting transferred files. Xerox Mobile Scanner User’s Guide...
-
Page 45: Scan And Send Files To A Computer
Scans in black & white at 300dpi and creates an Adobe PDF (*.pdf) file. Scans in color at 300dpi and creates an Adobe PDF (*.pdf) file. Insert an item in the scanner. Xerox Mobile Scanner User’s Guide... -
Page 46: Scan To A Windows Computer
Start > Eye-Fi > Eye-Fi Center. Double-click the icon that displays the images for that date. The folder expands to display the images as icons. Double-click an image icon to view the image. Xerox Mobile Scanner User’s Guide... -
Page 47: Scan To A Mac Computer
When the option to send items to Eye-Fi View is enabled, you can access your scanned images from any computer through the Eye-Fi website. Images are stored for seven days in the Eye-Fi account using the free account. To access images: In a web browser, access http://www.eye.fi Click the login link. Log in. Xerox Mobile Scanner User’s Guide... - Page 48 Select the specific card from the drop-down list on the left side instead of the device or My Activity. Click an image icon to access the folder. Xerox Mobile Scanner User’s Guide...
-
Page 49: Scan And Send Files To Anios Mobile Device (Ipad, Ipod, And Iphone)
Open the App Store from your mobile device. Open the search field and then input: Xerox DocToMe Tap Search. Select Xerox DocToMe and follow the on-screen steps to download the mobile application to your device. Tap DocToMe to open the application. Xerox Mobile Scanner... - Page 50 Tap Next on the Welcome screen. Input your Eye-Fi account email address and password, and then tap Login. If the Eye-Fi card is in the scanner, make sure the scanner is powered on. Tap Add... under Eye-Fi Cards. Xerox Mobile Scanner User’s Guide...
- Page 51 You will now be in the DocToMe mobile application. When you are within range of your configured wireless network, scanned images will be sent directly to your mobile device from the Eye-Fi card in your Xerox Mobile Scanner. Please refer to Using DocToMe on page 58 for instructions on scannig and sending images to your mobile device.
-
Page 52: Connecting To The Eye-Fi Direct Mode Network
The recommended settings are: Select 2 minutes for Direct Mode to wait for a device to connect to it. Select 30 seconds for the Direct Mode to stay on after the last item is received. Xerox Mobile Scanner User’s Guide... - Page 53 These instructions assume that you have already logged into your Eye-Fi account, and paired to the Eye-Fi card, as indicated in the instructions for Download and Install Xerox DocToMe on page 49. Tap the gear icon to show the settings for DocToMe.
- Page 54 13. Tap Done on the Settings screen. 14. Open the Wi-Fi settings for your mobile device. 15. If the Eye-Fi card is in the scanner, make sure the scanner is still connected to the computer and powered on. Xerox Mobile Scanner User’s Guide...
- Page 55 Network has been initialized. 17. On your mobile device—tap the Eye-Fi Card when it displays in the list of available networks under Choose a Network. 18. Tap in the password field for the Eye-Fi Card network. Xerox Mobile Scanner User’s Guide...
- Page 56 21. The Settings for the mobile device will now show that it is connecting to the Eye-Fi Card network. Technical note: if the Eye-Fi card doesn’t display in the list of available networks for your mobile device after a minute, try clicking Start Direct Mode Network in the Eye-Fi Center application again. Xerox Mobile Scanner User’s Guide...
- Page 57 Disconnect the scanner from the computer and power cycle the scanner. When the scanner power is back on, insert a photo in the scanner. The scanner scans saves the image to the Eye-Fi card, and the card starts transmitting the image. Open the DocToMe application. Xerox Mobile Scanner User’s Guide...
-
Page 58: Using Doctome
After you have configured the software to connect to the Eye-Fi card, you can use DocToMe to view and share scanned images, including multi-page PDF files. The scanned images that are transferred to your mobile device and will be displayed in the Documents list in the application. Xerox Mobile Scanner User’s Guide... - Page 59 Document list always appears on the left side of the full image view. You can scroll the list up and down. Tap on a document to show the full image view on the right side. Renaming Documents In the Documents list, tap the file you want to rename. Xerox Mobile Scanner User’s Guide...
- Page 60 In the Documents list, tap the Edit button. A selection circle will be displayed next to each time in the documents list. Tap on each file name that you want to send. Tap the share icon. Xerox Mobile Scanner User’s Guide...
-
Page 61: Scanning To Doctome
Scans in black & white at 300dpi and creates an Adobe PDF (*.pdf) file. Scans in color at 300dpi and creates an Adobe PDF (*.pdf) file. Insert an item face up in the paper feed slot, aligned to the left side of the scanner. Xerox Mobile Scanner User’s Guide... -
Page 62: Creating Multiple Page Pdf Files
Problem – not all of my scanned files are showing up in DocToMe. We recommend that you disable Eye-Fi View if you want to use Xerox DocToMe for scanning and transmitting images to your mobile device. Images will not be transferred to Eye-Fi View when the destination is DocToMe on your mobile device. -
Page 63: Scan And Send Files To An Android Mobile Device
Upon installation, touch the Open button to launch the application. Input your Eye-Fi account email address and password, and then tap Login. If the Eye-Fi card is in the scanner, make sure the scanner is powered on. Xerox Mobile Scanner User’s Guide... - Page 64 A confirmation dialogue will display on your device. Make sure the options for Photos (JPG files) and RAW photos (PDF files) is selected, and then tap the option to Switch to [your mobile device model]. Tap Continue on the Eye-Fi Card Pairing screen. Xerox Mobile Scanner User’s Guide...
-
Page 65: Connecting To The Eye-Fi Direct Mode Network
You will now be in the Eye-Fi mobile application. When you are within range of your configured wireless network, scanned images will be sent directly to your mobile device from the Eye-Fi card in your Xerox Mobile Scanner. Note that if you had previously selected Photos and RAW files to be sent to your computer during the initial setup, pairing your mobile device with the Eye-Fi card automatically changes Photos and RAW files to be transferred to your mobile device. - Page 66 Disconnect the scanner from your computer and power cycle the scanner. Testing the Direct Mode Network After you have configured the Direct Mode network we recommend that you run a test scan to verify the software is working as expected. Xerox Mobile Scanner User’s Guide...
- Page 67 Note: You can set the application to automatically connect to the Eye-Fi network. When the option is selected, each time that you scan and open the Eye-Fi application, the device is automatically switched to the Eye-Fi network without being prompted. From the menu options, press Settings, then Application Preferences, and Automatically Connect. Xerox Mobile Scanner User’s Guide...
-
Page 68: Scanning To Eye-Fi
The scanner starts scanning, when finished it is saved to the Eye-Fi card and the card starts transmitting the file. In the Eye-Fi application on your mobile device, you will see images loading into the software. Creating Multiple Page PDF Files Turn on the scanner Xerox Mobile Scanner User’s Guide... - Page 69 When the LED stops flashing the PDF file is saved with all items scanned in one file to the Eye-Fi card and the card starts transmitting the file. In the Eye-Fi application on your mobile device, you will see images loading into the software. Xerox Mobile Scanner User’s Guide...
-
Page 70: Pdf File Transfer Using Evernote
In the Eye-Fi Center, if a required image is not already in the tray at the bottom of the window, drag and drop it to the tray or right-click the image and add it to the tray. Delete any other images in the tray. Click the Publish button. A window opens. Xerox Mobile Scanner User’s Guide... - Page 71 Select Evernote, and click Share Now. The images are sent to your Evernote account, as shown here. Send them by email to your computer/device. Xerox Mobile Scanner User’s Guide...
-
Page 72: Access And Delete Images From The Eye-Fi Card
The setting is saved to the scanner firmware and not to the Eye-Fi card, so you can enable or disable this feature whether or not an Eye-Fi card is currently in the scanner. If you are using a standard SDHC memory card or USB flash drive, the files will not automatically be deleted. Xerox Mobile Scanner User’s Guide... -
Page 73: Airplane Mode
The battery LED will start to slowly flash in 2 second intervals. This means that the Eye-Fi card is no longer using wireless connection. To turn Wi-Fi back on simply repeat the steps as listed above. When Wi-Fi is turned back on the battery LED will stop flashing. Xerox Mobile Scanner User’s Guide... -
Page 74: Troubleshooting And Error Messages
“not in range” message, connect the scanner to the computer with Eye-Fi Center software installed, and click the Start Direct Mode Network button in the Direct Mode tab. Xerox Mobile Scanner User’s Guide... -
Page 75: Maintenance
Status LEDs on page 78 • Xerox Mobile Scanner Specifications on page 79 • Xerox Mobile Scanner Spare Part List on page 80 This section contains scanner information about regular maintenance, specifications and spare parts. Xerox Mobile Scanner User’s Guide... -
Page 76: Calibrating Your Scanner
Calibrating the scanner with a dirty or creased calibration page may cause the image quality to worsen. Note: if calibration fails, the function LEDs will start blinking. Simply insert the calibration page while the lights are still flashing to try the calibration again. Xerox Mobile Scanner User’s Guide... -
Page 77: Cleaning Your Scanner
Swipe the tip across the inside of the scanner from right-to-left. Repeat this 5 or 6 times to thoroughly clean the scanner. When you are finished cleaning the scanner, release the button on the side of the scanner. Store the cleaning swab in a clean, dust-free area. Xerox Mobile Scanner User’s Guide... -
Page 78: Status Leds
Status LEDs The status light indicates the current state of the scanner. Descriptions of the most common patterns are listed below. Contact Xerox Technical Support if you experience a different blinking pattern. Normal Operation • Function LEDs—When a single LED is lit next to one of the icons, this is the currently selected scan function. -
Page 79: Xerox Mobile Scanner Specifications
Xerox Mobile Scanner Specifications Optical resolution 300 dpi Bit depth 24-bit color, 1-bit bitonal (black & white) Maximum item size 8.5" x 14" (216 mm x 356 mm) Minimum item size 2.0" x 2.0" (51 mm x 51 mm) Scan method... -
Page 80: Xerox Mobile Scanner Spare Part List
Xerox Mobile Scanner Spare Part List Please use the following part name and number when ordering a replacement part for your scanner. Part Name Part Number Carrying bag 88-0630-001 Battery 28-0008-000 USB Cable 35-0238-000 Memory card 51-0004-100 Power Supply 37-0096-000 Plug adapters 35-0096-000 (U.S.) -
Page 81: Regulatory Information
Regulatory Information This chapter includes: • Basic Regulations on page 82 • Copy Regulations on page 84 Xerox Mobile Scanner User’s Guide... -
Page 82: Basic Regulations
(2) this device must accept any interference received, including interference that may cause undesired operation. Changes and modifications to this equipment not specifically approved by Xerox may void the user’s authority to operate this equipment. -
Page 83: Other Regulations
A full declaration of conformity, defining the relevant directives and referenced standards, can be obtained from your Xerox Limited representative or by contacting: Environment, Heath and Safety The Document Company Xerox Bessemer Road Welwyn Garden City Herts AL7 1HE England, Telephone +44 (0) 1707 353434... -
Page 84: Copy Regulations
Copyright Office, Library of Congress, Washington, D.C. 20559. Ask for Circular R21. Certificates of Citizenship or Naturalization. (Foreign Naturalization Certificates may be photographed.) Passports. (Foreign Passports may be photographed.) Immigration Papers. Draft Registration Cards. Xerox Mobile Scanner User’s Guide... -
Page 85: Canada
Copyrighted material or trademarks of any manner or kind without the consent of the copyright or trademark owner. The above list is provided for your convenience and assistance, but it is not all inclusive, and no liability is assumed for its completeness or accuracy. In case of doubt, consult your solicitor. Xerox Mobile Scanner User’s Guide... -
Page 86: Other Countries
Copyright material or trademarks without the consent of the owner • Postage stamps and other negotiable instruments Note: This list is not inclusive and no liability is assumed for either its completeness or accuracy. In case of doubt, contact your legal counsel. Xerox Mobile Scanner User’s Guide... -
Page 87: Compliance Information
Compliance Information This chapter includes: • Product Recycling & Disposal on page 88 • Energy Star for the USA on page 89 Xerox Mobile Scanner User’s Guide... -
Page 88: Product Recycling & Disposal
Product Recycling & Disposal USA & Canada If you are managing the disposal of your Xerox product, please note that the product may contain lead, mercury, Perchlorate, and other materials whose disposal may be regulated due to environmental considerations. The presence of these materials is fully consistent with global regulations applicable at the time that the product was placed on the market. -
Page 89: Energy Star For The Usa
Energy Star for the USA Energy Program Compliance The Xerox Mobile Scanner is E qualified under the E Program Requirements for Imaging NERGY NERGY Equipment. The E and E are registered United States trademarks. The E Imaging NERGY NERGY NERGY Equipment Program is a team effort between U.S., European Union and Japanese governments and the office... - Page 90 Xerox Mobile Scanner User’s Guide...
Need help?
Do you have a question about the Xerox Mobile Scanner and is the answer not in the manual?
Questions and answers