
Related Manuals for Raritan Dominion KX II Server KX2-432


Summary of Contents for Raritan Dominion KX II Server KX2-432
-
Page 1: User Guide
Dominion KX II ® KX2-116 KX2-216 KX2-416 KX2-132 KX2-232 KX2-432 KX2-464 User Guide Release 2.0.1 Copyright © 2007 Raritan, Inc. DKX2-0D-E June 2007 255-62-4023-00... - Page 2 This page intentionally left blank.
-
Page 3: Fcc Information
Raritan, Inc. © Copyright 2007 Raritan, Inc., CommandCenter®, RaritanConsole, Dominion®, and the Raritan company logo are trademarks or registered trademarks of Raritan, Inc. All rights reserved. Java® is a registered trademark of Sun Microsystems, Inc. Internet Explorer and Active Directory are registered trademarks of Microsoft®... -
Page 4: Safety Guidelines
Safety Guidelines To avoid potentially fatal shock hazard and possible damage to Raritan equipment: • Do not use a 2-wire power cord in any product configuration. • Test AC outlets at your computer and monitor for proper polarity and grounding. -
Page 5: Table Of Contents
KX II Local Console − KX II Devices....................29 KX II Remote Console − KX II Devices....................29 Multi-Platform Client (MPC) − KX I and KX II Devices ..............30 Raritan Remote Client (RRC) − KX I Devices Only................30 Language Support........................31 Java® Runtime Environment (JRE) ..................31 Launching the KX II........................32... - Page 6 Options ............................62 View Menu ..........................63 View Toolbar............................63 Scaling.............................63 Target Screen Resolution ........................63 Help Menu..........................63 About Raritan Virtual KVM Client.....................63 Chapter 7: Virtual Media ..............65 Overview ..........................65 Prerequisites for Using Virtual Media..................66 Using Virtual Media ........................66 Opening a KVM Session ......................67 Connecting to Virtual Media.....................67...
- Page 7 ONTENTS Setting Permissions .........................77 Setting Port Permissions .........................77 Group-based IP ACL (Access Control List) ..................78 Modify Existing User Group ......................80 Change Password........................82 Authentication Settings ......................83 Implementing LDAP Remote Authentication..................85 Implementing RADIUS Remote Authentication ................87 Chapter 9: Device Management ...........89 Network Settings ........................90 Network Basic Settings........................91 Network Miscellaneous Settings ......................92 LAN Interface Settings........................92...
- Page 8 ONTENTS Removing Dominion KX II from CC-SG Management............141 Appendix A: Specifications ............143 Remote Connection .......................144 KVM Properties ........................144 TCP and UDP Ports Used .....................145 Target Server Connection Distance and Video Resolution ...........146 Network Speed Settings......................146 Appendix B: Updating the LDAP Schema ........147 Returning User Group Information..................147 From LDAP ............................147 From Microsoft Active Directory.....................147...
- Page 9 IGURES Figures Figure 1: Dominion KX II Configuration......................1 Figure 2: Dominion KX2-116........................3 Figure 3: Dominion KX2-432........................3 Figure 4: Dominion KX II CIMs: D2CIM-VUSB (left); D2CIM-PWR (right)............ 3 Figure 5: Terminology and Topology ......................5 Figure 6: Solaris Mouse Configuration....................... 15 Figure 7: Dominion KX II Connections .......................
- Page 10 IGURES Figure 42: File Server Setup ........................70 Figure 43: User Management Menu ......................71 Figure 44: User List............................ 72 Figure 45: User Page..........................73 Figure 46: User Group List......................... 75 Figure 47: Group Page ..........................76 Figure 48: Group-based IP Access Control List ..................78 Figure 49: IP ACL Example........................
- Page 11 IGURES Figure 85: Upgrade Report ........................123 Figure 86: Reboot ............................ 124 Figure 87: Reboot Confirmation ....................... 124 Figure 88: Diagnostics Menu ........................125 Figure 89: Network Interface........................126 Figure 90: Network Statistics (statistics) ....................127 Figure 91: Network Statistics (interfaces)....................127 Figure 92: Network Statistics (route) ......................
- Page 12 viii IGURES...
-
Page 13: Chapter 1: Introduction
For larger data centers and enterprises, numerous Dominion KX II units (along with Dominion SX units for remote serial console access and Dominion KSX for remote/branch office management) can be integrated into a single logical solution using Raritan’s CommandCenter Secure Gateway (CC-SG) management appliance. -
Page 14: Virtual Media
KX II U OMINION UIDE Virtual Media All Dominion KX II models support virtual media. The benefits of virtual media – mounting of remote drives/media on the target server to support software installation, and diagnostics – are now available in all of the Dominion KX II models. Each Dominion KX II comes equipped with virtual media to enable remote management tasks using the widest variety of CD, DVD, USB, internal and remote drives and images. -
Page 15: Product Photos
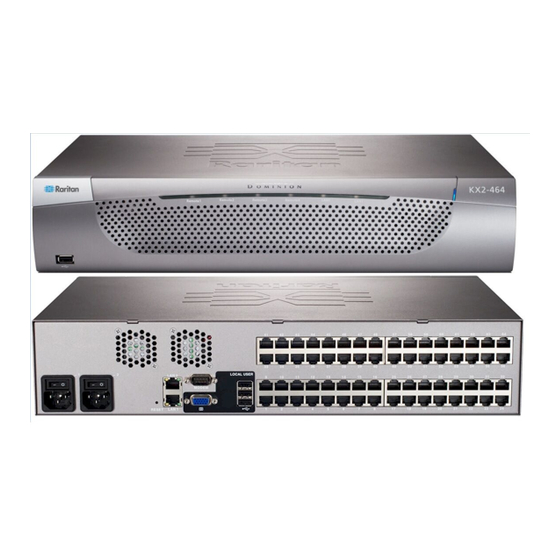
1: I HAPTER NTRODUCTION Product Photos Figure 2: Dominion KX2-116 Figure 3: Dominion KX2-432 Figure 4: Dominion KX II CIMs: D2CIM-VUSB (left); D2CIM-PWR (right) -
Page 16: Product Features
DHCP or fixed IP addressing • SNMP and Syslog management • Power control associated directly with servers to prevent mistakes • Integration with Raritan’s CommandCenter Secure Gateway (CC-SG) management appliance • CC Unmanage feature to remove device from CC-SG control... -
Page 17: Terminology
VGA monitor) attached directly to Dominion KX II to control target servers locally (directly at the rack, not through the network). CIMs Dongles that connect to each target server and Raritan power strip. (Computer Interface Available for all of the supported Operating Systems. Refer to... -
Page 18: User Guide
For more information about the Raritan Multi-Platform Client (MPC), refer to the Raritan Multi- Platform Client (MPC) and Raritan Remote Client (RRC) User Guide. For more information about the entire Raritan product line, refer to the Raritan User Manuals & Quick Setup Guides CD ROM or Raritan’s Web site... -
Page 19: Chapter 2: Getting Started
Chapter 2: Getting Started Login Information • The default Dominion KX II login user name is admin and the default password is raritan. This user has administrative privileges. • Passwords are case sensitive and must be entered in the exact case combination in which they were created. -
Page 20: Supported Operating Systems And Cims (Target Servers)
KX II U OMINION UIDE Supported Operating Systems and CIMs (Target Servers) In addition to the new Dominion KX II D2CIMs, most Paragon® and Dominion KX I CIMs are supported. The following table displays the supported target server operating systems, CIMs, virtual media, and mouse modes: UPPORTED OUSE... -
Page 21: Chapter 3: Installation And Configuration
3: I HAPTER NSTALLATION AND ONFIGURATION Chapter 3: Installation and Configuration Overview This section provides a brief overview of the installation process. Each step is further detailed in the remaining sections of this chapter. To install and configure Dominion KX II: 1. -
Page 22: Desktop Background
For additional information on Intelligent Mouse mode, refer to the Raritan Multi-Platform Client (MPC) and Raritan Remote Client (RRC) User Guide (Appendix B: Conditions for Intelligent Mouse Synchronization) available on Raritan’s Website... -
Page 23: Windows 2000 Settings
3: I HAPTER NSTALLATION AND ONFIGURATION Note: For target servers running Windows 2000 or XP, you may wish to create a user name that will be used only for remote connections through Dominion KX II. This will enable you to keep the target server’s slow mouse pointer motion/acceleration settings exclusive to the Dominion KX II connection. - Page 24 KX II U OMINION UIDE Animation options: Animate controls and elements inside windows Animate windows when minimizing and maximizing Fade options: Fade or slide menus into view Fade or slide ToolTips into view Fade out menu items after clicking Click OK. g.
- Page 25 3: I HAPTER NSTALLATION AND ONFIGURATION Note: If you change video resolution, you must logout of the target server and log back in for the video settings to take effect. Note for Red Hat 9 Target Servers If you are running Red Hat 9 on the target server using a USB CIM, and are experiencing problems with the keyboard and/or mouse, there is an additional configuration setting you can try.
-
Page 26: Make Linux Settings Permanent
KX II U OMINION UIDE SUSE Linux 10.1 Settings Note: Do not attempt to synchronize the mouse at the SUSE login prompt. You must be connected to the target server to synchronize the mouse cursors. To configure the mouse settings: 1. -
Page 27: Figure 6: Solaris Mouse Configuration
2. Issue the following command to change the output resolution: setenv output-device screen:r1024x768x70 3. Issue the “boot” command to reboot the server. You can also contact your Raritan representative to purchase a video output adapter: F YOU SE THIS IDEO... - Page 28 KX II U OMINION UIDE Mouse Settings To configure the mouse settings (Sun Solaris 10.1): 1. Select Launcher. Application Manager – Desktop Controls opens. 2. Select Mouse Style Manager. The Style Manager – Mouse dialog opens. 3. Set the Acceleration slider to 1.0. 4.
-
Page 29: Make Unix Settings Permanent
3: I HAPTER NSTALLATION AND ONFIGURATION IBM AIX 5.3 Settings Follow these steps in this section to configure target servers running IBM AIX 5.3. To configure the mouse: 1. Go to Launcher. 2. Select Style Manager. 3. Click Mouse. The Style Manager – Mouse dialog opens. 4. -
Page 30: Step 2 (Optional): Configure Keyboard Language
The Caps Lock LED starts to blink, indicating that the CIM is in Layout Code Change mode. The text window displays: Raritan Computer, Inc. Current keyboard layout code = 22h (US5 UNIX). 3. Type the layout code desired (for example, 31 for the Japanese keyboard). -
Page 31: Step 4: Connect The Equipment
3: I HAPTER NSTALLATION AND ONFIGURATION Step 4: Connect the Equipment Connect the Dominion KX II to the power supply, network, local PC, and target servers. The numbers in the diagram correspond to the sections describing the connection. Figure 7: Dominion KX II Connections 1. -
Page 32: Target Server Ports
KX II U OMINION UIDE 3. Local Access Port (local PC) For convenient access to target servers while at the rack, use the Dominion KX II Local Access port. While the local port is required for installation and setup, it is optional for subsequent use. The local port provides the KX II Local Console graphical user interface for administration and target server access. -
Page 33: Step 5: Dominion Kx Ii Initial Configuration
2. Once the unit has booted, the KX II Local Console is visible on the monitor attached to the Dominion KX II local port. Type the default username (admin) and password (raritan) and click Login. The Change Password screen is displayed. -
Page 34: Assigning An Ip Address
KX II U OMINION UIDE Assigning an IP Address These procedures describe how to assign an IP Address using the Network Settings page. For complete information about all of the fields and the operation of this page, refer to Network Settings. -
Page 35: Naming Target Servers
3: I HAPTER NSTALLATION AND ONFIGURATION Naming Target Servers To name the target servers: 1. Connect all of the target servers if you have not already done so (as described in Step 3: Connect the Equipment, Target Server Ports). 2. Using the KX II Local Console, select Device Settings > Port Configuration. The Port Configuration page opens: Figure 9: Port Configuration 3. -
Page 36: Note To Cc-Sg Users
If you are using Dominion KX II in a CC-SG configuration, perform the installation steps as outlined above, and when finished, consult the CommandCenter Secure Gateway User Guide, Administrator Guide, or Deployment Guide to proceed (all found on Raritan’s Website under Support: http://www.raritan.com/support/productdocumentation). -
Page 37: Remote Authentication
CC-SG user database. For additional information about CC-SG authentication, refer to the CommandCenter Secure Gateway User Guide, Administrator Guide, or Deployment Guide at: http://www.raritan.com/support/productdocumentation. Supported Protocols In order to simplify management of usernames and passwords, the Dominion KX II provides the capability to forward authentication requests to an external authentication server. -
Page 38: Authentication Vs. Authorization
KX II U OMINION UIDE Authentication vs. Authorization Authentication is the process of verifying that a user is who he says he is. Once a user is authenticated, the user’s group is used to determine his system and port permissions. The user’s assigned privileges determine what type of access is allowed. -
Page 39: Users, Groups, And Access Permissions
3: I HAPTER NSTALLATION AND ONFIGURATION Users, Groups, and Access Permissions Overview The Dominion KX II stores an internal list of all user and group names to determine access authorization and permissions. This information is stored internally in an encrypted format. There are several forms of authentication and this one is known as “local authentication”. - Page 40 KX II U OMINION UIDE...
-
Page 41: Chapter 4: Connecting To The Dominion Kx Ii
4: C KX II HAPTER ONNECTING TO THE OMINION Chapter 4: Connecting to the Dominion KX II User Interfaces There are several user interfaces in the Dominion KX II providing you with easy access any time, anywhere. These include the KX II Local Console, the KX II Remote Console, and the Multi- Platform Client (MPC). -
Page 42: Multi-Platform Client (Mpc) − Kx I And Kx Ii Devices
Dominion units. MPC can be installed for standalone use or accessed through a Web browser. After installing the Dominion KX II, either download a standalone version of Raritan MPC and establish an initial network connection, or launch the application directly. -
Page 43: Language Support
Java® Runtime Environment (JRE) Important: It is recommended that you disable Java caching and clear the Java cache. Please refer to your Java documentation or the Raritan Multi- Platform Client (MPC) and Raritan Remote Client (RRC) User Guide for more information. -
Page 44: Launching The Kx Ii
4. Type your Username and Password. If this is the first time logging in, log in with the factory default username and password (admin and raritan (all lower case)); you will be prompted to change the default password. Refer to... -
Page 45: Kx Ii Console Layout
4: C KX II HAPTER ONNECTING TO THE OMINION KX II Console Layout Both the KX II Remote Console and the KX II Local Console interfaces provide an HTML (Web- like) interface for configuration and administration, as well as target server list and selection. The options are organized into various tabs. -
Page 46: Kx Ii Console Navigation
Use the scroll bar on the right For more information about navigation and selection in the Raritan Multi-Platform Client (MPC), refer to the Raritan Multi-Platform Client (MPC) and Raritan Remote Client (RRC) User Guide. Logging Out To quit the Dominion KX II Console: Click Logout in the upper right-hand corner of the page. -
Page 47: Kx Ii Console Menu Tree
4: C KX II HAPTER ONNECTING TO THE OMINION KX II Console Menu Tree The following diagram represents all of the menu options available in both the KX II Remote and KX II Local Console interfaces. Variations between the KX II Local Console and the KX II Remote Console are identified. -
Page 48: Managing Favorites
KX II U OMINION UIDE Managing Favorites A Favorites feature is provided so you can organize and quickly access the devices you use frequently. The Favorite Devices section is located in the lower left side (sidebar) of the Port Access page and provides the ability to: •... -
Page 49: Manage Favorites Menu
4: C KX II HAPTER ONNECTING TO THE OMINION Manage Favorites Menu The Manage Favorites menu provides these options: Favorites List, Discover Devices – Local Subnet, Discover Devices – KX Subnet, and Add New Device to Favorites. To open the Manage Favorites menu: Click the Manage button. -
Page 50: Favorites List
KX II U OMINION UIDE Favorites List From the Favorites List page, you can add, edit, and delete devices from your list of Favorites. To open the Favorites List page: Select Manage > Favorites List. The Favorites List page opens: Figure 18: Favorites List To add a Favorite: Click the Add button. -
Page 51: Figure 19: Edit (Favorite Information)
4: C KX II HAPTER ONNECTING TO THE OMINION To edit a Favorite: 1. From the Favorites List page, check the checkbox next to the appropriate Dominion KX II device. 2. Click the Edit button. The Edit page opens: Figure 19: Edit (Favorite Information) 3. -
Page 52: Discover Devices - Local Subnet
KX II U OMINION UIDE Discover Devices – Local Subnet This option discovers the devices on your local subnet (that is, the subnet where the Dominion KX II Remote Console is running); access these devices directly from this page, or add them to your list of favorites. -
Page 53: Discover Devices - Kx Subnet
4: C KX II HAPTER ONNECTING TO THE OMINION Discover Devices – KX Subnet This option discovers the devices on the KX device subnet (that is, the subnet of the Dominion KX II device IP address itself); access these devices directly from this page, or add them to your list of favorites. -
Page 54: Add New Favorite
KX II U OMINION UIDE Add New Favorite To add a device to your favorites list: 1. Select Manage Favorites > Add New Device to Favorites. The Add New Favorite page opens: Figure 22: Add New Favorite 2. Type a meaningful Description. 3. -
Page 55: Chapter 5: Accessing Target Servers
5: A HAPTER CCESSING ARGET ERVERS Chapter 5: Accessing Target Servers Port Access Page After successfully logging into the Dominion KX II Remote Console, the Port Access page opens. This page lists all of the Dominion KX II ports, the connected target servers, and their status and availability. -
Page 56: Port Action Menu
KX II U OMINION UIDE To change the display sort order: Click the column heading you want to sort on. The list of target servers is sorted by that column. Port Action Menu 1. When you click on a Port Name in the Port Access list, the Port Action menu is displayed. Please note that only options available for the selected port are listed in the Port Action menu: •... -
Page 57: Connecting To A Target Server
5: A HAPTER CCESSING ARGET ERVERS Connecting to a Target Server To connect to a target server: 1. From the KX II Remote Console, click the Port Access tab to open it. The Port Access page opens. 2. Click the Port Name of the target you want to access. The Port Action Menu is displayed: Figure 24: Port Action Menu 3. -
Page 58: Power Controlling A Target Server
KX II U OMINION UIDE Power Controlling a Target Server Note: These features are available only when you have made power associations. Refer to power control for more information. Power Cycle a Target Server To power cycle a target server: 1. -
Page 59: Chapter 6: Virtual Kvm Client
6: V KVM C HAPTER IRTUAL LIENT Chapter 6: Virtual KVM Client Whenever you access a target server using the KX II Remote Console, a Virtual KVM Client window is opened. There is one Virtual KVM Client for each target server connected to; these windows can be accessed via the Windows Taskbar. -
Page 60: Options
KX II U OMINION UIDE Options Menu Tree The following diagram represents all of the menu options available in the Virtual KVM Client. Figure 27: Virtual KVM Client Menu Tree Toolbar UTTON ESCRIPTION Properties Video settings Calibrate color Synchronize client and target server mouse cursors Refresh screen Auto-sense video Send Ctrl+Alt+Delete... -
Page 61: Mouse Pointer Synchronization
6: V KVM C HAPTER IRTUAL LIENT Mouse Pointer Synchronization When remotely viewing a target server that uses a mouse, you will see two mouse pointers: one belonging to your remote client workstation and the other belonging to the target server. When the mouse pointer lies within the Virtual KVM Client target server window, mouse movements and clicks are directly transmitted to the connected target server. - Page 62 KX II U OMINION UIDE Additional Notes for Intelligent Mouse Mode • Be sure that there are no icons or applications in the upper left section of the screen since that is where the synchronization routine takes place. • Do not use an animated mouse. •...
-
Page 63: Connection Menu
6: V KVM C HAPTER IRTUAL LIENT Connection Menu Properties Dialog The Dominion KX II dynamic video compression algorithms maintain KVM console usability under varying bandwidth constraints. Dominion KX II units optimize KVM output not only for LAN use, but also for WAN and dialup use. These units can also control color depth and limit video output, offering an optimal balance between video quality and system responsiveness for any bandwidth. - Page 64 KX II U OMINION UIDE 3. Select the Color Depth from the drop-down list. Dominion KX II can dynamically adapt the color depth transmitted to remote users in order to maximize usability in all bandwidths. 15-bit RGB Color 8-bit RGB Color 4-bit Color 4-bit Gray 3-bit Gray...
-
Page 65: Connection Info
6: V KVM C HAPTER IRTUAL LIENT Connection Info To obtain information about your Virtual KVM Client connection: Select Connection > Connection Info. The Connection Info window opens: Figure 30: Connection Info The following information is displayed about the current connection: •... -
Page 66: Keyboard Menu
KX II U OMINION UIDE Keyboard Menu Send Ctrl+Alt+Delete Due to its frequent use, a Ctrl+Alt+Delete macro has been pre-programmed into the Virtual KVM Client. This key sequence is sent to the target server to which you are currently connected. In contrast, if you were to physically press the Ctrl+Alt+Delete keys while using the Virtual KVM Client, the command would first be intercepted by your own PC due to the structure of the operating system, instead of sending the key sequence to the target server as intended. -
Page 67: Figure 32: Add Keyboard Macro
6: V KVM C HAPTER IRTUAL LIENT Figure 32: Add Keyboard Macro 3. Type a name in the Keyboard Macro Name field. This is the name that will display on the Virtual KVM Client menu bar after the macro is created. In this example, type Minimize All Windows. -
Page 68: Figure 34: New Macro In Keyboard Menu
KX II U OMINION UIDE 7. Click OK from the Add Keyboard Macro window to save the macro. 8. Click Close from the Keyboard Macros window (Figure 31). The keyboard macro created is now listed as an option from Keyboard menu: Figure 34: New Macro in Keyboard Menu To cancel without saving changes: Click Cancel. -
Page 69: Video Menu
6: V KVM C HAPTER IRTUAL LIENT Video Menu Video settings can be refreshed automatically in several ways: • The Refresh Screen option forces a refresh of the video screen • The Auto-sense Video Settings option automatically detects the target server’s video settings •... -
Page 70: Video Settings
KX II U OMINION UIDE Video Settings Use the Video Settings option to manually adjust the video settings. Video Settings Opens Video Settings for manual adjustment of video parameters. To change the video settings: 1. Select Video > Video Settings. The Video Settings window opens displaying the current settings: Figure 35: Video Settings 2. - Page 71 Warning: Please exercise caution when changing the Clock and Phase settings; doing so may result in lost or distorted video and you may not be able to return to the previous state. Contact Raritan Technical Support before making any changes.
-
Page 72: Mouse Menu
KX II U OMINION UIDE Mouse Menu When controlling a target server, the KX II Remote Console displays two mouse cursors: one belonging to your client workstation and the other belonging to the target server. You can operate in either single mouse mode or dual mouse mode. When in dual mouse mode and properly configured, these two mouse cursors will align. -
Page 73: Standard
“dance” in the top left corner of the screen and calculates the acceleration. For this mode to work properly, certain conditions must be met. For additional information on Intelligent Mouse mode, refer to the Raritan Multi-Platform Client User Guide (Appendix B: Conditions for Intelligent Mouse Synchronization) available on Raritan’s Website http://www.raritan.com/support/productdocumentation, or on the Raritan User... -
Page 74: Tools Menu
KX II U OMINION UIDE Tools Menu Options From the Tools menu, you can specify certain options for use with the Virtual KVM Client: synchronize mouse when in dual mouse mode, enable logging, keyboard type, and the exit target screen resolution mode hotkey. To set the tools options: 1. -
Page 75: View Menu
Dominion KX II device is not under CC-SG management. Help Menu About Raritan Virtual KVM Client This menu option provides version information about the Virtual KVM Client should you require assistance from Raritan technical support. To obtain version information: Select Help > About Raritan Virtual KVM Client. - Page 76 KX II U OMINION UIDE...
-
Page 77: Chapter 7: Virtual Media
7: V HAPTER IRTUAL EDIA Chapter 7: Virtual Media Overview Virtual media extends KVM capabilities by enabling target servers to remotely access media from the client PC and network file servers. With this feature, media mounted on the client PC and network file servers is essentially mounted virtually by the target server. -
Page 78: Prerequisites For Using Virtual Media
KX II U OMINION UIDE Prerequisites for Using Virtual Media The following conditions must be met in order to use virtual media: Dominion KX II • For users requiring access to virtual media, KX permissions must be set to allow access to the relevant ports, as well as virtual media access (VM Access port permission) for those ports. -
Page 79: Opening A Kvm Session
7: V HAPTER IRTUAL EDIA Opening a KVM Session To open a KVM session: 1. Open the Port Access page from the Dominion KX II Remote Console. Figure 39: Open KVM Session 2. Connect to the target server from the Port Access page: a. -
Page 80: Cd-Rom/Dvd-Rom/Iso Images
KX II U OMINION UIDE 2. Select the drive from the Local Drive drop-down list. 3. If you want read and write capabilities, check the Read-Write option checkbox. This option is disabled for non-removable drives. Please refer to the conditions when read-write is not available for more information. -
Page 81: Disconnecting Virtual Media
7: V HAPTER IRTUAL EDIA 3. For ISO images: a. Select the ISO Image option. Use this option when you want to access a disk image of a CD, DVD, or hard drive. ISO format is the only format supported. b. -
Page 82: File Server Setup (File Server Iso Images Only)
KX II U OMINION UIDE File Server Setup (File Server ISO Images Only) Note: This feature is only required when using virtual media to access file server ISO images. Use the Dominion KX II Remote Console File Server Setup page to designate the files server(s) and image paths that you want to access using Dominion KX II Virtual Media. -
Page 83: Chapter 8: User Management
8: U HAPTER ANAGEMENT Chapter 8: User Management The User Management menu is organized as follows: User List, Add New User, User Group List, Add New User Group, Change Password, and Authentication Settings. Figure 43: User Management Menu User List Display an alphabetical list of all users;... -
Page 84: User List
KX II U OMINION UIDE User List The User List page displays a list of all users including their Username, Full Name, and User Group. The list can be sorted on any of the columns by clicking on the column name. From the User List page, you can also add, modify, or delete users. -
Page 85: Add New User
8: U HAPTER ANAGEMENT Add New User It is a good idea to define user groups before creating Dominion KX II users, because when you add a user, you must assign that user to an existing user group. From the User page, you can add new users, modify user information, and reactivate users that have been deactivated. -
Page 86: Modify Existing User
KX II U OMINION UIDE Modify Existing User To modify an existing user: 1. From the User page (Figure 45), change the appropriate fields. (Refer to Add New User information about how to get access the User page.) 2. Click OK. -
Page 87: User Group List
8: U HAPTER ANAGEMENT User Group List User groups are used with local and remote authentication (via RADIUS or LDAP). It is a good idea to define user groups before creating individual users, because when you add a user, you must assign that user to an existing user group. -
Page 88: Add New User Group
KX II U OMINION UIDE Add New User Group To add a new user group: 1. Open the Group page using one of these methods: • Select User Management > Add New User Group, or • Click the Add button from the User Group List page Figure 47: Group Page The Group page is organized into the following categories: Group, Permissions, Port Permissions, and IP ACL. -
Page 89: Setting Permissions
8: U HAPTER ANAGEMENT Set the IP ACL (optional). This feature limits access to the Dominion KX II device by specifying IP addresses; it applies only to users belonging to a specific group, unlike the Access Control list feature which applies to all access attempts to the device (and takes priority). -
Page 90: Group-Based Ip Acl (Access Control List)
KX II U OMINION UIDE Group-based IP ACL (Access Control List) Important: Please exercise caution when using group-based IP access control. It is possible to be locked out of your Dominion KX II if your IP Address is within a range that has been denied access. This feature limits access to the Dominion KX II device by users in the selected group to specific IP addresses. -
Page 91: Figure 49: Ip Acl Example
8: U HAPTER ANAGEMENT To delete a rule: 1. Specify the Rule # you want to delete. 2. Click Delete. 3. You are prompted to confirm the deletion. Click OK. Important: ACL rules are evaluated in the order in which they are listed. For instance, in the example shown here, if the two ACL rules were reversed, Dominion would accept no communication at all. -
Page 92: Modify Existing User Group
KX II U OMINION UIDE Modify Existing User Group Note: All permissions are enabled (and cannot be changed) for the Admin group. To modify an existing user group: 1. From the Group page, change the appropriate fields and set the appropriate permissions. Figure 50: Modify Group 2. -
Page 93: Set Permissions For Individual Group
8: U HAPTER ANAGEMENT Set Permissions for Individual Group To set permissions for an individual user group: 1. Locate the user from among the groups listed. Individual groups can be identified by the @ in the Group Name. 2. Click on the Group Name. The Group page (Figure 50) opens. 3. -
Page 94: Change Password
KX II U OMINION UIDE Change Password To change your password: 1. Select User Management > Change Password. The Change Password page opens: Figure 51: Change Password 2. Type your current password in the Old Password field. 3. Type a new password in the New Password field; retype the new password in the Confirm New Password field. -
Page 95: Authentication Settings
8: U HAPTER ANAGEMENT Authentication Settings From the Authentication Settings page you can configure the type of authentication used for access to your Dominion KX II. Refer to Authentication vs. Authorization for more information about how authentication and authorization operate and differ. Note: Even if you select remote authentication (LDAP or RADIUS), local authentication is still used. - Page 96 KX II U OMINION UIDE 2. Select the option for the authentication protocol you want to use (Local Authentication, LDAP, or RADIUS). Selecting the LDAP option enables the remaining LDAP fields; selecting the RADIUS option enables the remaining RADIUS fields. 3.
-
Page 97: Implementing Ldap Remote Authentication
8: U HAPTER ANAGEMENT Implementing LDAP Remote Authentication Lightweight Directory Access Protocol (LDAP) is a networking protocol for querying and modifying directory services running over TCP/IP. A client starts an LDAP session by connecting to an LDAP server (the default TCP port is 389). The client then sends operation requests to the server, and the server sends responses in turn. -
Page 98: Returning User Group Information From Active Directory Server
KX II policies and user group privileges (that are applied locally to AD user groups). Note: If you are an existing Raritan, Inc. customer, and have already configured the Active Directory server by changing the AD schema, Dominion KX II still supports this configuration, and you do not need to perform the following operations. -
Page 99: Implementing Radius Remote Authentication
8: U HAPTER ANAGEMENT Implementing RADIUS Remote Authentication Remote Authentication Dial-in User Service (RADIUS) is an AAA (authentication, authorization, and accounting) protocol for network access applications. To use the RADIUS authentication protocol: Figure 54: Authentication Settings (RADIUS) 1. Type the IP Address of your primary and (optional) secondary remote authentication servers in the Primary Radius Server and Secondary Radius Server fields, respectively. -
Page 100: Returning User Group Information Via Radius
Your remote RADIUS server can provide these user group names by returning an attribute, implemented as a RADIUS FILTER-ID. The FILTER-ID should be formatted as follows: Raritan:G{GROUP_NAME} where is a string, denoting the name of the group to which the user belongs. -
Page 101: Chapter 9: Device Management
9: D HAPTER EVICE ANAGEMENT Chapter 9: Device Management The Device Settings menu is organized as follows: Network, Date/Time, Event Management (Settings and Destinations), Power Supply Setup, Port Configuration, and Local Port Settings (Dominion KX II Local Console only). Figure 55: Device Settings Menu Network Customize the network configuration for the Dominion KX II. -
Page 102: Network Settings
KX II U OMINION UIDE Network Settings Use the Network Settings page to customize the network configuration (e.g., IP Address, discovery port, and LAN interface parameters) for your Dominion KX II unit. Important: Dominion KX II must be rebooted for new network settings to take effect. -
Page 103: Network Basic Settings
9: D HAPTER EVICE ANAGEMENT To cancel without saving changes: Click Cancel. To reset to factory defaults: Click Reset to Defaults. Network Basic Settings Figure 57: Network Settings (Network Basic Settings) • Device Name. Type a unique name for the device (up to 16 characters; spaces are not allowed). -
Page 104: Network Miscellaneous Settings
KX II U OMINION UIDE ♦ If DHCP is used, enter the Preferred host name (DHCP only). Up to 63 characters. Network Miscellaneous Settings Figure 58: Network Settings (Network Miscellaneous Settings) • Discovery Port. Dominion KX II discovery occurs over a single, configurable TCP Port. The default is Port 5000, but you can configure it to use any TCP port except 80 and 443. - Page 105 9: D HAPTER EVICE ANAGEMENT • LAN Interface Speed & Duplex. Select from among the speed and duplex combinations available. Autodetect Default option 10 Mbps/Half 10 Mbps/Full 100 Mbps/Half 100 Mbps/Full 1000 Mbps/Full Gigabit − Half-duplex provides for communication in both directions, but only one direction at a time (not simultaneously).
-
Page 106: Date/Time Settings
KX II U OMINION UIDE Date/Time Settings Use the Date/Time Settings page to specify the date and time for the Dominion KX II. There are two ways to do this: • Manually set the date and time, or • Synchronize with a Network Time Protocol (NTP) Server. To set the date and time: 1. -
Page 107: Event Management
9: D HAPTER EVICE ANAGEMENT Event Management The Dominion KX II Event Management feature provides a set of screens for enabling and disabling the distribution of system events to SNMP Managers, Syslog, and the audit log. These events are categorized, and for each event you can determine whether you want the event sent to one or several destinations. -
Page 108: Figure 62: Syslog Configuration
KX II U OMINION UIDE 3. In the Name, Contact, and Location fields, type the SNMP Agent’s (this Dominion unit’s) name as it appears in the KX II Console interface, a contact name related to this unit, and where the Dominion unit is physically located, respectively. 4. -
Page 109: Event Management - Destinations
9: D HAPTER EVICE ANAGEMENT Event Management – Destinations System events, if enabled, can generate SNMP notification events (traps), or can be logged to Syslog or Audit Log. Use the Event Management - Destinations page to select which system events to track and where to send this information. Note: SNMP traps will only be generated if the SNMP Logging Enabled option is checked;... -
Page 110: Snmp Agent Configuration
KX II U OMINION UIDE 2. Check the checkboxes for those Event line items you want to enable or disable, and where you want to send the information. Tip: Enable or disable entire Categories by checking or clearing the Category line checkboxes, respectively. -
Page 111: Snmp Trap Configuration
9: D HAPTER EVICE ANAGEMENT SNMP Trap Configuration SNMP provides the ability to send traps, or notifications, to advise an administrator when one or more conditions have been met. The following table lists the Dominion KX II SNMP traps: ESCRIPTION cimConnected A CIM is plugged into to the Dominion KX II port. -
Page 112: Power Supply Setup Page
KX II U OMINION UIDE Power Supply Setup Page The Dominion KX II provides dual power supplies, and can automatically detect and provide notification regarding the status of these power supplies. Use the Power Supply Setup page to specify whether you are using one or both of the power supplies. Proper configuration ensures that the Dominion KX II sends the appropriate notifications should a power supply fail. -
Page 113: Port Configuration Page
9: D HAPTER EVICE ANAGEMENT Port Configuration Page The Port Configuration page displays a list of the Dominion KX II ports. Ports connected to target servers or power strips are displayed in blue and can be edited. For ports with no CIM connected or with a blank CIM name, a default port name of Dominion-KX2_Port# is assigned, where Port# is the number of the Dominion KX II physical port. -
Page 114: Power Control
The Dominion KX II provides remote power control of target servers. To utilize this feature, you must have a Raritan remote power strip and the D2CIM-PWR computer interface module (CIM). Once power assignments are made, remote power management of your target servers is possible. -
Page 115: Name The Power Strip (Port Page For Power Strips)
Port Configuration page that is connected to a Raritan remote power strip. The Type and the Name fields are pre-populated; please note that the (CIM) Type cannot be changed. The following information is displayed for each outlet in the power strip: outlet Number, Name, and Port Association. -
Page 116: Associate Target Servers To Outlets (Port Page)
From this page, you can define those associations so that you can power on, power off, and power cycle the server from the Port Access page. To use this feature, you will need: • Raritan remote power strip(s) • Power CIMs (D2CIM-PWR) Figure 68: Port Page (KVM ports) -
Page 117: Figure 69: Port Page (Target Server Settings For D2Cim-Vusb)
9: D HAPTER EVICE ANAGEMENT To change the port name: 1. Type something descriptive in the Name field. For example, the name of the target server would be a likely candidate. The name can be up to 32 alphanumeric characters and can include special characters. - Page 118 KX II U OMINION UIDE Certain BIOS do not support USB high-speed capabilities and the attempt to auto-negotiate does not work. If you are experiencing BIOS problems with the target server, check the Use Full Speed for Virtual Media CIM option. Note: For SUSE 9.2 target servers, please enable (check) the Use Full Speed for Virtual Media CIM option for those target server ports.
-
Page 119: Chapter 10: Security Settings
10: S HAPTER ECURITY ETTINGS Chapter 10: Security Settings The Security menu is organized as follows: Security Settings and IP Access Control. Figure 70: Security Menu Security Settings Configure security settings for login limitations, strong passwords, user blocking, and encryption & share. IP Access Control Control access to your Dominion KX II unit. -
Page 120: Security Settings
From the Security Settings page, you can specify login limitations, user blocking, password rules, and encryption and share. Raritan SSL certificates are used for public and private key exchanges, and provide an additional level of security. Raritan web server certificates are self-signed; Java applet certificates are signed ®... -
Page 121: Login Limitations
10: S HAPTER ECURITY ETTINGS Login Limitations Using Login Limitations you can specify restrictions for single login, password aging, and the logging out of idle users. • Enable Single Login Limitation. When checked, only one login per username is allowed at any time. When cleared, a given username/password combination can be connected into the device from several client workstations simultaneously. -
Page 122: User Blocking
KX II U OMINION UIDE − Minimum length of strong password. Passwords must be at least 8 characters long. The default is 8, but it can be up to 63. − Maximum length of strong password. The default is 16, but can be up to 64 characters long. -
Page 123: Encryption & Share
10: S HAPTER ECURITY ETTINGS Encryption & Share Using the Encryption & Share settings you can specify the type of encryption used, PC and VM share modes, and the type of reset performed when the Dominion KX II reset button is pressed. Figure 74: Security Settings (Encryption &... -
Page 124: Checking Your Browser For Aes Encryption
Enable Local Factory Reset (Default). Returns the Dominion KX II unit to the factory defaults. − Enable Local Admin Password Reset. Resets the local administrator password only. The password is reset to raritan. − Disable All Local Resets. No reset action is taken. Checking Your Browser for AES Encryption... -
Page 125: Ip Access Control
10: S HAPTER ECURITY ETTINGS IP Access Control Using IP Access Control, you can control access to your Dominion KX II unit. By setting a global Access Control List (ACL) you are by ensuring that your device does not respond to packets being sent from disallowed IP addresses. - Page 126 KX II U OMINION UIDE To add (append) rules: 1. Type the IP Address and subnet mask in the IP/Mask field. 2. Select the Policy from the drop-down list. 3. Click Append. The rule is added to the bottom of the rules list. 4.
-
Page 127: Chapter 11: Maintenance
11: M HAPTER AINTENANCE Chapter 11: Maintenance The Maintenance menu includes these options: Audit Log, Device Information, Backup/Restore, CIM Firmware Upgrade, Firmware Upgrade, Factory Reset (Dominion KX II Local Console only), Upgrade Report, and Reboot. Figure 77: Maintenance Menu OCAL EMOTE Audit Log View Dominion KX II events sorted by date and time. -
Page 128: Audit Log
KX II U OMINION UIDE Audit Log A log is created of Dominion KX II system events. To view the audit log for your Dominion KX II unit: Select Maintenance > Audit Log. The Audit Log page opens: Figure 78: Audit Log The Audit Log page displays events by date and time (most recent events listed first). -
Page 129: Device Information
Device Information The Device Information page provides detailed information about your Dominion KX II device and the CIMs in use. This information is helpful should you need to contact Raritan Technical Support. To view information about your Dominion KX II and CIMs: Select Maintenance >... -
Page 130: Backup And Restore
KX II U OMINION UIDE Backup and Restore From the Backup/Restore page, you can backup and restore the settings and configuration for your Dominion KX II. In addition to using backup and restore for business continuity purposes, you can use this feature as a time-saving mechanism. For instance, you can quickly provide access to your team from another Dominion KX II, by backing up the user configuration settings from the KX II in use and restoring those configurations to the new KX II. - Page 131 11: M HAPTER AINTENANCE To restore your Dominion KX II: WARNING: Please exercise caution when restoring your Dominion KX II to an earlier version. Usernames and password in place at the time of the backup will be restored. If you do not remember the old administrative usernames and passwords, you will be locked out of the KX II.
-
Page 132: Cim Upgrade
KX II U OMINION UIDE CIM Upgrade Use this procedure to upgrade CIMs using the firmware versions stored in the memory of your Dominion KX II unit. In general, all CIMs are upgraded when you upgrade the device firmware using the Firmware Upgrade page. -
Page 133: Firmware Upgrade
– doing so will likely result in damage to the unit or CIMs. To upgrade your Dominion KX II unit: 1. Locate the appropriate Raritan firmware distribution file (*.RFP), found on the Raritan Firmware Upgrades Web page: http://www.raritan.com/support/firmwareupgrades download the file. -
Page 134: Figure 83: Firmware Upgrade Review
8. As prompted, close the browser and wait approximately 5 minutes before logging in to the Dominion KX II again. For information about upgrading the device firmware using the Multi-Platform Client, refer to the Raritan Multi-Platform Client (MPC) and Raritan Remote Client (RRC) User Guide. -
Page 135: Upgrade Report
11: M HAPTER AINTENANCE Upgrade Report Dominion KX II provides information about upgrades performed on the KX II unit and attached CIMS. To view the upgrade report: Select Maintenance > Upgrade Report. The Upgrade Report page opens: Figure 85: Upgrade Report Information is provided about the last Dominion KX II upgrade that was run, the final status of that upgrade, and the firmware version. -
Page 136: Reboot
KX II U OMINION UIDE Reboot The Reboot page provides a safe and controlled way to reboot your Dominion KX II unit; this is the recommended method for rebooting. Important: All KVM connections will be closed and all users will be logged off. To reboot your Dominion KX II: 1. -
Page 137: Chapter 12: Diagnostics
Network Statistics • Ping Host • Trace Route to Host The KX Diagnostics option is intended for use in conjunction with Raritan Technical Support. Figure 88: Diagnostics Menu Network Interface Obtain the status of network interface. Network Statistics Obtain statistics about the network. -
Page 138: Network Interface Page
KX II U OMINION UIDE Network Interface Page The Dominion KX II provides information about the status of your network interface. To view information about your network interface: Select Diagnostics > Network Interface. The Network Interface page opens: Figure 89: Network Interface The following information is displayed: •... -
Page 139: Network Statistics Page
12: D HAPTER IAGNOSTICS Network Statistics Page The Dominion KX II provides statistics about your network interface. To view statistics about your network interface: 1. Select Diagnostics > Network Statistics. The Network Statistics page opens. 2. Select the appropriate option from the Options drop-down list: •... -
Page 140: Figure 92: Network Statistics (Route)
KX II U OMINION UIDE Figure 92: Network Statistics (route) 3. Click the Refresh button. The relevant information is displayed in the Result field. -
Page 141: Ping Host Page
12: D HAPTER IAGNOSTICS Ping Host Page Ping is a network tool used to test whether a particular host or IP Address is reachable across an IP network. Using the Ping Host page, you can determine if a target server or another Dominion KX II unit is accessible. -
Page 142: Trace Route To Host Page
KX II U OMINION UIDE Trace Route to Host Page Trace route is a network tool used to determine the route taken all the way to the provided hostname or IP Address. To trace the route to the host: 1. Select Diagnostics > Trace Route to Host. The Trace Route to Host page opens: Figure 94: Trace Route to Host 2. -
Page 143: Kx Diagnostics
HAPTER IAGNOSTICS KX Diagnostics Note: This page is for use by Raritan Field Engineers or when you are directed by Raritan Technical Support. KX Diagnostics downloads the diagnostics information from Dominion KX II to the client machine. Three operations can be performed on this page: •... -
Page 144: Figure 96: Diagnostics Scripts
UDP port 21 must be opened and made available to Raritan Technical Support. d. Raritan Technical Support will also need to know the administrative password for the KX e. Once Raritan Technical Support has completed their testing, return UDP port 21 to its original state. -
Page 145: Chapter 13: Kx Ii Local Console
13: KX II L HAPTER OCAL ONSOLE Chapter 13: KX II Local Console KX II Local Console Dominion KX II provides at-the-rack access and administration via its local port, which features a browser-based graphical user interface for quick, convenient switching between servers. The Dominion KX II Local Console provides a direct analog connection to your connected servers;... -
Page 146: Reset Button
KX II U OMINION UIDE Mouse: Attach either a standard PS/2 mouse to the Mini-DIN6 (female) mouse port or a standard USB mouse to one of the USB Type A (female) ports. Reset Button At the back of the Dominion KX II unit, there is a Reset button. It is recessed to prevent accidental presses (you will need a pointed object to use this button). -
Page 147: Starting The Kx Ii Local Console
13: KX II L HAPTER OCAL ONSOLE Starting the KX II Local Console Simultaneous Users The Dominion KX II Local Console provides an independent access path to the connected target servers. Using the Local Console does not prevent other users from simultaneously connecting over the network. -
Page 148: Accessing Target Servers
KX II U OMINION UIDE Accessing Target Servers Server Display After you login to the KX II Local Console, the Port Access page opens. This page lists all of the Dominion KX II ports, the connected target servers, and their status and availability. Figure 101: Local Console Port Access The target servers are initially sorted by Port Number;... -
Page 149: Accessing A Target Server
13: KX II L HAPTER OCAL ONSOLE Hotkeys Because the Dominion KX II Local Console interface is completely replaced by the interface for the target server you are accessing, a hotkey is utilized so you can switch between these interfaces. The Local Port hotkey allows you to rapidly access the KX II Local Console user interface when a target server is currently being viewed. -
Page 150: Local Port Administration
KX II U OMINION UIDE Local Port Administration The Dominion KX II can be managed by either the KX II Local Console or the KX II Remote Console. Please note that the KX II Local Console also provides access to these administrative functions: •... - Page 151 13: KX II L HAPTER OCAL ONSOLE 3. Select the Local Port Hotkey. The Local Port Hotkey is used to return to the KX II Local Console interface when a target server interface is being viewed. The default is Double Click Scroll Lock, but you can select any key combination from the drop-down list: OTKEY AKE THIS...
-
Page 152: Factory Reset (Kx Ii Local Console Only)
KX II U OMINION UIDE Factory Reset (KX II Local Console Only) Note: This feature is available only on the Dominion KX II Local Console. The Dominion KX II offers several types of reset modes from the Local Console user interface. Note: It is recommended that you save the audit log prior to performing a factory reset. -
Page 153: Chapter 14: Cc Unmanage
14: CC U HAPTER NMANAGE Chapter 14: CC Unmanage Overview When a Dominion KX II device is under CommandCenter Secure Gateway control and you attempt to access the device directly using the Dominion KX II Remote Console, the following message is displayed (after entry of a valid username and password): Figure 104: Device Managed by CC-SG Message Removing Dominion KX II from CC-SG Management Unless the Dominion KX II is released from CC-SG control, you cannot access the device... -
Page 154: Figure 106: Confirm Cc Unmanage
KX II U OMINION UIDE To remove the device from CC-SG management (to use CC Unmanage): 1. Click the Yes button. You are prompted to confirm the action: Figure 106: Confirm CC Unmanage 2. Click the Really Unmanage button. A message is displayed confirming that the device is no longer under CC management: Figure 107: Device Removed from CC Management 3. -
Page 155: Appendix A: Specifications
A: S PPENDIX PECIFICATIONS Appendix A: Specifications Environmental Requirements PERATING Temperature 0℃- 40℃ (32℉- 104℉) Humidity 20% - 85% RH Altitude Vibration 5-55-5 HZ, 0.38mm, 1 minutes per cycle; 30 minutes for each axis (X, Y, Z) Shock PERATING Temperature 0℃- 50℃... -
Page 156: Remote Connection
KX II U OMINION UIDE Electrical Specifications ARAMETER ALUE Input Nominal Frequencies 50/60 Hz Nominal Voltage Range 100/240 VAC Maximum Current AC RMS 0.6A max. AC Operating Range 100 to 240 VAC (+-10%), 47 to 63 Hz Output +5 VDC, +12VDC -5 VDC, -12VDC Maximum DC Power Output Maximum AC Power Consumption... -
Page 157: Tcp And Udp Ports Used
Port 443 via your firewall and Dominion KX II can still function. • Dominion KX II (Raritan KVM-over-IP) Protocol, Configurable Port 5000 – With the exception of the ports above, all communication to Dominion KX II occurs over a single, configurable TCP Port. -
Page 158: Target Server Connection Distance And Video Resolution
The use of Paragon CIMs will not increase the distance between the Dominion KX II and the target server. Due to the multiplicity of server manufacturers and types, OS versions, video drivers, etc. and the subjective nature of video quality, Raritan cannot guarantee performance across all distances in all environments. Refer to the Supported Video Resolutions for the video resolutions supported by Dominion KX II. -
Page 159: Appendix B: Updating The Ldap Schema
B: U LDAP S PPENDIX PDATING THE CHEMA Appendix B: Updating the LDAP Schema Note: The procedures in this chapter should be attempted only by experienced users. Returning User Group Information Use the information in this chapter to return User Group information (and assist with authorization) once authentication is successful. -
Page 160: Adding Attributes To The Class
KX II U OMINION UIDE Figure 108: Create New Attribute 4. Type rciusergroup in the Common Name field. 5. Type rciusergroup in the LDAP Display Name field. 6. Type 1.3.6.1.4.1.13742.50 in the Unique x5000 Object ID field. 7. Click on the Syntax drop-down arrow and select Case Insensitive String from the list. 8. -
Page 161: Updating The Schema Cache
B: U LDAP S PPENDIX PDATING THE CHEMA Updating the Schema Cache 1. Right-click Active Directory Schema in the left pane of the window and select Reload the Schema from the shortcut menu. 2. Minimize the Active Directory Schema MMC console. Editing RCI User Group Attributes for User Members To run Active Directory script on Windows 2003 server, please use the script provided by Microsoft. -
Page 162: Figure 111: User Properties
KX II U OMINION UIDE 6. Click on the Select a property to view drop-down arrow and select rciusergroup from the list. Figure 111: User Properties 7. In the Attribute Values panel of the window, type the user name you would like returned to RRC in the Edit Attribute field. -
Page 163: Appendix C: Informational Notes
C: I PPENDIX NFORMATIONAL OTES Appendix C: Informational Notes Overview This chapter includes important notes on Dominion KX II usage. Future updates will be documented and available online through the Help – User Guide link in the KX II Remote Console interface. -
Page 164: Java Runtime Environment (Jre)
KX II U OMINION UIDE Tilde Symbol From the Virtual KVM Client and the Multi-Platform Client, the key combination of Alt Gr + 2 does not produce the tilde (~) symbol when using a French keyboard. To obtain the tilde symbol: Create a macro consisting of the following commands: 1. -
Page 165: Mouse Pointer Synchronization (Fedora)
Fedora Core 6 and Firefox 1.5 or 2.0. Through testing, it has been determined that installation of libXp resolves window focusing issues with Fedora Core 6. Raritan has tested with libXp-1.0.0.8.i386.rpm; this resolved all of the keyboard focus and popup-menu problems. -
Page 166: Cims
Virtual KVM Client Version not Known from CC-SG Proxy Mode When the Virtual KVM Client is launched from CommandCenter Secure Gateway (CC-SG) in proxy mode, the Virtual KVM Client version is unknown. In the About Raritan Virtual KVM Client dialog, the version is displayed as “Version Unknown”. -
Page 167: Appendix D: Faqs
In general, KX I customers can continue to use their existing switches the Dominion KX I to for many years. As their data centers expand, customers can purchase Dominion KX II? and use the new KX II models. Raritan’s centralized management ® appliance, CommandCenter Secure Gateway, and the Multi-Platform Client (MPC) both support KX I and KX II switches seamlessly. - Page 168 KX II U OMINION UIDE UESTION NSWER Can the Dominion KX II Yes. The Dominion KX II ships standard with 19" rack mount brackets. be rack mounted? It can also be reverse rack mounted so the server ports face forward. How large is the Dominion KX II is only 1U high (except KX2-464, which is 2U), fits in Dominion KX II?
-
Page 169: Remote Access
Firefox. Dominion KX II ® can now be accessed on Windows, Linux, Sun Solaris and Macintosh desktops, via Raritan’s Java-based Multi-Platform Client (MPC) and the new Virtual KVM Client™. Dominion KX II administrators can also perform remote management (set passwords and security, rename servers, change IP address, etc.) using a convenient browser-based interface. - Page 170 KX II U OMINION UIDE UESTION NSWER Do you have a non- Yes. Both the Virtual KVM Client and the Multi-Platform Client Windows client? (MPC), allow non-Windows users to connect to target servers through the Dominion KX I and KX II switches. MPC can be run via Web browsers and standalone.
-
Page 171: Universal Virtual Media
D: FAQ PPENDIX Universal Virtual Media UESTION NSWER What Dominion KX II All Dominion KX II models support virtual media. It is available models support virtual standalone and through CommandCenter Secure Gateway, a centralized media? management appliance. What types of virtual Dominion KX II supports the following types of media: internal and media does the USB-connected CD/DVD drives, USB mass storage devices, PC hard... -
Page 172: Ethernet And Ip Networking
How much bandwidth Dominion KX II offers next generation KVM-over-IP technology – the does Dominion KX II very best video compression available. Raritan has received numerous require? technical awards confirming its high video quality transmissions and the low bandwidth utilization. - Page 173 Dominion KX II may work with remote access products like CITRIX if used with CITRIX? configured appropriately, but Raritan cannot guarantee it will work with acceptable performance. Products like CITRIX utilize video redirection technologies similar in concept to digital KVM switches so that two KVM-over-IP technologies are being used simultaneously.
- Page 174 KX II U OMINION UIDE UESTION NSWER I’m having problems The Dominion KX II relies on your LAN/WAN network. Some connecting to the possible problems include: Dominion KX II over • Ethernet auto negotiation. On some networks, 10/100 auto my IP network. What negotiation does not work properly and the KX II unit must be could be the problem? set to 100MB/full duplex or the appropriate choice for its...
-
Page 175: Servers
What software do I have None. Dominion KX II can be accessed completely via a Web browser to install in order to (although an optional installed client is provided on Raritan’s Web site access Dominion KX II Raritan.com for the purpose of accessing Dominion KX II via modem). -
Page 176: Installation
How far can my servers In general servers can be up to 150 feet (45 m) away from Dominion be from Dominion KX KX II depending on the type of server. (Please refer to the Raritan Web site or Target Server Connection Distance for more information.) For... - Page 177 How do I connect a If there are only a few serially-controlled devices, they may be serially controlled (RS- connected to a Dominion KX II using Raritan’s new P2CIM-SER serial 232) device to Dominion converter. KX II, such as a Cisco...
-
Page 178: Local Port
Yes. The local port presentation is identical and completely in sync If I use the local port to change the name of a with remote access clients, as well as Raritan’s optional connected server, does CommandCenter Secure Gateway management appliance. To be clear,... - Page 179 PPENDIX UESTION NSWER If I use Dominion KX Yes. If the name of a server is changed remotely, or via Raritan’s II’s remote optional CommandCenter Secure Gateway management appliance, this administration tools to update immediately affects Dominion KX II’s on-screen display.
-
Page 180: Power Control
Remote Client User Interface. If configured by the administrator, then SNMP or Syslog events will be generated. What type of power Raritan’s Remote Power Control power strips can be connected to the control capabilities does Dominion KX II to provide power control of the target servers. After a... -
Page 181: Scalability
KVM switch. Please note that analog KVM switches vary in their specifications and Raritan cannot guarantee the interoperability of any particular third- party analog KVM switch. Contact Raritan technical support for further ® information. Raritan’s Paragon and Paragon II analog switches are IP- ®... -
Page 182: Computer Interface Modules (Cims)
Paragon, which requires CIMs that transmit video at a range of 1000 Raritan’s analog matrix feet (300 meters). To ensure that all Raritan’s customers experience the KVM switch, Paragon? very best quality video available in the industry – a consistent Raritan characteristic – Dominion Series CIMs do not interoperate with Paragon. -
Page 183: Security
Should Dominion KX II’s internal authentication capabilities be used, passwords stored? all sensitive information such as usernames and passwords are stored in an encrypted format. Literally no one, including Raritan technical support or Product Engineering departments, can retrieve those usernames and passwords. -
Page 184: Manageability
Yes. In addition to Dominion KX II’s own internal logging capabilities, integrate with SNMP? Dominion KX II can send SNMP tracks to SNMP management systems like HP Openview and Raritan’s CC-NOC. Can Dominion KX II’s Yes. Dominion KX II supports the industry-standard NTP protocol for... -
Page 185: Miscellaneous
What is Dominion KX 192.168.0.192 II’s default IP address? What is Dominion KX The KX II’s default username and password are admin/raritan [all II’s default username lower case]. However, for the highest level of security, the KX II forces and password? the administrator to change the Dominion KX II default administrative username and password when the unit is first booted up. -
Page 186: Troubleshooting
KX II U OMINION UIDE Troubleshooting UESTION NSWER I am logged into the Yes, this is correct behavior and is the direct result of how browsers and Dominion KX II using cookies function. Firefox, and I opened another Firefox browser. I am automatically logged into the same Dominion KX II with... - Page 187 D: FAQ PPENDIX 255-62-4023-00...
- Page 188 Web: www.raritan.com Asia Pacific Headquarters Raritan Australia Offices Raritan Deutschland GmbH Raritan Asia Pacific, Inc. Raritan Melbourne Lichtstraße 2 5F, 121 , Lane 235 , Pao-Chiao Road, Level 2, 448 St Kilda Rd., D-45127 Essen, Germany Hsin Tien 231, Melbourne, VIC3004 Tel.
Need help?
Do you have a question about the Dominion KX II Server KX2-432 and is the answer not in the manual?
Questions and answers