Table of Contents
Advertisement
Advertisement
Table of Contents

Subscribe to Our Youtube Channel
Related Manuals for Brookstone iConvert USB Turntable


Summary of Contents for Brookstone iConvert USB Turntable
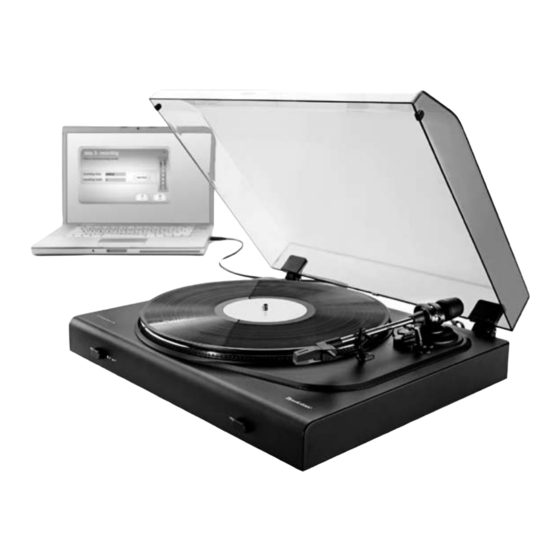
- Page 1 iConvert ® USB Turntable The easiesT way To converT records To digiTal files...
-
Page 2: Table Of Contents
Table of conTenTs Cautions and Warnings . . . . . . . . . . . . . . . . . . . . . . . . . . . . . . . . . . . . . . . . . . . . . . . . . . 2-3 Location of Controls . -
Page 3: Important Safety Instructions
caUTIon • TO REDUCE THE RISK OF ELECTRIC SHOCK, DO NOT REMOVE COVER . THERE ARE NO SERVICEABLE PARTS INSIDE . • TO REDUCE THE RISK OF FIRE OR ELECTRIC SHOCK, DO NOT EXPOSE THIS UNIT TO RAIN OR MOISTURE . The lightning flash with arrow-head symbol within an equilateral triangle is intended to alert the user to the presence of uninsulated “dangerous voltage”... - Page 4 DanGeR To reduce the risk of electric shock, burns, fire or injury: Always unplug the unit from the electrical outlet immediately after using . Do not use while bathing or in a shower . Do not place or store unit where it can fall or be pulled into a tub or sink . Do not place in or drop into water or other liquid .
-
Page 5: Location Of Controls
locaTIon of conTRols Adapter Arm Lift Lever Platter Tonearm Lock Tonearm Set... - Page 6 locaTIon of conTRols Dust Cover Power Cord USB Port Signal Connectors...
- Page 7 locaTIon of conTRols Foot (4) Speed Indicators Stop Button...
-
Page 8: Operation
oPeRaTIon Select the speed for the record to be played by setting the SPEED SELECT BUTTON . Place a record on the turntable PLATTER . Use the 45 rpm record ADAPTER on the turntable shaft when playing a 45 rpm, which has a large center hole . Remove the stylus protector cover and release the tonearm clip . -
Page 9: Ez Audio Converter Software
eZ aUDIo conveRTeR sofTwaRe The EZ Audio Software is the easiest way to transfer your vinyl and tape recordings to your computer . To take advantage of advanced audio editing features, you may wish to also install the optional Audacity Software (see pages 12-33) . - Page 10 Applications menu . When you open the software you will see the “Step 1 Get Connected” screen . Connect the iConvert USB Turntable to the computer with the included USB cable . Once the USB is connected, click NEXT on the “Step 1 Get Connected”...
- Page 11 The software will split tracks automatically when it detects silence in the music . To split tracks manually, deselect the box labeled “Automatically Split Recording into Separate Tracks . ” Note: This auto-track feature is only available for PC users . When you are ready to start recording, click RECORD to immediately play your music .
- Page 12 13 . Once the software has exported your recordings to iTunes, you will see RECORDING COMPLETE on your computer . 14 . Click “YES” if you would like to continue recording . 15 . Click “NO” if you do not want to record more songs . 16 .
-
Page 13: Audacity Software
aUDacITY sofTwaRe The Audacity Software has advanced audio editing features and is the most user-involved way to transfer your recordings to your computer . make sure that your USB turntable Important: Before starting the software, is plugged into the computer and both the computer and the turntable are plugged in and powered on . - Page 14 insTalling aUdaciTy sofTware on a Mac ® Insert the included CD . Open the CD icon on your desktop . Drag the installation folder for Audacity to your hard drive . We recommend that you move the folder to your “Applications” folder . A window will appear that shows the files being copied .
- Page 15 Select “USB Audio Device” from “Audacity Preferences” (see below) . After configuring the settings, you are ready to begin recording . If you are still having difficulty finding the USB turntable, check your system settings or control panel to adjust the audio input settings from the sound control panel . note: a) you may choose to download the latest version of audacity from the following website: http://www.audacity.com.
- Page 16 MaIn ToolbaR selection Tool - Selects the range of audio you want to listen to or edit . envelope Tool - Changes the volume over time . draw Tool - Modifies individual samples . Zoom Tool - Zooms in and out . Timeshift Tool - Slides tracks left or right .
-
Page 17: Audio Control Buttons
aUDIo conTRol bUTTons skip to start - Moves the cursor to time 0 . If you press “Play” at this point, your project will play from the beginning . Play - Starts playing audio at the cursor position . If only some audio is selected, only the selection is played . - Page 18 eDIT ToolbaR All of the buttons on this Toolbar perform actions—and with a couple of exceptions, they’re all just shortcuts of existing menu items to save you time . Holding the mouse over a tool will show a “tooltip” to remind you which one is which . copy Paste Trim away the audio outside the selection...
- Page 19 Zoom in Zoom out fit selection in window - Zooms until the selection just fits inside the window . fit Project in window - Zooms until all of the audio just fits inside the window . TRack PoP-Down MenU The Track Pop-Down Menu appears when you click in a track’s title . This lets you access a few special commands that apply to individual tracks (see the following pages) .
- Page 20 name - Changes the name of the track . Move Track Up - Trades places with the track above the selected one . Move Track Down - Trades places with the track below the selected one . waveform - Sets the display to waveform, the default way of visualizing audio . waveform (db) - Sets the display to waveform (dB), which is similar to waveform, but on a logarithmic scale, measured in decibels (dB) .
-
Page 21: File Menu
set sample format - This determines the quality of the audio data and the amount of space it takes up . 16-bit is the quality used by audio CDs and is the minimum quality that Audacity uses internally (8-bit audio files are automatically converted when you open them) . - Page 22 save Project as - Same as Save Project (above), but lets you save a project as a new name . Recent files - Brings up a list of files you have recently opened in Audacity to be re-opened quickly . export as wav - Exports all of the audio in your project as a WAV file, an industry- standard format for un-compressed audio .
-
Page 23: Edit Menu
export labels - If you have a Label Track in your project, this command lets you export the labels as a text file . You can import labels in the same text format using the “Import Labels” command in the Project Menu . export Multiple - Lets you split your project into multiple files all in one step . - Page 24 Paste - Inserts whatever is on the clipboard at the position of the selection or cursor in the project, replacing whatever audio data is currently selected, if any . Trim - Removes everything to the left and right of the selection . Delete - Removes the audio data that is currently selected without copying it to the clipboard .
- Page 25 select > cursor to end - Selects from the cursor position to the end of the selected tracks . find Zero crossings - Modifies the selection slightly so that both the left and right edge of the selection appear on a positive-slope zero crossing . This makes it easier to cut and paste audio without resulting in an audible clicking sound .
-
Page 26: View Menu
vIew MenU Zoom In - Zooms in on the horizontal axis of the audio, displaying more detail about less time . You can also use the zoom tool to zoom in on a particular part of the window . Zoom normal - Zooms to the default view, which displays about one inch per second . -
Page 27: Project Menu
float control Toolbar - Moves the Control Toolbar out of the window and into its own floating window, so you can position it wherever you want . The menu item changes to Dock Control Toolbar, which you can use to put the toolbar back into the main window . - Page 28 Import Raw Data - Allows you to open a file in virtually any un-compressed format . When you select the file, Audacity will analyze it and try to guess its format . It will guess correctly about 90% of the time, so you can try just pressing “OK” and listening to the result .
- Page 29 new stereo Track - Creates a stereo track (similar to above) . You can also create a Stereo Track by joining two tracks using the Track Pop-Down Menu . new label Track - Creates a new Label Track, which can be very useful for textual annotation .
-
Page 30: Generate Menu
generaTe MenU If you choose an item from the Generate Menu when there are no tracks in a project, a new track is created . Otherwise, the current track is used . If a track is selected and the cursor is placed in a single place in the track audio is inserted at the cursor position . -
Page 31: Effect Menu
effecT MenU The items in this menu only work when you have audio selected . Audacity does not have any real-time effects; you must select the audio, apply the effect and then listen to the results . Most effects have a Preview button . Clicking on this button plays up to three seconds of audio, allowing you to hear what it will sound like after the effect is applied . - Page 32 change speed - Changes the speed of the audio by re-sampling . Making the speed higher will also increase the pitch, and vice versa . This will change the length of the selection . change Tempo - Changes the tempo (speed) of the audio without changing the pitch .
- Page 33 noise Removal - Cleans up noise from a recording . First, select a small piece of audio that is silent except for the noise, select “Noise Removal”, and click on the “Get Noise Profile” button . Then select all of the audio you want filtered, select “Noise Removal”...
-
Page 34: Analyze Menu
wahwah - Uses a moving bandpass filter to create its sound . A Low Frequency Oscillator (LFO) is used to control the movement of the filter throughout the frequency spectrum . Adjusts the phase of the left and right channels when given a stereo selection, so that the effect seems to travel across the speakers . -
Page 35: Troubleshooting
TRoUblesHooTInG ProBleM caUse solUTion I cannot hear the USB device Make sure the USB music playing when not powered . device is connected I am recording, and to a working USB port I don’t see the audio on your computer . meters moving . - Page 36 TRoUblesHooTInG ProBleM caUse solUTion Audio output not Make sure your The music is playing set correctly . computer’s sound card and the audio meters is selected as your are moving, but I am playback device . not hearing the music . Turn up the volume Computer speakers on your computer .
- Page 37 TRoUblesHooTInG ProBleM caUse solUTion The USB device’s If your own USB device The recording sounds Gain level is set is equipped with a Gain loud and distorted . too high . knob, turn it down . The recording The USB device’s If your own USB device is barely audible .
- Page 38 TRoUblesHooTInG ProBleM caUse solUTion Recording input In Vista or 7, you may On Windows Vista or 7, properties in Vista or 7 need to manually my recordings are mono not set to “stereo . ” specify “stereo” for instead of stereo . the recording input .
-
Page 39: Compatibility
coMPaTIbIlITY • PC running Windows XP (32-bit), Vista (32-bit) or 7 ® ® • running OS X 10 . 4 * or higher (with Intel processor) ® • One available USB 1 . 1 port or higher • Compatible with most standard operating system drivers *This product includes two Macintosh-compatible software recording programs on the CD-ROM . -
Page 40: Specifications
sPecIfIcaTIons TUrnTaBle Type: . . . . . . . . . . . . . . . . . . . . . . . . . . . . . . . . . . . . . . . . Belt drive semi-automatic Drive motor: . -
Page 41: Specifications
sPecIfIcaTIons (conT.) general Power supply: . . . . . . . . . . . . . . . . . . . . . . . . . . . . . . . 110V 60 Hz Power consumption: . -
Page 42: Warranty
(“Warranty Period”) . If a defect arises and a valid claim is received within the Warranty Period, at its option, Brookstone will either 1) repair the defect at no charge, using new or refurbished replacement parts, or 2) replace the product with a new product that is at least functionally equivalent to the original product, or 3) provide a store credit in the amount of the purchase price of the original product . - Page 43 Brookstone, in so far as permitted by law, provides these products “as is . ” This warranty does not apply to: a) damage caused by failure to follow instructions relating to product’s use or the installation of components; b) damage caused by accident, abuse, misuse, fire, floods, earthquake or other external causes;...
- Page 44 Merrimack, New Hampshire USA 03054 • 800-846-3000 • www . B rookstone . c om 634899...
Need help?
Do you have a question about the iConvert USB Turntable and is the answer not in the manual?
Questions and answers