
Related Manuals for Brookstone Photo Scanner


Summary of Contents for Brookstone Photo Scanner
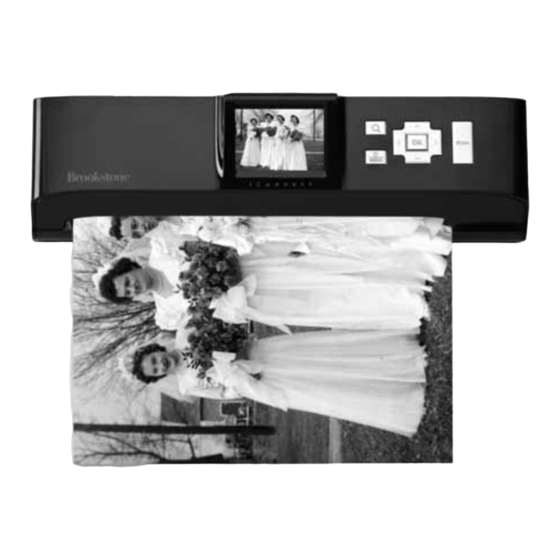
- Page 1 ® Photo Scanner Save photo printS aS DiGitaL FiLeS— without a CoMputer Note: Photos on this cover are oriented face-up for display purposes only. (Photos are loaded face down during actual use.)
-
Page 2: Table Of Contents
TablE Of CONTENTs Cautions and Warnings ........... . 2 Location of Parts and Controls . -
Page 3: Cautions And Warnings
CaUTION • TO REDUCE THE RISK OF ELECTRIC SHOCK, DO NOT REMOVE COVER. THERE ARE NO SERVICEABLE PARTS INSIDE. • TO REDUCE THE RISK OF FIRE OR ELECTRIC SHOCK, DO NOT EXPOSE THIS UNIT TO RAIN OR MOISTURE. The lightning flash with arrow-head symbol within an equilateral triangle is intended to alert the user to the presence of uninsulated “dangerous voltage”... - Page 4 DaNGER To reduce the risk of electric shock, burns, fire or injury: Do not use while bathing or in a shower. 2. Do not place or store unit where it can fall or be pulled into a tub or sink. 3.
- Page 5 7. The unit should be situated away from direct sunlight or heat sources such as radiators, electric heaters, heat registers, stoves or other units (including amplifiers) that produce heat. Avoid placing on top of stereo or computer equipment that radiates heat. 8.
-
Page 6: Location Of Parts And Controls
lOCaTION Of PaRTs aND CONTROls Front SCAN MENU BaCk MENU SCAN... -
Page 7: Included Accessories
lOCaTION Of PaRTs aND CONTROls Paper Guide 9. Left Button 2. Feed Slot 10. Up Button 3. 2.4” LCD Screen 11. Scan Button 4. Power/Menu Button 12. Mini USB Port 5. OK Button 13. SD/MMC 6. Down Button 14. Paper Exit Slot Right Button 15. -
Page 8: Supported Memory Card Types
sUPPORTED MEMORY CaRD TYPEs • SD/SDHC • Mini SD/Mini SDHC (use with adapter—not included) • Micro SD/Micro SDHC (use with adapter—not included) • MMC • RS-MMC (use with adapter—not included) OPERaTION ConneCtinG to power Connect one end of the adapter to the scanner’s DC IN jack, and the other end to a power source. - Page 9 CLeaninG the photo SCanner Before first use, clean the scanner so you will get the best quality scan possible. We suggest you clean the scanner both manually and automatically, periodically during use. Manual cleaning: With the scanner off and unplugged, open the front of the scanner by sliding your fingernails under the front edge of the scanner cover and lifting it off (see below).
-
Page 10: Calibrating The Scanner
CaLiBratinG the SCanner 1. Insert the CALIBRATION PAPER, with the white side facing down, into the FEED SLOT as instructed on the CALIBRATION PAPER. 2. Press the MENU button to bring up the System Menu. 3. Press the LEFT/RIGHT button to select Setup. 4. -
Page 11: Scanner Setting
SCanner SettinG Press the SCAN button and then the MENU button to enter the scanner setting menu. Press LEFT/ RIGHT button to select Scan or Setup. Press UP/DOWN button to select an option from the submenus (below). Menus Sub Menus Descriptions Scan Color Mode... -
Page 12: Scanning Images
sCaNNING IMaGEs Ensure the back of the scanner has enough room for your photo to eject out the back. Insert a memory card. Insert your photo or document facing down into the FEED SLOT on the front of the scanner. Adjust the PAPER GUIDE against the edge of the photo if necessary. note: to avoid paper jams, align the photo or document against the right side of the FeeD SLot and adjust the paper GuiDe if it is smaller than an a4 size. -
Page 13: Playing Back Scanned Images On Lcd Screen
PlaYING baCk sCaNNED IMaGEs ON lCD sCREEN After you scan a photo or document, the scanner will automatically enter the Playback mode. If you want to enter this mode before you have scanned an image, press the OK button. Playback will start as a full screen image with the image number in the top right-hand corner of the LCD SCREEN. -
Page 14: Transferring Images To A Pc
TRaNsfERRING IMaGEs TO a PC To move your photos to your PC, connect the scanner directly. First, ensure that the SD/MMC card that you wish to transfer photos/documents from is inserted in the scanner. Then, connect one end of the power adapter to the scanner’s DC IN jack, and the other end to a power outlet. -
Page 15: Care And Maintenance
CaRE aND MaINTENaNCE CLeaninG the SCanner In order to maintain the best image quality, and prevent dust accumulation, please clean the image sensor inside the scanner regularly (about every 50-100 scans, or whenever unwanted vertical/horizontal lines appear on the scanned image). Follow the instructions on page 8. warninG: Do not use any tools other than the ones supplied to clean the image sensor inside the scanner. -
Page 16: Storing The Scanner
StorinG the SCanner If the scanner will not be used for a prolonged period of time, follow the instructions below to store the scanner for future use. 1. Disconnect the scanner from the power supply. 2. Place the scanner and power adapter in a box or bag to keep them from accumulating dust. -
Page 17: Specifications
sPECIfICaTIONs Scan Sensor ....... . . Linear color CIS Display ........2.4" color TFT LCD (480x234 pixels) Scan size . -
Page 18: Warranty
(“Warranty Period”). If a defect arises and a valid claim is received within the Warranty Period, at its option, Brookstone will either 1) repair the defect at no charge, using new or refurbished replacement parts, or 2) replace the product with a new product that is at least functionally equivalent to the original product, or 3) provide a store credit in the amount of the purchase price of the original product. - Page 19 Brookstone, in so far as permitted by law, provides these products “as is. ” This warranty does not apply to: a) damage caused by failure to follow instructions relating to product’s use or the installation of components; b) damage caused by accident, abuse, misuse, fire, floods, earthquake or other external causes;...
- Page 20 Merrimack, New Hampshire USA 03054 • 800-846-3000 • www.Brookstone.com 671669...
Need help?
Do you have a question about the Photo Scanner and is the answer not in the manual?
Questions and answers