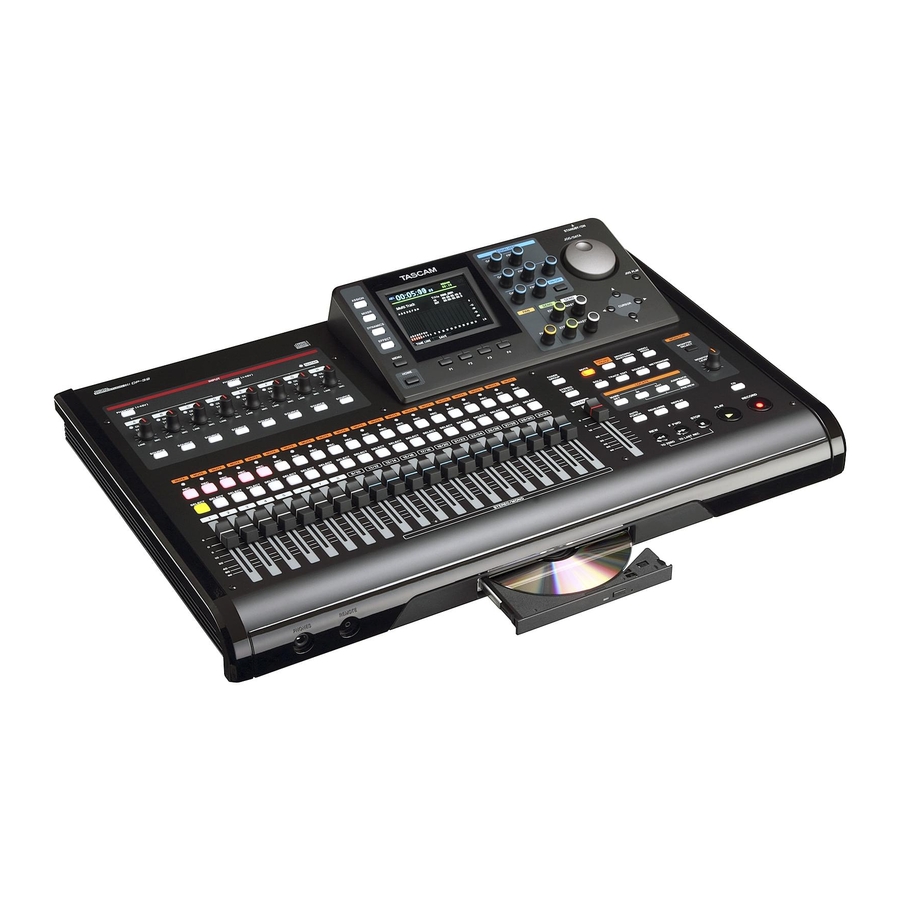
Tascam DP-32 Digital Portastudio Owner's Manual
Digital multitrack recorder
Hide thumbs
Also See for DP-32 Digital Portastudio:
- Troubleshooting supplement (2 pages) ,
- Schematic diagram (32 pages)
Table of Contents
Advertisement
Quick Links
Advertisement
Chapters
Table of Contents

Related Manuals for Tascam DP-32 Digital Portastudio


Summary of Contents for Tascam DP-32 Digital Portastudio
- Page 1 D01175120A DP-32 Digital Portastudio OWNER'S MANUAL...
-
Page 2: Important Safety Precautions
CAUTION Model number ______________________________ Changes or modifications to this equipment not expressly approved by TEAC CORPORATION for compliance could Serial number ______________________________ void the user's authority to operate this equipment. TASCAM DP-32... -
Page 3: Important Safety Instructions
TASCAM DP-32... -
Page 4: Safety Information
• USE OF CONTROLS OR ADJUSTMENTS OR PERFORMANCE OF PROCEDURES OTHER THAN THOSE SPECIFIED HEREIN MAY RESULT IN HAZARDOUS RADIATION EXPOSURE. • IF THIS PRODUCT DEVELOPS TROUBLE, CONTACT YOUR NEAREST QUALIFIED SERVICE PERSONNEL, AND DO NOT USE THE PRODUCT IN ITS DAMAGED STATE. TASCAM DP-32... -
Page 5: Table Of Contents
Changing the signal phase ........45 4 – Preparation ..........31 Checking the fader level ..........45 Inserting and removing SD cards ........31 Setting levels sent to stereo buses ......45 Inserting an SD card ..........31 Solo ..................45 Removing the card ............31 TASCAM DP-32... - Page 6 Using the mastering equalizer ......67 Virtual tracks ...............56 Using mastering compression .......68 Recording to virtual tracks ........56 Using normalize ............69 Assigning virtual tracks ..........56 Checking the noise shaper (noise shaped 8 - Track Editing ..........57 dithering) ..............69 Exiting Mastering mode ..........69 TASCAM DP-32...
- Page 7 Finalizing a CD .............86 Importing songs from audio CDs ........86 Erasing a CD-RW ..............87 Media Compatibility Table ..........87 15 – Troubleshooting........88 16 – Messages ..........89 General messages .............89 CD mode messages ............91 CD-related error messages ..........92 17 – Specifications ........93 TASCAM DP-32...
-
Page 8: Introduction
1 – Introduction Thank you very much for purchasing the TASCAM DP-32 • Audio CDs can be created from mixed-down master Digital Multitrack Recorder. files, and tracks on audio CDs can be played back and imported Before connecting and using the unit, please take time to • Song data and WAVE files can be copied and backed up... -
Page 9: Intellectual Property Rights
Intellectual property rights • Extremely cold places • Places with bad ventilation or high humidity • TASCAM is a trademark of TEAC Corporation, registered • Very dusty locations in the U.S. and other countries. • Make sure that the unit is mounted in a level position • SDHC Logo is a trademark of SD-3C, LLC. -
Page 10: Precautions For Use
CDs to become unplayable. • Do not apply labels or other materials to discs. Do not use discs that have had tape, stickers or other materials applied to their surface. Do not use discs that TASCAM DP-32... -
Page 11: Quick Guide
CAUTION Never use any AC adaptor or power cord other than the supplied TASCAM PS-1225L AC adaptor and its power In this section, we will play back the demo song on the cord. Use of a different adaptor or cord could cause included SD card. -
Page 12: Listening To The Demo Song
4. Use the JOG/DATA dial or the CURSOR (5/b) of that input or track. Repeat for other inputs and buttons to select , and then press the tracks. DEMO SONG F4 (t) button to open a menu list. TASCAM DP-32... -
Page 13: Recording And Mastering
The currently loaded song is saved and a new song is buttons to select (highlight green) , and then SONG created. press the F4 (t) button. screen opens. SONG LIST 8. Press the HOME button to return to the Home screen. TASCAM DP-32... -
Page 14: Connecting And Setting The Input Sources
3. Use the TRIM knob for INPUT H to adjust the guitar input level. Set the TRIM knob so that the OL indicator for INPUT H does not light even when the loudest sound to be recorded is input. TASCAM DP-32... -
Page 15: Recording A Guitar To Track 1
The recorded file is saved in the folder of the currently loaded song. 3. Press the REC button for TRACK 1 so the REC button becomes unlit. 3. Press the HOME button to return to the Home screen. TASCAM DP-32... -
Page 16: Recording A Vocal To Track 3
Use the JOG/DATA dial or press the SOURCE button 6. Return to the beginning of the song, start playback for INPUT B to set the TRACK 3 recording source to of the recorded rhythm and lead guitar parts, and practice singing along with the recording. TASCAM DP-32... -
Page 17: Mixing The Tracks
Play back the song, press and hold the MARK SET button and press the OUT button where you want to end the master file. The position where you press the button is set as the OUT point, which is where the mix down will end. TASCAM DP-32... -
Page 18: Mastering A Recording
ª Applying compression Use the compressor on the master file to adjust the dynamics and loudness of the entire song. 1. When in mode, press the F2 ( Mastering COMP button to open the screen. COMP MULTI TASCAM DP-32... -
Page 19: Creating An Audio Cd With The Master File
Mixdown Mastering normalization. MIXDOWN/MASTERING button repeatedly until you 3. Press the F1 (g) button to return to the Mastering return to mode. Multi Track screen. mode, press the BOUNCE button to Bounce switch to mode. Multi Track TASCAM DP-32... -
Page 20: Writing To A Cd-R/Cd-Rw
F4 (t) button to open the WRITE SONG LIST screen. On this screen, you can change the order that the master files will be written to the CD-R/CD-RW and set the gaps between them. (For details about changing TASCAM DP-32... -
Page 21: Ejecting A Cd
Hold the disc by its edges and lift it out. CAUTION Do not lift the disc forcibly. Doing so could damage the unit or the disc. TASCAM DP-32... -
Page 22: Names And Functions Of Parts
These buttons are also used to assign input sources to Depending on the microphone, a loud noise could tracks (see "Assigning inputs" on page 40). occur, possibly damaging equipment and harming people's hearing. • Do not connect or disconnect a microphone when phantom power is turned on. TASCAM DP-32... - Page 23 (See "Assigning inputs to a stereo bus" on page 41.) STEREO fader Use this fader to adjust the stereo signal level output from the STEREO OUT jacks and PHONES jack. Use this fader also to adjust the recording level when bouncing or mixing down tracks. TASCAM DP-32...
- Page 24 40.) MIXER button/indicator Press to open the Mixer screen. On this screen, you can adjust the settings for the selected input (INPUT A to H) or track (including GROUP) that is selected. (See "Bouncing tracks" on page 50.) TASCAM DP-32...
- Page 25 Press to open the pop-up MONITOR SELECT window on the Home screen. (See "Monitor selection" on page 42.) MONITOR LEVEL knob & Use this knob to adjust the level of the signals output from the MONITOR OUT jacks. TASCAM DP-32...
-
Page 26: Front Panel
REMOTE jack (2.5mm TRS) CAUTION Connect a TASCAM RC-3F footswitch (sold separately) Do not use this button at any time other than an here to remotely control a variety of operations, emergency. Before doing this, turn the power off (put in including punching in and out (starting and stopping standby) and disconnect the AC adaptor. -
Page 27: Rear Panel
Cord holder • XLR (1: GND, 2: HOT, 3: COLD) Wrap the cord of the supplied TASCAM PS-1225L AC adaptor around this hook to prevent the plug from • TRS (Tip: HOT, Ring: COLD, Sleeve: GND) becoming disconnected accidentally. -
Page 28: Home Screen
Bounce Mixdown Mastering The following items are also shown here: Rehearsal Auto Punch Search INPUT A to H overload indicators If the input signal of any INPUT A to H source is too loud, the corresponding indicator lights. TASCAM DP-32... -
Page 29: Menu Structure
Auto Monitor setting Page 72 Preview Time setting Page 54 Peak Hold setting Page 43 Song Name Type (switch between DATE and Page 72 WORD) Date/Time (system time Page 33 setting) Initialize (restore default Page 73 settings) TASCAM DP-32... -
Page 30: Navigating Screens
When an item has a menu, "t" appears on the right side, and the F4 (t) button is used to open it. In the menu, you can press the F1 (g) button to return to the previous screen. TASCAM DP-32... -
Page 31: Preparation
• Be sure to use the included TASCAM PS-1225L AC • A list of SD cards that have been confirmed to work adaptor to supply power to this unit. Power cannot with this unit can be found on the TASCAM website be supplied to this unit by USB. -
Page 32: Starting Up & Shutting Down
When the unit starts up, it defaults to multitrack mode, power was turned off (put in standby). You can even undo regardless of the mode used last before shutting down. and redo previous operations. TASCAM DP-32... -
Page 33: Setting The Date And Time
PREFERENCE When in any mode other than multitrack mode, many of the onscreen operations are unavailable. In this manual, explanations are given for multitrack mode unless otherwise noted. TASCAM DP-32... -
Page 34: Connecting Other Equipment
Loud noise could occur, resulting in harm to equipment and hearing. • Recorder functions cannot be used when the unit is connected to a computer via USB. TASCAM RC-3F Footswitch (Optional) When connecting an electric-acoustic guitar with a built-in Headphones... -
Page 35: Song Management
2. Use the JOG/DATA dial or the CURSOR (5/b/g/t) buttons to select (highlight green) , and then SONG buttons to select (highlight green) , and then SONG press the F4 (t) button. press the F4 (t) button. screen opens. SONG LIST screen opens. SONG LIST TASCAM DP-32... -
Page 36: Saving A Song
) button on SAVE disappears from the screen. SONG LIST the Home screen. 9. Once the song is created, the pop-up window disappears from the screen. SONG LIST 10. Press the HOME button to return to the Home screen. TASCAM DP-32... -
Page 37: Viewing Song Information
F4 (t) button. A confirmation pop-up message appears. 5. Press the F2 ( ) button to perform the erase. NOTE To cancel erasing a song, press the F1 ( ) button instead of the F2 ( ) button. TASCAM DP-32... -
Page 38: Protecting Songs
Song Protected message will appear and the operation will be prevented. • To remove protection from a song, follow the same procedure above, unchecking songs that you want to unlock in step 3. TASCAM DP-32... -
Page 39: Changing A Song Name
) button. NOTE To cancel changing a song name, press the F1 ( ) button instead of the F2 ( ) button. 6. Once the song name is changed, the pop-up window disappears from the screen. SONG LIST TASCAM DP-32... -
Page 40: Basic Recording
3. Press the F3 [ST/MONO] button to change the type of the selected track. 4. If you want to change the type of other tracks, repeat steps 2 and 3. TASCAM DP-32... -
Page 41: Assigning Inputs To Stereo Tracks
You can check the current assignment on the Assign screen. The assigned input source name ( ) is shown on the level meter display area of each track on the Home screen. TASCAM DP-32... -
Page 42: Monitoring
As shown below, if a red line appears at the top of a level meter, the level is too high (it stays on screen for a TASCAM DP-32... -
Page 43: Peak Hold Display
3-band EQs (equalizers). CAUTION The effect of the input equalizer will be recorded. If you plan to make EQ adjustments during mixdown, turn input equalizers OFF and turn track equalizers ON. Adjust the equalizer settings on the Mixer screen. TASCAM DP-32... -
Page 44: Digital Trim Setting (Track Only)
The effect send signal level is affected by the track fader. 3. Use the SEND EFF 1/EFF 2 knobs to adjust the external send levels. Setting range: (Default: 4. Use the SEND MASTER 1/MASTER 2 knobs to adjust the internal send levels. Setting range: (Default: TASCAM DP-32... -
Page 45: Changing The Signal Phase
In a rehearsal mode, monitoring and other recording 2. Turn the JOG/DATA dial to adjust the level. operations are the same as during actual recording, but input signals are not recorded. Setting range: +6.0dB To rehearse, press the REHEARSE button so that the button lights. TASCAM DP-32... -
Page 46: Making The First Recording
Rehearsal the Home screen. TASCAM DP-32... -
Page 47: Input Selection And Assignment
ª Canceling an undo operation (redo) "Setting the track type" on page 40.) Press the UNDO/REDO button when it is lit. The undone operation is redone, restoring the state before the undo, and the UNDO/REDO button becomes unlit. TASCAM DP-32... -
Page 48: Undoing Older Operations (Multiple Undo)
In this state, the UNDO/REDO button lights. The record of operations undone by a multiple undo is not immediately erased. The unit has simply been returned to a previous state. TASCAM DP-32... -
Page 49: Recorder Functions
Using a footswitch to punch in/out TASCAM RC-3F footswitch. Options: You can connect a TASCAM RC-3F footswitch (sold PLAY STOP (right pedal separately) to the REMOTE jack on the front panel and... -
Page 50: Bouncing Tracks
SOURCE button. The current position of the recorder is shown as a time TASCAM DP-32... -
Page 51: Locating A Specified Time Directly
01, the bar value will decrease and the total value will change in succession. When set to 4/4, for example, if the value drops below when the cursor is located TASCAM DP-32... -
Page 52: Returning To Zero Or The Last Recording Position
You can also use the CURSOR (5/b) buttons to increase/decrease the vertical zoom (audio level). Press the CURSOR 5 button to increase the vertical zoom (audio level), or the CURSOR b button to decrease it. Increasing the zoom makes it easier to cue precisely. TASCAM DP-32... -
Page 53: Repeat Playback
3. Repeat icon After starting from the IN point, when playback reaches the OUT point, it returns to the IN point and continues. Playback continues to repeat between the IN and OUT points. TASCAM DP-32... -
Page 54: Previewing Cue Points
Once the punch-out point is reached, POSTROLL 9.9 sec recording ends, but playback continues for the post-roll After setting time and then stops. MODE PREROLL POSTROLL press the F4 (t) button to return to the Home screen. TASCAM DP-32... -
Page 55: Checking Punch-In/Out Points
STOP (8) button. (AUTO PUNCH, If you are not satisfied with the result, press the REHEARSE and REPEAT buttons all light in this case.) RECORD (0) button again and record another take. TASCAM DP-32... -
Page 56: Virtual Tracks
• When creating a song, Virtual Track #1 is assigned to each physical track. • Recording, playback, and editing is only possible on virtual tracks assigned to physical tracks. • You can assign an already recorded virtual track to a physical track and record over it. TASCAM DP-32... -
Page 57: Track Editing
ª TO point The TO point is the current playback position. NOTE If you press the JOG PLAY button to enable jog mode, you can set IN and OUT points with subframe (1/10 frame) precision. COPY PASTE window TASCAM DP-32... -
Page 58: Copy/Paste
In other words, you can overwrite the target track from the TO point with a designated number of repetitions of the source data. The following parameters are used in this operation. • SOURCE Track • IN/OUT/TO • TARGET • TIMES TASCAM DP-32... -
Page 59: Move/Paste
• IN/OUT This operation inserts recorded data into the target track starting from the TO point. Therefore, the target track becomes longer. The following parameters are used in this operation. • SOURCE Track • IN/OUT/TO • TARGET Track TASCAM DP-32... -
Page 60: Silence (Erase Part)
The following parameters are used in this operation. • SOURCE Track • TARGET Track NOTE If you choose the same track for both the and the SOURCE track, a notification appears and TARGET Same Track the operation will not be executed. TASCAM DP-32... -
Page 61: Using Internal Effects
CAUTION When using a guitar effect together with a dynamic effect, the dynamic effect can be inserted on a maximum of 2 channels. The selected input (A to H) and on/off state are shown on the screen. TASCAM DP-32... -
Page 62: Guitar Effects
(For example, assign input H/H to tracks 9/10.) Mono input Stereo input Odd track Odd track EFFECT Even track Even track TASCAM DP-32... -
Page 63: Send Effects
F4 (t) button. 3. The setting is loaded and the library list closes, but the Send Effect screen stays open. Press the F1 (g) button to return to the Send Effect screen without loading a setting. TASCAM DP-32... -
Page 64: 10 - Mixing Down And Mastering Songs
Setting range: ±12 dB 1.6 kHz (Default: 0 dB) If another fader is moved, the SELECT button of the (Default: 100 Hz) master fader will blink and the movement will have no Use track SELECT buttons to select desired tracks. effect. TASCAM DP-32... -
Page 65: Send Effects
41.) NOTE • In Mixdown mode, appears on the upper left Mixdown corner of the Home screen. • If the interval between the IN and OUT points is shorter than 4 seconds, when you start to record, TASCAM DP-32... -
Page 66: Exiting Mixdown Mode
MIXDOWN/ • When in Multi Track MASTERING button to switch to mode, and Mixdown then press the MIXDOWN/MASTERING button again to switch to mode. Mastering • You cannot switch to mode if there is no Mastering master file. TASCAM DP-32... -
Page 67: Mastering Procedures
Use the MID Q knob to set the resonance (width) of the RECORD (0) button to start recording. MID FREQ band. The recording starts and the PLAY (7) and RECORD (0) Setting range: (Default: 0.25 buttons light. Recording always starts from regardless 00:00:00:00 of the current position. TASCAM DP-32... -
Page 68: Using Mastering Compression
Adjusts how fast the compressor disengages after the level drops below the threshold. AUTO MAKE 2. Press the F3 ( ) button to open the library LIBRARY This feature automatically adjusts the volume to list. prevent it from being reduced by the compressor. TASCAM DP-32... -
Page 69: Using Normalize
Exiting Mastering mode NORM NORMALIZE To exit mode and return to Mastering Multi Track mode, press the MIXDOWN/MASTERING button. 2. Press the F2 ( ) button to normalize the master track. 3. Once normalization completes, the Mastering screen reopens. TASCAM DP-32... -
Page 70: 11 - Various Other Functions
• Select to set this unit to MTC Master. work during recording. • Select to set this unit to MIDI Clock Master. CLOCK • Select when you do not want to output a sync signal from the unit. TASCAM DP-32... -
Page 71: Midi Remote Control
MIDI appears and the center of the tuning meter lights. sequencer or another DP-32 unit. A bar appears to the left or right of the center if the sound is lower or higher than the target pitch. The bar ª... -
Page 72: Preference Menu Settings
WORD: The characters set are used for the beginning of the song name. Set center footswitch Foot SW Page 49 pedal assignment Example (set to "TASCAM"): Center "TASCAM0001" Set left footswitch pedal Foot SW assignment DATE: The date is used for the beginning of Left the song name. -
Page 73: Restoring The Initial Preference Settings
5. Once initialization completes, the messages closes, but the screen remains open. PREFERENCE NOTE If you want to cancel the initialization, press the F1 ( button. 6. After making the settings, press the HOME button to return to the Home screen. TASCAM DP-32... -
Page 74: 12 - Sd Card Management
• SD and SDHC cards that are at least 512MB in size can be used. A list of SD cards that have been confirmed to work with this unit can be found on the TASCAM website (http://tascam.com/). 3. Use the JOG/DATA dial to select QUICK FORMAT and press the F4 (t) button. -
Page 75: Full Formatting An Sd Card
If you want to cancel the full format, press the F1 ( ) button. 5. Once the full format completes, the message closes, but the screen remains open. FORMAT NOTE When a card is formatted, one song is automatically created in the MUSIC folder. TASCAM DP-32... -
Page 76: 13 - Exchanging Data With A Computer
USB connection in the item of the screen. MENU This unit appears as an external drive named DP-32 on the computer's display. Clicking on the DP-32 drive will display the MUSIC, UTILITY, and AudioDepot folders. CAUTION • Be sure to use the included TASCAM PS-1225L AC... -
Page 77: Disconnecting
Depending on the OS version and settings you might also be The UTILITY folder is used, for example, to update the system able to eject the DP-32 icon by clicking on an eject icon next software used by the unit. In addition, do not delete or to it in a Finder window or by using a control key. -
Page 78: Track Import And Export
• To import a stereo WAV file, an empty stereo track is necessary. 9. Once importing completes, a pop-up window appears and then the screen Audio Depot reopens. 10. Press the HOME button to return to the Home screen. TASCAM DP-32... -
Page 79: Exporting Tracks
If you want to delete multiple files, repeat the button again while the track is selected (highlighted blue). procedure above. 5. After you finish putting checks (4) next to the tracks you want to export, press the F4 (t) button. A confirmation message appears. TASCAM DP-32... -
Page 80: 14 - Using Cds
CD. IMPORT 2. Press the F3 (-) button or the disc tray eject button on the front panel to open the tray slightly. Pull the tray out until it opens completely as shown below. TASCAM DP-32... -
Page 81: Loading A Cd
2. Press the disc gently near the center to set it on the tray. The disc should click into place and be level with the tray. 3. Push the tray to close it. The tray will click when shut. TASCAM DP-32... -
Page 82: Forcing Disc Ejection
Use Track At Once to write a single master file at a time to selected track. When the CD player is stopped, a CD-R/CD-RW. press the PLAY (7) button to play back the selected track. Use this when you want to write files to a CD-R/CD-RW at different times. TASCAM DP-32... -
Page 83: Using Disc At Once
4. Use the JOG/DATA dial to select (highlight blue) songs which you want to write to CD-R/CD-RW, and press the F2 (4) button to select the desired songs (selected songs have check marks 4 in the boxes next to them). TASCAM DP-32... -
Page 84: Using Track At Once
15. Once you have completed setting the gap lengths, press the F1 (g) button to return to the screen. WRITE SONG LIST 16. After you have finished changing the song order and song gap settings, press the F4 (t) button. TASCAM DP-32... -
Page 85: Using Live Writer
7. To finalize, use the JOG/DATA dial to select CD-R/CD-RW. otherwise, select , and then press the F4 (t) button again (default: The confirmation message shown below appears. 8. Press the F2 ( ) button to begin writing to the CD-R/CD-RW. TASCAM DP-32... -
Page 86: Finalizing A Cd
• You cannot add tracks to a disc that has been finalized. 5. When a confirmation message appears, press the F2 ( ) button to confirm. After the tracks have been imported from the audio CD, the reopens. CD PLAY/IMPORT TASCAM DP-32... -
Page 87: Erasing A Cd-Rw
CAUTION : Operation not assured – This operation erases the entire CD-RW. Erased data N: Not compatible cannot be restored. Confirm that you will not lose important data before erasing a disc. NOTE CD-R discs cannot be erased. TASCAM DP-32... -
Page 88: 15 - Troubleshooting
• You might also be able to noise if you use this unit's GROUND connector to ground the unit. TASCAM DP-32... -
Page 89: 16 - Messages
USB to format the card in FAT format and if an unformatted card is inserted in the unit. Format Error Always use the DP-32 to format cards to be used with it. Replace the card or format it using the FORMAT Format CARD menu. - Page 90 Even if the SD card has enough remaining space, this error could occur if you perform many editing operations. You may be able to continue to work after executing the DELETE UNUSED item in the Work Memory Full SONG menu to increase the amount of available working memory. (See "Undoing an operation" on page 47.) TASCAM DP-32...
-
Page 91: Cd Mode Messages
An invalid CD-R/CD-RW has been inserted. Insert an unfinalized CD-R/CD-RW. Invalid CD This message appears when the FINALIZE item of the CD menu is used, but a CD-R/CD-RW that cannot Insert Opened CD be finalized has been inserted. Insert a CD-R/CD-RW that you want to finalize. TASCAM DP-32... -
Page 92: Cd-Related Error Messages
An error occurred during the execution of a CD menu CD-DA IMPORT operation. Import Error An error occurred during the execution of a CD menu CD PLAYER operation. Media Error An error in CD-R/CD-RW writing occurred during the execution of a CD menu MASTER WRITE operation. Writing Failed TASCAM DP-32... -
Page 93: 17 - Specifications
Rated input level: +4 dBu Maximum input level: +20 dBu Operating requirements STEREO OUT jack Connector: RCA pin jack See the TASCAM website (http://www.tascam.com/) for updated information about OS compatibility. Rated output level: –10 dBV Maximum output level: +6 dBV Windows Output impedance: 200 Ω... -
Page 94: Dimensional Drawings
17 – Specifications General Power supply AC adaptor (TASCAM PS-1225L) Power consumption 12 W (Phantom power ON) Dimensions 514 x 104 x 340 mm (Width x Height x Depth, excluding projections) Weight 6.2 kg/13.67 lb Operating temperature range 5 to 35ºC/41 to 95ºF Dimensional drawings * Illustrations in this manual may differ from the actual product. -
Page 95: Block Diagram
17 – Specifications Block diagram TASCAM DP-32... -
Page 96: Level Diagram
17 – Specifications Level diagram TASCAM DP-32... -
Page 97: 18 - Appendix
18 – Appendix MIDI Control Change message When the DP-32 receives MIDI Control Change messages from an external device (such as a sequencer), they can control the DP-32 mixer and effect parameters. Mixer control change parameters Select a channel group of 8 track/input channels beforehand. -
Page 98: Midi Program Change Message
MIDI Program Change message Preset libraries of the send effects Program Change Display Effect type When the DP-32 receives MIDI Program Change messages, HALL it can call settings from the effect libraries. The Bank Select message of MIDI Control Change is used ROOM to select presets and users of the effect libraries. -
Page 99: Midi Implementation Chart
When MMC is set to MASTER or SLAVE, RP version 1.00 (T, R): MIDI full timecode message is T when GENERATOR is set to MTC. Mode 1: OMNI ON, POLY Mode 2: OMNI ON, MONO : YES / ×: NO Mode 3: OMNI OFF, POLY Mode 4: OMNI OFF, MONO TASCAM DP-32... -
Page 100: Bit-Map Array Of Mmc Commands
(6C) (6B) (6A) (69) (68) (67) – 0 (74) (73) (72) (71) (70) (6F) (6E) – 0 (7B) (7A) (79) (78) (77) (76) (75) – 0 – 0 – 0 – 0 (7F) (7E) (7D) (7C) RESUME WAIT TASCAM DP-32... - Page 101 Note TASCAM DP-32...
- Page 102 Note TASCAM DP-32...
- Page 103 Note TASCAM DP-32...
- Page 104 DP-32 TEAC CORPORATION http://tascam.jp/ Phone: +81-42-356-9143 1-47 Ochiai, Tama-shi, Tokyo 206-8530, Japan TEAC AMERICA, INC. http://tascam.com/ Phone: +1-323-726-0303 7733 Telegraph Road, Montebello, California 90640 USA TEAC CANADA LTD. http://tascam.com/ Phone: +1905-890-8008 Facsimile: +1905-890-9888 5939 Wallace Street, Mississauga, Ontario L4Z 1Z8, Canada TEAC MEXICO, S.A.
Need help?
Do you have a question about the DP-32 Digital Portastudio and is the answer not in the manual?
Questions and answers