Table of Contents
Advertisement
Quick Links
Advertisement
Table of Contents

Subscribe to Our Youtube Channel
Related Manuals for Tascam DP-008


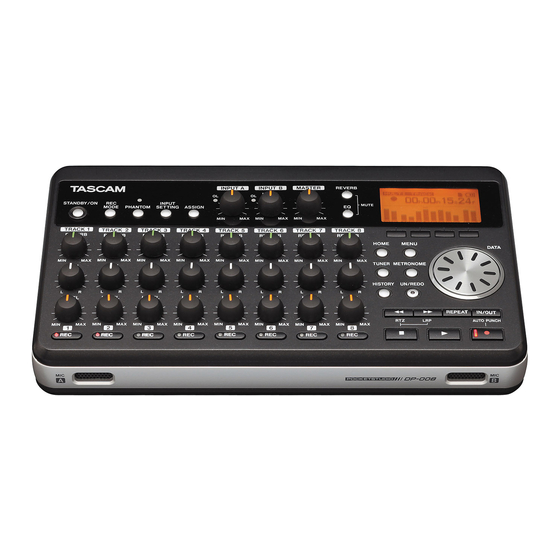
Summary of Contents for Tascam DP-008
- Page 1 D01092520A DP-008 8-Track Digital Pocketstudio OWNER'S MANUAL...
-
Page 2: Important Safety Information
TEAC CORPORATION for compliance could void the user's authority to operate this equipment. TASCAM DP-008 CAUTION: TO REDUCE THE RISK OF ELECTRIC SHOCK, DO NOT REMOVE COVER (OR BACK). NO USER-SERVICEABLE PARTS INSIDE. REFER SERVICING TO QUALIFIED SERVICE PERSONNEL. - Page 3 (volume) from earphones or headphones can cause hearing loss. If you are experiencing problems with this • product, contact TEAC for a service refer- ral. Do not use the product until it has been repaired. TASCAM DP-008...
- Page 4 Do not carry or store batteries together with • small metal objects. The batteries could short, causing leak, rupture or other trouble. TASCAM DP-008 Do not heat or disassemble batteries. Do • not put them in fire or water. Batteries could rupture or leak, causing fire, injury or stains around them.
-
Page 5: Table Of Contents
Erasing the operation history ... 51 7 – Recorder Functions ...52 Punching in and out ... 52 Using the foot switch to punch in/out 52 Setting the foot switch polarity ... 52 Bouncing tracks ... 53 Using the bounce function ... 53 TASCAM DP-008... - Page 6 Initializing SD cards ... 70 11 – Exchanging Data with a Computer ...71 Supported operating systems ... 71 Connecting with a computer ... 71 TASCAM DP-008 Disconnecting ... 72 Song backup and restoration ... 73 Backing-up songs ... 73 Restoring songs ... 74 Track import and export ...
-
Page 7: Introduction
(¥) F2 ( EXEC Additional information is introduced in the • styles below when needed: We give hints and tips on using the DP-008 when you see this icon. NOTE A note provides additional explanations for special situations. CAUTION A caution shows that you may lose data (recordings) if you do not follow the instructions. -
Page 8: Intellectual Property Rights
512 MB in size can be used. of SD cards that have been tested with this unit can be found on the TASCAM web site (www. tascam.com). Precautions for use SD cards are delicate media. In order to avoid damaging a card or the card slot, please take the following precautions when handling them. -
Page 9: Cautions On Installation
Cleaning the unit To clean the unit, wipe gently with a soft dry cloth. Do not use any benzene, paint thinner, ethyl alcohol or other chemical agents to clean the unit as they could damage the surface. 1 – Introduction TASCAM DP-008... -
Page 10: Quick Start Guides
AA batteries into the compartment, paying attention to the plus/minus (+/–) orientation. This unit can use alkaline or NiMH batteries. TASCAM DP-008 4 Close the battery compartment cover after installing the batteries. 5 Connect headphones to the connector. -
Page 11: Playing And Mixing The Demo Song
SONG 4 Rotate the DATA press the ¥ key to open the F4 ( screen that shows a list of songs. LOAD screen. MENU SONG (¥) key to open wheel to select , and LOAD SONG TASCAM DP-008... -
Page 12: Tip
TRACK1–8 LEVEL knob and the MASTER LEVEL dial to hear the demo song. knob adjusts the MASTER LEVEL TASCAM DP-008 volume of all eight tracks at the same time. The standard position is around 2–3 o'clock. Use the balance between Use the monitoring level. -
Page 13: From Recording To Creating A Master Track
SONG 6 Press the Home Screen. wheel to select , and DATA CREATE (¥) key to open the SONG screen. ” (where is a number). ) key. The currently EXEC key to return to the HOME TASCAM DP-008... -
Page 14: Connecting And Setting The Input Sources
MIC/LINE. 3 Press the key to open the INPUT SETTING screen. INPUT SETTING TASCAM DP-008 INPUT A On this screen you can set the input sources for both At first, the input source for already selected. 4 Use the... -
Page 15: Setting The Guitar As Track 1
TRACK 1 TRACK in this example. key to return to the HOME key. The key TRACK 1 REC knob to adjust the INPUT A TRIM knob so that the TRIM INPUT A knob is turned down, TRIM TASCAM DP-008... -
Page 16: Recording Guitar To Track 1
VOLUME guitar sound through headphones. When doing so, the meters on the right side of the display become active. TASCAM DP-008 NOTE • You can use the TRACK 1 PAN knob to adjust the stereo position of the signal when monitoring. -
Page 17: Record Guitar To Track 2
When you play the guitar, the input level is shown by the (TRACK 2) meters on the display. INPUT A INPUT B key to set the key to return to the key. The key (INPUT A) and TASCAM DP-008... -
Page 18: Record Vocals On Track 3
MASTER LEVEL dial as necessary to adjust the VOLUME monitoring levels and balance. TASCAM DP-008 7 Return to the start of the song again and press the playback (Á) key while pressing and holding the record (–) key to start recording. The stops blinking and stays lit constantly. -
Page 19: Press The Home Home Screen
If the OL indicator continues to light even when the TRIM knob is turned down, the mic signal itself is too loud. In this case, OL indicator is shown MIC B meter on the screen. knob, TRACK 3 LEVEL MASTER knob and dial as VOLUME TASCAM DP-008... -
Page 20: Mixing The Tracks
9 When you are finished, press the stop (ª) key to stop recording. 10 Press the key again. Its TRACK 3 REC light turns off. TASCAM DP-008 Mixing the tracks After you finish recording, the next step is to make a stereo mix. 1 Use the LEVEL , to adjust the levels of the tracks and the balance between them. - Page 21 F4 ( 5 Turn the DATA 6 Press the F4 ( key) to EXEC into master recording mode and return to the Home Screen. key to open the screen. wheel to select MASTER key to put the unit TASCAM DP-008...
- Page 22 RECORDER MODE 9 Turn the wheel to select DATA PLAY TASCAM DP-008 10 Press the F4 ( into master playback mode and return to the Home Screen. 11 Press the playback (Á) key to play the stereo master track that you created.
-
Page 23: Shutting Down The Unit
If you do so, the unit cannot 2 – Quick Start Guides shut down properly and all unsaved data will be lost. Lost data cannot be restored. We recommend that you also save the data manually often. TASCAM DP-008... -
Page 24: Names And Functions Of Parts
A, INPUT B) for each track. Press this key to open the INPUT ASSIGN the display. The input signal of the input TASCAM DP-008 assigned to a track becomes the track’s recording source. (See “Assigning inputs” on page 43.) INPUT A and INPUT B TRIM knobs and... - Page 25 Press this key alone to stop recording, playback, fast forward and fast rewind. If you press the Ô or key at the same time, the transport will also screen. MENU METRONOME screen. TUNER indicator lights when ª key, the transport will ) key TASCAM DP-008...
-
Page 26: Front Panel
They can be set as input sources for INPUT A/B Internal MIC/ Internal MIC/Hi gh TASCAM DP-008 Record (–) key and indicator Press the playback this key to start recording. The indicator lights when recording. If you press this... -
Page 27: Rear Panel
Use these to connect a monitoring system (powered speakers or an amplifier with speakers). PHONES jack Connect headphones (with a stereo mini- Ext. screen. plug connector) to this jack. VOLUME dial Use this to adjust the volume output from PHONES MIC/LINE GUITAR connector. TASCAM DP-008... -
Page 28: Right Side Panel
USB cable. This allows to sharing, importing and exporting files between the unit and the computer, including backup of the song data. (See “Connecting with a computer” on page 71.) IN 5V connector Connect a dedicated power adaptor (PS-P520, sold separately). TASCAM DP-008... -
Page 29: Bottom Panel
3 – Names and Functions of Parts Bottom panel [Inside of the battery compartment] Battery compartment cover Battery compartment The batteries (four AA) that power the unit are inserted here. TASCAM DP-008... -
Page 30: Home Screen
Cursor key that shows the time increment being edited Turning the wheel changes the DATA TASCAM DP-008 value of the selected time increment. Level meter and EQ status for INPUT A and B Shows the signal level for input sources A and B. -
Page 31: Preparations
+ and - indications. CAUTION • The unit does not have charging ability. To use NiMH batteries, use an optional charger. • The included alkaline batteries are for confirming the operation of the unit and might not last very long. TASCAM DP-008 Protected... -
Page 32: Connecting An Ac Adaptor (Sold Separately)
“ ” appears. After the TASCAM start-up screen, the Home Screen appears. [Start-up Screen] TASCAM DP-008 When the unit starts up it defaults to the AC outlet recorder mode regardless of the mode TRACK used last before shutting down. -
Page 33: Formatting Sd Cards
MUL TI TRACK When in modes other than MUL TI TRACK mode, some screen operations do not function. In this Owner’s Manual, unless otherwise noted, the recorder mode explained is assumed to be the mode. MUL TI TRACK TASCAM DP-008... -
Page 34: Connecting With Other Equipment
Right side panel connections TASCAM PS-P520 (Optional) DC plug Computer TASCAM DP-008 NOTE Recorder functions cannot be used when connected to a computer by USB. Adjusting the contrast The LCD display contrast can be adjusted. Use the following procedures to adjust the Headphones contrast. -
Page 35: Setting The Backlight
The setting options are 5sec . When set to 15sec 30sec backlight always stays lit. The default setting is 4 After making the setting, press the key to return to the Home Screen. HOME 4 – Preparations (¥) screen. item, 10sec TASCAM DP-008... -
Page 36: Song Management
MENU 2 Use the wheel to select DATA press the (¥) key to open the menu screen. TASCAM DP-008 3 Use the and press the PARTITION MTR partition list. [SD card with one partition] [SD card with multiple partitions] An asterisk (Ú) shows the active partition. -
Page 37: Editing Names
DATA . The F2 ( EXEC key to return to the HOME screen. MENU wheel to select DATA SONG (¥) to open the menu SONG wheel to select DATA CREATE (¥) to open the SONG CREATE TASCAM DP-008... -
Page 38: Saving A Song
3 Turn the wheel to select DATA press the (¥) key. screen appears. SONG SAVE TASCAM DP-008 4 Change the song name if you want and then press the names” on page 37). 5 Press the Home Screen. Viewing song information... -
Page 39: Erasing Songs
SONG key to return to the key. F4 ( EXEC screen. MENU wheel to select , and DATA SONG (¥) key to open the SONG wheel to select ERASE (¥) key. screen, which SONG ERASE TASCAM DP-008... -
Page 40: Protecting Songs
• least one song, so if you erase all the songs on a partition, a new song is created auto- matically. TASCAM DP-008 Protecting songs ✔ If you protect a song, editing, recording, and erasing of that song is prohibited. -
Page 41: Basic Recording
ON, phantom power is provided to both jacks. 1 When the recorder is stopped, press (low PHANTOM screen. (high INPUT A MIC/ switch on the rear side GUITAR MIC/LINE INPUT A INPUT B key to open the PHANTOM Indicator TASCAM DP-008... -
Page 42: Monitoring Input Signals
PHONES and LINE OUT jacks and can be heard with connected headphones and monitoring systems. TASCAM DP-008 About the OL indicators and level meters The audio levels of this unit can be checked using the INPUT A/B OL level meters on the Home Screen. -
Page 43: Assigning Inputs
) key to open the Setting value (input EQ ON/OFF (Default: OFF) 1.7 kHz – 18 kHz (Default: 5 kHz) ±12 dB (Default: 0.0 dB) 32 Hz – 1.6 kHz (Default: 350 Hz) ±12 dB (Default: 0.0 dB) TASCAM DP-008... -
Page 44: Making The First Recording
TRACK 1 first, will no longer be in record standby, , which were TRACK 2 TRACK 3 TASCAM DP-008 pressed afterwards, will be in record standby. 2 Set the recording level. Turn the ( INPUT B input level of the input channel. Watch... -
Page 45: Multitrack Recording
Stereo position (panning) Using the knob for a track, you can adjust the track signal’s stereo position. Track EQ (equalizer) Each track has a 2-band equalizer (EQ). TASCAM DP-008 knobs to adjust... -
Page 46: Reverb
3 After making the track EQ settings, press the key to return to the HOME Home Screen. TASCAM DP-008 screen. NOTE EQ SETTING When track EQ is ON for a track, the track is shown on the Home Screen as in the illus- tration below. -
Page 47: Muting Tracks
LEVEL number is shown on the Home Screen in inverse (dark number on light background). key and key at REVERB TRACK MUTE key of a track to turn key to return to the Home Track mute ON indication TASCAM DP-008... -
Page 48: Mastering
“ ” appears and this position is set as OUT ! the OUT point. TASCAM DP-008 You can also set the OUT point when playback is stopped by pressing the F4 (OUT) key. 3 Press the HOME Home Screen. -
Page 49: Undoing Operations (Undo)
PHONES connector, so it can also be REC MODE screen. Turn RECORDER MODE MUL TI TRACK key to put the F4 ( EXEC Á ) key to start playback. TASCAM DP-008... -
Page 50: Undoing The Last Operation (Single Undo)
1 Press the key to open the HISTORY screen. HISTORY TASCAM DP-008 This screen shows the operation history as a list. Each operation in the list is called an “event.” The event list starts at the bottom with event number “... -
Page 51: Erasing The Operation History
If you want to keep the operation history even when you power OFF, turn song protect ON before turning the power OFF (see “Protecting songs” on page 40). CAUTION You cannot undo erasing the operation history! Only do it if you are certain about TASCAM DP-008... -
Page 52: Recorder Functions
In step 4 above, step on the foot switch instead of pressing the record (º) key. In step 5, step on the foot switch again instead of pressing the playback (Á) key. TASCAM DP-008 Foot switch Setting the foot switch polarity Set the foot switch polarity on the screen. -
Page 53: Bouncing Tracks
Mute the bounce source tracks (see “Muting tracks” on page 47), and play wheel to select DATA BOUNCE key to put the unit in F4 ( EXEC keys for the bounce desti- keys knobs for the LEVEL knobs knob to adjust MASTER LEVEL TASCAM DP-008... -
Page 54: Locate And Search Functions
2 Turn the wheel to change the value DATA above the cursor. When adjusting, the TASCAM DP-008 value will carry over automatically when it reaches the highest or lowest value in a field. For example, when turning the wheel to increase the value in the... -
Page 55: Fast Forward/Rewind Search
[SET IN] [SET OUT] screen is open I /O SETTING key to open F2 ( ED IT (§) and (¶) keys to move keys to move the cursor wheel to change the value HOME TASCAM DP-008... -
Page 56: Using Repeat Playback
OUT point is reached. Setting the interval between repetitions The interval can be set from 1.0 to 9.9 seconds. TASCAM DP-008 1 Press the key to open the MENU screen. 2 Turn the wheel to select... -
Page 57: Using Auto Punch In/Out To Record
IN point. NOTE • Auto punch in/out mode cannot be entered during repeat mode or if no REC key has been pushed. • Auto punch in/out can be undone. TASCAM DP-008... -
Page 58: Editing Tracks
IN/OUT screen. SETTING The IN point is saved as the time when the ) key is pressed. TASCAM DP-008 OUT point The OUT point is the ending point for the part of the track subject to track editing. Press the IN/OUT screen. -
Page 59: Explanation Of Items
(all tracks) has been set as the 1 -8 , the SOURCE TRK (all tracks). In other words, this setting 1 -8 cannot be changed in this case. as the SOURCE TRK choices DESTINATION TRK , the DESTINATION TRK (track pairs). choice DESTINATION TRK TASCAM DP-008... -
Page 60: Copy/Paste
COPY data. The following parameters are used in this operation. SOURCE TRK ( • IN/OUT/TO • TASCAM DP-008 DESTINATION TRK • COPY TIMES • COPY/INSERT This function copies the audio data from between the IN and OUT points on the COPY source track, and inserts it on the COPY destination track starting from the TO point. -
Page 61: Move/Paste
OUT points on the selected track. This function splits the track at the IN point and shifts the recorded data after the IN point to after the OUT point. Therefore, the track becomes longer. The following parameters are used in this operation. TASCAM DP-008... -
Page 62: Cut (Remove Part)
CUT TRK ( • IN/OUT • SILENCE (part erase) TASCAM DP-008 This function cuts (deletes) the audio data between the IN and OUT points on the selected track, leaving silence between the IN and OUT points, as though there had been no recording. -
Page 63: Clean Out (Track Erase)
Use this function to completely erase the selected track. This erases the entire track, so the IN, OUT and TO points have no effect. The following parameter is used in this operation. CLEAN OUT TRK ( • 8 – Editing Tracks TASCAM DP-008... -
Page 64: Miscellaneous Functions
Set the frequency of the accent from for different time signatures. The default setting is LEVEL Set the metronome volume from TASCAM DP-008 The default setting is 3 When finished making settings, press the key to return to the Home Screen. HOME The metronome functions according to the setting made in step 2 above. -
Page 65: Oscillator Mode
Use this to set the note output. The setting range is The default setting is LEVEL Use this to set the output level. The setting range is (maximum). HOME screen. TUNER ) key to display the OSC. – 435Hz 445Hz 440Hz – (minimum) – TASCAM DP-008... -
Page 66: Turning The Power Off Automatically
(the values that they had when the unit was shipped from the factory). This operation is called initialization. 1 When the recorder is stopped, press the TASCAM DP-008 key to open the MENU 2 Turn the... - Page 67 SONG ( 1 /3) currently loaded song, remaining recording time on partition page: MTR partitions and CARD (2/3) capacities, FAT partition capacity page: system firmware version F /W (3/3) page keys to TASCAM DP-008...
-
Page 68: 10 - Sd Card Management
This operation erases all the data on the card and cannot be undone! Confirm that you will not lose important data before formatting a card. 1 When the recorder is stopped, press TASCAM DP-008 to open the screen. MENU MENU... -
Page 69: Reformatting Mtr Partitions
DATA CARD (¥) key to open the CARD wheel to select DATA REFORMAT (¥) key to open the screen. wheel to select the DATA key. F2 ( EXEC key to reformat the F3 ( menu CARD F4 ( TASCAM DP-008... -
Page 70: Reformatting The Fat Partition
NOTE After initializing an SD card, it is necessary menu CARD to format it if you want to use it with the DP-008 again. (See “Formatting SD cards” F4 ( on page 33). screen. MENU wheel to select , and... -
Page 71: 11 - Exchanging Data With A Computer
Backed-up data can be restored to a different DP-008 unit than the one that created it. In other words, files can be freely exchanged between DP-008 units, making it easy to add additional recordings or mix existing recordings in a different location. -
Page 72: Disconnecting
If you turn the unit’s power ON after making the USB connection, the screen above appears right away. The unit appears as an external drive named “DP-008” on the computer’s display. The FAT partition of the TASCAM DP-008 has three directories (folders): BACKUP, WAVE and UTILITY. CAUTION •... -
Page 73: Song Backup And Restoration
USB cable (see “Disconnecting” on page 72). keys, the wheel DATA ) and ) keys, to ” and an icon appear on the DATA menu reopens. TASCAM DP-008... -
Page 74: Restoring Songs
DATA , and press the (¥) key. RESTORE The screen shows the backup files on the FAT partition. TASCAM DP-008 NOTE An error message appears if there are no files on the FAT partition. 7 Turn the DATA that you want to restore, and press the key. -
Page 75: Importing Tracks
To import a stereo WAV file, an empty track pair is necessary. 9 After importing completes, press to return to the Home Screen. wheel to select the WAV key. wheel to select the track key. F4 ( EXEC HOME TASCAM DP-008... -
Page 76: Exporting Tracks
DATA export, and press the ✔ check in the checkbox. TASCAM DP-008 screen. By checking multiple checkboxes, you IMPORT / can export more than one track at once. Select a track and press the... -
Page 77: Exporting A Stereo Master Track
USB cable (see “Disconnecting” on page 72). keys, the wheel DATA keys to edit the name Dup l icate name ) appears. ) key to overwrite the key to return to the HOME TASCAM DP-008... -
Page 78: 12 - Troubleshooting
71)? Before making the USB connection, songs, • tracks, or stereo master tracks are backed TASCAM DP-008 up or exported to the FAT partition? (Files on the MTR partition cannot directly be read.) When using the AC adaptor, noise occurs if I connect a passive guitar or bass directly. -
Page 79: 13 - Messages
UN/REDO key which cannot be used until you press STOP. You are trying to perform an action which cannot be done while recording. Now Recording 13 – Messages Meaning and remedy TASCAM DP-008... - Page 80 Center. SD Wri te Busy /F Error F i leErr Audio Rst F ai l SaveParam F ai l Mount Error SD-Card Error ! FX Rx F ai led FX Busy TASCAM DP-008 Meaning and remedy ® ® CARD FORMAT...
-
Page 81: 14 - Specifications And Block Diagram
General Recording media SD card (512 MB - 2 GB) or SDHC card (4 GB - 32 GB) File system MTR partition: TASCAM original FAT partition: FAT32 Built-in mic Omni directional, Stereo Power supply Four AA batteries or Optional AC adaptor... -
Page 82: Optional Accessories
Macintosh Mac OS X 10.2 or later Backup memory The following settings are backed up even when the unit power is turned off. INPUT SETTING item (except Input • PREFERENCE item • Contrast • Backlight • Auto off • TASCAM DP-008 Foot switch polarity •... -
Page 83: Dimensions
14 – Specifications and Block Diagram Dimensions 36 mm 221 mm Block diagram TASCAM DP-008... -
Page 84: 15 - Commonly-Used Functions
15 – Commonly-used Functions This section is a brief guide to some operations on the DP-008 which may not be immediately obvious from looking at the panel controls. Key sequences are written like this: • + Ô means “press and hold the key and press Ô.”... - Page 85 See "Restoring songs" on page See "Bouncing tracks" on page See "Metronome" on page 64. See "Metronome" on page 64. See "Viewing song information" on page 38. See "Mastering" on page 48. See "Selecting the input source" on page 41. TASCAM DP-008...
- Page 86 Add reverb Use EQ on an input signal INPUT SETTING Use EQ on a track Use phantom power PHANTOM Mute the playback sound of REVERB the track TASCAM DP-008 Keys, etc. TO press ® PREFERENCE ® PREFERENCE ® PREFERENCE ®...
- Page 87 TASCAM DP-008...
- Page 88 Río Churubusco 364, Colonia Del Carmen, Delegación Coyoacán, CP 04100, México DF, México TEAC UK LIMITED Phone: +44-8451-302511 Suites 19 & 20, Building 6, Croxley Green Business Park, Hatters Lane, Watford, Hertfordshire. WD18 8TE, U.K. TEAC EUROPE GmbH Phone: +49-611-71580 Bahnstrasse 12, 65205 Wiesbaden-Erbenheim, Germany DP-008 www.tascam.jp www.tascam.com www.tascam.com www.teacmexico.net www.tascam.co.uk www.tascam.de...
Need help?
Do you have a question about the DP-008 and is the answer not in the manual?
Questions and answers