Table of Contents
Advertisement
Quick Links
Advertisement
Table of Contents

Related Manuals for Soundstream VIR-7200


Summary of Contents for Soundstream VIR-7200
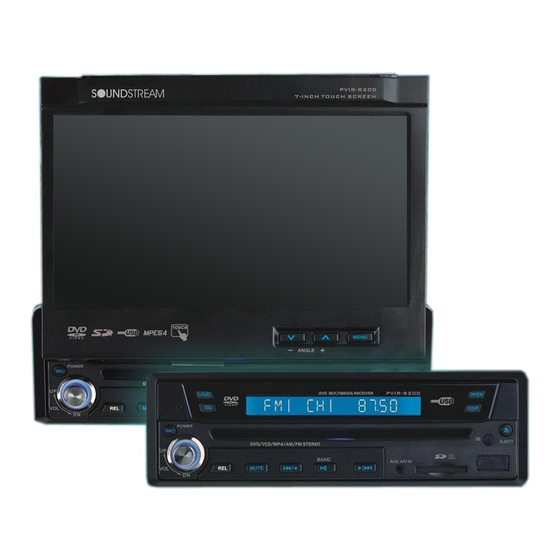
- Page 1 -7200 DVD/VCD/CD/WMA/MP3/FM/AM RECEIVER Operating Instructions...
-
Page 2: Table Of Contents
Thank you for buying this product, please read through these operating instructions, so you will know how to operate your model properly. after you have finished reading the instructions, put them away in a safe place for future reference . CONTENTS PRECAUTIONS FRONT PANEL... -
Page 3: Precautions
PRECAUTIONS Notes on Installation When replacing the fuse(s), the The unit is designed for 12VDC, placement must be of the same negative ground operation perage as shown on the fuse system only. Before installing holder. the unit,make sure your vehicle connect ed to DC 12V negative Do not block vents or radiator... -
Page 4: Front Panel
FRONT PANEL FRONT PANEL... - Page 5 FRONT PANEL 1 PWR/SRC:Press PWR/SRC button 9 USB slot:Insert USB device, the to turn on the unit, press and hold the PTID-8200 will play the files of USB button for 1 second or longer to turn off automatically. the unit. In power on, press PWR/SRC button to select one of the source: 10 IR window RADIO/DVD/SD/USB/AUX.
-
Page 6: System Menu
SYSTEM MENU In radio mode, the TFT displays the following menu: FADE Touch the to adjust the fader. Touch EXIT to input the chosen value. Pressing the SETUP button on the Note: remote control, touching the MENU the other items of this menu have the button on the TFT will show the same operations. - Page 7 SYSTEM MENU TIME FORMAT Touch the to adjust the picture. And touch SAVE to save the setting. Then touch EXIT to exit this item. CLOCK SYS Note: KEY BEEP the other items of this menu have the MONI FLEX 24 HOUR same operations.
- Page 8 SYSTEM MENU AMS (Stored station automatically) REVER POLA REVER POLA SUBWOOFER SUBWOOFER AMS FULLUP AMS FULLUP Touch to turn on or off the auto tuning REVER POLA mode. If selecting ON, when all the stations are stored, it will prohibit new AMS function.
- Page 9 SYSTEM MENU SCREEN ADJUST LOCAL ADJUST MENU LOCAL AREA Please press the button LOCAL GOTO FREQ Touch to toggle LOCAL OFF/ON.When Touch SCREEN ADJ. The local is ON, it only receives the strong displayed on the top left corner of TFT, local stations.
-
Page 10: Remote Control
REMOTE CONTROL Installing the battery REMOTE CONTROL Slide the tray out on the back of the remote control and insert the battery with the plus (+)and minus(-)poles LOUD pointing in the proper direction. ANGLE SUB-T PROG GOTO CLEAR Use and care of the remote MENU TITLE control... - Page 11 REMOTE CONTROL 1 POWER TRACK AUDIO SUBTITLE Refer to PWR/SRC operation. ANGLE TT TIME CH TIME REPEAT TIME DISP.Then press 2 EQ ENTER button to set the value. Press to select the corresponding In VCD mode, press GOTO button and preset modes to adjust the sound cursor button to select TRACK DISC quality.
- Page 12 REMOTE CONTROL 22 BAND/P/N 12 ZOOM In radio mode, press to select bands. Press to increase or decrease the In DVD/VCD mode, press P/N button picture in size, as follows: to select PAL MULTI or NTSC. 23 SETUP MUTE In playback mode, short press to display Press to mute the device.
-
Page 13: Basic Operation
BASIC OPERATION ¼ ò µ ¥ ¹ Ê Õ Ï Å Å ³ ý Ö ¸ Ä Ï 1.Reset the Unit Note: When o After selecting the desired mode, perating the unit for the first time or after replacing the car battery, you you can adjust the current level by must reset the unit. - Page 14 BASIC OPERATION .Mute Function Press button to shut off the sound output. And appears on the TFT. Press it again to resume to previous volume level. Pressing MUTE on the head unit also performs the same operation. .Mode Selector Press PWR/SRC button to select radio mode playback mode SD mode USB mode or AUX IN mode.
-
Page 15: Radio Operation
RADIO OPERATION 4.MO/ST Selector 1.Band Selector In FM radio mode, pressing ST button In radio mode, repeatedly press BAND on the remote control will toggle Mono button on the remote control will select mode or Stereo mode. bands in the following order: 5.Scanning/Memorizing Stations Automatically Touching BAND on the TFT panel or... -
Page 16: Dvd/Vcd/Cd Operation
DVD/VCD/CD OPERATION .Repeat Playing 1.Basic operation In DVD mode, press RPT on the (1) Insert a disc into the disc loading remote control to perform replaying slot,the unit will automatically switch function the PTID-8200 will repeat the on, if a disc is loaded, press PWR/ same chapter. - Page 17 DVD/VCD/CD OPERATION 9.On-screen display 12.Selecting different title In DVD mode,press to display Title (DVD mode) Elapsed Title Remain Chapter On a DVD disc, you can press TITLE Elapsed Chapter Remain Display on the remote control to return the root Off. menu of the disc, and you can select In VCD/CD mode,press to display different chapters or titles upward or...
- Page 18 DVD/VCD/CD OPERATION Auto switch to vedio When driving a car, in DVD/SD/USB mode, TFT display ATTENTION: YOU CANNOT USE THIS FUNCTION WHILE DRIVING , in AUX mode, TFT display “AUX MENU”. When the parking break is engaged, in DVD/SD/USB mode, TFT display change into playback mode, in AUX mode, change into playback mode if A/V IN exists.
-
Page 19: System Setup
SYSTEM SETUP SYSTEM SETUP Some DVD titles may be recorded in special formats. In such cases, the DVD titles will When you press SETUP button on the always appear on the screen in their original remote control, the setup menu will be dis- format,regardless of which TV display format played. - Page 20 SYSTEM SETUP 3. VIDEO SETUP PAGE Speaker Setup Page DOWNMIX LT/RT 3.1 VIDEO QUALITY SETUP PAGE STEREO V SURR Video Setup Page SET DOWNMIX MODE COMPONENT 2.2 SPDIF SETUP PAGE COMPONENT Audio Setup Page SPEAKER SETUP SPDIF SETUP 4. PREFERENCE SETUP PAGE The preference setting is active only when no disc is inserted and the CDV997 is stopped completely, the setting is effective on next time...
- Page 21 SYSTEM SETUP 5.1 PASSWORD MODE 4.3 DISC MENU PASSWORD MODE: Sets the function operation DISC MENU: Sets the preferred menu language as to be ON for locking the parental function, and the default when playing DVD.(if DVD support these languages) OFF for changing the parental level.
- Page 22 SYSTEM SETUP SETTING THE TV SCREEN SIZE Multi-aspect ratio suit to different TV screen size. TV Screen Size Picture format 16:9 on Disc Pan Scan Letter-box Wide Screen 16:9 Function supported by DVD discs There are many functions available on DVD discs and the functions vary per player and per manu- facturer.
-
Page 23: Mp3 Operation
MP3 OPERATION 1.Basic operation of MP3 (1) Insert a MP3 disc into the slot, the unit will automatically switch on, if a MP3 disc is loaded, press PWR/SRC on the remote control to start the playback. * You can eject a MP3 disc by pressing on the head unit. -
Page 24: Installation
INSTALLATION INSTALLATION Notes Before finally installing the unit, connect the wiring temporarily, making sure it is all connected up properly, and the unit and the system work properly. Use only the parts included with unit to ensure proper installation. The use of una- uthorized parts can cause malfunctions. - Page 25 INSTALLATION Install the Unit Installation Method: DIN Front-Mount Bend these claws outward for a tight fit, if necessary. Front Wall of the Cab To support the unit Detach the Unit 2. Insert the keys supplied to the unit at both sides of the unit (shown as 1.
-
Page 26: Cable Connection
CABLE CONNECTION Black Black Plug RADIO SIGNAL INPUT Black/Red Plug AUX IN-R Brown/Yellow Plug REVERSE VIDEO IN Black/White Plug AUX IN-L 3 Black/Yellow Plug Deep gray/Red Plug EXOTERIC VIDEO INPUT AUDIO OUT F.R 4 Brown/Brown Plug Deep gray/White Plug WOOF OUT AUDIO OUT F.L Orange/Orange Plug DIGITAL AUDIO OUT... -
Page 27: Trouble Shooting
TROUBLE SHOOTING TROUBLE SHOOTING Common problems Symptom Remedy Cause Power doesn't switch ON . Leads and connectors are Confirm once more that all connections The unit doesn't operate. incorrectly connected are correct A fuse has blown Fix the problem causing the blown fuse and replace the old fuse with a new one of the same capacity Noise and other factors are... - Page 28 TROUBLE SHOOTING Problem during DVD playback Symptom Remedy Cause Playback is not possible The loaded disc has a different Replace the disc with one featuring the region number from this unit same region number as this unit Dialog language (and The DVD playing does not You cannot switch among multiple subtitle language) can not...
-
Page 29: Specification
SPECIFICATION GENERAL power requirement ---------------------------------------------- DC/12V(10.8~16V) grounding system ------------ -------------------------------- ----------- negative type max: current consumption ------- ------------------------------------------- 15 ADC max: power output -------- ----------------------------------------------- ------- load impedance --------------- ------------------------------------ ------- dimensions------------------------------------------------------------178X 165 50 weight--------------------------------------------------------------------------------2.6KG DVD PLAYER SN ratio ------ -------------------------------------------------- more than 70dB(1KHz) dynamic range --------------... - Page 30 SPECIFICATON FM TUNER frequency range --------------------------------------------------- 87.5~107.9MHz usable sensitivity ---------------------------------------------------------------10dB SN ratio -------------------------------------------------------------------- 55dB(mono) distortion --------------------------------------------------------------------0.5%(mono) stereo separation --------------------------------------------------- ---- 30dB(1KHz) MW TUNER frequency range ----------------------------------------------------- 531~1710KHz usable sensitivity --------------------------------------------------------------- 30dB signal-to-noise ratio ------------------------------------------------------------- 50dB...
-
Page 31: Accessories
ACCESSORIES ACCESSORIES Removable Trim Ring Mounting Bracket equipped on the unit (Half Sleeve) X1 Rubber X1 Mounting Screw M5 LOUD ANGLE SUB-T PROG GOTO CLEAR MENU TITLE ENTER SETUP BAND ZOOM AUDIO Release key X2 Remote Control X1 100mm AV In CableX1 Mount Strap X1 Wire connector X1 User manual X1...
Need help?
Do you have a question about the VIR-7200 and is the answer not in the manual?
Questions and answers