Runco Video Xtreme VX-44d Installation & Operation Manual
1080p digital light processing projector and digital high definition (dhd) controller/scaler/processor
Hide thumbs
Also See for Video Xtreme VX-44d:
- Owner's operating manual (114 pages) ,
- Owner's operating manual (114 pages) ,
- Brochure & specs (6 pages)
Table of Contents
Advertisement
Quick Links
Download this manual
See also:
Owner's Operation Manual
Advertisement
Table of Contents
Troubleshooting

Subscribe to Our Youtube Channel
Related Manuals for Runco Video Xtreme VX-44d


Summary of Contents for Runco Video Xtreme VX-44d
- Page 1 N S T A L L A T I O N P E R A T I O N A N U A L VX-44d VX-55d 1080p Digital Light Processing Projector and Digital High Definition (DHD™) Controller/Scaler/Processor...
-
Page 3: Runcocare™ Standard Two Year Limited Warranty
1. Runco may update this list of products excluded from this warranty from time to time at Runco’s sole discretion, but updates to the list of covered products will not apply on a retroactive basis. - Page 4 3. Runco Technical Support staff will attempt to correct any minor issues that may be causing the problem. If Runco is unable to fix the problem to the customer’s satisfaction, Runco will issue a Return Material Authorization (RMA) if it is determined that the claim was made within the coverage period of the Standard Limited Warranty.
- Page 5 6. Runco’s warranty does not cover black uniformity issues or other LCD issues associated with usage outside the Runco recommended guidelines and specifications for the product 7. Second day shipment delivery time and availability may vary based on origin and destination and Runco is unable to deliver to PO Box and FPO Box addresses Extended Service Options Runco offers extended and expanded service plans.
- Page 6 Runco. The trademarks reporduced in this Runco Owner’s Manual and used on the Runco Products are either owned by Runco or are licensed by Runco. You may not reproduce or use the trademarks without the prior written consent of Runco.
-
Page 7: Important Safety Instructions
Important Safety Instructions Thank you for your purchase of this quality Runco video product! For the best performance, please read this manual carefully as it is your guide through the menus and operation. WARNING This symbol is intended to alert the user to the presence of CAUTION uninsulated “dangerous voltage”... -
Page 8: Compliance Information
Council Directive 2006/95/EC and amended by M1 and C1 on Low Voltage Equipment Safety; EN 60950 “Safety of information technology equipment, including electrical business equipment” The Technical Construction file required by this Directive is maintained at the corporate headquarters of Runco International, LLC, located at 1195 NW Compton Drive, Beaverton, OR 97006-1992. - Page 9 The recycling of materials will help to conserve natural resources. This symbol is only valid in the European Union. If you wish to discard this product, please contact your local authorities or dealer and ask for the correct method of disposal. Runco VX-44d/-55d Installation/Operation Manual...
- Page 10 Notes: Runco VX-44d/-55d Installation/Operation Manual...
-
Page 11: Table Of Contents
Description, Features and Benefits ................3 Key Features and Benefits ..................4 Parts List ........................4 2. Controls and Functions ....................5 VX-44d/-55d at a Glance .....................5 VX-44d/-55d Input Panel ....................6 VX-44d/-55d Built-In Keypad ..................8 DHD Controller Front Panel ..................10 DHD Controller Rear Panel ..................12 Outputs ........................12... - Page 12 Mounting the VX-44d/-55d ..................28 Floor Mounting (Upright) ..................28 Ceiling Mounting (Inverted)..................28 Adjusting the Projection Angle ................28 Connections to the VX-44d/-55d and DHD Controller ..........29 Connector Panel Access..................29 Connecting the DHD Controller to the VX-44d/-55d..........29 Connecting Source Components to the DHD Controller ........30 RS-232 Controller Connection ................36...
- Page 13 RS-232 Connection and Port Configuration ............87 Serial Command Syntax ..................87 Using Discrete IR Codes ....................92 IR Command Protocol ..................92 IR Command List....................93 7. Specifications ......................95 VX-44d/-55d Specifications ..................95 DHD Controller Specifications ..................97 VX-44d/-55d Dimensions ...................98 Supported Timings .....................99 Runco VX-44d/-55d Installation/Operation Manual xiii...
- Page 14 Table of Contents Notes: Runco VX-44d/-55d Installation/Operation Manual...
- Page 15 3-6. Lens Assembly (Front View)..................25 3-7. Mounting Angle Ranges (Front-to-Back and Side-to-Side)..........28 3-8. Connecting the VX-44d/-55d to the DHD Controller ...........29 3-9. RS-232 Connection from the DHD Controller to the VX-44d/-55d ......30 3-10. HDMI Source Connections ..................31 3-11. Component Video Source Connections..............32 3-12.
- Page 16 List of Figures 5-2. Unlocking the Lamp ....................77 5-3. Removing the Lamp ....................78 5-4. Installing A New Lamp ....................78 5-5. Removing the Primary Lens..................80 6-1. RC5 Message Format ....................93 7-1. VX-44d/-55d Dimensions ...................98 Runco VX-44d/-55d Installation/Operation Manual...
-
Page 17: Introduction
Target Audience of the VX-44d/-55d. Runco has made every effort to ensure that this manual is accurate as of the date it was printed. However, because of ongoing product improvements and customer feedback, it may require updating from time to time. You can always find the latest version of this and other Runco product manuals on-line, at www.runco.com. -
Page 18: Using This Manual
Using This Manual If you need..Turn to page: Information about obtaining service General information about the Video Extreme™ DLP Projector and DHD Controller Installation instructions First-time configuration instructions Advanced configuration instructions Troubleshooting tips Product specifications Runco VX-44d/-55d Installation/Operation Manual... -
Page 19: Description, Features And Benefits
Xenon lamp illumination system to bring astoundingly high performance and ultra high resolution to the very best theaters on the planet. The VX-44d features a 1000W Xenon lamp, while the VX-55d uses a 1.2-kW Xenon lamp to produce Runco’s brightest 1080p pictures ever. Four CinOptx™ zoom lenses are available with broad AxiShift™... -
Page 20: Key Features And Benefits
• CinOptx™ Telesto lens options for stunning sharpness and throw distance flexibility ➤ Parts List Your VX-44d/-55d is shipped with the following items. If any items are missing or damaged, please contact your Runco dealer or Runco Customer Service at (800) 23-RUNCO. -
Page 21: Controls And Functions
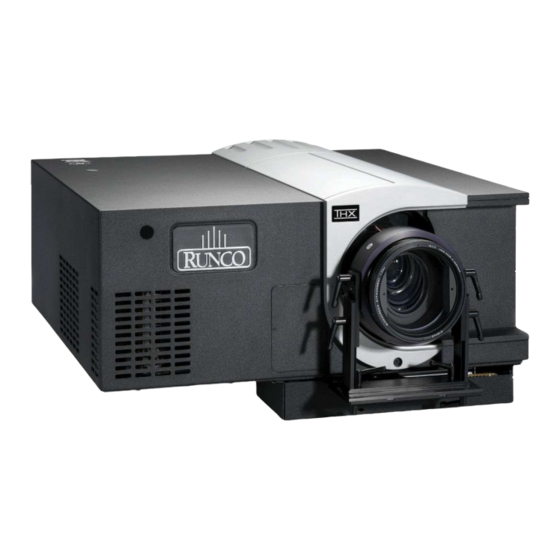
2. Controls and Functions Figure 2-1 shows the key VX-44d/-55d components. VX-44d/-55d at a Glance Figure 2-1. VX-44d/-55d Top/Rear/Front View Runco VX-44d/-55d Installation/Operation Manual... -
Page 22: Vx-44D/-55D Input Panel
Remove this cover to access the lamp compartment. 5. REAR FOOT (Stationary) 6. POWER INPUT (100 to 240 VAC) Connect the VX-44d/-55d to power here. (The VX-44d requires 100 to 240 VAC; the VX-55d requires 200 to 240 VAC.) 7. PROJECTION LENS 8. - Page 23 Controller to this input. 9. INPUT 1 (RGBHV) Not used. Connect all video sources to the DHD Controller. 10. INPUT 5 (Option 1) Reserved for future use. 11. INPUT 6 (Option 2) Reserved for future use. Runco VX-44d/-55d Installation/Operation Manual...
-
Page 24: Vx-44D/-55D Built-In Keypad
8. MENU Press this button to show or hide the projector menus. The VX-44d/-55d has its own internal menu system, separate from Note that of the DHD Controller. However, it is intended for use by trained service personnel only. - Page 25 Controls and Functions 9. Menu Navigation Buttons: UP BUTTON ( ) Used to move the menu cursor up in the VX-44d/-55d menu system. LEFT BUTTON ( ) Used to move the menu cursor left in the VX-44d/-55d menu system. DOWN BUTTON ( ) Used to move the menu cursor down in the VX-44d/-55d menu system.
-
Page 26: Dhd Controller Front Panel
16:9 - 4:3 - Letterbox - VirtualWide - Cinema - Virtual Cinema - Native Virtual Cinema is available only on the VX-44d/-55d/CineWide or Note VX-44d/-55d/CineWide with AutoScope. For more information about aspect ratios, refer to Table 4-1. - Page 27 Native - Virtual Cinema - Cinema - VirtualWide - Letterbox - 4:3 - 16:9 10. ENTER BUTTON When an item is highlighted on the OSD, the ENTER button selects the item. 11. STANDBY LED Lights amber when the DHD Controller is in standby mode; otherwise it is off. Runco VX-44d/-55d Installation/Operation Manual...
-
Page 28: Dhd Controller Rear Panel
1. HDMI Out Connect this to Input 2 (DVI) on the VX-44d/-55d (see Figure 2-2). 2. Display Control Connect this to the RS-232 IN input on the VX-44d/-55d, using the provided communication cable. 3. TRIGGERS Connection for up to three (3), 12-volt trigger-controlled devices such as retractable screens, screen masks or a CineWide with AutoScope system. -
Page 29: Inputs
This is the main AC input fuse (5mm x 20mm, 500 mA, 250V slow-blow). 13. MAIN POWER SWITCH Disconnects or applies power to the DHD Controller. 14. POWER INPUT (100 to 240 VAC) Connect the DHD Controller to power here. Runco VX-44d/-55d Installation/Operation Manual... -
Page 30: Vx-44D/-55D Remote Control Unit
Controls and Functions Figure 2-6 shows the VX-44d/-55d remote control, and the paragraphs that follow describe its functionality. VX-44d/-55d Remote Control Unit (not available on RETURN some models) EXIT 16 : 9 4 : 3 HDMI HDMI CUST (“CUST 2” on some models) Figure 2-6. - Page 31 UP Button = Native - Virtual Cinema - Cinema - VirtualWide - Letterbox - 4:3 - 16:9 DOWN Button = 16:9 - 4:3 - Letterbox - VirtualWide - Cinema - Virtual Cinema - Native Virtual Cinema is available only on the VX-44d/-55d/CineWide. For Note more information about aspect ratios, refer to Table 4-1.
- Page 32 Press to recall settings for the current input from the “ISF Day” memory preset. CUST 1 Press to recall settings for the current input from the “Custom” memory preset. THX (CUST 2) Press to recall settings for the current input from the “THX” memory preset. Runco VX-44d/-55d Installation/Operation Manual...
-
Page 33: Installation
• The remote control may fail to operate if the infrared remote sensor is exposed to bright sunlight or fluorescent lighting. • Ambient conditions may possibly impede the operation of the remote control. If this happens, point the remote control at the DHD Controller, and repeat the operation. Runco VX-44d/-55d Installation/Operation Manual... -
Page 34: Quick Setup
Installation Table 3-1 gives a quick overview of the VX-44d/-55d installation process. The sections following this one provide detailed instructions. Quick Setup Installation must be performed by a qualified custom video Note installation specialist. Table 3-1. Installation Overview For Details, Refer to... -
Page 35: Installation Considerations
Images may then appear washed out and less vibrant. Runco VX-44d/-55d Installation/Operation Manual... -
Page 36: Throw Distance
Estimating Throw Distance Throw Distance (TD) = Screen Width (w) x Lens Throw Ratio Figure 3-1. Estimating Throw Distance Table 3-3 lists the available lens options for the VX-44d/-55d and their associated throw ratios. Table 3-3. VX-44d/-55d Lens Options and Throw Ratios... -
Page 37: Vertical And Horizontal Position
Lens Shift (1.0 x H) Note: This is a general example of lens shift. Lenses vary in their shift capabilities. No particular lens or projector is used in this example. Figure 3-3. Vertical Lens Shift (EXAMPLE ONLY) Runco VX-44d/-55d Installation/Operation Manual... - Page 38 Screen Center Screen Width (W) Note: This is a general example of lens shift. Lenses vary in their shift capabilities. No particular lens or projector is used in this example. Figure 3-4. Horizontal Lens Shift (EXAMPLE ONLY) Runco VX-44d/-55d Installation/Operation Manual...
- Page 39 Installation Table 3-4 lists the lens shift limits for each available VX-44d/-55d lens, as percentages and absolute measurements with a 100 x 56 inch (1.78:1) screen. Table 3-4. Vertical and Horizontal Lens Shift Limits Lens Option Telesto B or Telesto D...
-
Page 40: Folded Optics
In order to easily solve this issue, Runco recommends using the DHD Controller with a high-quality audio receiver that has the ability to effectively synchronize audio and video signals. -
Page 41: Other Considerations
Figure 3-6. Lens Assembly (Front View) 5. With the lens fully inserted (and connected), turn it clockwise until the lens release button “pops” indicating the lens is fully inserted. Runco VX-44d/-55d Installation/Operation Manual... -
Page 42: Installing The Optional Cinewide Lens Mount
Installation If you are installing a VX-44d/-55d with the optional CineWide or CineWide with AutoScope system, proceed as follows to install the anamorphic lens mounting assembly Installing the Optional (stationary base plate or AutoScope lens motor). CineWide Lens Mount 1. Do not install the CineWide lens yet, only the mounting plate or Note lens motor. -
Page 43: Install Projector Stand (Cinewide With Autoscope, Floor-Mount)
(CineWide with AutoScope, Floor-Mount) If you are installing the VX-44d/-55d in an upright position (not ceiling-mounted), use the supplied hardware to attach the projector stand to the bottom of the projector as shown below. This stand allows the projector to lie flat on the mounting surface with the AutoScope lens motor installed. -
Page 44: Mounting The Vx-44D/-55D
For fixed installations, and for those that want the projector out of sight or have a limited (Inverted) space for projector and audience, you can invert the VX-44d/-55d and suspend it from the ceiling using a specially-designed ceiling mount fixture. -
Page 45: Connections To The Vx-44D/-55D And Dhd Controller
Installation Proceed as follows to connect the DHD Controller to the VX-44d/-55d, your video sources, external controller(s) – if present – and AC power. Connections to the VX-44d/-55d and DHD When connecting your equipment: Controller • Turn off all equipment before making any connections. -
Page 46: Connecting Source Components To The Dhd Controller
Installation RS-232 Connection: Connect the Display Control output from the DHD Controller to the RS-232 input on the VX-44d/-55d. Use a standard, modular telephone cable with RJ11 plugs at both ends. On the VX-44d/-55d end, use the provided RJ11-to-DB9 adapter. This adapter is wired as shown in Figure 3-9. -
Page 47: Hdmi Source Connections
Installation HDMI HDMI AV OUT AV OUT HDMI sources (BD, DVD, DTV Set-Top Box etc.) Figure 3-10. HDMI Source Connections Runco VX-44d/-55d Installation/Operation Manual... -
Page 48: Component Video Source Connections
Component Video Source Connections: Connect your component video sources to the HD1, HD2 and/or Component/SCART inputs as shown in Figure 3-11. RCA-to-BNC adapter COMPONEN T VIDEO OUT DTV-Set-Top Box (DTV-STB) BD/DVD Figure 3-11. Component Video Source Connections Runco VX-44d/-55d Installation/Operation Manual... -
Page 49: Rgbhv Source Connections
Installation RGBHV Source Connections: Connect personal computers and/or other RGB sources to the HD1, HD2 and/or Component/SCART inputs as shown in Figure 3-12. BNC-to-RCA adapter RGB Camcorder Computer Figure 3-12. RGBHV Source Connections Runco VX-44d/-55d Installation/Operation Manual... -
Page 50: Scart Rgbs Source Connections
SCART source to the Component/SCART input on the DHD Controller. Connect the sync output from your SCART source to the Video input on the DHD Controller. See Figure 3-13. SCART-to-RGBS adapter Green DVD/DTV STB Blue Sync Gaming Console Figure 3-13. SCART RGBS Source Connections Runco VX-44d/-55d Installation/Operation Manual... - Page 51 Installation Composite and S-Video Source Connections: See Figure 3-14. Composite Camcorder S-Video S-Video Gaming Console Figure 3-14. S-Video and Composite Video Source Connections Runco VX-44d/-55d Installation/Operation Manual...
-
Page 52: Controller Connection
For more information about using this connection, refer to External Control on page 87. to Automation/ 2 Receive Data 3 Transmit Data Control System 5 Ground or PC (none of the other pins are used) Figure 3-15. RS-232 Control System Connection Runco VX-44d/-55d Installation/Operation Manual... -
Page 53: Connecting 12-Volt Trigger Outputs To External Equipment
Installation If your VX-44d/-55d is equipped with a CineWide with AutoScope system, connect the Connecting 12-volt AutoScope lens motor to a 12-volt trigger output on the DHD Controller; see Figure 3-16. Trigger Outputs to External Equipment Similarly connect other 12-volt trigger-activated equipment (such as retractable screens or screen masks) to the other trigger outputs. -
Page 54: Connecting An External Ir Receiver To The Dhd Controller
Controller external IR receiver to the DHD Controller to extend the range of the remote control. See Figure 3-17. Remote Control IR Sensor IR Repeater (3.5-mm, mini phono plug) Figure 3-17. External IR Receiver Connection Runco VX-44d/-55d Installation/Operation Manual... -
Page 55: Connecting To Ac Power
(100 to 240 VAC). Projector: Similarly connect the VX-44d/-55d to a nearby AC outlet. The input voltage to a VX-44d must be between 100 and 240 VAC. The input voltage to a VX-55d must be between 200 and 240 VAC. -
Page 56: Turning On The Power
“On” appears in the projector LED status window. The fluorescent display on the DHD Controller indicates the active source, input resolution/frame rate and aspect ratio; for example: Current Source VX-44d HDMI 1 16:9 1080i/60 Aspect Ratio Input Resolution/Frame Rate Runco VX-44d/-55d Installation/Operation Manual... -
Page 57: Primary Lens Adjustments
When finished adjusting the lens, press EXIT repeatedly on the VX-44d/-55d built-in keypad to exit test pattern mode. By default, the VX-44d/-55d is configured for a “floor/front” installation, in which the 3.10 projector is installed upright and in front of the screen. If it is installed behind the screen Adjusting the Picture and/or mounted on a ceiling, you must change the picture orientation. -
Page 58: Installing And Adjusting The Cinewide Anamorphic Lens
If this is an AutoScope installation, leave enough space between Note the projector and the lens mounting assembly to allow the lens to move out of the light path without the assembly coming into contact with the projector front jewelry. Runco VX-44d/-55d Installation/Operation Manual... -
Page 59: Configure Lens Motor Trigger (Cinewide With Autoscope)
3. Slowly move the anamorphic lens into place so that there are no shadows on either side of the screen: Too Far Left Correct position Too Far Right 4. When the horizontal position is properly set, tighten the Yaw/X-Adjustment Levers to secure the lens in place. Runco VX-44d/-55d Installation/Operation Manual... - Page 60 There may be some pincushion distortion even after the lens is Note properly adjusted, especially at shorter throw distances. If this is the case, Runco recommends that you slightly over-scan the image into the screen frame area to mask the distortion. Runco VX-44d/-55d Installation/Operation Manual...
- Page 61 4. When the image geometry appears correct, tighten the set screws to secure the lens in place. (When viewed from the front, the rear opening on the anamorphic lens should appear as a tall, narrow oval.) Runco VX-44d/-55d Installation/Operation Manual...
-
Page 62: Optimizing Lamp And Lens Performance
• Press EXIT to return to the previous screen. • Press MENU to leave the menu system and return to the presentation. To set up the VX-44d/-55d for use with the DHD Controller, you will use the Installation and Lamp Adjust menus. -
Page 63: Installation Menu
Installation Select Installation from the VX-44d/-55d Main Menu to access these advanced lamp Installation Menu and lens configuration options: • LumaCal™, for maintaining constant lamp brightness Installation Language English • OptiCal™, to save and restore lens positions Picture Orientation Front... - Page 64 If both calibrations have been done, the OptiCal checkbox is checked and OptiCal enabled. When OptiCal is enabled, the VX-44d/-55d performs a Reference calibration when the projector is turned on. The lens returns to its last saved position (or actual position, if no motion calibration has been done previously).
-
Page 65: Working With The Lamp
Note For more information, refer to Lamp Info on page 72. To access the Lamp Adjust menu, press MENU on the VX-44d/-55d built-in keypad (Figure 2-3). Then, Select Lamp Adjust from the Main Menu. Lamp Hours (read-only): Lamp Hours shows the number of hours logged on the current lamp. - Page 66 • Max Brightness: The lamp will always burn as brightly as possible, driven by 100% of the power level rating for the installed lamp (1,000 watts for the VX-44d or 1,200 watts for the VX-55d). Keep in mind that the “maximum brightness” for any lamp gradually diminishes over time.
- Page 67 Installation HOW LONG CAN I MAINTAIN BRIGHTNESS? The VX-44d/-55d can maintain your “Intensity” setting until the required power reaches the maximum rating for the lamp. The lower the setting, the longer it will take to reach this threshold and the longer you can maintain the desired brightness.
- Page 68 Installation Notes: Runco VX-44d/-55d Installation/Operation Manual...
-
Page 69: Operation
5, 6, 7 ... 15 ... 59, 60 System Information Splash Enable On/Off Field Service OSD Position Hor. / Ver. 0, 1, 2 ... 100 Manufacturing Note: Default settings appear in bold type. Figure 4-1. DHD Controller OSD Menu Structure for VX-44d/-55d Runco VX-44d/-55d Installation/Operation Manual... -
Page 70: Main Menu
Standby LED On / Off 0 (off), 1, 2, 3 or 4 System Reset Figure 4-1. DHD Controller OSD Menu Structure for VX-44d/-55d (continued) ➤ Main Menu The Main Menu is the starting point for accessing all DHD Controller functions. -
Page 71: Input Source
Most modern DVD/BD players and set-top boxes have such controls. • Viewer preference (original aspect ratio with “black bars,” or a full-screen presentation with some distortion or cropping). The aspect ratio selection is automatically saved for each input and Note resolution. Runco VX-44d/-55d Installation/Operation Manual... - Page 72 16:9 4:3 Image on 16:9 Screen (Display) screen. 4:3 Image on 16:9 Screen with VirtualWide On a 2.35:1 screen, the image is 4:3 Image on centered between black bars on 2.35:1 Screen with VirtualWide either side. Runco VX-44d/-55d Installation/Operation Manual...
- Page 73 320 on the left and right sides and 180 above and below. 720p HDTV Image With SDTV and EDTV sources, the DHD Controller scales the image horizontally to achieve a 16:9 aspect ratio. Runco VX-44d/-55d Installation/Operation Manual...
-
Page 74: Picture
Memory Presets on page 64. Although it may be possible to obtain satisfactory picture quality using the naked eye and regular program material, Runco recommends using the following calibration tools for best results: • External test pattern source – Ovation Multimedia, Digital Video Essentials or AVIA test DVD or equivalent. - Page 75 Select Contrast and press ENTER. Adjust the contrast to a point just below which the white rectangle starts to increase in size. Brightness and contrast controls are interactive. A change to one Note may require a subtle change to the other in order to achieve the optimum setting. Runco VX-44d/-55d Installation/Operation Manual...
- Page 76 (on either side of the green bar) appear to be a single shade of blue. Like the brightness and contrast controls, the color and tint controls Note are interactive. A change to one may require a subtle change to the other in order to achieve the optimum setting. Runco VX-44d/-55d Installation/Operation Manual...
- Page 77 The Noise Filter is useful for clearing up noisy images from 480i video sources. Use the left- or right-arrow buttons to select the desired amount of noise reduction, keeping in mind that higher settings (which reduce high frequencies) may also “soften” the image. Runco VX-44d/-55d Installation/Operation Manual...
-
Page 78: Input Position
100% plus 1% increments of the size determined by the aspect ratio function. A setting of 10, for example, zooms in on the image 5% on all sides or 10% total. Figure 4-6 illustrates the effect of each overscan mode setting. Runco VX-44d/-55d Installation/Operation Manual... -
Page 79: Overscan Modes
Steady flickering or several soft vertical stripes or bands across the entire image indicates poor pixel tracking. Proper pixel tracking helps ensure that the image quality is consistent across the screen, that aspect ratio is maintained and that pixel phase (see above) can be optimized. Runco VX-44d/-55d Installation/Operation Manual... -
Page 80: Memory Presets
To save the settings for the current input and display mode to the Note ISF Night or ISF Day memory preset, select Save ISF Night or Save ISF Day from the Calibration menu (refer to Save ISF Night/Save ISF Day on page 69). Runco VX-44d/-55d Installation/Operation Manual... -
Page 81: Information
Information your DHD Controller and display device. Signal System Should you ever need to contact Runco Technical Support, this information will help them answer your questions or resolve product performance issues. Field Service Manufacturing Signal... - Page 82 For more information, refer to Working With the Lamp on page 49. • Mode: With the VX-44d/-55d, two lamp adjustment modes are available: Power or Intensity. The two modes are mutually exclusive; when you select the Power mode, the Intensity selection in the Lamp menu is grayed out. Likewise, when you select Intensity, the Power selection is grayed out.
- Page 83 Operation Figure 4-7. CIE 1931 Chromaticity Diagram • Mode: With the VX-44d/-55d, two color temperature adjustment modes are available: Simple or Advanced. The two modes are mutually exclusive; when you select the Simple mode (or if Advanced mode is not supported by the projector), the Advanced selection in the Color Temp menu is grayed out.
- Page 84 Use a higher setting for rooms with a lot of ambient light. Use a lower setting for more “theater-like” viewing conditions (little or no ambient light). Runco VX-44d/-55d Installation/Operation Manual...
- Page 85 “clipboard,” which is a temporary memory location. When you do, the message “Settings Copied” briefly appears on-screen. The Copy/Paste menu then re-appears, indicating the source of the copied settings. Copied settings are not retained after a power cycle. Note Runco VX-44d/-55d Installation/Operation Manual...
-
Page 86: Service
Press MENU when you have finished entering text. • Splash Timer: When you turn on the VX-44d/-55d, it projects a welcome screen with the Runco and ISF logos, along with the personalized information you enter as described above. - Page 87 Try again, entering a valid code. • COMP Key Source: Select COMP Key Source from the Remote Control menu to assign the COMP remote control button to either the Component or SCART input. Runco VX-44d/-55d Installation/Operation Manual...
- Page 88 • Lamp Info: Select Lamp Info from the Display Device - Configure menu to obtain information about the currently-installed lamp: its serial number and number of hours in use. You can also obtain this information using the VX-44d/-55d built-in Note keypad. For more information, refer to Working With the Lamp on page 49.
- Page 89 “in the ballpark” after which you can perform further calibration, if necessary. To perform an Auto Calibration, do one of the following: On the VX-44d/-55d Built-in Keypad (see Figure 2-3): Press AUTO SETUP followed by ENTER. When the Auto Setup completes, press ENTER again to keep the new settings.
- Page 90 You can assign one or more trigger outputs to each aspect ratio. Those triggers are then activated by selecting that aspect ratio. With an VX-44d/-55d/CineWide with AutoScope, assign at least one trigger output (the same one to which the lens motor is connected) to the Cinema and Virtual Cinema aspect ratios.
- Page 91 HDMI 1 or HDMI 2 inputs. By default, the extensions are on. Change these settings only if HDMI EDID incompatibility issues arise. Runco VX-44d/-55d Installation/Operation Manual...
- Page 92 A confirmation message appears. Select Yes to continue with the reset or select No to cancel. This action is not undoable. Proceed with caution! Before you Caution perform a System Reset, save your “Custom” Memory Presets (page 64) and ISF Day/Night Memory Presets (page 69). Runco VX-44d/-55d Installation/Operation Manual...
-
Page 93: Maintenance And Troubleshooting
5. Maintenance and Troubleshooting The VX-44d/-55d uses a Cermax® Xenon lamp to deliver its high brightness. The lamp should be replaced when it reaches the end of its life (typically 1000 hours), or sooner if a Lamp and Filter noticeable degradation in brightness occurs. When you replace a lamp, you should Replacement replace the filters as well. - Page 94 4. Grasp the lamp by its housing only and pull it straight out (lamp slides along guides) until it’s free; see Figure 5-3. Discard the lamp using safe disposal/recycling practices or contact your Runco dealer for a possible re-lamping program. Figure 5-3. Removing the Lamp 5.
-
Page 95: Filter Replacement
2. Remove the secondary anamorphic lens, if present. 3. Place the lens cap on the installed lens to protect it from damage. 4. Press and hold the “lens release” button located in the top right corner of the lens panel. Runco VX-44d/-55d Installation/Operation Manual... - Page 96 5. Grasping the lens barrel, turn it in a counter-clockwise direction until it stops. Then, pull it forward to remove it (disconnects from the connector assembly). Note: The connector assembly moves as you turn the lens. Figure 5-5. Removing the Primary Lens Runco VX-44d/-55d Installation/Operation Manual...
-
Page 97: Troubleshooting Tips
Maintenance and Troubleshooting Table 5-1 provides some general guidelines for troubleshooting problems you may encounter with the VX-44d/-55d. If the suggested solutions fail to resolve the problem or if Troubleshooting Tips you encounter an issue not described here, please contact Runco Technical Support. - Page 98 DHD lens motor and DHD Controller. Controller (Figure 3-15). • Incorrect trigger • Correct the trigger assignment. assignment (refer to Configure Lens Motor Trigger (CineWide with AutoScope) on page 43). Runco VX-44d/-55d Installation/Operation Manual...
-
Page 99: Error Codes
CRC error in flash ROM. Download new software. Engineering-only programming is complete. Contact Runco, replace TIPM. Attempting to download code without being in boot mode. Invalid interrupt. Power off/on. If it persists, contact dealer or Runco Technical Support. User forced system to stay in boot mode. - Page 100 Note: To clear a system error, press the EXIT key (on the projector’s built-in keypad) twice. If necessary, reset the projector by powering it off, allowing it to cool and powering it on again. Contact your Runco dealer or Runco technical support if the error persists. Runco VX-44d/-55d Installation/Operation Manual...
- Page 101 Note: To clear a system error, press the EXIT key (on the projector’s built-in keypad) twice. If necessary, reset the projector by powering it off, allowing it to cool and powering it on again. Contact your Runco dealer or Runco technical support if the error persists. Runco VX-44d/-55d Installation/Operation Manual...
- Page 102 Maintenance and Troubleshooting Notes: Runco VX-44d/-55d Installation/Operation Manual...
-
Page 103: External Control
In addition to using the DHD Controller front-panel keypad or remote control unit, there are two methods of controlling the VX-44d/-55d and DHD Controller externally: • Using a serial (RS-232) link to send ASCII commands and receive responses to those commands. - Page 104 ASPECT? Returns current aspect ratio CINEMA Selects the Cinema aspect ratio LETTERBOX Selects the Letterbox aspect ratio NATIVE Selects the Native aspect ratio VIRTUALWIDE Selects the VirtualWide aspect ratio VIRTUALCINEMA Selects the Virtual Cinema aspect ratio Runco VX-44d/-55d Installation/Operation Manual...
- Page 105 Image Preset Commands CUSTOM Loads “Custom” image preset CUSTOM1 Loads “THX” image preset CUSTOM2 Loads “ISF Day” image preset NIGHT Loads “ISF Night” image preset PRESET? Returns currently-selected preset (ISF Day, ISF Night, Custom or THX) Runco VX-44d/-55d Installation/Operation Manual...
- Page 106 OHPOS? Returns output horizontal position value OVPOS -50/50 Sets the value for output vertical position OVPOS? Returns output vertical position value OWIDTH -50/50 Sets the value for output width OWIDTH? Returns output horizontal width value Runco VX-44d/-55d Installation/Operation Manual...
- Page 107 IR remote only you’ll be doing so via serial commands. These commands provide active OSD responses just like the IR remote. DOWN Down-Arrow ( ) key ENTER ENTER key EXIT EXIT (RETURN) key LEFT Left-Arrow ( ) key MENU MENU RIGHT Right-Arrow ( ) key Up-Arrow ( ) key Runco VX-44d/-55d Installation/Operation Manual...
-
Page 108: Using Discrete Ir Codes
For example, here is the RC5 control code for the ON button on the DHD Controller remote control unit (assuming the default address is used): With Toggle Bit = 0 Binary With Toggle Bit = 1 Binary Start Toggle Function Address Command Bits Runco VX-44d/-55d Installation/Operation Manual... -
Page 109: Ir Command List
Cinema aspect ratio COMP 0x344E 0x3C4E Component video input Note: These codes assume that the default address of 17 is used. If you change it to something other than 17, you will need to modify these codes accordingly. Runco VX-44d/-55d Installation/Operation Manual... - Page 110 Composite video input V-WIDE 0x344C 0x3C4C VirtualWide aspect ratio Note: These codes assume that the default address of 17 is used. If you change it to something other than 17, you will need to modify these codes accordingly. Runco VX-44d/-55d Installation/Operation Manual...
-
Page 111: Specifications
7. Specifications Table 7-1 lists the VX-44d/-55d specifications. VX-44d/-55d Table 7-1. VX-44d/-55d Specifications Specifications Projector Type: Digital Light Processing (DLP), 3-chip, 16:9 SuperOnyx DMD Native Resolution: 1920 x 1080 (16:9) Aspect Ratios: Refer to Table 7-2 Video Standards: Refer to Table 7-2... - Page 112 Contrast Ratio (variable, based on lens aperture setting): 1500 - 2000:1 These are typical projector brightness and contrast specifications found in most companies’ sales literature. Runco includes these measurements in its literature to allow for direct comparison with other manufacturers’ projectors. These measurements are typically taken at 9,000K to 13,000K to get expected performance data when the projector is used in professional, commercial and industrial displays.
-
Page 113: Dhd Controller Specifications
Specifications Table 7-1. VX-44d/-55d Specifications (continued) Limited Warranty: Projector: Two (2) years parts and labor from the date of delivery to the end user. Lamp: 1000 hours or six (6) months, whichever comes first. Specifications are subject to change without notice. -
Page 114: Vx-44D/-55D Dimensions
Specifications Figure 7-1 shows the VX-44d/-55d dimensions (all dimensions are in inches). VX-44d/-55d Dimensions Intake Vents 12.225 29.023 9.668 11.245 28.240 Exhaust Vent 27.465 Figure 7-1. VX-44d/-55d Dimensions Runco VX-44d/-55d Installation/Operation Manual... -
Page 115: Supported Timings
√ 75.00 60.289 102.250 – – – √ √ √ 85.00 68.633 117.500 – – – √ √ √ 60.00 60.000 108.000 – – – 1280x960 1280x960 √ √ √ 85.00 85.938 148.500 – – – Runco VX-44d/-55d Installation/Operation Manual... - Page 116 – √ √ NTSC 3.58 – 59.94/60.00 15.734/15.750 3.580 – – – – √ √ NTSC 4.43 – 59.94/60.00 15.734/15.750 4.430 – – – – √ √ PAL-B/G/H/I – 50.00 15.625 4.430 – – – – Runco VX-44d/-55d Installation/Operation Manual...
- Page 117 Rate (Hz) (MHz) (kHz) √ √ PAL-M – 59.94/60.00 15.734/15.750 3.580 – – – – √ √ PAL-N – 50.00 15.625 3.580 – – – – √ √ √ SECAM – 50.00 15.625 13.500 – – – Runco VX-44d/-55d Installation/Operation Manual...
- Page 118 Specifications Notes: Runco VX-44d/-55d Installation/Operation Manual...
- Page 120 020-0826-02 Rev. B April 2009 Runco International • (800) 23RUNCO • Fax (503) 748-8161 • www.runco.com...
Need help?
Do you have a question about the Video Xtreme VX-44d and is the answer not in the manual?
Questions and answers