
Related Manuals for Runco NLMP22109


Summary of Contents for Runco NLMP22109
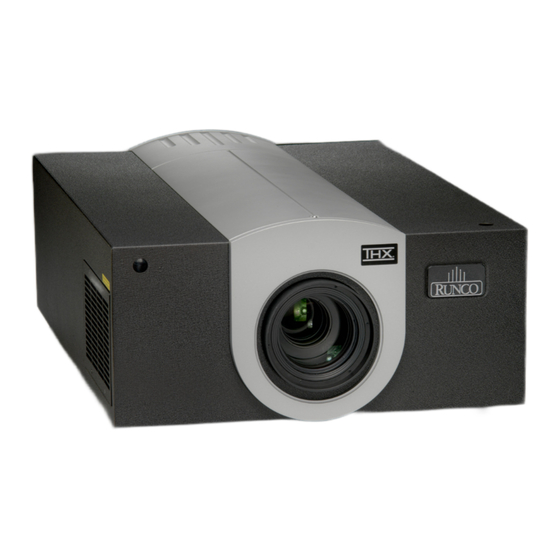
- Page 1 N S T A L L A T I O N P E R A T I O N A N U A L VX-22i 1080p, 3-chip Digital Light Processing Projector...
-
Page 3: Two Year Limited Warranty
(6) months or 1000 hours, whichever comes first, from the effective date of delivery to the end user. In addition, Runco will provide a new or rebuilt replacement lamp for the lamp that fails due to defects in materials or workmanship for a period of six (6) months or 1000 hours, whichever comes first, from the effective date of delivery to the end user. - Page 4 IMPORTANT -- WARRANTY REGISTRATION: Please fill out and mail your warranty registration card. It is imperative that Runco knows how to reach you promptly if we should discover a safety problem or product update for which you must be notified.
- Page 5 ADDITIONAL INFORMATION: To locate the name and address of the nearest Runco Authorized Service Center, or for additional information about this Limited Warranty, please call or write: RUNCO INTERNATIONAL, INC. Attn: Customer Service Department 2900 Faber Street Union City, CA 94587...
-
Page 6: Important Safety Instructions
Important Safety Instructions Thank you for your purchase of this quality Runco video projector! It has been designed to provide you with the quality of video that is expected in a home theater. For the best performance, please read this manual carefully as it is your guide through the menus and operation. -
Page 7: Compliance Information
Compliance Information DECLARATION OF CONFORMITY: Manufacturer’s Name: Runco International, a subsidiary of Planar Systems, Inc. Manufacturer’s Address: 2900 Faber Street, Union City, CA 94587 hereby declares that the products Model Numbers: VX-22i, VX-22i/CineWide and VX-22i/CineWide with AutoScope conform with the provisions of: Council Directive 2004/108/EC on Electromagnetic Compatibility;... - Page 8 The recycling of materials will help to conserve natural resources. This symbol is only valid in the European Union. If you wish to discard this product, please contact your local authorities or dealer and ask for the correct method of disposal. viii Runco VX-22i Installation/Operation Manual...
-
Page 9: Table Of Contents
Notes on Remote Control Operation ..............13 Quick Setup .......................14 Installation Considerations ..................15 Installation Type ....................15 Ambient Light .......................15 Throw Distance.....................16 Vertical and Horizontal Position................17 Vertical and Horizontal Lens Shift................17 Folded Optics .......................19 Other Considerations ....................20 Installing the Primary Projection Lens .................20 Runco VX-22i Installation/Operation Manual... - Page 10 Configure Lens Motor Trigger ................40 Adjust the Anamorphic Lens .................40 4. Operation .........................45 Using the On-Screen Menus ..................45 Main Menu......................47 Input Source ......................47 Aspect Ratio ......................47 Picture .........................49 Input Position......................53 Memory Presets ....................54 Information ......................54 Calibration ......................55 Service .........................57 Runco VX-22i Installation/Operation Manual...
- Page 11 5. Maintenance and Troubleshooting ................59 Lamp Replacement ....................59 Filter Replacement .....................60 Troubleshooting Tips ....................61 6. Serial Communications ..................63 RS-232 Connection and Port Configuration ...............63 Serial Command Syntax .....................63 7. Specifications ......................67 VX-22i Specifications ....................67 VX-22i Dimensions .....................69 Supported Timings .....................70 Runco VX-22i Installation/Operation Manual...
- Page 12 Table of Contents Notes: Runco VX-22i Installation/Operation Manual...
- Page 13 4-2. Typical PLUGE Pattern for Adjusting Brightness ............50 4-3. Typical Gray Bar Pattern for Adjusting Contrast ............51 4-4. Typical Color Bar Pattern for Adjusting Color Saturation and Tint........51 4-5. Typical Test Pattern for Adjusting Sharpness..............53 7-1. VX-22i/CineWide with AutoScope Dimensions............69 Runco VX-22i Installation/Operation Manual xiii...
- Page 14 List of Figures Notes: Runco VX-22i Installation/Operation Manual...
-
Page 15: Introduction
Target Audience most out of the VX-22i. Runco has made every effort to ensure that this manual is accurate as of the date it was printed. However, because of ongoing product improvements and customer feedback, it may require updating from time to time. You can always find the latest version of this and other Runco product manuals on-line, at www.Runco.com. -
Page 16: Using This Manual
Use the following table to locate the specific information you need in this manual. Using This Manual If you need..Turn to page: Information about obtaining service General information about the VX-22i DLP Projec- Installation instructions First-time configuration instructions Advanced configuration instructions Troubleshooting tips Product specifications Runco VX-22i Installation/Operation Manual... -
Page 17: Description, Features And Benefits
The results are simply stunning, with jaw-dropping images that must be seen to be believed! Runco has taken 1080p performance to a new level with this machine and harnessed the brightness and contrast capabilities inherent in 3-chip light engine design for a powerful presentation. -
Page 18: Parts List
Parts List Your VX-22i is shipped with the following items. If any items are missing or damaged, please contact your Runco dealer or Runco Customer Service at (800) 23RUNCO. • VX-22i DLP Projector • Remote Control Unit and two (2), AAA-size batteries •... -
Page 19: Controls And Functions
The logo can be rotated to match the projector orientation: inverted (ceiling-mounted) or upright. To rotate the logo, grip it at the sides, pull it away from the projector and rotate it 180 degrees. 4. CABLE OPENING Pass cables through this opening. 5. EXHAUST VENT Runco VX-22i Installation/Operation Manual... -
Page 20: Vx-22I Rear Panel
– Flashes blue (one second on/one second off) to indicate an error condition. – Flashes blue (one half-second on/one half-second off) for approximately 90 seconds after the system is turned off. 4. ISSUE LED Lights red to indicate an error condition. Runco VX-22i Installation/Operation Manual... - Page 21 Pressing the MENU button brings up the main VX-22i menu. Also, if you are in an adjustment mode or function, pressing MENU brings the menu back one level. 16. INPUTS Connect your video sources and other equipment to these inputs. Refer to VX-22i Rear Connector Panel on page 8. Runco VX-22i Installation/Operation Manual...
-
Page 22: Vx-22I Rear Connector Panel
(Currently, only RS-232 interface is supported.) 6. 12-VOLT (750 mA) TRIGGER OUTPUTS Connection for up to three (3), 12-volt trigger-controlled devices. These can be retractable screens, screen masks or the Runco CineWide with AutoScope system. Runco VX-22i Installation/Operation Manual... - Page 23 9. COMPOSITE VIDEO INPUT Standard composite video input for connecting a VCR, laser disc player or other composite video source. 10. S-VIDEO INPUT A standard S-Video input for connecting a DVD player, satellite receiver or Super VHS (S-VHS) VCR. Runco VX-22i Installation/Operation Manual...
-
Page 24: Vx-22I Remote Control
VX-22i Remote Control LIGHT SOURCE S-VID HDMI1 HDMI2 INFO ENTER EXIT MENU CONT TINT PICTURE MEMORY CUST1 CUST2 NIGHT ASPECT RATIO 16:9 LBOX VWIDE CINEMA VCINE FOCUS ZOOM LENS FOCUS ZOOM LENS Figure 2-4. VX-22i Remote Control Runco VX-22i Installation/Operation Manual... - Page 25 Press this button to show or hide the OSD controls. 5. Picture Adjustment Buttons: BRT (Brightness) Press to adjust black level. CONT (Contrast) Press to adjust white level. COL (Color) Press to adjust color intensity. TNT (Tint) Press to adjust color hues. Runco VX-22i Installation/Operation Manual...
- Page 26 (enlarge) or the DOWN button to zoom out (reduce). When finished, press MENU or EXIT. LENS (Lens Shift) To adjust the lens position, press LENS. Then, press and hold the RIGHT, LEFT, UP or DOWN button. When finished, press MENU or EXIT. Runco VX-22i Installation/Operation Manual...
-
Page 27: Installation
• The remote control may fail to operate if the infrared remote sensor is exposed to bright sunlight or fluorescent lighting. • Ambient conditions may possibly impede the operation of the remote control. If this happens, point the remote control at the projector, and repeat the operation. Runco VX-22i Installation/Operation Manual... -
Page 28: Quick Setup
CineWide lens adjustments: position, pitch (angle), geometry and focus Projector calibration: adjust the following for each input; save settings when finished: • Aspect ratio • Brightness • Contrast • Color level • Tint • Input position Runco VX-22i Installation/Operation Manual... -
Page 29: Installation Considerations
Images may then appear washed out and less vibrant. Runco VX-22i Installation/Operation Manual... -
Page 30: Throw Distance
1. Throw distance does not affect image quality, provided these ranges are taken into account. 2. Only the C, D and E lenses can be used with the optional CineWide (secondary anamorphic) lens. Doing so affects the throw distances as shown here. Runco VX-22i Installation/Operation Manual... -
Page 31: Vertical And Horizontal Position
(1.0 x H) Note: This is a general example of lens shift. Lenses vary in their shift capabilities. No particular lens or projector is used in this example. Figure 3-3. Vertical Lens Shift (EXAMPLE ONLY) Runco VX-22i Installation/Operation Manual... - Page 32 Screen Center Screen Width (W) Note: This is a general example of lens shift. Lenses vary in their shift capabilities. No particular lens or projector is used in this example. Figure 3-4. Horizontal Lens Shift (EXAMPLE ONLY) Runco VX-22i Installation/Operation Manual...
-
Page 33: Folded Optics
Figure 3-5. The position of the projector and mirror must be accurately set. If you are considering this type of installation, contact your dealer for assistance. Figure 3-5. Folded Optics Runco VX-22i Installation/Operation Manual... -
Page 34: Other Considerations
The projection lens is shipped separately from the projector. To install it, proceed as follows: Installing the Primary Projection Lens 1. Loosen the captive Phillips screw at the top of the Projector Front Jewelry. 2. Remove the jewelry. Runco VX-22i Installation/Operation Manual... - Page 35 6. Carefully rotate the lens assembly 45 degrees clockwise until the motor socket connector is aligned with the connector on the flange. Then, gently push the lens assembly in until it is seated flush against the flange and the connectors have seated. Runco VX-22i Installation/Operation Manual...
-
Page 36: Installing The Optional Cinewide Lens Mount
AutoScope lens motor. You will install the CineWide lens after you install the projector and adjust the primary lens. 2. Some components shipped with your projector may differ slightly from what is shown in these instructions. Runco VX-22i Installation/Operation Manual... -
Page 37: Installing The Autoscope Lens Motor (Vx-22I/Cinewide With Autoscope)
Figure 3-6. VX-22i/CineWide with AutoScope Motor Assembly - Exploded View Remove Projector Front Feet: Place the projector upside down on a blanket or Remove other soft surface. Loosen and remove the two front feet on the projector. Runco VX-22i Installation/Operation Manual... - Page 38 Using six (6) each of the supplied, M6 x 12mm Pan-Head Phillips screws (item #2), attach the AutoScope Ceiling Mount Adapters/Projector Stands (items #3 and #4) to the projector as shown in Figure 3-7. Figure 3-7. VX-22i with Ceiling Mount Adapters/Projector Stands DO NOT OVER-TIGHTEN THE SCREWS. Caution Runco VX-22i Installation/Operation Manual...
-
Page 39: Autoscope Lens Motor Installation
Secure the motor to the projector with the six remaining M6 x 12mm Pan-Head Phillips screws (item #2). Figure 3-8. AutoScope Lens Motor Installation After you have installed the AutoScope lens motor, proceed with Mounting the VX-22i (page 27). Runco VX-22i Installation/Operation Manual... -
Page 40: Installing The Fixed Cinewide Base Plate (Vx-22I/Cinewide)
(see Figure 3-9). 3. Secure the base plate to the projector with the screws provided for this purpose. Screw, Phillips CineWide Pan-Head, Base Plate M6-1.0 x 12mm (4x) Figure 3-9. Installing the Fixed CineWide Base Plate Runco VX-22i Installation/Operation Manual... -
Page 41: Mounting The Vx-22I
VX-22i and suspend it from the (Inverted) ceiling using a specially-designed ceiling mount fixture. Use only the Runco-approved ceiling mount kit designed for your Note projector (part number 956-0075-00). Install the mount kit according to the instructions provided with it. -
Page 42: Connections To The Vx-22I
HD3 (VGA / Y-Pb-Pr) HD1 (RCA) HD2 (BNC) HDMI or DVI-to-HDMI Cable (sold separately) BD/HD-DVD/ DVD/DTV STB Figure 3-10. HDMI Source Connections Runco VX-22i Installation/Operation Manual... -
Page 43: Digital (Dtv) Rgb Or Component Video Connections (Hd1, Hd2)
HD1 (RCA) HD2 (BNC) Vert Horiz Red/Pr Blue/Pb Green/Y Vert Horiz Red/Pr Blue/Pb Green/Y DTV or Progressive DTV or Progressive Component (YPbPr) Source Component (YPbPr) Source Figure 3-11. Digital (DTV) RGB or Component Video Connections (HD1, HD2) Runco VX-22i Installation/Operation Manual... -
Page 44: Digital (Dtv) Rgb Or Component Video Connections (Hd3)
HD3 (VGA / Y-Pb-Pr) Green/Y Blue/Pb Red/Pr Horiz Vert DTV or Progressive Component (YPbPr) Source Figure 3-12. Digital (DTV) RGB or Component Video Connections (HD3) Runco VX-22i Installation/Operation Manual... - Page 45 Analog (Computer) RGB Connections: See Figure 3-13. Personal HD3 (VGA / Y-Pb-Pr) Computer HD2 (BNC) Vert Horiz Red/Pr Blue/Pb Green/Y Figure 3-13. Analog RGB Connections Runco VX-22i Installation/Operation Manual...
- Page 46 S-Video/Composite Video Connections: See Figure 3-14. HD3 (VGA / Y-Pb-Pr) DVD Player, VCR, Satellite Receiver, Laser Disc etc. Figure 3-14. S-Video and Composite Video Connections Runco VX-22i Installation/Operation Manual...
-
Page 47: Rs-232 Controller Connection
63. WIRED REMOTE Service port. Not for user access 5 Ground 3 Transmit Data to Automation/ 2 Receive Data Control System (none of the other pins are used) or PC Figure 3-15. RS-232 Control System Connection Runco VX-22i Installation/Operation Manual... -
Page 48: Connecting 12-Volt Trigger Outputs To External Equipment
For more information on using the 12-volt triggers, refer to Triggers on page 58. AutoScope Lens Motor (Rear) Power AC Input Switch 3.5-mm mini plug Retractable Screen or other Rear Panel 12-volt trigger-activated Sleeve = Ground device Tip = +12V HD1 (RCA) Figure 3-16. 12-volt Trigger Output Connections Runco VX-22i Installation/Operation Manual... -
Page 49: Connecting An External Ir Receiver To The Vx-22I
Connect the other end to a 110 VAC power source. The input voltage to the AutoScope lens motor must be between Caution 100 and 120 VAC. Do not connect the AutoScope lens motor to a 200-240 VAC power source! Runco VX-22i Installation/Operation Manual... -
Page 50: Turning On The Power
3. Select Display Device from the Service Menu. 4. Select Installation from the Display Device menu. 5. Choose Floor Rear, Ceiling Front or Ceiling Rear, to match the installation method. You must enter a passcode to access the Service menu. Note Runco VX-22i Installation/Operation Manual... -
Page 51: Primary Lens Adjustments
To change the projected image position, use the cursor buttons to highlight “Left,” Vertical and Horizontal “Right,” “Up” or “Down” in the Lens menu. Then, press and hold the ENTER button to Lens Shift shift the image in that direction. Runco VX-22i Installation/Operation Manual... -
Page 52: Installing And Adjusting The Cinewide Anamorphic Lens
Carriage Plate (CineWide instructions. If any items are missing or damaged, please contact your Runco dealer or with AutoScope) or Base Runco Customer Service at (800) 23RUNCO. - Page 53 6. Attach the lens to the Lens Adapter Ring by threading it clockwise. Lens threads into ring Figure 3-19. Attaching the Anamorphic Lens to the Lens Adapter Ring Runco VX-22i Installation/Operation Manual...
-
Page 54: Configure Lens Motor Trigger
3. Slowly move the anamorphic lens into place so that there are no shadows on either side of the screen: Too Far Left Correct position Too Far Right 4. When the horizontal position is properly set, tighten the Yaw/X-Adjustment Levers to secure the lens in place. Runco VX-22i Installation/Operation Manual... - Page 55 There may be some pincushion distortion even after the lens is Note properly adjusted, especially at shorter throw distances. If this is the case, Runco recommends that you slightly over-scan the image into the screen frame area to mask the distortion. Runco VX-22i Installation/Operation Manual...
- Page 56 Then, angle the lens to even out any left-right pincushion distortion: Anamorphic Lens (Top View) Correct Position Wrong Position Once the proper lens angle has been set, firmly tighten the Yaw/X-Adjustment Levers to secure the lens in place. Runco VX-22i Installation/Operation Manual...
- Page 57 Anamorphic Lens Set Screw (item #10) to secure the lens in place. (When viewed from the front, the rear opening on the anamorphic lens should appear as a tall, narrow oval.) Focus: Finally, rotate the Focus Ring on the anamorphic lens to fine-tune the optical focus. Runco VX-22i Installation/Operation Manual...
- Page 58 Notes: Runco VX-22i Installation/Operation Manual...
-
Page 59: Operation
Then, to confirm your selection, press ENTER on the remote control (or SELECT on the projector rear panel). The VX-22i OSD menus are arranged hierarchically, as shown in Figure 4-1. Depending on the selected input source and signal characteristics, some menu options may not be available. Runco VX-22i Installation/Operation Manual... - Page 60 Film Mode On / Off (SD sources only) Miscellaneous (Chroma Upsampling On / Off Error) Motion Threshold 0, 1, 2 ... 15 Altitude Normal / High System Reset Restore Saved Settings Figure 4-1. VX-22i OSD Menu Structure Runco VX-22i Installation/Operation Manual...
-
Page 61: Main Menu
The currently-selected aspect ratio is indicated by a “ ” to its left; in this example, 16:9 is selected. Letterbox The aspect ratio selection is automatically saved for each input and Note VirtualWide resolution. Cinema Virtual Cinema Runco VX-22i Installation/Operation Manual... - Page 62 16:9 4:3 Image on 16:9 Screen (Display) screen. 4:3 Image on 16:9 Screen with VirtualWide On a 2.35:1 screen, the image is 4:3 Image on centered between black bars on 2.35:1 Screen with VirtualWide either side. Runco VX-22i Installation/Operation Manual...
-
Page 63: Picture
Contrast training program for technicians and installers to use these standards to obtain optimal picture quality from Runco video display devices. Accordingly, Runco recommends that Color setup and calibration be performed by an ISF certified installation technician. - Page 64 Memory Presets on page 54. Although it may be possible to obtain satisfactory picture quality using the naked eye and regular program material, Runco recommends using the following calibration tools for best results: • External test pattern source – Ovation Multimedia, Digital Video Essentials or AVIA test DVD or equivalent.
- Page 65 Color Saturation: On your external test pattern source, select a color bar pattern like the one shown in Figure 4-4. Figure 4-4. Typical Color Bar Pattern for Adjusting Color Saturation and Tint Runco VX-22i Installation/Operation Manual...
- Page 66 (on either side of the green bar) appear to be a single shade of blue. Like the brightness and contrast controls, the color and tint controls Note are interactive. A change to one may require a subtle change to the other in order to achieve the optimum setting. Runco VX-22i Installation/Operation Manual...
-
Page 67: Input Position
Width: Select Width from the Input Position menu to change the projected image width. Press to increase the width; press to decrease it. Height: Select Height from the Input Position menu to change the projected image height. Press to increase the height; press to decrease it. Runco VX-22i Installation/Operation Manual... -
Page 68: Memory Presets
Select Information from the Main Menu to display information about the current input signal (resolution, frequency, type et cetera) and installed firmware versions. Should you ever need to contact Runco Technical Support, this information will help them answer Information your questions or resolve product performance issues. -
Page 69: Calibration
Calibration menu passcode. This makes it possible to restore the picture quality settings to what they were when the projector was installed, simply by recalling the “ISF Night” preset. Runco VX-22i Installation/Operation Manual... - Page 70 Splash Timer: Select Splash Timer from the Calibration menu to set the amount of time the Runco/ISF logo “splash” screen appears when you turn on the projector. The range is from 5 to 60 seconds, in one-second increments.
-
Page 71: Service
RGB, select “RGB BNC” from the Input Source menu to enable the VX-22i to properly display that signal. When you change the default color space for an HD input, it takes Note effect the next time you select that input (not immediately). Runco VX-22i Installation/Operation Manual... - Page 72 You can assign one or more trigger outputs to each aspect ratio. Those triggers are then activated by selecting that aspect ratio. If your projector is equipped with the Runco CineWide with AutoScope system, assign at least one trigger output (the same one to which the lens motor is connected) to the Cinema and Virtual Cinema aspect ratios.
-
Page 73: Maintenance And Troubleshooting
For lamp or filter replacement, please contact your nearest Runco authorized service center or Runco dealer. Do not attempt to replace the lamp yourself! The VX-22i lamp is under high pressure. Handle it with great care at WARNING all times. -
Page 74: Filter Replacement
2. Pull the filter out of the projector and discard. Do not reuse filters. 3. Insert the new filter with the pleats facing in and the foam-covered side facing out. 4. Replace the filter access panel and tighten the screws to secure it. Runco VX-22i Installation/Operation Manual... -
Page 75: Troubleshooting Tips
Table 5-1 provides some general guidelines for troubleshooting problems you may encounter with the VX-22i. If the suggested solutions fail to resolve the problem or if you Troubleshooting Tips encounter an issue not described here, please contact Runco Technical Support. Table 5-1. Troubleshooting Chart Symptom... - Page 76 Notes: Runco VX-22i Installation/Operation Manual...
-
Page 77: Serial Communications
• When the VX-22i receives an OFF command, it will not acknowledge or execute any commands for approximately 90 seconds afterwards. This is to prevent hot re-strikes of the lamp, which can damage it. Runco VX-22i Installation/Operation Manual... - Page 78 Turns projector on Powering Up Gennum Init Complete Display system firmware version information: (see description) > rev * Runco Gennum Scaler Board * * Rev 0.28 (T01) 05 Jan 2007 * File Name: Runco_Gennum.ncd Created: 21 Dec 2006 - 10:42:40 Device:...
- Page 79 For example, to increase Brightness by five increments, send this sequence of commands: MBR <Enter> MNR <Enter> MNR <Enter> MNR <Enter> MNR <Enter> MNR <Enter> EXIT <Enter> Adjust Brightness Adjust Color Level MCOL (none) Adjust Contrast MCON Adjust Tint MTIN Runco VX-22i Installation/Operation Manual...
- Page 80 Notes: Runco VX-22i Installation/Operation Manual...
-
Page 81: Specifications
(3) +12 VDC, each rated at 750 mA and thermal fuse-protected Control Options: Discrete infrared remote Serial commands via RS-232 interface Built-in keypad on rear panel RS-232 Communication 19200 bps, no parity, 8 data bits, 1 stop bit, no flow control Parameters: Runco VX-22i Installation/Operation Manual... - Page 82 Light Output: 2850 ANSI Lumens Contrast Ratio: 4000:1 These are typical projector brightness and contrast specifications found in most companies’ sales literature. Runco includes these measurements in its literature to allow for direct comparison with other manufacturers’ projectors. These measurements are typically taken at 9,000K to 13,000K to get expected performance data when the projector is used in professional, commercial and industrial displays.
-
Page 83: Vx-22I Dimensions
Figure 7-1 shows the VX-22i dimensions (all dimensions are in inches). VX-22i Dimensions Figure 7-1. VX-22i/CineWide with AutoScope Dimensions Runco VX-22i Installation/Operation Manual... -
Page 84: Supported Timings
– – √ √ 1400x1050 1400x1050 60.00 65.317 121.750 – – √ √ 75.00 82.278 156.000 – – √ √ 1600x1200 1600x1200 60.00 75.000 162.000 – – √ √ 1920x1200 1920x1200 60.00 74.038 154.000 – – Runco VX-22i Installation/Operation Manual... - Page 85 √ √ √ √ PAL-M – 59.94/60.00 15.734/15.750 3.580 √ √ √ √ PAL-N – 50.00 15.625 3.580 √ √ √ √ PAL-60 – 59.94/60.00 15.734/15.750 4.430 √ SECAM – 50.00 13.500 4.250/4.410 – – – Runco VX-22i Installation/Operation Manual...
- Page 86 Notes: Runco VX-22i Installation/Operation Manual...
- Page 88 020-0838-00 rev. A November 2007 S ER IAL N UM B E R Runco International • 2900 Faber Street • Union City, CA 94587 • Ph (510) 324-7777 / (800) 23RUNCO / Fax (510) 324-9300 www.runco.com Runco CL-810 Owner’s Operating Manual...
Need help?
Do you have a question about the NLMP22109 and is the answer not in the manual?
Questions and answers