Table of Contents
Advertisement
D a te
M S F S ig n a l
T im e
R e v e r s e
F o r w a r d
1
2
L W
M W
W e e k e n d
O n /O ff
S le e p
C a n c e l
F M
W e e k e n d
S u n
M o n
T u e
W e d
T h u
C a n c e l
1
2
3
4
5
1
2
1 5 0
1 7 0
2 0 0
2 3 0 2 6 0 2 8 0
5 4 0
6 0 0
7 0 0
9 0 0
1 2 0 0
8 8
9 2
9 6
1 0 0
1 0 4
1 0 6
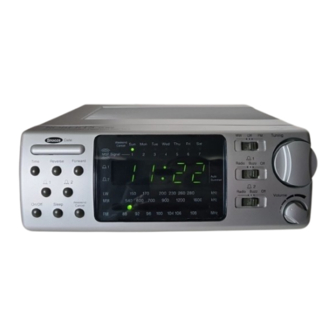
CR9910
3 Band Radio Controlled
Dual Alarm Clock Radio
M W
L W
F M
F r i
S a t
6
7
1
R a d io
B u z z
O ff
A u to
S u m m e r
2
R a d io
B u z z
O ff
k H z
1 6 0 0
k H z
1 0 8
M H z
Please read this manual before use
T u n in g
V o lu m e
Advertisement
Table of Contents

Related Manuals for Roberts CR9910


Summary of Contents for Roberts CR9910
- Page 1 CR9910 3 Band Radio Controlled Dual Alarm Clock Radio T u n in g D a te W e e k e n d S u n M o n T u e W e d T h u F r i...
-
Page 2: Controls (Front)
Controls (front) T u n in g D a te W e e k e n d S u n M o n T u e W e d T h u F ri S a t C a n c e l M S F S ig n a l T im e R e v e rs e... - Page 3 Controls (underside) DIMMER 21. Display dimmer switch C A U T I O N 22. Battery compartment RISK OF ELECTRIC SHOCK DO NOT OPEN If you need any further advice, please call our Technical Helpline on :- 020 8758 0338 (Mon-Fri)
-
Page 4: Automatic Clock Setting
Automatic clock setting When switched on your clock radio will receive and synchronise to one of the most accurate clocks in the world. The signal is received from the official UK standard frequency and time signal transmitter (MSF) located at Rugby in the U.K. At certain times of the year the MSF transmitter closes down for maintenance during this time it will be necessary to set the clock manually (see the sections headed Setting the Time and Date Manually). -
Page 5: Setting The Time Manually
Forward button or Reverse button until the correct time appears. The clock uses a 24 hour display. 2. After setting the time, the CR9910 will continue to run on its own internal quartz time base and will automatically synchronise itself with the radio time signal commencing on the 54th minute of every hour. -
Page 6: Listening To The Radio
Listening to the Radio O n /O ff 1. Turn on the radio by pressing the On/Off button . The LED dial pointer 1 5 0 1 7 0 2 0 0 2 3 0 2 6 0 2 8 0 k H z will light up indicating that the radio is switched on. -
Page 7: Setting Alarm Times
Setting alarm times Your alarm clock radio has two separate alarms which can be set to activate at different times. The alarms can be set to wake you by either the buzzer or the radio. Note: In the event of a power failure the backup battery will ensure that the alarm sounds at the preset time. -
Page 8: Checking The Alarm Times
Checking the Alarm Times 1. To check alarm 1 time, press the Alarm 1 button ( ) the display will show alarm 1 time whilst the button is held down. 2. To check alarm 2 time, press the Alarm 2 button ( ) the display will show alarm 2 time whilst the button is held down. -
Page 9: Setting The Alarms To Wake To Radio
Setting the alarms to wake to radio R a d io B u z z O ff R a d io B u z z O ff 1. Set the alarm time as previously described. 2. Set the Alarm 1 function switch or Alarm 2 function switch to the 'Radio' position. -
Page 10: Dimmer Switch
Wire Aerial Frequency Coverage 87.5 - 108MHz Built-in Ferrite aerial 525 - 1610kHz 147 - 284kHz Built-in Ferrite aerial ROBERTS RADIO LIMITED PO BOX 130 MEXBOROUGH SOUTH YORKSHIRE S64 8YT The company reserves the right to amend the specification without notice. -
Page 11: Mains Supply
IF IN DOUBT - CONSULT A QUALIFIED ELECTRICIAN. Mains supply Back-up Battery (not necessary for the unit to function) The CR9910 will operate from a supply of AC 230volts, 50Hz only. Slide the battery cover catch in the direction of the arrow. Remove the battery cover. - Page 12 In the event that it is not possible to return the instrument to the Roberts' dealer from whom it was purchased, please contact Roberts Radio Technical Services department at the address shown below before taking further action. These statements do not affect the statutory rights of a consumer. ROBERTS RADIO TECHNICAL SERVICES DEPARTMENT 97-99 Worton Road Isleworth Middlesex...
Need help?
Do you have a question about the CR9910 and is the answer not in the manual?
Questions and answers
Roberts CR9910 was plugged out for an hour or two. in the resulting 24 hours numbers just going round and round. how do I fix it so clock is correctly set please?
To reset the clock on a Roberts CR9910 after it was unplugged:
1. Press and hold the Time button.
2. Use the Forward or Reverse button to adjust the time until the correct time appears. The clock uses a 24-hour display.
3. After setting the time, the clock will run on its internal quartz time base and automatically synchronize with the radio time signal on the 54th minute of every hour.
This answer is automatically generated