Janome Sewing Machine Instruction Book
Hide thumbs
Also See for Sewing Machine:
- Instruction book (138 pages) ,
- Getting started manual (112 pages) ,
- Instruction manual (92 pages)
Table of Contents
Advertisement
Quick Links
Advertisement
Table of Contents

Related Manuals for Janome Sewing Machine


Summary of Contents for Janome Sewing Machine
- Page 1 INSTRUCTION BOOK...
-
Page 3: Important Safety Instructions
Use only attachments recommended by the manufacturer as contained in this owner’s manual. 3. Never operate this sewing machine if it has a damaged cord or plug, if it is not working properly, if it has been dropped or damaged, or dropped into water. -
Page 4: Table Of Contents
SECTION II. GETTING READY TO SEW Stippling Stitch..............44 Connecting the Power Supply .......... 4 Clasp Stitch ..............45 Before Using Your Sewing Machine ......... 4 Fagoting ................45 Operating Instructions: ............. 4 Satin Stitches ..............45 Speed Control Slider ............5 Fringing................ -
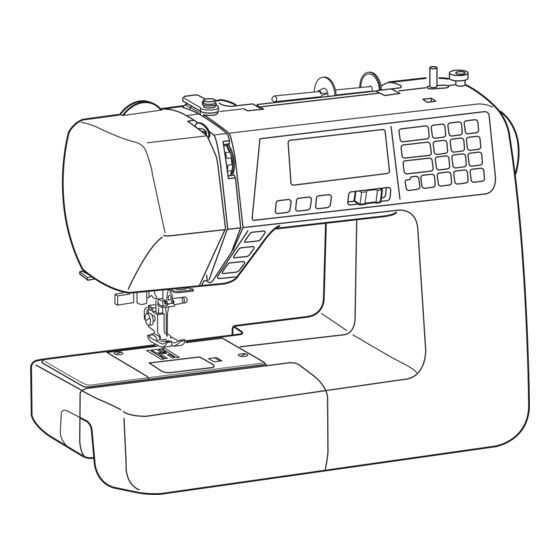
Page 5: Section I. Names Of Parts Names Of Parts
#3 Hole for stitch chart #4 Carrying handle #5 Handwheel #6 Power switch #7 Foot control jack #8 Machine socket #9 Foot control $0 Power supply cord NOTE: Sewing machine design and specifications are subject to change without prior notice. -
Page 6: Standard Accessories
Standard Accessories q Zigzag foot: A (set on the machine) w Overedge foot: C e Zipper foot: E r Satin stitch foot: F t Blind hem foot: G y 1/4˝ seam foot: O u Custom crafted zigzag foot: F2 i Automatic buttonhole foot: R o Assorted needle set !0 Spool holder ( X 2) (large) !1 Spool holder ( X 2) (small) -
Page 7: Extension Table
Extension Table The extension table q provides an extended sewing area and can be easily removed for free arm sewing. q Extension table w Pin e Hole • Detaching the table Pull the table away from the machine, as illustrated. •... -
Page 8: Section Ii. Getting Ready To Sew Connecting The Power Supply
To reduce the risk of electric shock, this plug is intended to fit in a polarized outlet only one way. Before using your sewing machine for the first time, If it still does not fit, contact a qualified electrician to place a scrap of fabric under the presser foot and run the install the proper outlet. -
Page 9: Speed Control Slider
Speed Control Slider Sewing speed can be varied by the speed control slider according to your sewing needs. To increase sewing speed, slide the slider to the right. To decrease sewing speed, slide the slider to the left. Controlling Sewing Speed Depress the foot control to start the machine. -
Page 10: Machine Operating Buttons
Machine Operating Buttons q Start/Stop button Lower the presser foot lifter. Press the start/stop button q to start the machine. The machine starts running slowly for the first few stitches; it then runs at the speed set by the speed control slider. - Page 11 t Needle up/down button Press the needle up/down button t to bring the needle up or down. y Thread cutter button Press the thread cutter button y to trim the threads after sewing. The thread cutter mark will blink i while the machine cuts the threads.
-
Page 12: Touch Panel
Touch Panel q Mode key When the power switch is turned on, the direct pattern selection (mode 1) is set automatically. Press the mode key to change the mode. Refer to page 18. w Clear key Press the clear key to clear the memorized stitch pattern. -
Page 13: Removing And Attaching The Foot Holder
Removing and Attaching the Foot Holder CAUTION: Turn OFF the power switch before detaching or attaching foot holder. • Removing the foot holder Remove the thumbscrew q by turning it counterclockwise with a screwdriver. • Attaching the foot holder Align the hole in the foot holder w with the threaded hole in the presser bar e. -
Page 14: Dropping Or Raising The Feed Dog
Dropping or Raising the Feed Dog The drop feed lever is located underneath the free arm bed on the back of the machine. q To drop the feed dog, push the lever in the direction of the arrow q. Set the stitch length value at “0.0” e. w To raise the feed dog, push the lever in the direction of the arrow w, as illustrated, and turn the handwheel r toward you. -
Page 15: Changing The Needle
Changing the Needle CAUTION: Turn OFF the power switch before changing the needle. z Turn off the power switch. Raise the needle to its highest position by turning the handwheel counterclockwise, and lower the presser foot. Loosen the needle clamp screw q by turning it counterclockwise. -
Page 16: Bobbin Winding
Bobbin Winding • Removing the bobbin Gently slide the hook cover release button q to the right and remove the hook cover plate w. Lift out the bobbin. q Hook cover release button w Hook cover plate • Horizontal spool pin Lift up the spool pin q. - Page 17 • Winding the bobbin NOTES: • Set the speed control slider at its fastest position for bobbin winding. • Use a bobbin with “J” mark as illustrated. z Draw the thread from the spool. x Guide the thread around the thread guide. c Pass the thread through the hole in the top of the bobbin from the inside to outside.
- Page 18 • Inserting the bobbin z Place a bobbin in the bobbin holder with the thread running off counterclockwise. q End of thread x Guide the thread into the first notch w on the front side of the bobbin holder. w Notch c Draw the thread to the left, sliding it between the tension spring blades.
-
Page 19: Threading The Machine
Threading the Machine Raise the presser foot. Press the needle up/down button q to raise the thread take-up lever to its highest position. q Needle up/down button CAUTION: Turn OFF the power switch before threading the machine. • Threading the machine z Draw the end of the thread around the upper thread guide. - Page 20 • Needle Threader CAUTION: Turn OFF the power switch when using the needle threader. z Lower the presser foot. Raise the needle to its highest position. Pull down the needle threader knob q as far as it will go. The hook comes out through the needle eye from behind.
- Page 21 • Drawing up the Bobbin Thread z Raise the presser foot. Hold the needle thread lightly with your left hand. x Press the needle up/down button q twice to lower and raise the needle to pick up the bobbin thread. q Needle up/down button c Pull both threads 4˝...
-
Page 22: Pattern Selection
Mode 6: Russian (Cyrillic) letters selection The number on the folder e indicates the selected mode number. To refer to the modes and their available stitch patterns for this sewing machine, please check the stitch chart or stitch reference on page 64. -
Page 23: Setting Mode
Setting Mode To enter the setting mode, press and hold the memory key and turn the power switch on until the setting mode screen appears. In this mode you can set the following machine functions. • Buzzer sound setting The buzzer sound can be turned on or off using the buzzer sound setting. -
Page 24: Adjusting The Needle Thread Tension For A Straight Stitch
Adjusting the Needle Thread Tension for a Straight Stitch • Correct tension q Needle thread (top thread) w Bobbin thread (bottom thread) e To loosen r To tighten The ideal straight stitch has threads locked between two layers of fabric, as illustrated (magnified to show detail). -
Page 25: Adjusting The Needle Thread Tension For A Zigzag Stitch
Adjusting the Needle Thread Tension for a Zigzag Stitch For an ideal zigzag stitch, the bobbin thread does not show on the right side (top side) of the fabric, and the needle thread shows slightly on the wrong side (bottom side) of the fabric. -
Page 26: Section Iii. Basic Sewing Straight Stitch Sewing
SECTION III. BASIC SEWING Straight Stitch Sewing q Stitch pattern: MODE 1: MODE 2: w Needle thread tension: 2 to 6 e Presser foot: Zigzag foot A • Starting to sew Raise the presser foot and position the fabric next to a seam guide line on the needle plate (5/8˝... - Page 27 • Needle Plate The seam guides on the needle plate and the hook cover help you to measure seam allowance. The numbers on the needle plate indicate the distance between the center needle position q and the edge of the fabric w. q Center needle position w Edge of the fabric 1/2 5/8 3/4...
-
Page 28: Straight Stitch
Straight Stitch q Stitch pattern: MODE 1: 1 or 4 MODE 2: 01 or 04 w Needle thread tension: 2 to 6 e Presser foot: Zigzag foot A For seaming garments, zipper application and more. Pattern 04 is used for seaming fine fabrics. Lock-a-Matic Stitch q Stitch pattern: MODE 1:... -
Page 29: Stretch Stitch
Stretch Stitch q Stitch pattern: MODE 1: MODE 2: 06 or 11 w Needle thread tension: 3 to 6 e Presser foot: Zigzag foot A This stitch is a narrow stretch stitch designed to eliminate puckering on knit fabrics and bias seams, while permitting the seam to be pressed completely open flat. -
Page 30: Zigzag Stitch
Zigzag Stitch q Stitch pattern: MODE 1: MODE 2: 07 or 12 w Needle thread tension: 2 to 6 e Presser foot: Zigzag foot A The zigzag stitch is one of the most useful and versatile stitches. It is used for overcasting, mending, appliqué, and also used as a decorative stitch. -
Page 31: Multiple Zigzag
Multiple Zigzag q Stitch pattern: MODE 1: MODE 2: w Needle thread tension: 3 to 6 e Presser foot: Zigzag foot A This stitch is used to finish seams on synthetics and other fabrics that tend to pucker. The stitch is also excellent for darning and mending tears. -
Page 32: Knit Stitch
Knit Stitch q Stitch pattern: MODE 2: w Needle thread tension: 3 to 6 e Presser foot: Zigzag foot A Place your fabric to allow a 5/8˝ (1.5 cm) seam. Trim excess close to the stitching. Be careful not to cut the stitches. -
Page 33: Zipper Sewing
Zipper Sewing q Stitch pattern: MODE 1: w Needle thread tension: 1 to 4 e Presser foot: Zigzag foot A Zipper foot E • Attaching the zipper foot Fit the pin w on the zipper foot into the groove q in the foot holder. - Page 34 x Attach the zipper foot with the pin on the right. Sew through all the layers from the end of the zipper opening, guiding the zipper teeth along the edge of the foot. c Stop the machine 2˝ (5 cm) before the foot reaches the slider on the zipper tape.
-
Page 35: Blind Hemming
Blind Hemming q Stitch pattern: MODE 1: MODE 2: 10 or 15 w Thread tension dial: 1 to 4 e Presser foot: Blind hem foot G z Fold a hem with the wrong side of the fabric up to form a 1/4˝ – 7/16˝ (0.4 – 0.7 cm) allowance. q Wrong side of fabric w 1/4˝... -
Page 36: Button Sewing
• Bridge stitch Patterns #55 to #58 in mode 3 are extender stitches which are used to insert straight stitches after a stitch pattern. The extender stitches #57 and #58 inherit the stitch length and needle drop position of a previous pattern in programmed pattern combination. -
Page 37: Attaching Elastic
Attaching Elastic q Stitch pattern: MODE 2: w Needle thread tension: 3 to 7 e Presser foot: Satin stitch foot F * Stitch patterns 08 in mode 2 can also be used. Mark the elastic into quarters. Match those to the center front, center back and side seams, and pin the elastic to the fabric. -
Page 38: Various Kinds Of Buttonholes And Their Uses
Various Kinds of Buttonholes and Their Uses q Square Buttonhole This square buttonhole is widely used on medium to heavy fabrics. The buttonhole size is automatically determined by placing a button in the foot. w Round-end Buttonhole This buttonhole is used on fine to medium weight fabrics, especially for blouses and children’s clothes. -
Page 39: Square Buttonhole
Square Buttonhole q Stitch pattern: MODE 2: w Thread tension dial: 1 to 5 e Presser foot: Automatic buttonhole foot R r Buttonhole lever sign • To sew z Press the needle up/down button to raise the needle Attach the automatic buttonhole foot R snapping the pin w into the groove q of the foot holder. - Page 40 b Start the machine to sew the buttonhole. The buttonhole will be automatically sewn. The machine will sew the left row first. n The machine will sew the back bartack and the right row. m The machine will sew the front bartack, then it stops automatically with the needle in the up position.
-
Page 41: Adjusting The Stitch Width And Density For Buttonholes
Adjusting the Stitch Width and Density for Buttonholes • Adjusting the stitch width Press the stitch width adjustment key change the stitch. Press the “–” button to decrease buttonhole width q. Press the “+” button to increase buttonhole width w. The stitch width can be varied from 2.5 to 7.0 depending on the selected buttonhole. -
Page 42: Keyhole Buttonhole
Keyhole Buttonhole q Stitch pattern: MODE 2: w Thread tension dial: 1 to 5 e Presser foot: Automatic buttonhole foot R The sewing procedure is the same as the square buttonhole. Use the seam ripper and an eyelet punch r to open the buttonhole. -
Page 43: Corded Buttonhole
Corded Buttonhole q Stitch pattern: MODE 2: w Thread tension dial: 1 to 5 e Presser foot: Automatic buttonhole foot R z Use the same procedure as the square buttonhole procedure. Set the stitch width to match the thickness of the cord used. With the buttonhole foot raised, hook the filler cord on the spur q at the back of the buttonhole foot. -
Page 44: Darning Stitch
Darning Stitch q Stitch pattern: MODE 2: w Thread tension dial: 3 to 6 e Presser foot: Automatic buttonhole foot R • Starting to sew z Pull the button holder q to the back. z x c v x Place the garment under the foot. Press the needle up/down button twice. -
Page 45: Tacking
Tacking q Stitch pattern: MODE 2: w Thread tension dial: 3 to 6 e Presser foot: Satin stitch foot F Tacking is used to reinforce pockets, crotch seams and belt carriers where extra strength is needed. • Start sewing Start the machine and sew until the machine stops automatically. -
Page 46: Section Iv. Decorative Stitching Shelltuck Stitch
SECTION IV. DECORATIVE STITCHING Shelltuck Stitch q Stitch pattern: MODE 2: w Needle thread tension: 6 to 8 e Presser foot: Satin stitch foot F Use a lightweight fabric (tricot, for example). Fold the fabric as shown and stitch on the fold. Allow the needle to just clear the folded edge to create a shelled edge. -
Page 47: Scallop Stitch
Scallop Stitch q Stitch pattern: MODE 3: w Thread tension dial: 3 to 6 e Presser foot: Zigzag foot A * Stitch patterns 29 or 64 in mode 3 can also be used. Sew the stitches approximately 3/8˝ (1 cm) inside the edge of the fabric. -
Page 48: Patchwork Piecing
Patchwork Piecing q Stitch pattern: MODE 3: 01 and 43 w Thread tension dial: 3 to 6 e Presser foot 1/4˝ seam foot O Zigzag foot A z Place the patchwork pieces right sides together. Select stitch pattern 01 in mode 3. Sew while guiding the edge of the fabric along the guide on the foot to keep a precise 1/4˝... -
Page 49: Clasp Stitch
Clasp Stitch q Stitch pattern: Mode 3: w Thread tension dial: 3 to 6 e Presser foot: Satin stitch foot F You can secure quilt layers and batting using the clasp stitch. z Select stitch pattern 22 (mode 3). Press the memory key. -
Page 50: Fringing
Fringing q Stitch pattern: MODE 3: w Thread tension dial: 3 to 6 e Presser foot: Satin stitch foot F Fringing adds a special touch on table linens and shawls. Choose a firm, woven fabric like linen where threads can be removed easily. -
Page 51: Cross Stitch
Cross Stitch q Stitch Pattern: Mode 3: w Thread tension dial: 3 to 6 e Presser foot: Satin stitch foot F Custom crafted zigzag foot F2 You can make cross stitch designs with these patterns in half the time it would take if embroidered by hand. * If you press the auto-lock button before sewing, the machine will sew one unit of the cross stitch and stop automatically. -
Page 52: Twin Needle Sewing
Twin Needle Sewing q Stitch pattern: Mode 3: 61 (example) w Thread tension dial: 3 to 6 e Presser foot: Satin stitch foot F Custom crafted zigzag foot F2 NOTES: • When you sew patterns with the twin needle, test the stitches before you begin to sew. -
Page 53: Section V. Programming Patterns And Letters Programming The Auto-Lock Stitch
SECTION V. PROGRAMMING PATTERNS AND LETTERS Programming the Auto-lock Stitch Example: Pattern #61 (mode 3) z Select pattern 61 (mode 3). Press the memory key. x Select pattern 92 (mode 3). Press the memory key. c Place the fabric and sew. The machine will sew a locking stitch, stitch pattern 61, locking stitch and stop. -
Page 54: Programming The Pattern Combination
Programming the Pattern Combination Example: Patterns #63, #65 and #64 (mode 3) z Select pattern 63 (mode 3). x Press the memory key, and the stitch pattern 63 is memorized. c The LCD display shows only 1 character at a time. The memorized stitch pattern is shifted to the left side of the display and the cursor blinks. -
Page 55: Bridge Stitches
Bridge Stitches Patterns #55 to #58 ( ) in mode 3 are bridge stitches which are used to insert straight stitches between stitch patterns. The bridge stitches #57 and #58 use the stitch length and needle drop position of the previous pattern in the programmed pattern combination. -
Page 56: Programming A Mirror Image
Programming a Mirror Image Example: Patterns #64 (Mode 3) and its mirror image z Select pattern 64 (Mode 3). Press the memory key. x Select pattern 64 (Mode 3). Press the flip key. The flip mark q will appear on the LCD display. -
Page 57: Sewing A Pattern Combination From The Beginning
Sewing a Pattern Combination from the Beginning If you have to stop sewing a pattern combination and wish to sew it over again, press the memory key to sew the pattern combination from the beginning. z Programmed pattern combination. x Stop sewing. c Press the memory key. -
Page 58: Programming Letters
Programming Letters In mode 4, 5 or 6, you can program text by entering the number of alphabets. Mode 4: Alphabets/number/symbol Mode 5: European accented letters Mode 6: Russian (Cyrillic) letters Example: To program “Deppé” z Press the mode key to enter mode 4. Enter 14 to select upper case letter “D”. -
Page 59: Reducing The Size Of Letters
Reducing the Size of Letters Example: To reduce the height of character “ ” to ♡ approximately 2/3 of its original size. z Press the mode key to enter mode 4. Enter 22 to select upper case letter “L”. Press the memory key. x Enter 85 to select character “... -
Page 60: Viewing A Long Text
Viewing a Long Text The LCD display shows up to 3 characters at a time. If the entire text is not displayed, press the cursor keys to scroll the text. z Pressing the cursor key shifts the cursor and scrolls the text to the left. -
Page 61: Duplicating A Letter (Pattern)
Duplicating a Letter (pattern) Example: To duplicate “2” from characters “123” z Move the cursor under the character “2”. x Press the memory key to duplicate the character “2”. -
Page 62: Stitch Adjustment Of Programmed Patterns
Stitch Adjustment of Programmed Patterns The stitch width and length of the programmed stitch pattern can be altered uniformly or individually. Example: To alter the stitch width uniformly. z Enter the mode 3. x Select pattern 73 ( Press the memory key. c Select pattern 73 ( v Press the flip key. - Page 63 Example: To alter the stitch width individually z Enter the mode 3. x Select pattern 61 ( ). Press the memory key twice. c Move the cursor under the second stitch pattern of 61 ( ). v Press the stitch width adjustment key to alter the stitch width (3.5).
-
Page 64: Correcting Distorted Stitch Patterns
Correcting Distorted Stitch Patterns The sewing results of the stretch patterns may vary depending upon the sewing conditions, such as sewing speed, type of fabric, number of layers etc. Always test sew on a scrap piece of the fabric that you wish to use. -
Page 65: Section Vi. Care Of Your Machine Cleaning The Hook Race And Feed Dog
After cleaning the machine, make sure the needle and presser foot are attached. Press the needle up/down button to raise the needle, then unplug the sewing machine. Remove the needle and presser foot. z Remove the setscrews w on the left hand side of the needle plate e with the screwdriver q supplied with the machine. -
Page 66: Problems And Warning Signs
Problems and Warning Signs Warning sign Cause Try this The machine will not sew with the start/stop Disconnect the foot control button because the foot control is connected. and start the machine. The machine will not sew because the presser Lower the presser foot lifter and restart the machine. -
Page 67: Troubleshooting
Troubleshooting Reference Cause Condition See page 15, 16 The needle thread 1. The needle thread is not threaded properly. breaks. See page 20, 21 2. The needle thread tension is too tight. See page 11 3. The needle is bent or blunt. See page 11 4. -
Page 68: Stitch Chart
Stitch Chart... - Page 72 Printed in Taiwan 809-800-102...
Need help?
Do you have a question about the Sewing Machine and is the answer not in the manual?
Questions and answers