Table of Contents
Advertisement
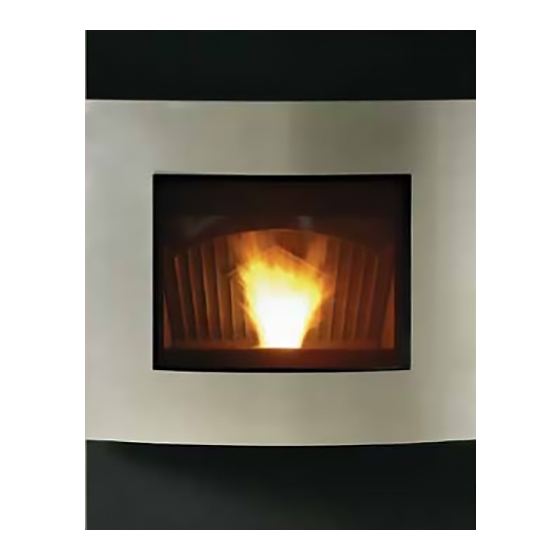
Model:
EDGE60
ZERO CLEARANCE PELLET FIREPLACE
Natural
• Important operating and
maintenance instruc-
tions included.
Please read this entire manual
before installation and use of this
pellet fuel-burning room heater.
Failure to follow these instructions
could result in property damage,
bodily injury or even death.
•
Do not store or use gasoline or other fl am-
mable vapors and liquids in the vicinity of this
or any other appliance.
• Do not overfi re - If any external part starts to
glow, you are overfi ring. Reduce fl ame height
(feed rate). Overfi ring will void your warranty.
• Comply with all minimum clearances to com-
bustibles as specifi ed. Failure to comply may
cause house fi re.
CAUTION
Tested and approved for wood pellets, shelled fi eld
corn, wheat and black oil sunfl ower seeds. Burning
of any other type of fuel voids your warranty.
www.quadrafi re.com
EDGE™ 60
Owner's Manual - Installation and Operation
Curved
NOTICE
DO NOT DISCARD THIS MANUAL
Read, understand and
•
follow these instruc-
tions for safe installa-
tion and operation.
WARNING
7051-158B
R
Tuscan
Leave this manual with
•
party responsible for use
and operation.
WARNING
Hot glass will cause burns.
•
Do not touch glass until it is cooled
•
NEVER allow children to touch glass
•
Keep children away
•
CAREFULLY SUPERVISE children in same room
as fi replace.
•
Alert children and adults to hazards of high
temperatures.
High temperatures may ignite clothing or other
fl ammable materials.
•
Keep clothing, furniture, draperies and other
fl ammable materials away.
Installation and service of this appliance should
be performed by qualifi ed personnel. Hearth &
Home Technologies recommends NFI certifi ed
professionals, or technicians supervised by an
NFI certifi ed professional.
Tested and
Portland
O-T L
Oregon USA
Listed by
C
US
OMNI-Test Laboratories, Inc.
Studio
HOT SURFACES!
Glass and other surfaces are
hot during operation AND
cool down.
December 6, 2011
Advertisement
Table of Contents
Troubleshooting

Related Manuals for Quadra-Fire EDGE 60


Summary of Contents for Quadra-Fire EDGE 60
- Page 1 Model: EDGE™ 60 Tested and Portland O-T L Oregon USA Listed by EDGE60 ZERO CLEARANCE PELLET FIREPLACE OMNI-Test Laboratories, Inc. Owner’s Manual - Installation and Operation Tuscan Studio Natural Curved NOTICE DO NOT DISCARD THIS MANUAL Read, understand and Leave this manual with •...
-
Page 2: Congratulations
Hearth & Home Technologies welcomes you to our tradition of and fi replaces. And yet we are old-fashioned when it comes to excellence! In choosing a Quadra-Fire appliance, you have craftsmanship. Each unit is meticulously fabricated and surfaces our assurance of commitment to quality, durability, and perfor- are hand-fi... -
Page 3: Table Of Contents
EDGE 60 Pellet Fireplace Safety Alert Key: • DANGER! Indicates a hazardous situation which, if not avoided will result in death or serious injury. • WARNING! Indicates a hazardous situation which, if not avoided could result in death or serious injury. -
Page 4: Limited Warranty
EDGE 60 Pellet Fireplace Page 4 7051-158B December 6, 2011... - Page 5 EDGE 60 Pellet Fireplace Page 5 December 6, 2011 7051-158B...
-
Page 6: Section 1: Listing And Code Approvals
• Install parts or components not Listed or approved. or “PL” connector pipe. Improper installation, adjustment, alteration, service or A Quadra-Fire Outside Air Kit must be installed in a mobile maintenance can cause injury or property damage. home installation. You must order the Outside Air Kit sepa- rately. -
Page 7: User's Guide
EDGE 60 Pellet Fireplace User’s Guide Operating Instructions WARNING HOT SURFACES! Glass and other surfaces are hot during operation AND cool down. Hot glass will cause burns. • Do not touch glass until it is cooled • NEVER allow children to touch glass •... -
Page 8: Fire Safety
C. Fuel Material and Fuel Storage • Pellets are either 1/4 inch or 5/16 inch (6-8mm) in diameter Pellet fuel quality can greatly fluctuate. The EDGE 60 • Length should be no more that 1-1/2 inches (38mm) appliance has been designed to burn a wide variety of fuels, •... -
Page 9: General Operation Information
EDGE 60 Pellet Fireplace CAUTION! Tested and approved for wood pellets, shelled 2. Thermostat Wall Control - Manual Setting fi eld corn, wheat and black oil sunfl ower seeds. Burning of When you select “Manual” on the AUTO/MANUAL screen the any other type of fuel voids your warranty. -
Page 10: Filling The Hoper With Fuel
EDGE 60 Pellet Fireplace G. Filling the Hopper with Fuel 3. Automatic or Manual Setting • Check the hopper and make sure it is empty before fi lling The automatic setting will control the heat output based on with fuel. - Page 11 EDGE 60 Pellet Fireplace 5. Auto-Clean Cycle 2. Soft Start Cycle (SS-Low / SS-Med) The fi repot auto-clean system will cycle: Once the fi re is lit: • When the appliance is fi rst plugged in • The appliance moves into the low soft-start cycle as it continues to build the fi...
-
Page 12: Fire Characteristics & Flame Height Adjustment
EDGE 60 Pellet Fireplace J. Fire Characteristics and Flame Height Instructions to Hook Up to Battery Back-Up (Feed Rate) Adjustment Open Front to expose battery plug on bottom left side of fi replace. Plug in the battery. Figure 12.2. Be sure the bolts A properly adjusted fi... -
Page 13: Clear Space
EDGE 60 Pellet Fireplace K. Battery Back-up System (Cont’d) Wall Control Display The wall control will display the battery icon when operating in the battery back-up mode. Figure 13.1. “Maint Burn” will display when the thermostat has reached the set room temperature and will run on low until it reaches its auto-clean cycle time. -
Page 14: Section 3: Maintaining & Servicing Appliance Proper Shutdown Procedures
EDGE 60 Pellet Fireplace Maintaining & Servicing Your Appliance A. Proper Shutdown Procedure Before Servicing Your Appliance • Set wall control to OFF on AUTOMATIC / MANUAL SET- CAUTION! SHOCK AND SMOKE HAZARD! TING screen. Figure 14.1. • Proper Shutdown Procedure must be followed. -
Page 15: High Ash Fuel Content Maintenance
EDGE 60 Pellet Fireplace C. High Ash Fuel Content Maintenance Pull fireplace toward you until fully extended • Frequency: When the ash build-up exceeds the half way point in the fi repot • By: Homeowner If the ash build-up exceeds the half way point in the fi repot before it automatically cleans, then the fi... -
Page 16: General Maintenance & Cleaning
EDGE 60 Pellet Fireplace 2. Cleaning Ash Pan E. General Maintenance and Cleaning • Frequency: Wood Pellets: Weekly or every 3-5 bags Alternate Fuel: Daily or every 1 bag 1. Auto-Clean System Inspection & Cleaning • By: Homeowner • Frequency: Monthly or every ton (aprx. 50 bags) or a Locate the ash pan underneath the fi... - Page 17 EDGE 60 Pellet Fireplace 4. Cleaning Heat Exchanger, Drop Tube & Exhaust • Frequency: Monthly or every 1 ton of fuel (aprx. 50 bags). • By: Homeowner NOTE: There are heavy duty vacuum cleaners specifi cally designed for solid fuel appliance cleaning.
- Page 18 EDGE 60 Pellet Fireplace 5. Cleaning Firepot with Firepot Clean-Out Tool Cleaning Heat Exchanger, Drop Tube & Exhaust (Cont’d) • Frequency: Softwood Pellets: Weekly or every 5 bags 5. The combustion blower must be removed to clean Hardwood Pellets: Weekly or every 3 bags the exhaust path.
- Page 19 EDGE 60 Pellet Fireplace 7. Cleaning the Hopper 11. Cleaning Convection Blower - Do Not Use Lubrication • Frequency: Monthly or after burning 1 ton of fuel (aprx. 50 bags) or when changing fuel types • Frequency: Yearly or as needed •...
- Page 20 EDGE 60 Pellet Fireplace 14. Chimney Inspection and Cleaning.. Cover area around opening to prevent staining of rugs, furniture, etc… Work the brush up and down sev- • Frequency: Prior to each burn season and after pro- eral times until the chimney is clean. Use a powerful longed shut down.
-
Page 21: Section 4: Troubleshooting For Homeowner
EDGE 60 Pellet Fireplace Troubleshooting for Homeowner A. Frequently Asked Questions ISSUES SOLUTIONS 1. Metallic noise Noise is caused by metal expanding and contracting as it heats up and cools down, similar to the sound produced by a furnace or heating duct. -
Page 22: Wall Control Error Messages
EDGE 60 Pellet Fireplace B. Wall Control Error Codes Error Message Possible Cause Corrective Action SNAP DISC TRIPPED Overheat sensor (snap disc) has tripped Turn power off to appliance and manually reset snap disc then turn back on. If that doesn’t work, call your dealer. -
Page 23: Installer's Guide
EDGE 60 Pellet Fireplace Installer’s Guide Getting Started tion is to vent above roof line when possible. This mini- A. Design, Installation & Location Considerations mizes the affects of wind loading. 1. Appliance Location Since pellet exhaust can contain ash, soot or sparks, you... -
Page 24: Locating Your Thermostat Wall Control
EDGE 60 Pellet Fireplace E. Checklist to Help Determine Location B. Thermostat Wall Control Location The thermostat wall control’s location will have some affect on the appliance’s operation. Description • Maximum wire length from appliance is 100 feet (30.48m) Vent termination location - vertical or horizontal continuous unspliced wire. -
Page 25: Recommended Sequence Of Installation
EDGE 60 Pellet Fireplace F. Recommended Sequence of Installation G. Items to Verify During Test Burn • Check for leaks in the exhaust venting system. Do you NOTICE: see any smoke? • Read and understand Sections 6 through 10 for detailed Remember on a fi... -
Page 26: Recommended Locations
EDGE 60 Pellet Fireplace Framing Dimensions & Clearances A. Recommended Locations 10-1/8 in (257mm) Top/Rear Vent & Rear 27-1/4 in (692mm) 14-1/4 in (362mm) Outside Air Junction Box Outside Air, Right & Left 43-1/2 in 26-7/8 in 29-3/4 in (1105mm) -
Page 27: Sealing At Penetration Of Building Envelope
EDGE 60 Pellet Fireplace NOTE • It is necessary to use sealing strips of non-combustible materials between the fi replace hearth and factory-built hearth extension. • The use of a sand-cement grout between the hearth and an on-site constructed hearth extension is also necessary. -
Page 28: Construct A Chase
EDGE 60 Pellet Fireplace E. Construct the Chase You may enclose the vent system in a chase. See Figures Termination Cap 27.1 & 27.2. Metal Chase Top 1. Appliance and chimney enclosed in an exterior chase. Ceiling 2. Chimney offset through exterior wall and enclosed in chase. -
Page 29: Finishing Material
EDGE 60 Pellet Fireplace F. Finishing Material 2. Flush with the Mounting Frame NOTICE: Non-combustible material is not needed to fi nish The fi nish material can not be thicker than 1-1/2 inches this appliance. (38mm) to use this method. Figure 28.3. -
Page 30: Door Opening Clearances
EDGE 60 Pellet Fireplace G. Front Opening Clearance Curved Front Natural Front Tuscan Front TOP VIEW Appliance Finishing Material Masonry Spacer Mounting Frame Opening Clearances for the Curved, Tuscan and Natural Fronts *Note: The Masonry Spacer is used Edge of... - Page 31 EDGE 60 Pellet Fireplace G. Front Opening Clearance (Cont’d) Studio Front TOP VIEW Appliance Nailing Flange Drywall Finishing Material Masonry Spacer 1/2 in Mounting Frame (13mm) 5-1/4 In (133mm) Opening Clearances 7-1/2 In (190mm) for the Studio Front Edge of appliance...
- Page 32 EDGE 60 Pellet Fireplace H. Mantel Fuel Loading Clearances NOTE: Be sure to consider the process of loading fuel when choosing and locating a mantel. Mantel Finishing Material Drywall 24 in (610mm) 9 in (229mm) (1:1 rise to run ratio)
-
Page 33: Non-Combustible Materials
EDGE 60 Pellet Fireplace I. Non-Combustible Materials • Materials which will not ignite and burn, composed of any combination of the following: Steel - Iron Brick - Tile Concrete - Slate Glass - Plasters • Materials reported as passing ASTM E 136, Standard Test Method for Behavior of Metals, in a Vertical Tube Furnace at 750°... -
Page 34: Section 7: Installation Of Fireplace
EDGE 60 Pellet Fireplace Installation of Fireplace be turned around so the longer fl ange attaches to the fl oor. We Caution! Risk of Cuts/Abrasions. Wear protective recommend that the brackets are turned around for a concrete gloves and safety glasses during installation. Sheet attachment. -
Page 35: Junction Box And Wiring Diagram
EDGE 60 Pellet Fireplace D. Connecting Wall Control To Fireplace C. Junction Box & Wiring Diagram Caution! The fi replace should be securely attached to the 1. There is a 5 screw terminal connection bar that is located in the lower left side of the fi replace above the slide rails. -
Page 36: E. Thermostat Wall Control Installation
EDGE 60 Pellet Fireplace F. Installing Flue Collar, Vertical or Horizontal E. Thermostat Wall Control Installation The fi replace ships from the factory without the fl ue collar NOTICE: The thermostat wall control should be mounted on an inside wall and not in direct line with the appliance and gasket attached. -
Page 37: Flue Collar Installation
EDGE 60 Pellet Fireplace Vertical Installation (Cont’d) Horizontal Installation Pipe 1. Remove the fl ue collar and orange gasket from the component pack. Push out the 6 slugs in the gasket. 2. Remove the rear cover plate. Save screws and plate for later Flue Collar re-attachment. -
Page 38: Section 8: Vent Information
EDGE 60 Pellet Fireplace Vent Information A. Venting Termination Minimum Requirements Electrical Service Inside Corner FIXED FIXED OPEN CLOSED CLOSED OPEN J or K Figure 37.1 Termination Cap Air Supply Inlet Gas Meter Restricted Area An Outside Air Kit is required on all installations. -
Page 39: Avoiding Smoke And Odors
EDGE 60 Pellet Fireplace B. Avoiding Smoke and Odors Vent Confi gurations To reduce probability of reverse drafting during shut-down Negative Pressure, Shut-Down and Electrical Power conditions Hearth & Home Technologies strongly recom- Failure mends: To reduce the probability of back-drafting or burn-back in •... -
Page 40: Negative Pressure
EDGE 60 Pellet Fireplace C. Negative Pressure D. Draft WARNING! Risk of Asphyxiation! Negative pressure can Draft is the pressure difference needed to vent fi replaces cause spillage of combustion fumes and soot. successfully. When a fi replace is drafting successfully, all... -
Page 41: Chimney & Exhaust Connection
"L" or "PL" venting system. It can be vented guards may be required. vertically or horizontally. 2. Mobile Home: Approved for all Listed pellet vent. As with all installations a Quadra-Fire Outside Air Kit must WARNING! RISK OF INJURY OR PROPERTY be used with manufactured home installations. DAMAGE! . -
Page 42: Pipe Selection Chart
EDGE 60 Pellet Fireplace G. Pipe Selection Chart WARNING! RISK OF FIRE! The chart will help you in determining proper venting size Do NOT pack insulation or other combustibles between according to the equivalent feet of pipe calculated previously fi restops. -
Page 43: Outside Air Locations & Considerations
EDGE 60 Pellet Fireplace H. Outside Air Locations & Considerations Door Door Rear Vent 4-7/8 in. 4-7/8 in. 4-7/8 in. (124mm) (125mm) (24mm) 9-1/4 in. 1-3/4 in. 1-3/4 in. Outside Air Outside Air (235mm) (44mm) (44mm) Outside Air Rear of Fireplace... -
Page 44: Outside Air Installation
EDGE 60 Pellet Fireplace I. Outside Air Kit Installation Included in Kit: 2 wire ties, 1 collar assembly, 1 termina- Outside air is required on ALL installations. The Out- tion cap assembly, 1 trim ring, fasteners. side Air Kit must be ordered seperately. -
Page 45: Vertical, Interior, Typical Installation
Both installations are approved for mobile home instal- lations. Must use 3 or 4 inch (76mm to 102mm) “L” or “PL” Listed pellet venting or Listed double wall pipe and Quadra-Fire Outside Air Kit in all installations. 12 in. Flashing... -
Page 46: Through The Wall
Must use 3 or 4 inch (76mm-102mm) “L” or “PL” Listed pellet conform to CAN/CSA-B365 venting and a Quadra-Fire Outside Air Kit in ALL installations. Straight Out 0 in. (0mm) to Standoff Horizontal... -
Page 47: Section 9: Mobile Home Installation
EDGE 60 Pellet Fireplace Mobile Home Installation WARNING! Risk of Asphyxiation! CAUTION • Never install in a sleeping room. THE STRUCTURAL INTEGRITY OF THE MOBILE HOME FLOOR, WALL AND CEILING/ROOF MUST BE MAIN- Consumes oxygen in the the room. TAINED... -
Page 48: Section 10: Appliance Set-Up
EDGE 60 Pellet Fireplace Appliance Set-Up A. Optional Log Set Placement Instructions 2 PIECE LOG SET INSTALLATION 1. Place the left log as shown. There are 2 indentations in the bottom of the log to fi t over the screw heads in the fi... -
Page 49: Front Installation Instruction
Installing Front onto Mounting Frame EDGE 60 Pellet Fireplace B. Front - Installation Included in Kit: Front, mounting frame, masonry spacer, fasteners and glove Hinges Aligned Tools Required: Phillips Head screwdriver CAUTION! BURN HAZARD. Allow the front to cool before touching. Do NOT touch without wearing protective glove. -
Page 50: Section 11: Replacement Parts
EDGE 60 Pellet Fireplace Replacement Parts B. Combustion (Exhaust) Blower A. Glass Replacement Replacement WARNING! Risk of Injury! 1. Follow the proper shut down procedures as outlined on • Glass is 5mm thick high temperature heat-resistant ceramic page 14, Section 3.A glass. -
Page 51: Convection Blower
EDGE 60 Pellet Fireplace D. Baffl e Removal & Replacement C. Convection Blower Replacement WARNING! Risk of Injury! Cast iron is a very heavy 1. Follow the proper shut down procedures as outlined on material. The baffl e is made of cast iron and therefore is page 14, Section 3.A. -
Page 52: Section 12: Troubleshooting For Installers
EDGE 60 Pellet Fireplace With proper installation, operation, and maintenance your appli- ance will provide years of trouble-free service. This trouble- shooting guide shall be used by a qualifi ed service technician Troubleshooting For Installers only). Error Message Possible Cause... -
Page 53: Section 13: Reference Materials
EDGE 60 Pellet Fireplace Reference Materials A. Fireplace Dimensions Front View (shown without a Front) Top View Rear View 9-1/4 in. 26 in.(660mm) Rear Vent (235mm) 3/4 in. 9-1/4 in. (19mm) (234mm) 3/4 in. (19mm) Top Vent 29 in. 26-7/8 in. -
Page 54: Component Functions
EDGE 60 Pellet Fireplace When describing the location of a component, B. Component Functions it is always AS YOU FACE THE FRONT OF THE APPLIANCE. 1. Auto-Clean Motor 9. Firepot Location: Behind and under the fi repot on the left side, inside the convection air chamber Location: Inside fi... - Page 55 EDGE 60 Pellet Fireplace 16. Power Supply 20. Thermocouple - Drop Tube Location: At the rear of the appliance Location: Bottom of the drop tube on the right side and Function: Converts 120 volt AC current to 15 volt DC current to attached with a wing nut power the appliance.
-
Page 56: Component Locations
EDGE 60 Pellet Fireplace C. Component Locations Hopper Exhaust Transition Exhaust Feed Motor with Gasket Convection Blower Battery Backup Outside Air Intake w/Gasket (left side) Combustion Blower Power Supply Figure 55.1 - View of Left Rear Figure 55.2 - View of Right Rear Heat Exchanger, Front &... -
Page 57: Exploded Drawings
EDGE 60 Pellet Fireplace F. Service And Maintenance Log Date of Service Performed By Description of Service Page 63 December 6, 2011 7051-158B... -
Page 58: Service Parts & Accessories
Hearth & Home Technologies 1445 North Highway Colville, WA 99114 Division of HNI INDUSTRIES Please contact your Quadra-Fire dealer with any questions or concerns. For the number of your nearest Quadra-Fire dealer visit our web site at www.quadrafi re.com NOTICE...
Need help?
Do you have a question about the EDGE 60 and is the answer not in the manual?
Questions and answers