
Related Manuals for Salus ST620WBC


Summary of Contents for Salus ST620WBC
- Page 1 Salus ST620WBC Manual 013_89 09/02/2012 14:01 Page 1 Programmable Thermostat with Plug in RF Boiler Control Instruction Manual Model No ST620WBC...
- Page 2 Salus ST620WBC Manual 013_89 09/02/2012 14:01 Page 2 ST620WBC INSTRUCTION MANUAL...
- Page 3 R&TTE Directives 99/5/EC SAFETY INFORMATION These instructions are applicable to the Salus Controls model stated on the front cover of this manual only, and must not be used with any other make or model. These instructions are intended to apply in the United Kingdom only, and should be followed along with any other statutory obligations.
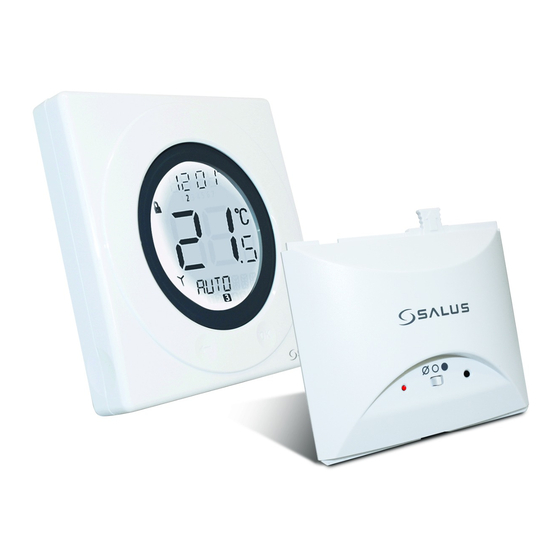
- Page 4 Salus ST620WBC Manual 013_89 09/02/2012 14:01 Page 4 INTRODUCTION The ST620WBC comprises of the S series programmable room thermostat with an integral plug- in RF boiler control. The RF boiler control is a direct replacement for the basic time clock or blanking plate usually supplied with the boiler.
- Page 5 Salus ST620WBC Manual 013_89 09/02/2012 14:01 Page 5 INTEGRAL RF BOILER CONTROL The Integral RF boiler control is the RF receiving unit for the ST620 programmable room thermostat. This unit uses a plug-in connection to connect directly to your boiler and provides the ON/OFF switching.
-
Page 6: Getting Started
Salus ST620WBC Manual 013_89 09/02/2012 14:01 Page 6 1. INSTALLATION ST620 Programmable Room Thermostat Getting Started……. Installing the ST620 Batteries To open the case of the ST620, undo the securing screw on the bottom. Now pull the screw down until it stops, then carefully separate the two halves of the case by gently pulling out an upwards direction. - Page 7 Salus ST620WBC Manual 013_89 09/02/2012 14:01 Page 7 Powering up the ST620 for the first time As soon as the batteries have been inserted, the ST620 will power up for the first time and behave in the following way: All the segments on the display along with the display backlight will be turned on as shown.
- Page 8 Salus ST620WBC Manual 013_89 09/02/2012 14:01 Page 8 Note: If you do not wish to mount the ST620 on the wall, use the stand provided and assemble the ST620 front and back housing. Remember to tighten the screw at the bottom.
- Page 9 Remove cover panel A upwards to remove. Pull top tab B upwards, then outwards to remove blanking plate or existing control. Now you are ready to fit your Salus integral RF boiler control ST620WBC INSTRUCTION MANUAL...
- Page 10 Salus ST620WBC Manual 013_89 09/02/2012 14:01 Page 10 First plug in the connector block C ensuring correct orientation. Remember to ensure the block is fully connected Now locate the boiler control’s four hooks then press in and down. Replace Cover panel A.
- Page 11 Salus ST620WBC Manual 013_89 09/02/2012 14:01 Page 11 Before switching the boiler on at its mains supply, ensure the module switch is in the OFF position To ensure the boiler control is connected properly, please now move the switch to ON .
-
Page 12: Rf Communication
Salus ST620WBC Manual 013_89 09/02/2012 14:01 Page 12 RF COMMUNICATION Your ST620 comes already paired with the integral boiler control. This means that the ST620 will communicate with integral boiler control straight away. Testing the ST620 RF communication Press the touch ring anywhere (except the OK and Arrow keys) to enter manual override mode. The current set temperature will be displayed on the LCD, now press the touch ring again and move your finger clockwise to increase the displayed temperature to 35 deg. - Page 13 Salus ST620WBC Manual 013_89 09/02/2012 14:01 Page 13 Gently press and hold the SYNC button with a blunt object. After 3 seconds the Boiler Control LED will flash once every second to indicate it is ready to pair and ready to receive a signal from the ST620. The Boiler Control will remain in pairing mode for 12 minutes.
-
Page 14: Additional Information
Salus ST620WBC Manual 013_89 09/02/2012 14:01 Page 14 The display counts down for a period of 10 minutes, with the RF Signal indicator flashing while the signal is being transmitted. The RF address code will be generated randomly. When the Boiler Control successfully receives a signal from the ST620 during the pairing operation, the Boiler Control will store the generated address code into its internal memory. - Page 15 Salus ST620WBC Manual 013_89 09/02/2012 14:01 Page 15 USER CONTROLS Integral RF Boiler Control A – LED This LED will be on when the ST620 is demanding heat. B – Mode Switch ON – Boiler will be on continuous AUTO – will follow time and temperature program in the ST620 OFF –...
- Page 16 Salus ST620WBC Manual 013_89 09/02/2012 14:01 Page 16 There are few user controls for the ST620, making the programmable thermostat very easy to operate. The controls are a Touch Ring (which surrounds the user display), two touch sensitive buttons, a reset button and a slide operated switch mounted on the side of the thermostat.
- Page 17 Salus ST620WBC Manual 013_89 09/02/2012 14:01 Page 17 USER CONTROL FUNCTION SUMMARY ST620: Key / Operation Functions Touch Ring (move clockwise) Increases the set temperature and scrolls through the menu selection Touch Ring (move anti- clockwise) Decreases the set temperature and scrolls through the menu selection...
- Page 18 Salus ST620WBC Manual 013_89 09/02/2012 14:01 Page 18 BASIC OPERATION Programme Output Weekday Weekend 6:00AM 6:00AM Getting Started……….. TEMP 21ºC 21ºC ST620 Programmable room thermostat 8:00AM 8:00AM TEMP 14ºC 14ºC Your ST620 comes with factory set default 11:00AM 11:00AM program. The temperature and time settings TEMP 21ºC...
-
Page 19: Manual Override
Salus ST620WBC Manual 013_89 09/02/2012 14:01 Page 19 Manual Override When the ST620 is in AUTO mode, press the Touch Ring anywhere except the OK and Arrow keys to enter the manual override mode. The currently set temperature will be displayed on the LCD and will flash. - Page 20 Salus ST620WBC Manual 013_89 09/02/2012 14:01 Page 20 RF Boiler Control When the switch on the Boiler Module is in the AUTO position, the Boiler Control will automatically receive the RF signal from the ST620 and control the module output so that it switches the boiler accordingly.
- Page 21 Salus ST620WBC Manual 013_89 09/02/2012 14:01 Page 21 ADVANCED FUNCTIONS Menu Screen Overview Press the OK key twice and use the touch ring to scroll through the Menus, and you can then press the OK key to select the menu you want to use.
- Page 22 Salus ST620WBC Manual 013_89 09/02/2012 14:01 Page 22 ADVANCED FUNCTIONS IN DETAIL PROGRAM Function Changing the Default Time and Temperature Program The ST620 offers great versatility with its programming options, allowing the user to programme the ST620 to operate on an individual, 5/2 or 7 day control cycle. The programmable thermostat has a default set of programmes that have been designed to meet the needs of most users.
- Page 23 Salus ST620WBC Manual 013_89 09/02/2012 14:01 Page 23 The hour setting will be the first setting that needs to be adjusted, and this will easily be seen because the ‘hours’ section of the time will be flashing. Using the Touch Ring, scroll up or down to adjust the hour to the required setting and then press the OK key to confirm.
-
Page 24: Holiday Function
Salus ST620WBC Manual 013_89 09/02/2012 14:01 Page 24 After entering the settings in Programmes 1 to 6 for Monday(1), the ST620 display will change to display a COPY TO screen. On this screen, scroll to the day that you want to copy the settings to using the Touch Ring, and then confirm this by pressing the OK key. - Page 25 Salus ST620WBC Manual 013_89 09/02/2012 14:01 Page 25 To start entering the Holiday Override settings, press the OK key once. ‘S_DAY’ will appear on the display. Use the Touch Ring to scroll to set the date and confirm the choice using the OK button.
- Page 26 Salus ST620WBC Manual 013_89 09/02/2012 14:01 Page 26 Use the Touch Ring to enter the date in exactly the same way as for the holiday start date. By default, the HOLIDAY mode start and end dates are set to the current date. Make sure that the end date is after the start date –...
- Page 27 Salus ST620WBC Manual 013_89 09/02/2012 14:01 Page 27 Cancelling Holiday Override Mode When in HOLIDAY mode, pressing the OK key will make the display change between CANCEL and HOLIDAY every 0.5 seconds as shown below: Pressing the OK key will cancel HOLIDAY mode and return the ST620 to AUTO mode.
- Page 28 Salus ST620WBC Manual 013_89 09/02/2012 14:01 Page 28 On entering the menu, use the Touch Ring to scroll to the preferred option (OFF or ON), and confirm the choice using the OK button. Use the Arrow key to return to the Menu Option display.
- Page 29 Salus ST620WBC Manual 013_89 09/02/2012 14:01 Page 29 TIME Function Radio Controlled Clock The ST620 time and day of the week settings are updated automatically every day (at 12:00 AM or 2:00 AM) by the use of a very accurate internal Radio Controlled Clock.
- Page 30 Salus ST620WBC Manual 013_89 09/02/2012 14:01 Page 30 On entering the menu, use the Touch Ring to scroll to the preferred option (12 or 24 hour clock), and confirm the choice using the OK button. Use the Arrow key to return to the previous screen display.
- Page 31 Salus ST620WBC Manual 013_89 09/02/2012 14:01 Page 31 After setting the date, the next screen display allows you to set the daylight saving time (DST) option. Use the Touch Ring to scroll to set the DST option ON or OFF, and confirm the setting using the OK button –...
- Page 32 Salus ST620WBC Manual 013_89 09/02/2012 14:01 Page 32 Once you have displayed your required language, press the OK button to select and save. ST620WBC INSTRUCTION MANUAL...
- Page 33 Salus ST620WBC Manual 013_89 09/02/2012 14:01 Page 33 SERVICE and CONTROL Functions Service Function The Service Menu should only be selected or changed by the Engineer carrying out the installation, or other qualified person. It is strongly recommended that you familiarise yourself with the instructions contained in the Operation section of this manual before attempting to change any of the settings in the SERVICE menu.
- Page 34 Once all digits have been entered, press OK to confirm or the arrow key to return to previous digit or previous display. The service code is total 3 digits, from 000 to 999. NOTE: If you forget the code then you will need to contact the Salus Technical Team Now you have entered your own PIN code you will be asked to select SERVICE ON or OFF.
- Page 35 Salus ST620WBC Manual 013_89 09/02/2012 14:01 Page 35 HEAT or COOL The unit is default HEAT, if you are happy with HEAT press OK . If you wish to configure the ST620 for a cooling application, select COOL and press OK NOTE: Changing the HEAT or COOL function should only be done by your engineer or a competent person.
- Page 36 Salus ST620WBC Manual 013_89 09/02/2012 14:01 Page 36 Confirm the setting using the OK key, or Press the Arrow key to return to the previous screen display. The next menu screen allows you to set a temperature setting. This temperature is the maximum temperature that the heating system will operate at once the previously set service date is reached.
- Page 37 Salus ST620WBC Manual 013_89 09/02/2012 14:01 Page 37 ST620WBC INSTRUCTION MANUAL...
- Page 38 Salus ST620WBC Manual 013_89 09/02/2012 14:01 Page 38 Once the SERVICE date has been reached, the system will only operate at the temperature that was previously set in SERVICE mode. The display will no longer display the operating mode, only the telephone number that has been entered and the SERVICE indicator (which will continue to flash).
- Page 39 Salus ST620WBC Manual 013_89 09/02/2012 14:01 Page 39 USEFUL INFORMATION BATTERY STATUS The ST620 checks the battery voltage frequently during normal operation .If the battery voltage is sensed as being low, the low battery indicator will be displayed on the screen.
- Page 40 Salus ST620WBC Manual 013_89 09/02/2012 14:01 Page 40 SLIDE SWITCH The Slide Switch has two positions: UNLOCKED and LOCKED. In the LOCKED position, the Touch Lock indicator will be visible on the LCD, and it will not be possible to change the ST620 settings. If you are unable to change any thermostat settings, check that the Slide Switch is in the UNLOCKED position.
- Page 41 (please DO NOT use solvents, polishes, detergents or abrasive cleaners, as these can damage the thermostat). There are no user serviceable parts within the unit; any servicing or repairs should only be carried out by Salus Controls or their appointed agents.
- Page 42 Salus ST620WBC Manual 013_89 09/02/2012 14:01 Page 42 Programming Programming Modes: User selectable for 5/2 or 7 day option Number of Programmes: Six (6) user programmes plus factory default programme. Override Facility: User selectable programme override facility. Holiday Facility: User selectable option to temporarily override selected programme.
- Page 43 Salus Controls warrants that this product will be free from any defect in materials or workmanship, and shall perform in accordance with its specification, for a period of two years from the date of installation. Salus Controls sole liability for breach of this warranty will be (at its option) to repair or replace the defective product.
- Page 44 Salus ST620WBC Manual 013_89 09/02/2012 14:01 Page 44 salus-tech. Email: sales@salus-tech.com Tel: 01226 323961 Sales Email: tech@salus-tech.com Tel: 01226 323961 Technical...
Need help?
Do you have a question about the ST620WBC and is the answer not in the manual?
Questions and answers