Table of Contents
Advertisement
C
OTTAGE
READ AND SAVE THESE INSTRUCTIONS!
Safety and the proper operation of your Casablanca fan both require a thorough knowledge of the product and proper
installation; therefore, before attempting to install and operate your Casablanca fan, read this owner's manual completely and
carefully. Retain this manual for future reference.
CAUTION: To avoid possible electrical shock, make certain that electricity is turned off at the circuit breaker or fuse box
before attempting any installation procedure.
INTRODUCTION
Before You Start . . . . . . . . . . . . . . . . . . . . . . . . . . . . . . . . . . . . . . . . . . . . . . . . . . . . . . . . . . . . . . . . . . . . . . . . . . . . . . . . . 2
Safe Use. . . . . . . . . . . . . . . . . . . . . . . . . . . . . . . . . . . . . . . . . . . . . . . . . . . . . . . . . . . . . . . . . . . . . . . . . . . . . . . . . . . . . . . . 2
General Guidelines . . . . . . . . . . . . . . . . . . . . . . . . . . . . . . . . . . . . . . . . . . . . . . . . . . . . . . . . . . . . . . . . . . . . . . . . . . . . . . . 3
Sloped Ceiling Installations . . . . . . . . . . . . . . . . . . . . . . . . . . . . . . . . . . . . . . . . . . . . . . . . . . . . . . . . . . . . . . . . . . . . . . . . 3
Getting Started . . . . . . . . . . . . . . . . . . . . . . . . . . . . . . . . . . . . . . . . . . . . . . . . . . . . . . . . . . . . . . . . . . . . . . . . . . . . . . . . . . 4
Crossbar Mounting Bracket Installation . . . . . . . . . . . . . . . . . . . . . . . . . . . . . . . . . . . . . . . . . . . . . . . . . . . . . . . . . . . . . . . 4
Lag Screw Installation (Optional). . . . . . . . . . . . . . . . . . . . . . . . . . . . . . . . . . . . . . . . . . . . . . . . . . . . . . . . . . . . . . . . . . . . 5
Canopy Installation . . . . . . . . . . . . . . . . . . . . . . . . . . . . . . . . . . . . . . . . . . . . . . . . . . . . . . . . . . . . . . . . . . . . . . . . . . . . . . . 5
Fan Preparation . . . . . . . . . . . . . . . . . . . . . . . . . . . . . . . . . . . . . . . . . . . . . . . . . . . . . . . . . . . . . . . . . . . . . . . . . . . . . . . . . . 6
Hanging the Fan . . . . . . . . . . . . . . . . . . . . . . . . . . . . . . . . . . . . . . . . . . . . . . . . . . . . . . . . . . . . . . . . . . . . . . . . . . . . . . . . . 7
Canopy Electrical Connections. . . . . . . . . . . . . . . . . . . . . . . . . . . . . . . . . . . . . . . . . . . . . . . . . . . . . . . . . . . . . . . . . . . . . . 7
Canopy Hatch Installation . . . . . . . . . . . . . . . . . . . . . . . . . . . . . . . . . . . . . . . . . . . . . . . . . . . . . . . . . . . . . . . . . . . . . . . . . 7
Remove Dummy Switch Housing & Shipping blocks . . . . . . . . . . . . . . . . . . . . . . . . . . . . . . . . . . . . . . . . . . . . . . . . . . . . 8
Blade Badge Installation . . . . . . . . . . . . . . . . . . . . . . . . . . . . . . . . . . . . . . . . . . . . . . . . . . . . . . . . . . . . . . . . . . . . . . . . . . . 8
Blade & Blade Holder Installation . . . . . . . . . . . . . . . . . . . . . . . . . . . . . . . . . . . . . . . . . . . . . . . . . . . . . . . . . . . . . . . . . . . 9
Switch Housing Installation . . . . . . . . . . . . . . . . . . . . . . . . . . . . . . . . . . . . . . . . . . . . . . . . . . . . . . . . . . . . . . . . . . . . . . . . 9
Control Bracket Installation . . . . . . . . . . . . . . . . . . . . . . . . . . . . . . . . . . . . . . . . . . . . . . . . . . . . . . . . . . . . . . . . . . . . . . . 10
Remote Operation. . . . . . . . . . . . . . . . . . . . . . . . . . . . . . . . . . . . . . . . . . . . . . . . . . . . . . . . . . . . . . . . . . . . . . . . . . . . . . . 11
Changing Transmitter Frequency Setting . . . . . . . . . . . . . . . . . . . . . . . . . . . . . . . . . . . . . . . . . . . . . . . . . . . . . . . . . . . . . 11
TROUBLESHOOTING TIPS . . . . . . . . . . . . . . . . . . . . . . . . . . . . . . . . . . . . . . . . . . . . . . . . . . . . . . . . . . . . . . . . . . . . . 12
CARE RECOMMENDATIONS . . . . . . . . . . . . . . . . . . . . . . . . . . . . . . . . . . . . . . . . . . . . . . . . . . . . . . . . . . . . . . . . . . . 13
AUTHORIZED SERVICE CENTERS . . . . . . . . . . . . . . . . . . . . . . . . . . . . . . . . . . . . . . . . . . . . . . . . . . . . . . . . . . . . . 14
PRODUCT SPECIFICATIONS . . . . . . . . . . . . . . . . . . . . . . . . . . . . . . . . . . . . . . . . . . . . . . . . . . . . . . . . . . . . . . . . . . . 16
Owner's Manual
™
CONTENTS
C12S72M AT0507
™
C
OTTAGE
1
Advertisement
Table of Contents

Subscribe to Our Youtube Channel
Related Manuals for Casablanca COTTAGE


Summary of Contents for Casablanca COTTAGE
-
Page 1: Table Of Contents
™ OTTAGE Owner’s Manual ™ OTTAGE READ AND SAVE THESE INSTRUCTIONS! Safety and the proper operation of your Casablanca fan both require a thorough knowledge of the product and proper installation; therefore, before attempting to install and operate your Casablanca fan, read this owner’s manual completely and carefully. -
Page 2: Before You Start
• Never install a fan over a pool or spa. 70"↑ • Never operate a fan that has been damaged in any way. Contact Casablanca Fan Company by calling 1-888-227-2178, or contact your local authorized 84" ↑ Casablanca dealer for assistance in obtaining service. -
Page 3: Mounting Recommendations
™ OTTAGE MOUNTING RECOMMENDATIONS GENERAL GUIDELINES Before mounting your Casablanca fan, read the following helpful recommendations. Th e location of the fan, air circulation, and fan size are all important factors to consider before installation. Location support brace Ceiling fans have practical uses in almost every room in your home. We suggest you follow these mounting recommendations as you decide where to install your Casablanca fan. -
Page 4: Fan Installation
FAN INSTALLATION GETTING STARTED Installing a New Ceiling Fixture Outlet Box Using Existing Ceiling Fixture Outlet Box If you do not have an existing fi xture located where you wish After turning the power OFF at its source (either the circuit to place your Casablanca fan, an approved ceiling fi... -
Page 5: Lag Screw Installation (Optional)
™ OTTAGE LAG SCREW INSTALLATION (OPTIONAL) NOTE: Th is step is required only under two conditions: If the fan weighs 36 lbs. or more (which does not pertain to this fan) or if the existing ceiling fi xture outlet box needs to be modifi... -
Page 6: Fan Preparation
FAN PREPARATION PERMA•LOCK™ HARDWARE (not to scale) Perma•Lock™ Downrod Allen Wrench and Ball Assembly IMPORTANT SAFETY INFORMATION: Before starting the installation of your ceiling fan, install the threaded downrod into the motor Motor Wires coupling and lock the assembly. (leave at least 6" long) Ground Wire (green) Prepare for fan installation as follows:... -
Page 7: Hanging The Fan
™ OTTAGE HANGING THE FAN Step 5a. To hang the fan body in the canopy, hold the fan body fi rmly and insert the ball into the canopy opening. Check that no wires are pinched. Rotate the fan body until the slot in the ball fi... -
Page 8: Remove Dummy Switch Housing & Shipping Blocks
REMOVE DUMMY SWITCH HOUSING & SHIPPING BLOCKS Step 8. To reach the blade holder mounting holes in the fan motor, the dummy switch housing must be removed. Take out the two 5-32 x 3/8" screws securing the dummy switch housing as shown. Put the two screws aside for the moment. -
Page 9: Blade & Blade Holder Installation
™ OTTAGE BLADE & BLADE HOLDER INSTALLATION Step 11b. Using two screws from screw pack “C” and the screwdriver provided; attach the blade/blade holder assembly to the motor. Tighten securely by hand only. TIP: For balancing purposes, loosely install all fi ve blades to the motor before tightening the blade screws securely. -
Page 10: Versa•Touch2™ Control Installation
VERSA•TOUCH2™ CONTROL INSTALLATION VERSA•TOUCH2™ HARDWARE (not to scale) Wood Screw Screw Drywall Anchor Screw 6-32 X " 6-32 X 1" 12v Battery 6-32 (2) 1" (2) W-72 W-72 Control Holder Control CONTROL BRACKET INSTALLATION SAFETY FIRST: To reduce the risk of electrical shock, this fan must be installed with an isolating wall control/switch. CAUTION! Do not use with wall dimmer. -
Page 11: Remote Operation
™ OTTAGE REMOTE OPERATION Fan Control To start the fan. Press the selected speed button to run the fan at the desired speed. Send Signal LOW=Low speed MED=Medium speed HIGH=High speed LIGHT To turn off the fan, press the FAN OFF button. Airfl... -
Page 12: Troubleshooting Tips
TROUBLESHOOTING TIPS Please refer to this troubleshooting guide before requesting service or contacting your dealer for assistance. PROBLEM POSSIBLE REMEDIES Fan will not start • Check the main circuit fuses, circuit breakers, and wall switch position. Check all wire connections. Make sure the power is turned off during this inspection. •... -
Page 13: Care Recommendations
• Connect the equipment into an outlet on a circuit diff erent from that to which the receiver is connected. • Consult the dealer or an experienced radio/TV technician for help. NOTE: Any changes or modifi cations to the transmitter or receiver not expressly approved by Casablanca Fan Company may void one's authority to operate this remote control. -
Page 14: Authorized Service Centers
AUTHORIZED SERVICE CENTERS STATE/CITY SERVICE CENTER NAME PHONE TYPE STATE/CITY SERVICE CENTER NAME PHONE TYPE ALASKA COLORADO (Continued) Anchorage 99518 Bering Sea Eccotech 907-563-7988 Longmont 80501 Lumenarea.com, Inc. 303-485-6800 Loveland 80538 Fireside Lighting 970-669-3540 ALABAMA Mobile 36618 Azalea City Service Ctr. 251-341-0663 CONNECTICUT Tuscaloosa... - Page 15 ™ OTTAGE STATE/CITY SERVICE CENTER NAME PHONE TYPE STATE/CITY SERVICE CENTER NAME PHONE TYPE IOWA MONTANA (Continued) Carroll 51401 J & L Electric Inc. 712-792-2444 Missoula 59801 Western Montana Lighting Supply 406-543-7166 Cedar Rapids 52404 Acme Electric Company 319-365-8677 NEBRASKA Coralville 52241 Ralston Creek...
-
Page 16: Product Specifications
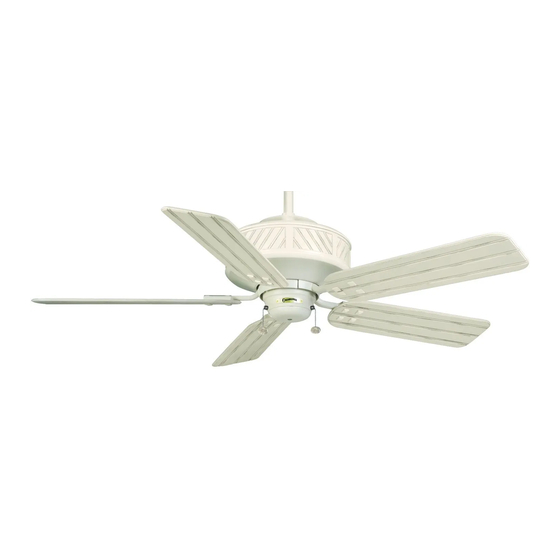
Duane Loberg 304-775-2399 Denton 76201 Larry W. Goff 940-387-7304 PRODUCT SPECIFICATIONS Collection: Casablanca Finishes: Architectural White Model Name: Cottage ™ Motor: 188 x 20mm Direct Drive Model Number: C12S72M Blade Span: 52" Blade Iron Pitch: 15° Dimensions: A = 12"...
Need help?
Do you have a question about the COTTAGE and is the answer not in the manual?
Questions and answers